Follow Slip Links Node
Using Slipbox Nodes (Follow Slip Links)
The Follow Slip Links node looks up the relationships already set on a given Slip (the anchor). You can narrow the results by direction (both, outgoing, or incoming), relationship type, and business predicate, and the result comes back as a list of the connected Slips' information.
This node also works well connected to an agent as a tool, but this tutorial covers it in an Ability to walk through the most basic usage first. Connecting it to an agent will be covered in a separate Slipbox agent integration guide. In this tutorial, you'll build an Ability workflow that looks up an existing relationship between a pair of test Slips in the Agentria Docs slipbox.
Before You Begin
A slipbox must already be set up in your project before starting this tutorial. For instructions on building a slipbox, see the 🔗Slipbox Guide.
This node looks up relationships that already exist, so the Slip you query needs at least one relationship set up beforehand. If you haven't created one yet, first go through the 🔗Link Slips Node tutorial to create one. This tutorial reuses the relationship between the two test Slips created in that tutorial, inside the Agentria Docs slipbox.
After completing this tutorial, you will be able to:
Use the Follow Slip Links node to look up the relationships set on a Slip.
Specify a query direction to retrieve only outgoing, only incoming, or both kinds of relationships.
Narrow your results with a relationship type filter and a predicate filter.
Verify the structure of the query result (
neighbors) by running the test and checking the output.
Workflow Overview
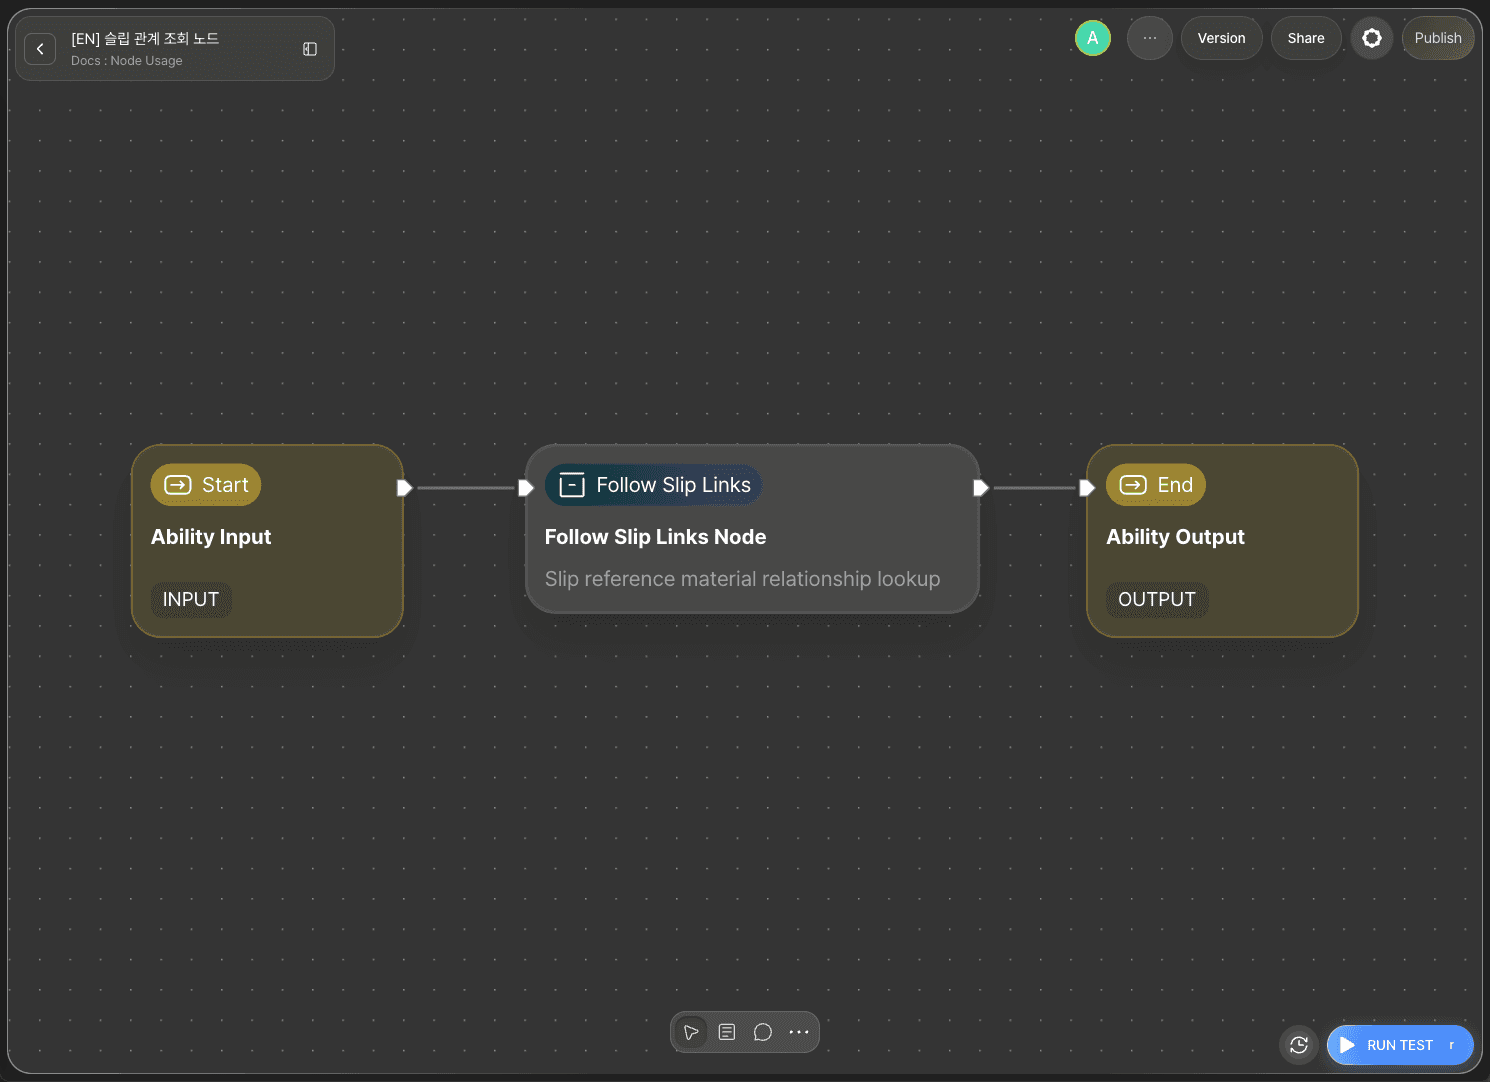
The core of this tutorial is the Follow Slip Links node.
The Follow Slip Links node identifies the anchor Slip by its UUID and, optionally, filters by direction, relationship type, and business predicate. Once the node runs successfully, it returns the matching relationships as a list, along with each connected Slip's information.
Follow Slip Links Node Basic Info
The Follow Slip Links node provides the following options.
Option | Required | Description |
|---|---|---|
| Required | The UUID of the Slip whose relationships you want to look up. |
| Optional (default |
|
| Optional | A list of relationship type names to look up (e.g. |
| Optional | An exact-match filter on the business predicate (lowercase snake_case, e.g. |
| Required | The Slipbox this node operates on. Bound at design time in the builder. |
This tutorial connects all five options to the Start Node, but the first test run leaves Direction, Relationship Type Filter, and Predicate Filter blank to check the default behavior first (Anchor Slip UUID only). Filter combinations are covered in the FAQ below.
Step 1: Create an Ability
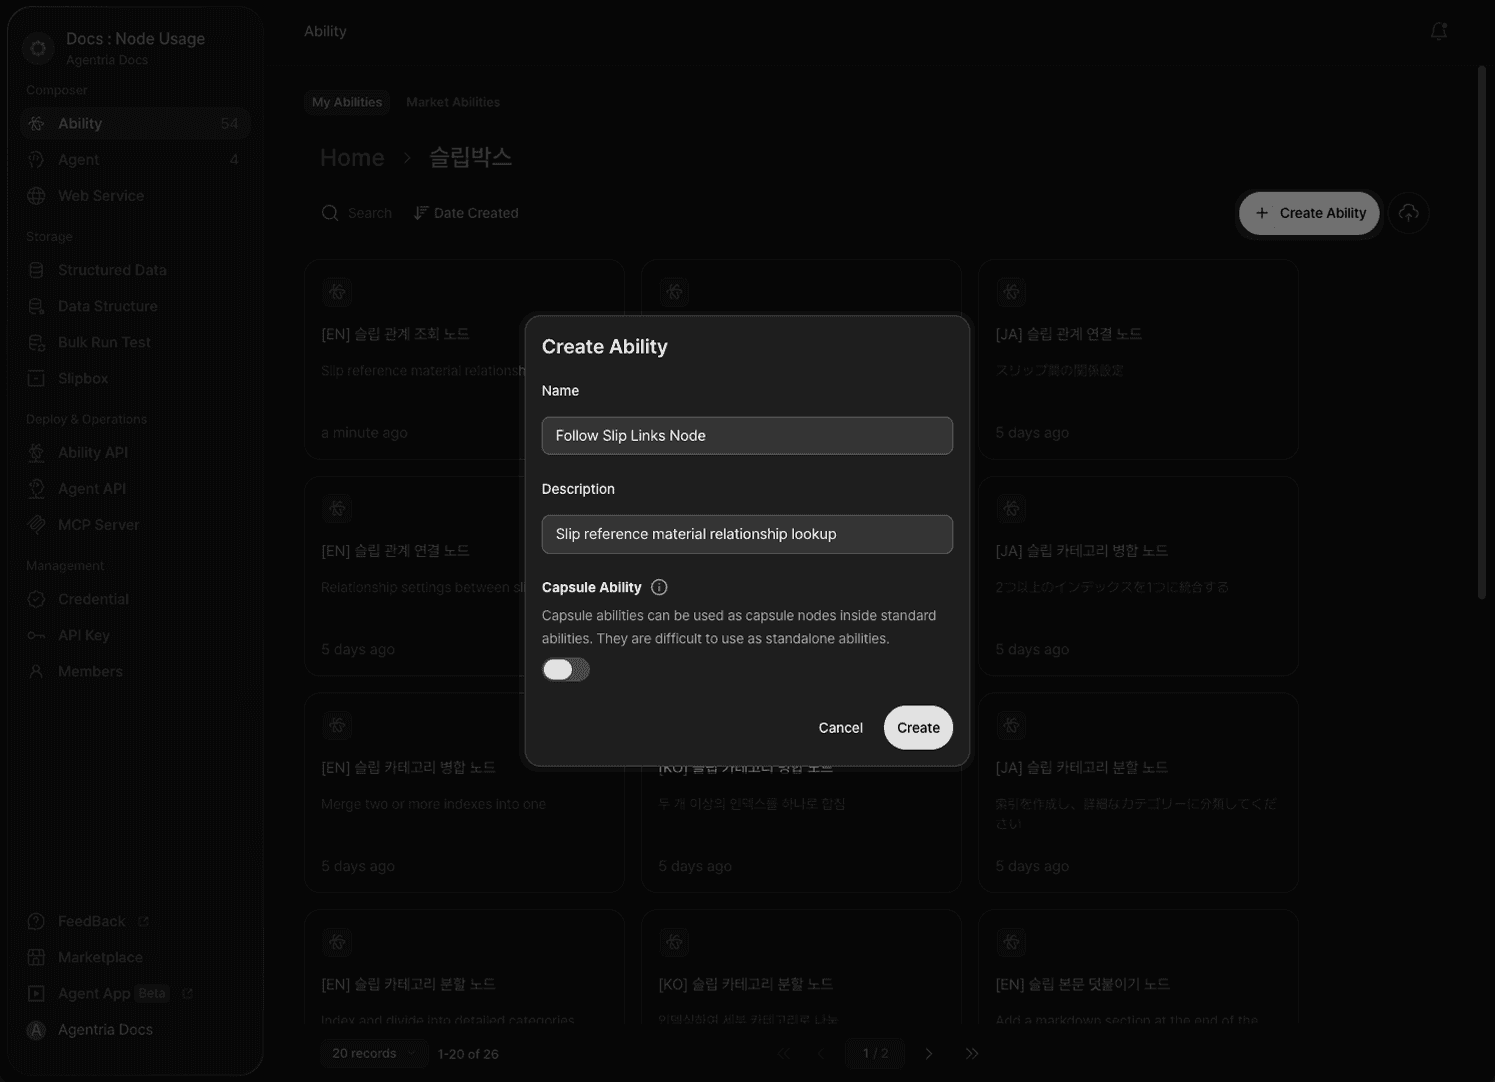
Create a new Ability. Enter Follow Slip Links node for Name and Look up a Slip's relationships for Description. Which Slip you query is up to you — this tutorial targets a test Slip in the Agentria Docs slipbox that already has a relationship set on it.
Step 2: Configure the Start Node
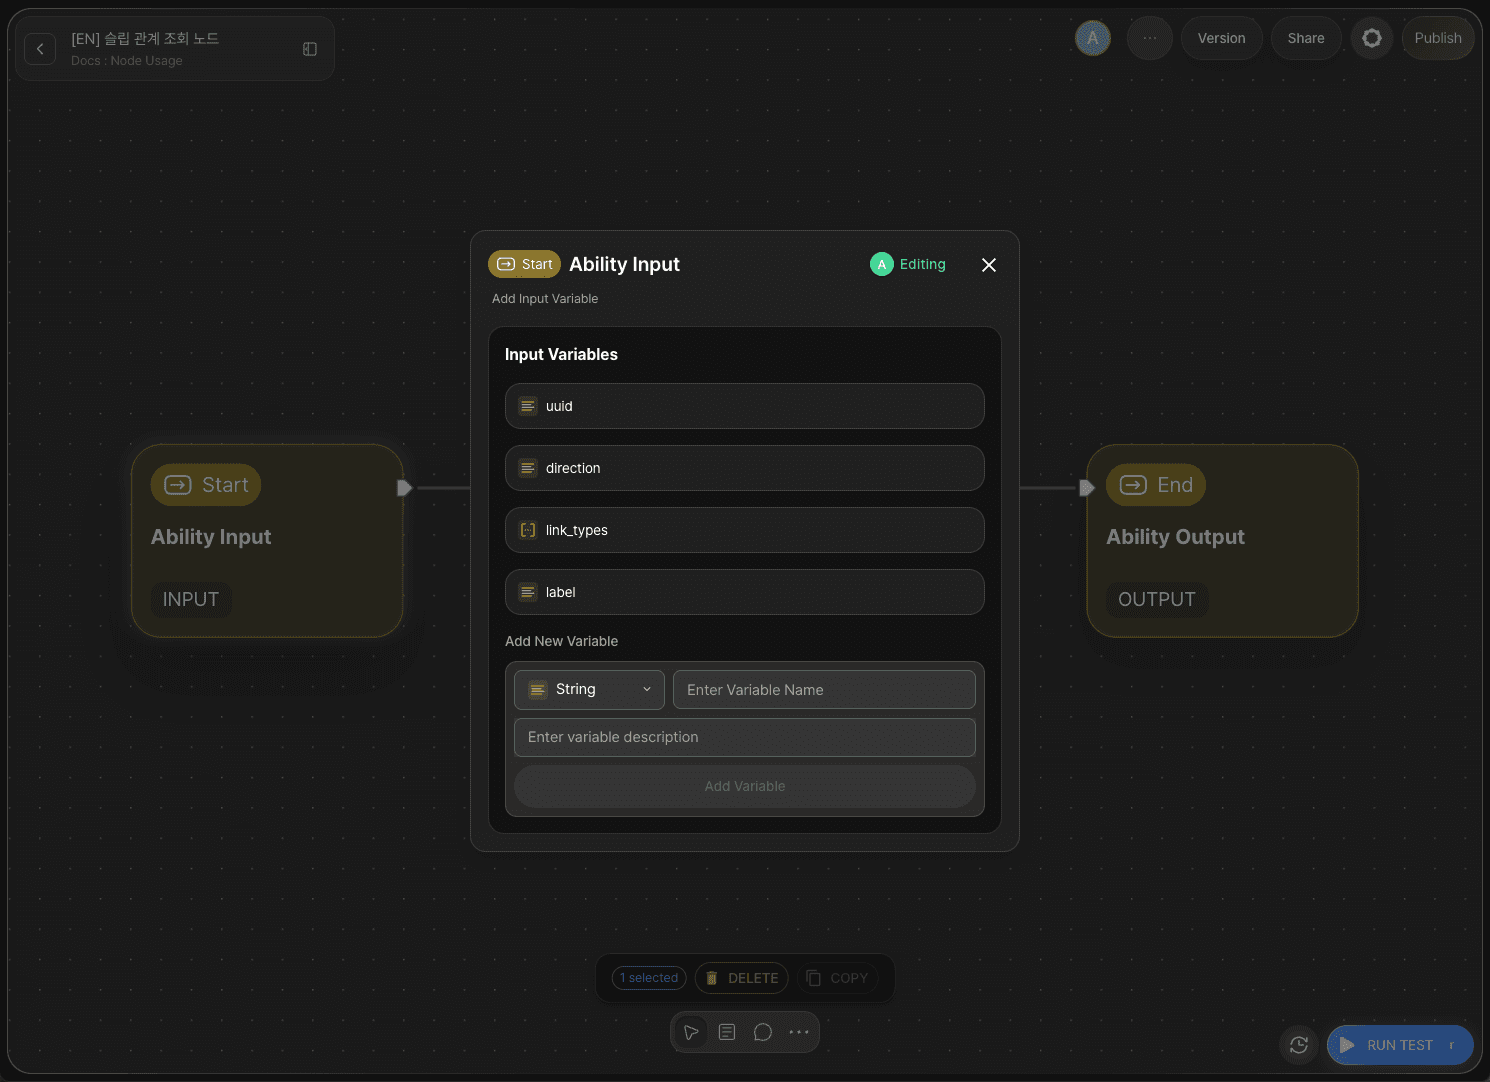
Double-click Start Node to enter the Node Editor. Add the following four variables.
uuid: accepts the UUID of the anchor Slip. (String)direction: accepts the query direction. (String)link_types: accepts the relationship type filter. (Array)label: accepts the predicate filter. (String)
Add link_types as an Array type, not a String.
Step 3: Add the Follow Slip Links Node
Click +Add Node → add a Follow Slip Links node from the Slipbox category.
Step 4: Configure the Follow Slip Links Node
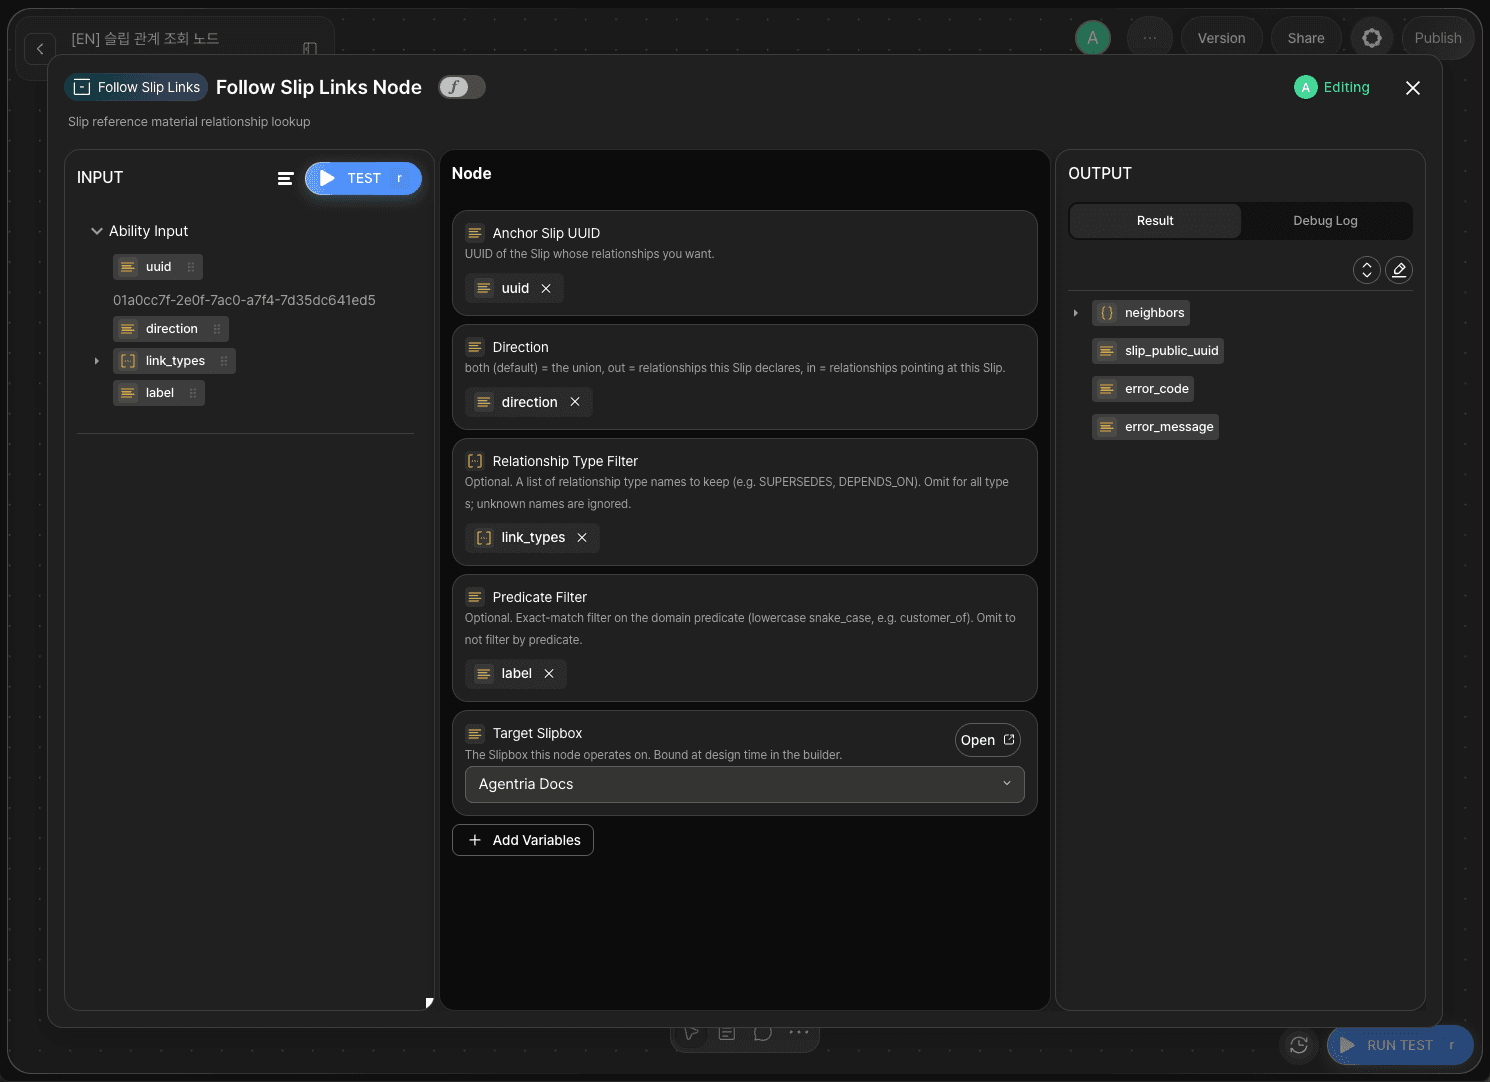
Double-click the Follow Slip Links node to enter the Node Editor. In Target Slipbox, select whichever slipbox you're working with — this tutorial selects Agentria Docs as an example. If you leave this unset, running the node fails with error_code set to SLIPBOX_NOT_FOUND, so make sure to check it.
Drag and drop the Start Node's input values onto the remaining fields as follows.
Adapter Variable | Bound Value |
|---|---|
|
|
|
|
|
|
|
|
Once the node runs successfully, it outputs neighbors (the list of matching relationships), slip_public_uuid (the UUID of the anchor Slip you queried), error_code, and error_message.
Step 5: Configure the End Node
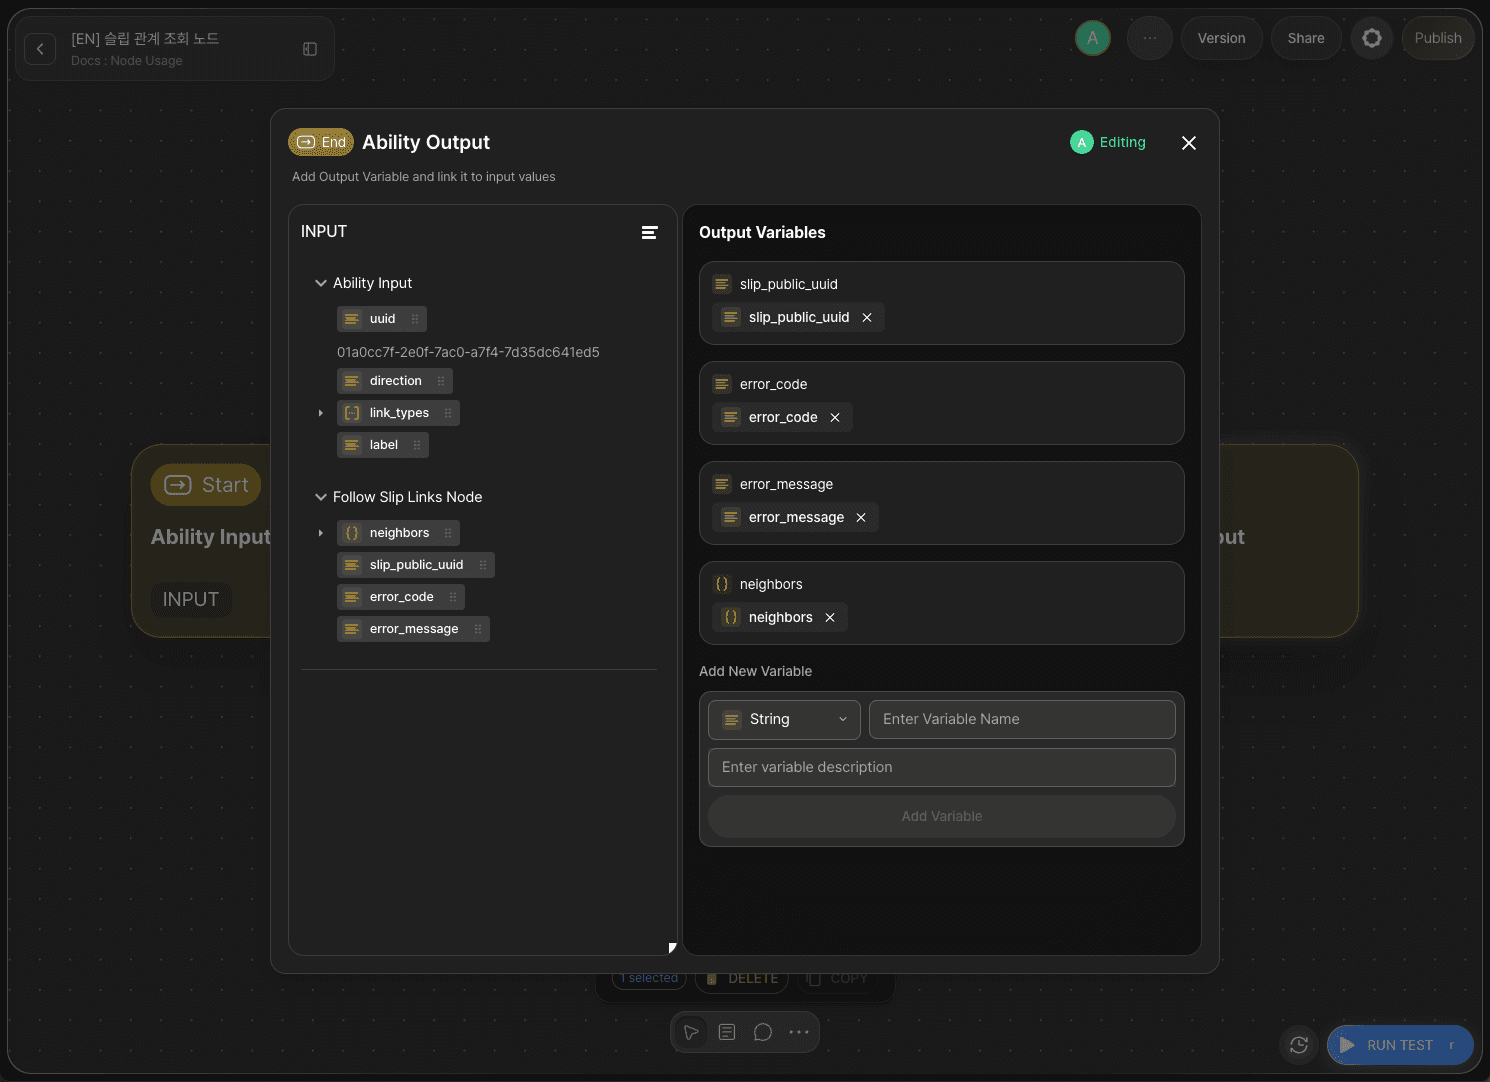
Double-click End Node to enter the Node Editor. Add a String output variable named result and drag and drop error_code from the Follow Slip Links node to bind it. This lets you check whether the lookup succeeded from the output value.
Step 6: Prepare a Test Slip With an Existing Relationship
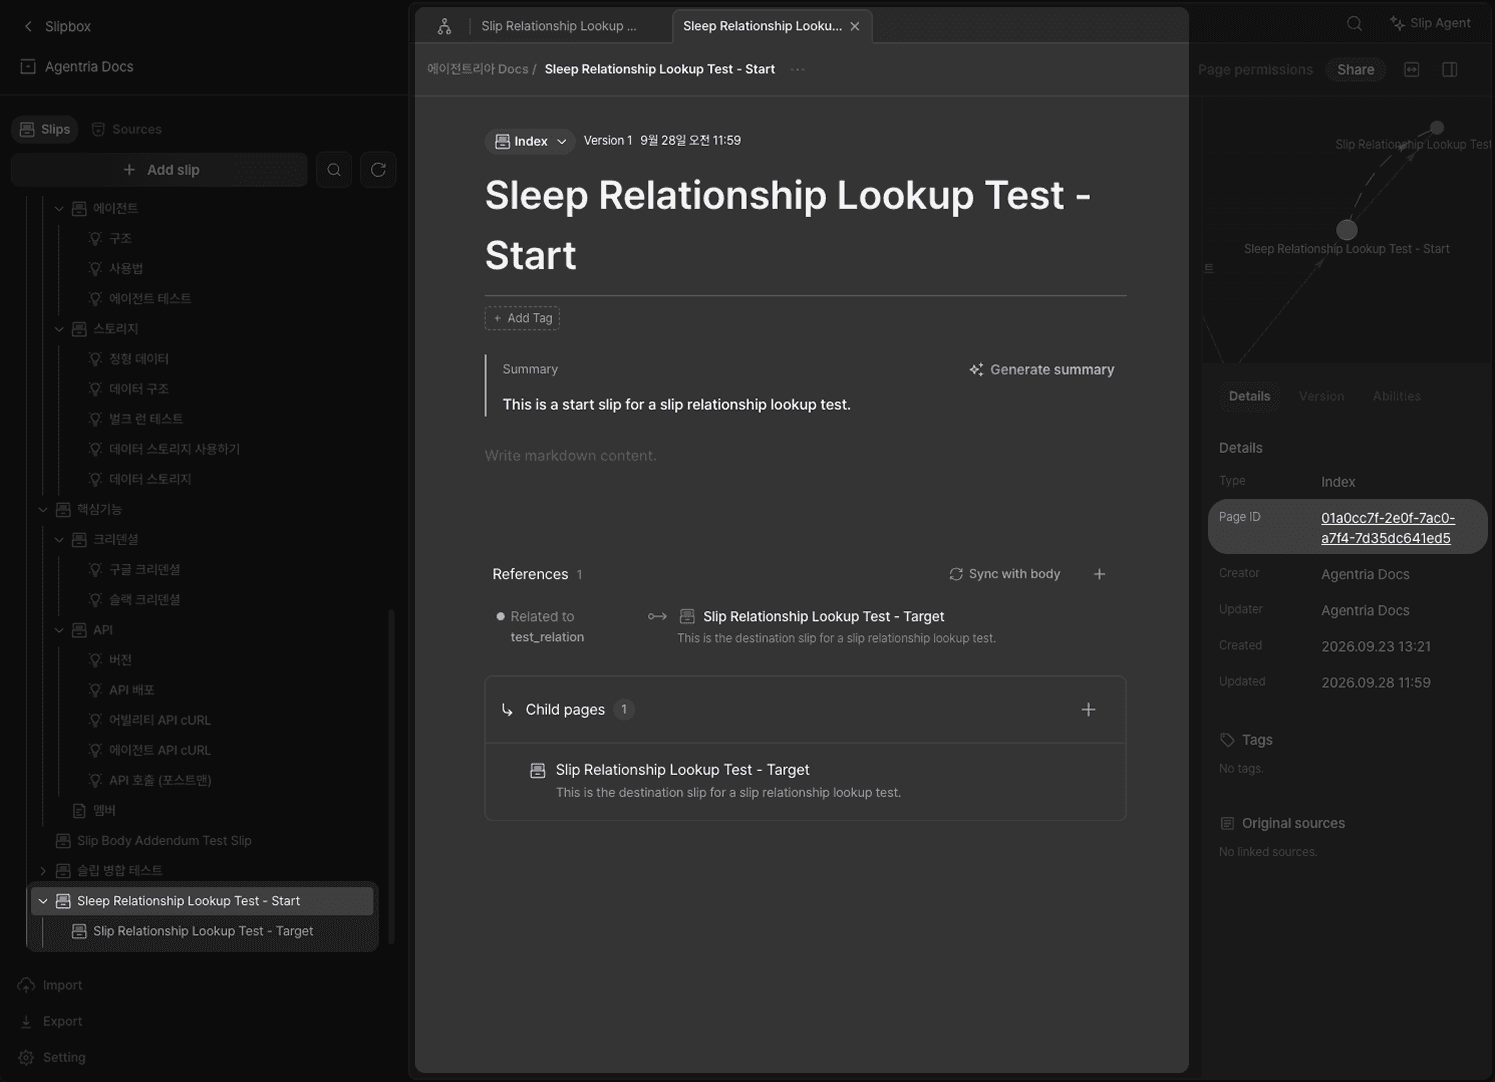
Since this node looks up relationships that already exist, the Slip you query needs at least one relationship set up beforehand. This tutorial reuses the RELATED_TO relationship between the anchor Slip and target Slip built in the 🔗Link Slips Node tutorial.
Go to the Agentria Docs slipbox, open the anchor Slip, and copy its public UUID from the details panel on the right. You'll use this value as the uuid input when you run the test.
Step 7: Run the Test
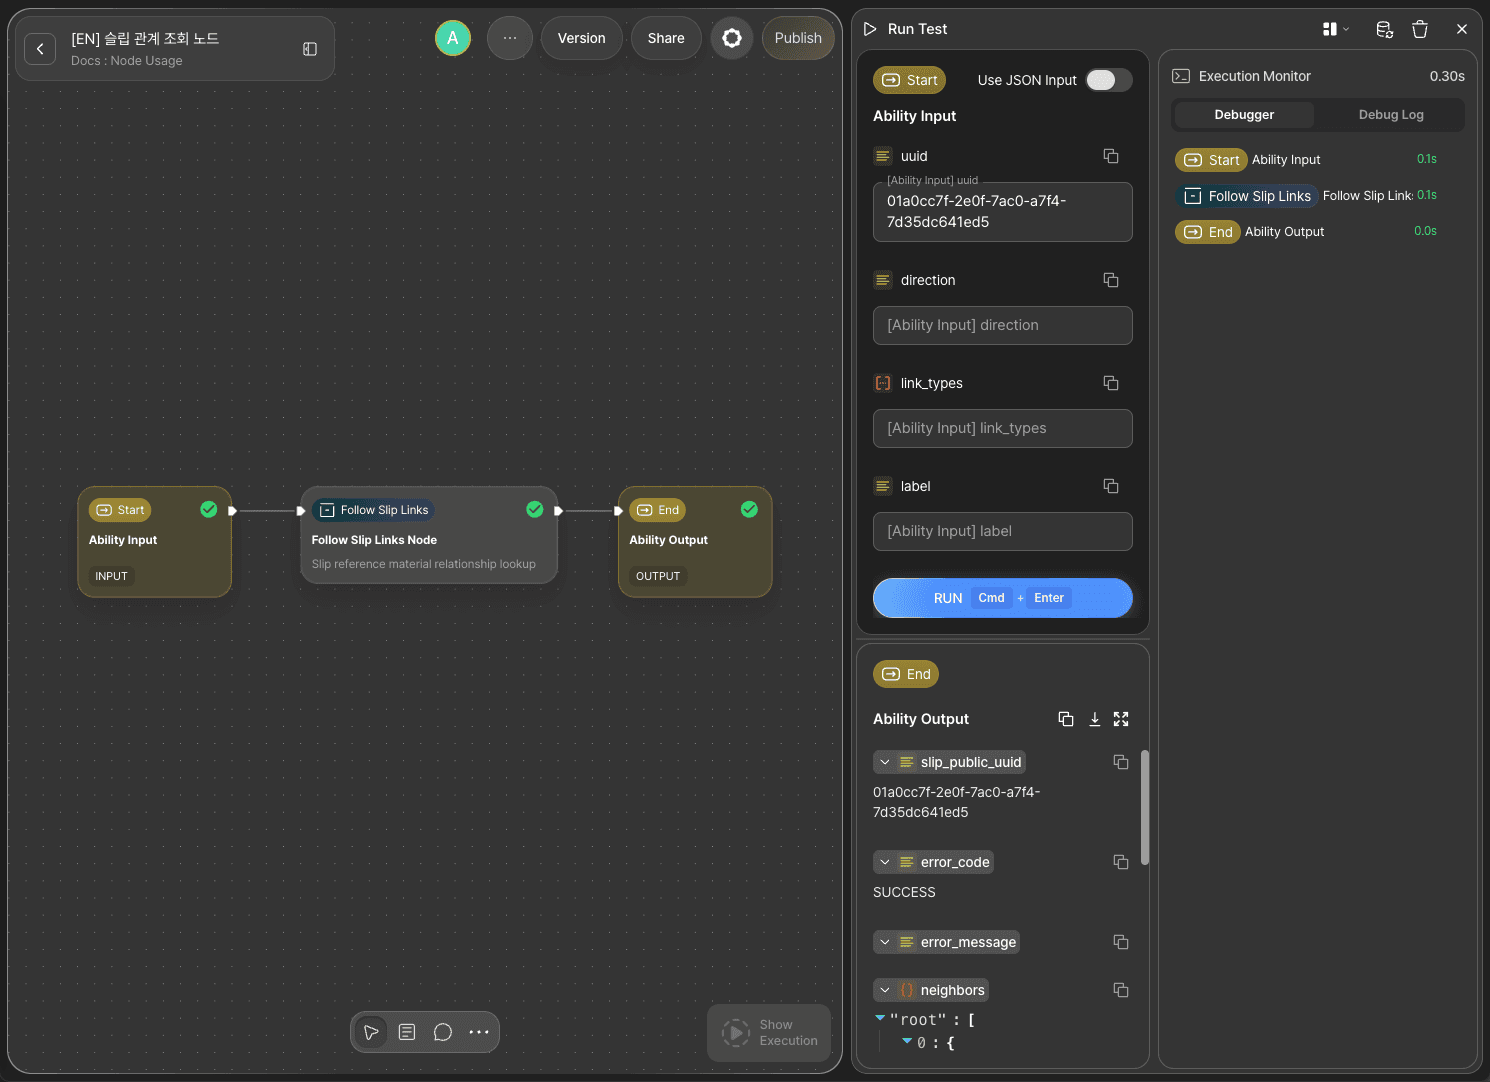
Paste the anchor Slip's public UUID into uuid. Leave direction, link_types, and label blank (default both, no filters), then click RUN TEST. If the result output is SUCCESS, the test succeeded.
Step 8: Check the Debug Log
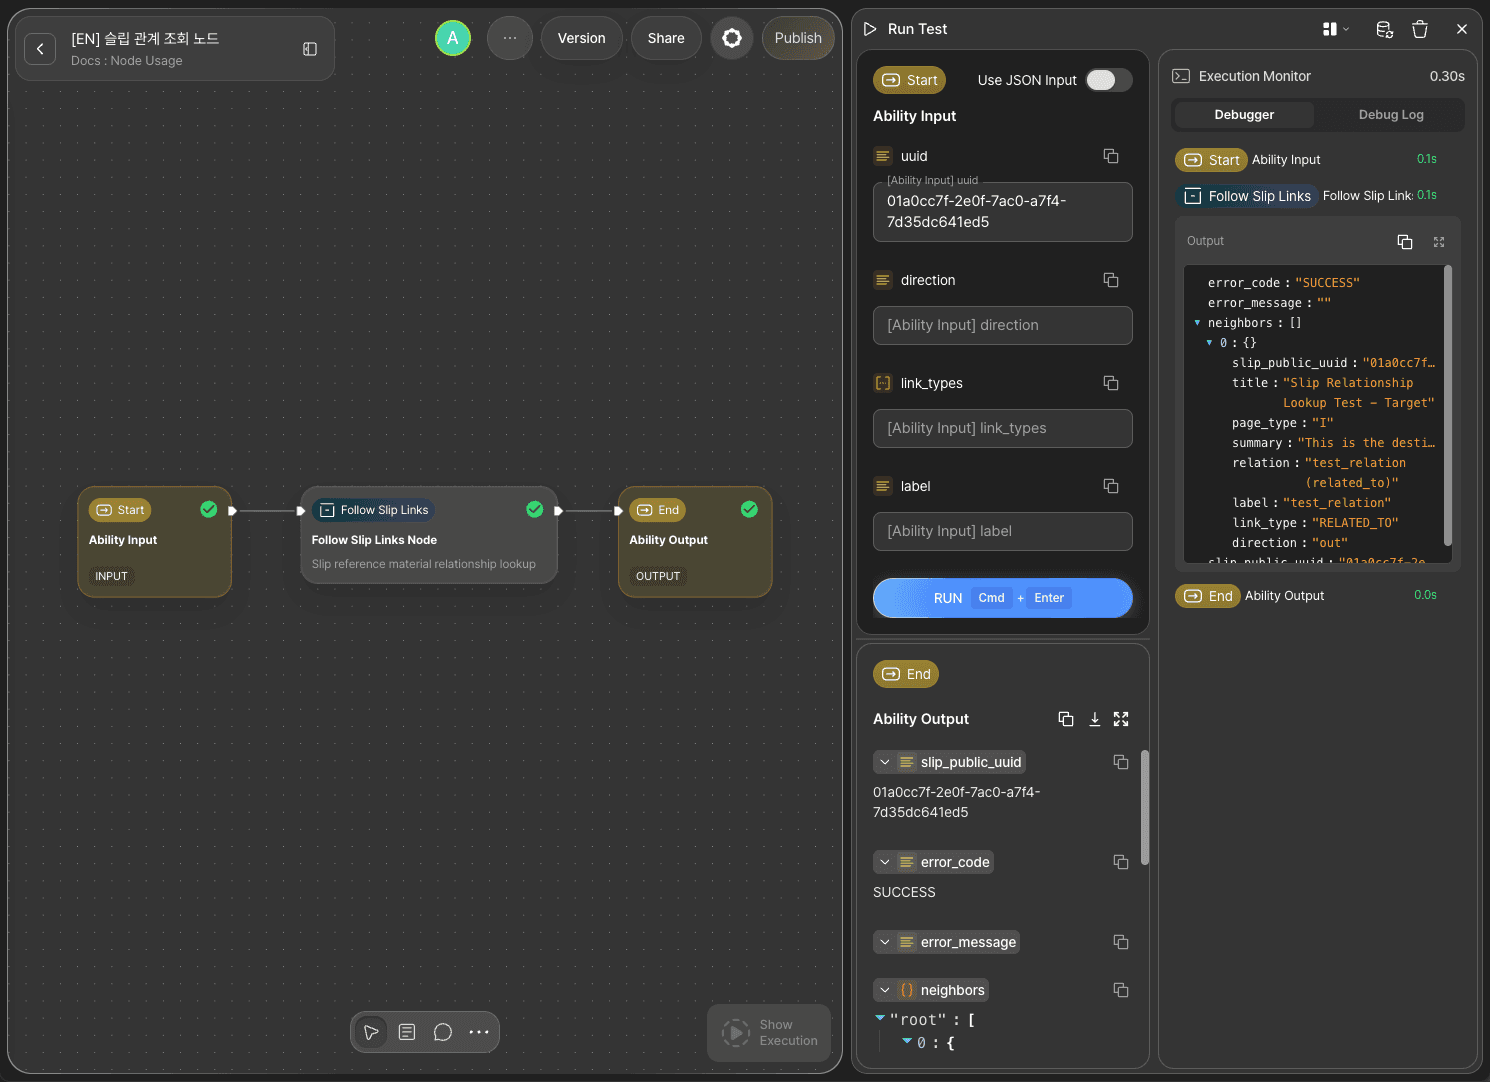
Check the Debug Log of the Follow Slip Links node to see the details showing error_code returned as SUCCESS, along with the connected Slip's information in the neighbors array (slip_public_uuid, title, summary, relation, label, link_type, direction). The node's slip_public_uuid output matches the anchor Slip's UUID you passed in.
Step 9: Cross-Check the Result in the Slipbox
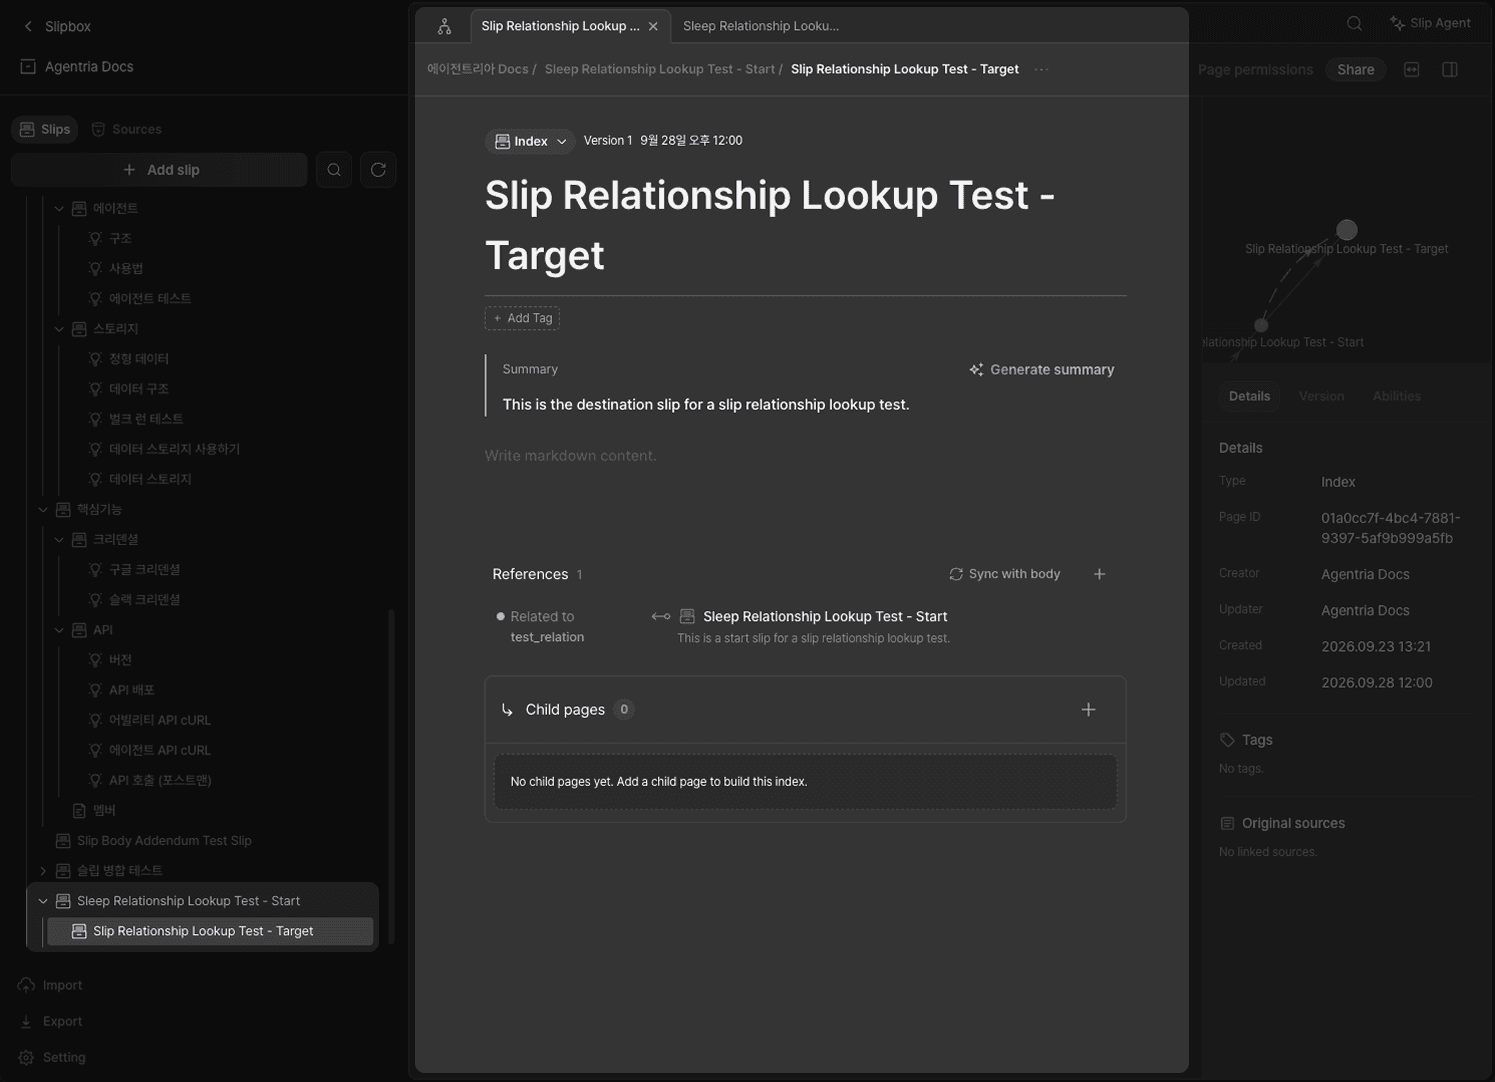
Go to the Agentria Docs slipbox and open the anchor Slip — the entry shown under References matches the neighbors output exactly: the relationship type you looked up (RELATED_TO), the label test_relation, the direction (outgoing), and the target Slip.
Next Steps
🎉 Congratulations! You've successfully built the "Look Up a Slip's Relationships" workflow using Agentria.
Connect this node to an Agent Loop node as a tool, and you can extend it into a workflow where the agent looks up relationships between Slips on its own during a conversation and uses them in its responses.
Agentria is a place where ideas become reality—your workflow can expand infinitely with your creativity.
For more node examples, visit the 🔗Node Usage page.
Frequently Asked Questions
What does the Follow Slip Links node do?
The Follow Slip Links node looks up the relationships already set on an anchor Slip. You can narrow the results by direction, relationship type, and business predicate, and the result comes back as a list of the connected Slips' information (neighbors). It's a read-only lookup — it doesn't create relationships.
What's the difference between both, out, and in for Direction?
out returns only the relationships the anchor Slip declared itself; in returns only the relationships other Slips created pointing at the anchor Slip. both (the default) returns both. For example, this tutorial's anchor Slip only has an outgoing relationship it declared and none pointing at it, so setting direction to in returns an empty neighbors array.
Can I pass more than one value in Relationship Type Filter?
Yes. Since it's an Array, you can pass several types at once, like ["IS_A", "PART_OF"], and any relationship matching at least one of them is included in the result (an OR condition). Passing a type name that doesn't exist is simply ignored without an error.
Does Predicate Filter support partial matches?
No, it only supports exact matches. For example, if the actual label is test_relation, you need to enter test_relation exactly to match it — any other string excludes that relationship from the result.
Can this node create new relationships?
No, this node is read-only. To create a new relationship, use the 🔗Link Slips node.