Get Started
The Beginner Guide Tutorial covers the most fundamental yet essential steps for newcomers to Agentria.
In this tutorial, you’ll learn how to activate the Slack Node, connect it with your Slack workspace, and create an Ability that sends a message through a bot.
Prerequisites
Before getting started, create a project in Agentria and open the Ability Canvas.
For detailed instructions on accessing the canvas, refer to Step 1 (Create a Project and Select a Composer) in the 🔗Get started in 3-Steps.
By completing this tutorial, you will be able to:
Add nodes
Declare variables in the Start Node
Connect nodes
Register Slack credentials
Add a Slack app and link your workspace
Configure credentials in the Slack Node
Set up a bot message in the Slack Node
Run a test to verify workflow execution results
Step 1: Create Slack OAuth and Credentials
To use the Slack Node, you must configure credentials based on an authentication key.
A Slack access token can only be issued through the OAuth(Open Authorization) flow.
If this is your first time setting up Slack OAuth, refer to the 🔗Slack Credential Guide.
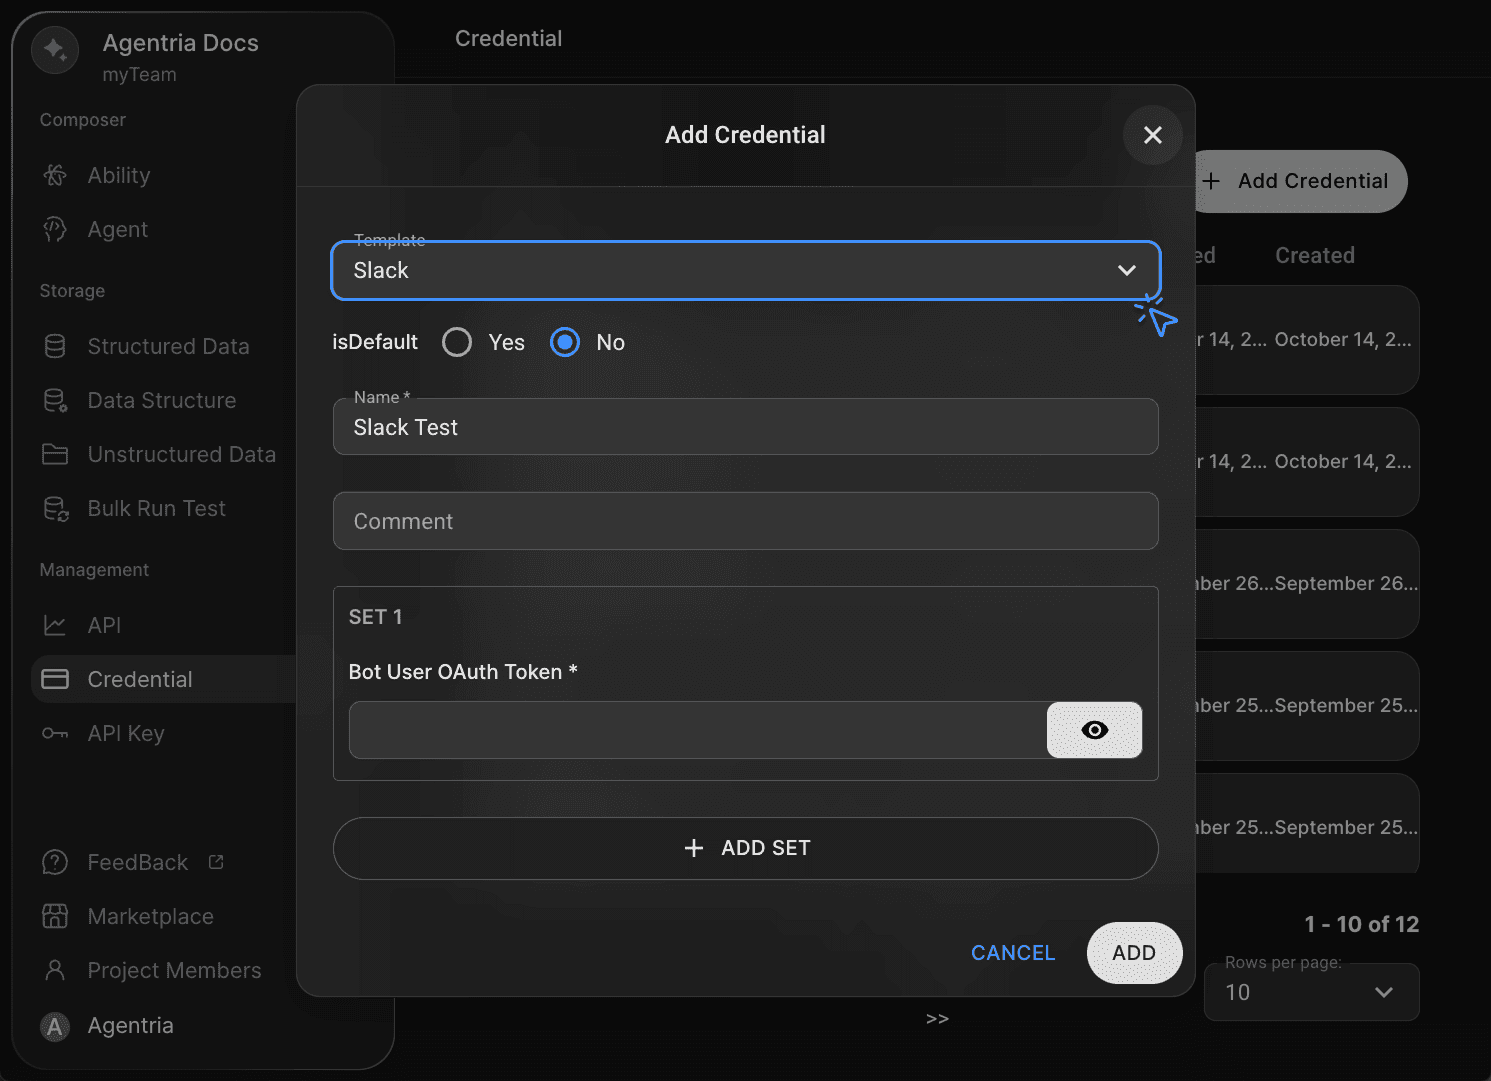
Credentials are authentication details required to verify users and grant access to a system or service.
For this tutorial, when registering you credential, set the template to Slack.
Step 2: Add a Slack Node
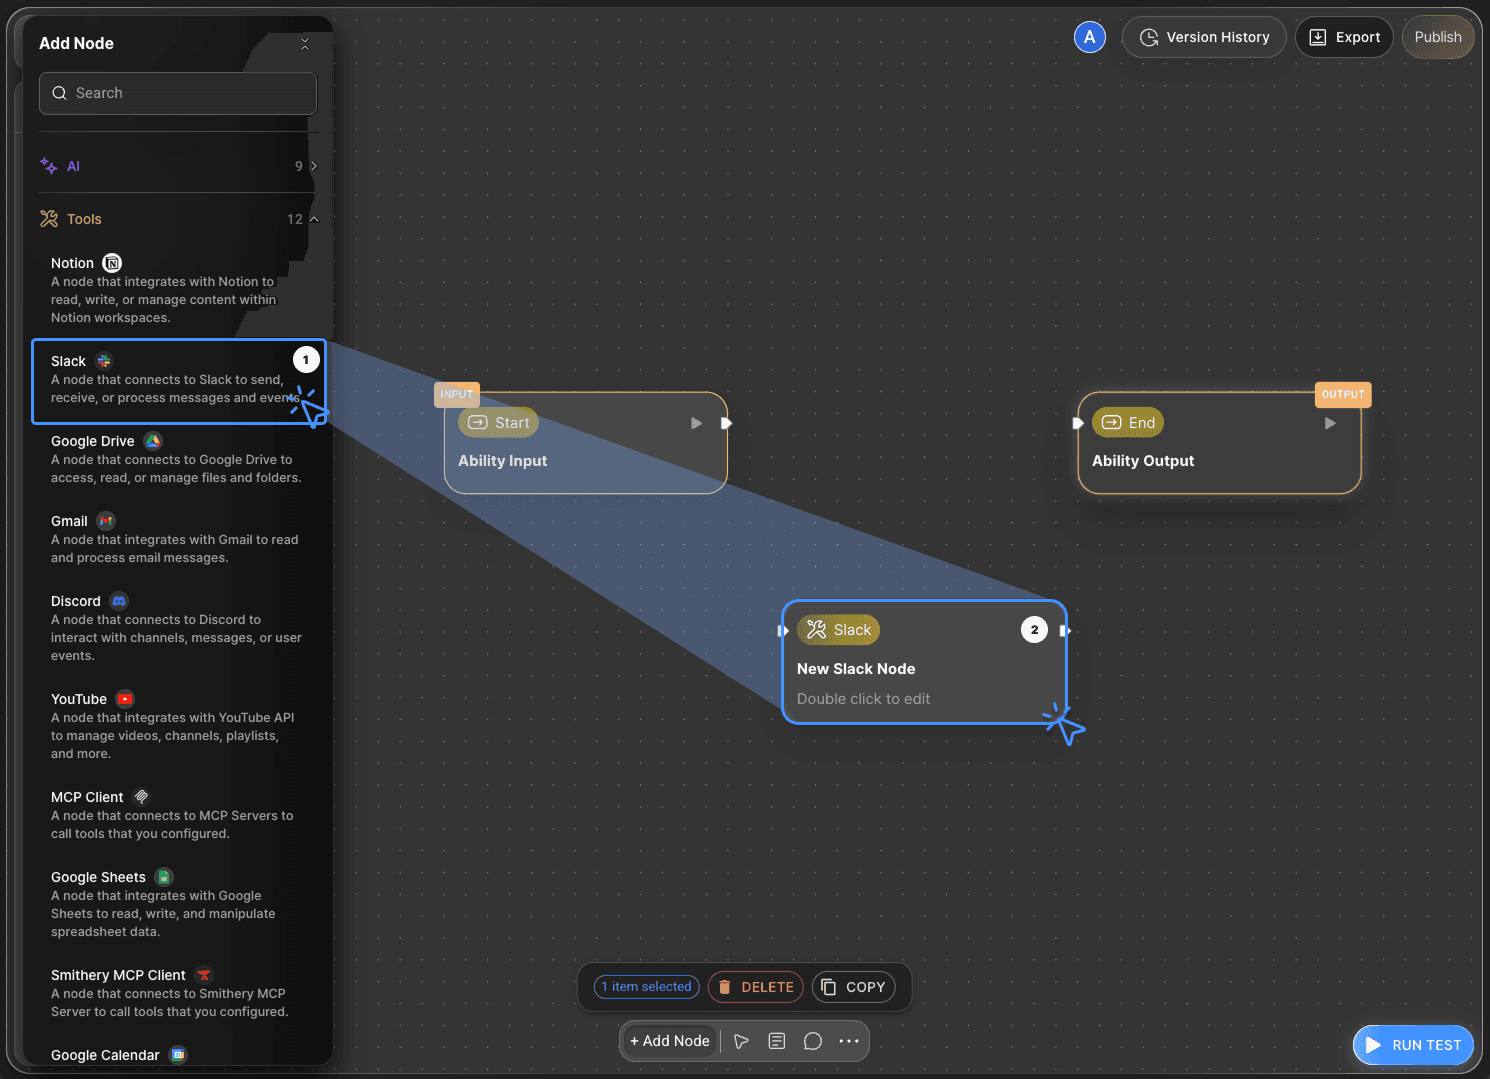
Click the +Add Node button at the bottom of the canvas, then open the Tools category in the sidebar.
Select the Slack Node and place it on the canvas using drag and drop.
Hover over the node and click the Edit button to open the options panel.
Rename the node to Send Slack Node.
Since the Slack Node supports multiple actions such as Send, Update, Delete, and List, it’s recommended to rename the node based on its intended operation.
Step 3: Declare Input Variables
By default, the Agentria canvas includes one Start Node and one End Node.
The Start Node initiates the entire workflow.
The End Node terminates the workflow.
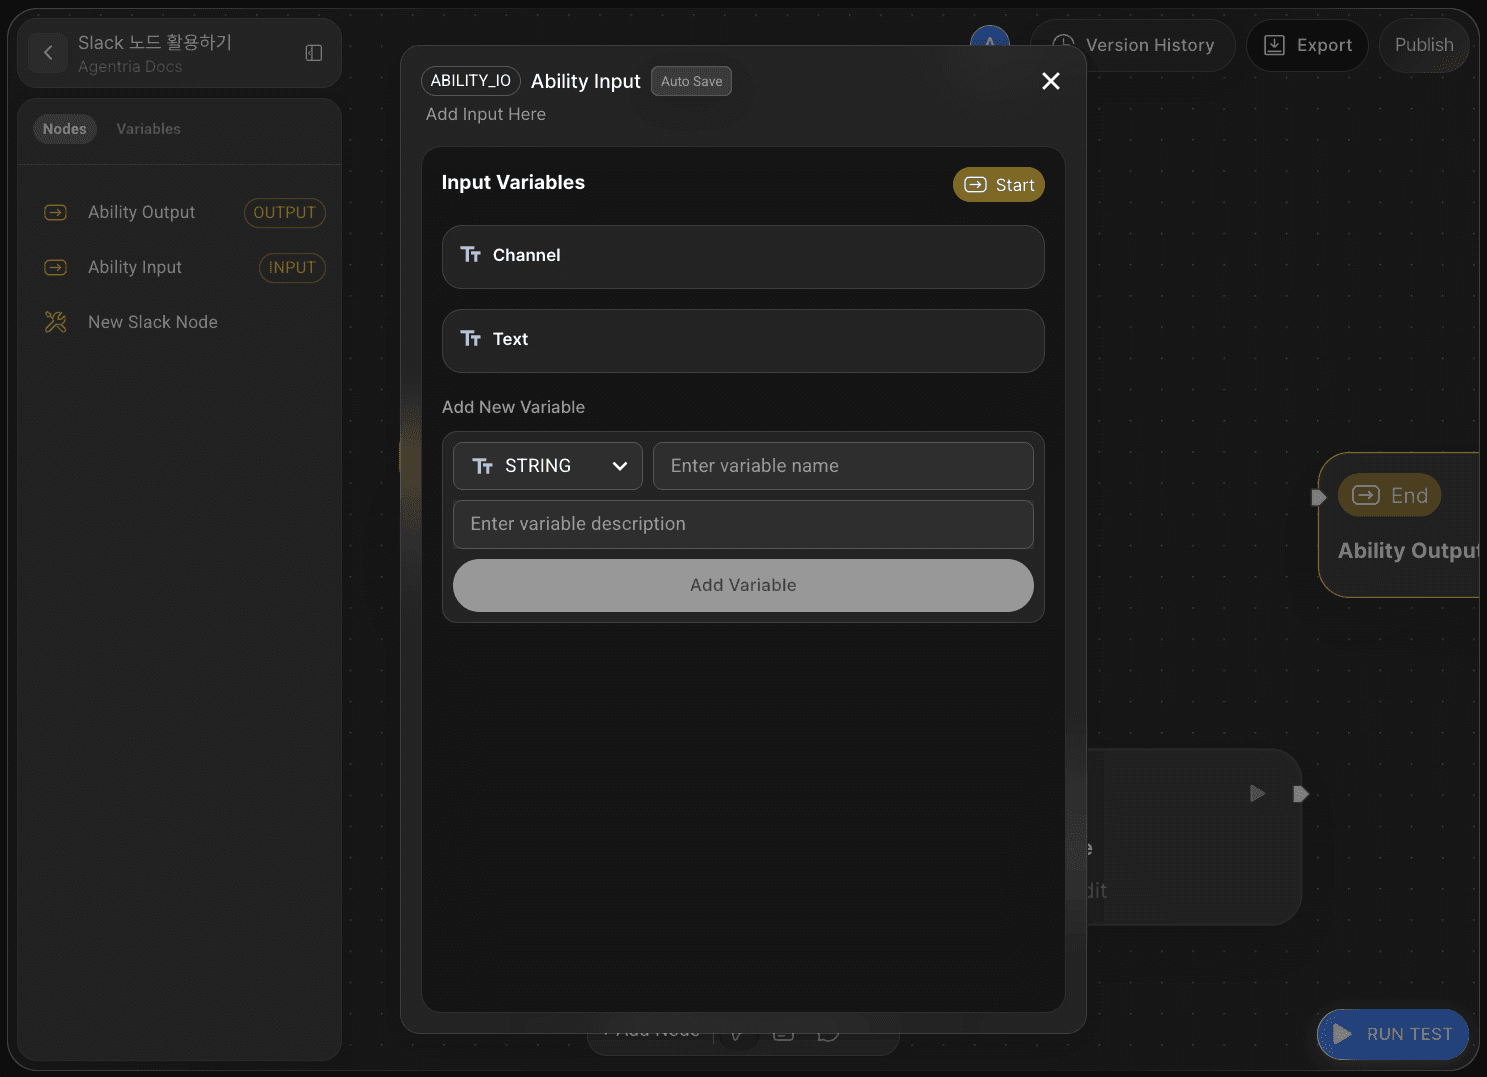
Double-click the Start Node to open its editor.
Here, you can configure the data type, name, and description of each variable.
In this tutorial, since we’ll be sending a bot message, set the data type to String and declare the following variables:
ChannelText
After declaring the variables, return to the editor canvas.
Step 4: Connect Nodes with an Edge
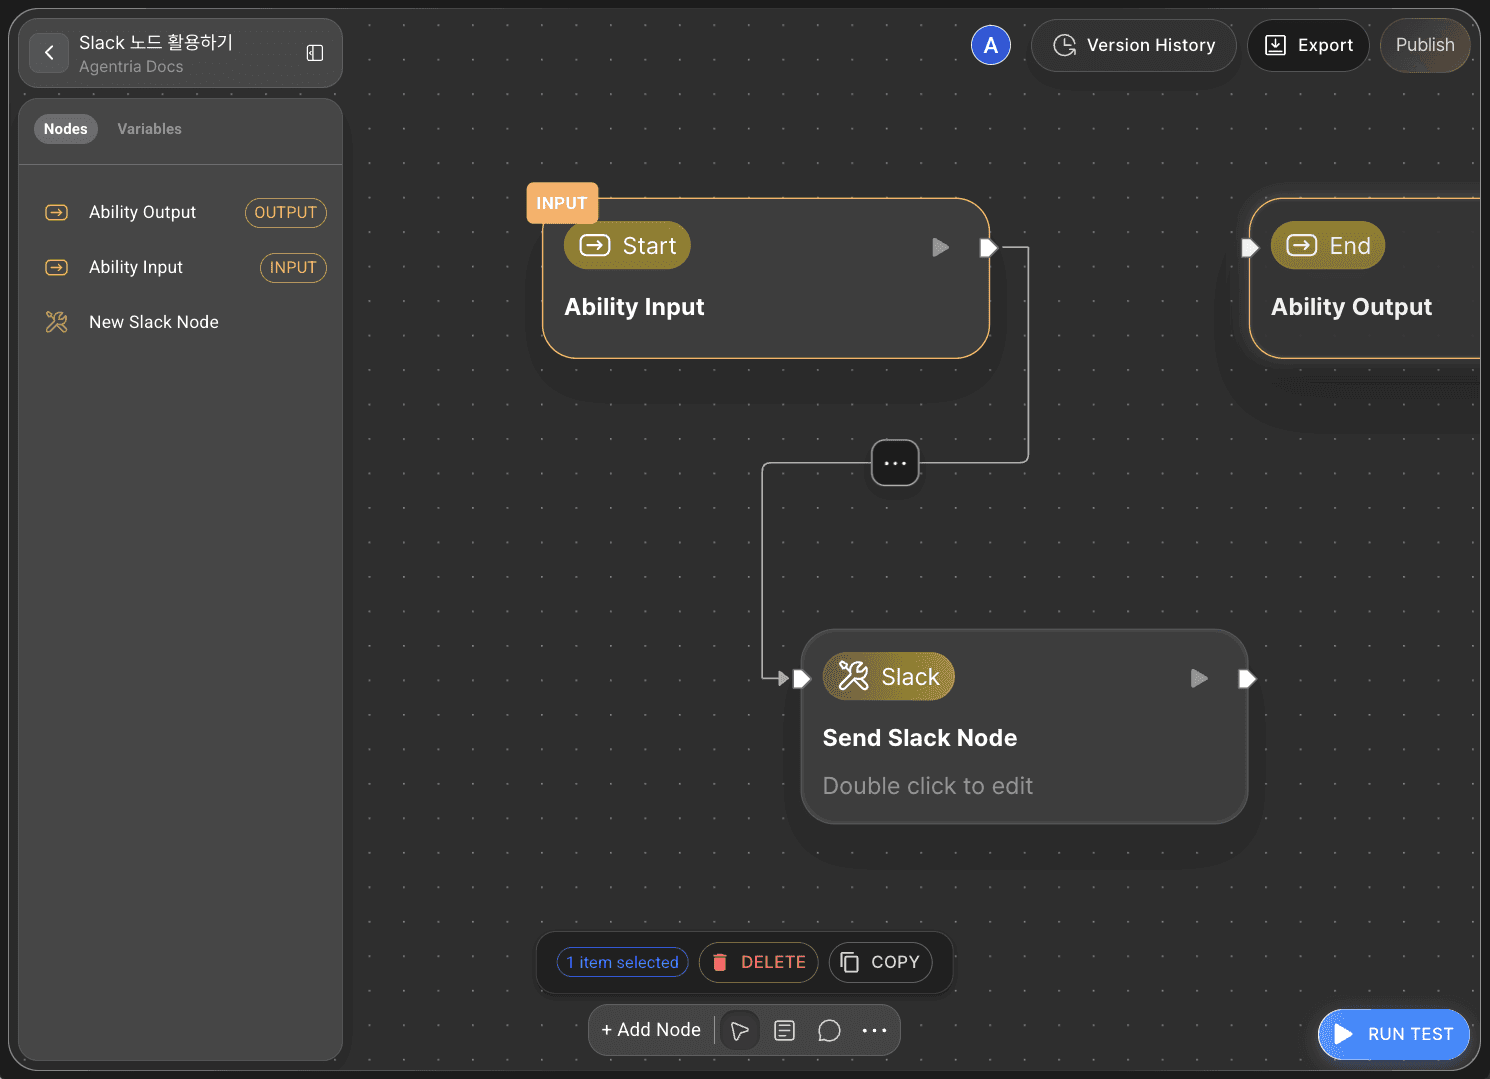
To use the variables received from the Start Node in the Slack Node, you need to connect the two nodes using an edge.
Connect the Out-Pin on the right side of the Start Node to the In-Pin on the left side of the Slack Node.
This connection passes the input values from the Start Node directly to the Slack Node.
Step 5: Configure the Slack Node
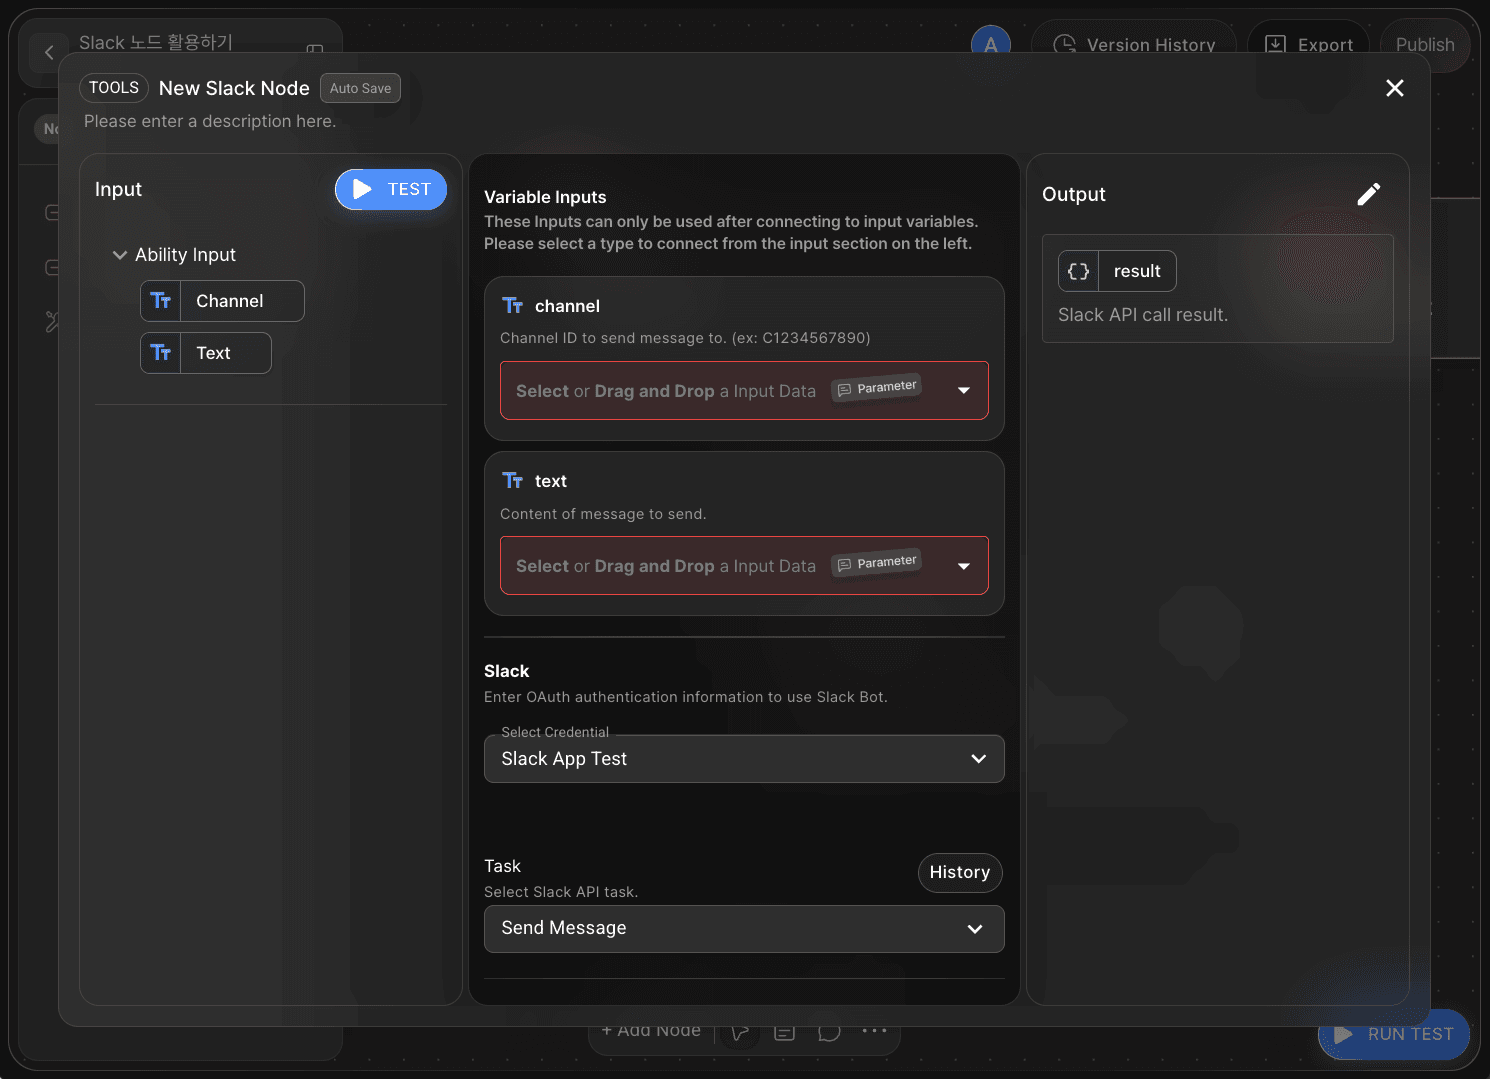
Double-click the Slack Node to open the node editor.
Select the previously registered Slack Credential to load it into the node.
The Slack Node allows you to define how the bot will be used through the Task setting.
Since this tutorial focuses on sending bot messages, select Send Message.
In the Start Node, we declared the channel name(Channel), and message content(Text) as variables to send a bot message.
To use these input values, you’ll need to map them as adapter variables.
Click Show Optional Variables, then click +Add Optional Variables to view available Slack options.
In this tutorial, you will select the following variables:
channeltext
Step 6: Bind Variables via Drag and Drop
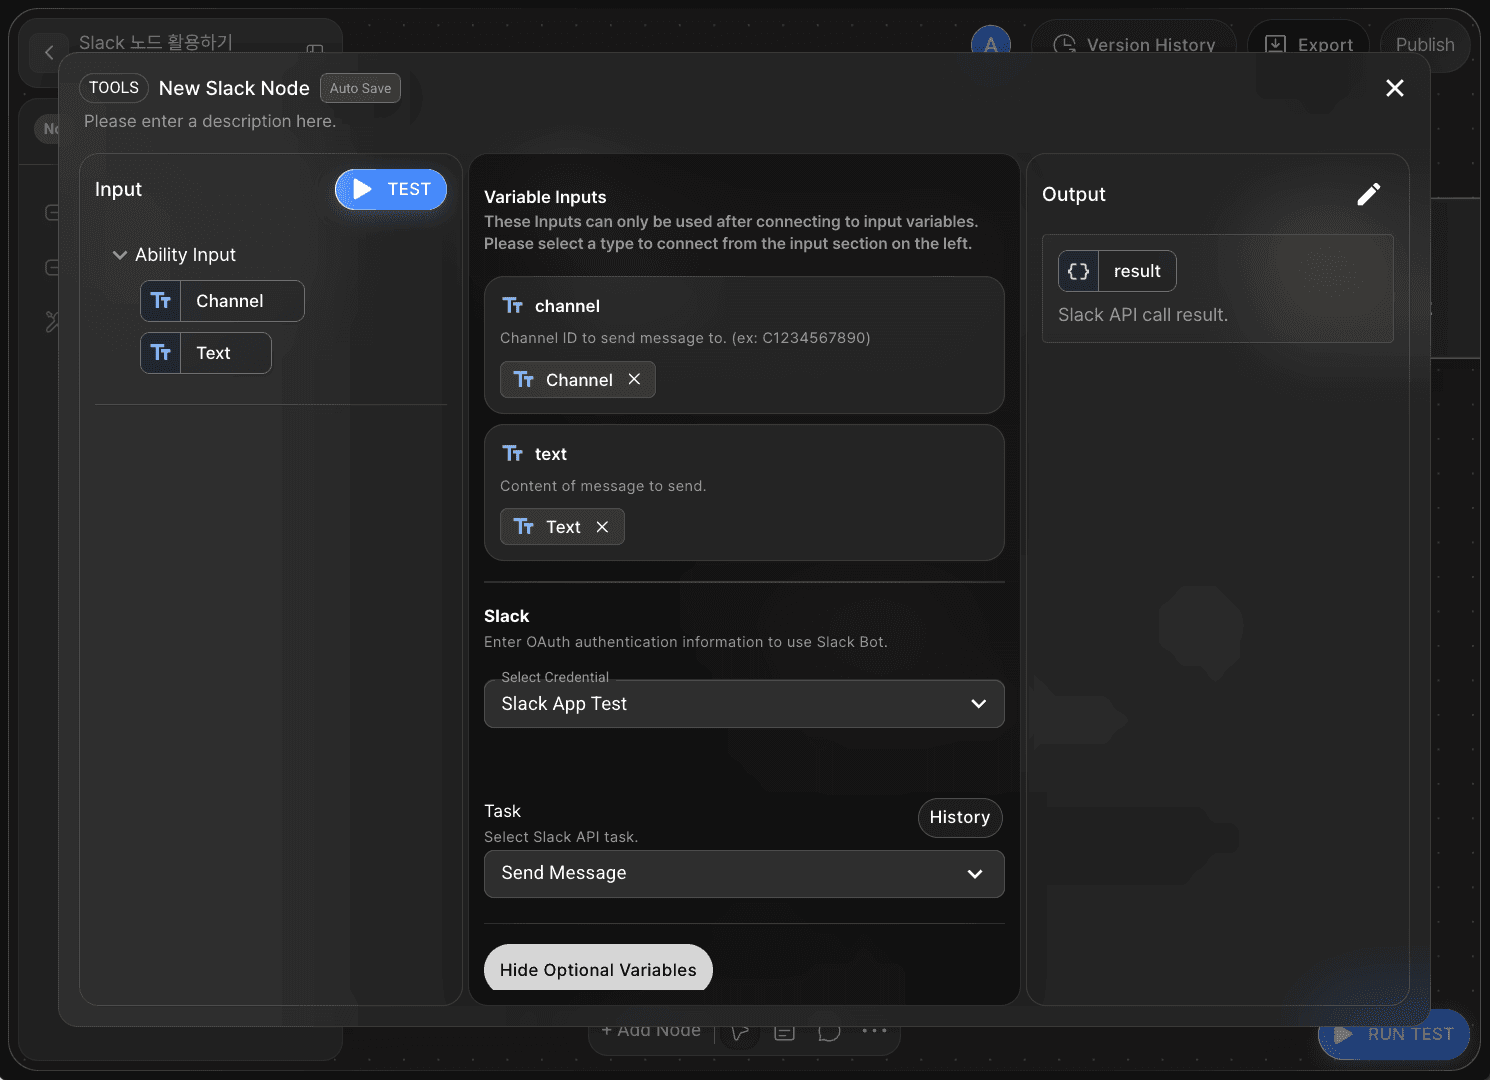
In Agentria, variables can be connected effortlessly without writing any code — simply use drag and drop.
Match the input variables from the Start Node to the adapter variables as follows:
channel:
Channeltext:
Text
The Slack Node outputs data in JSON format by default.
Step 7: Configure Slack Workspace
7-1 ) Copy the Channel ID
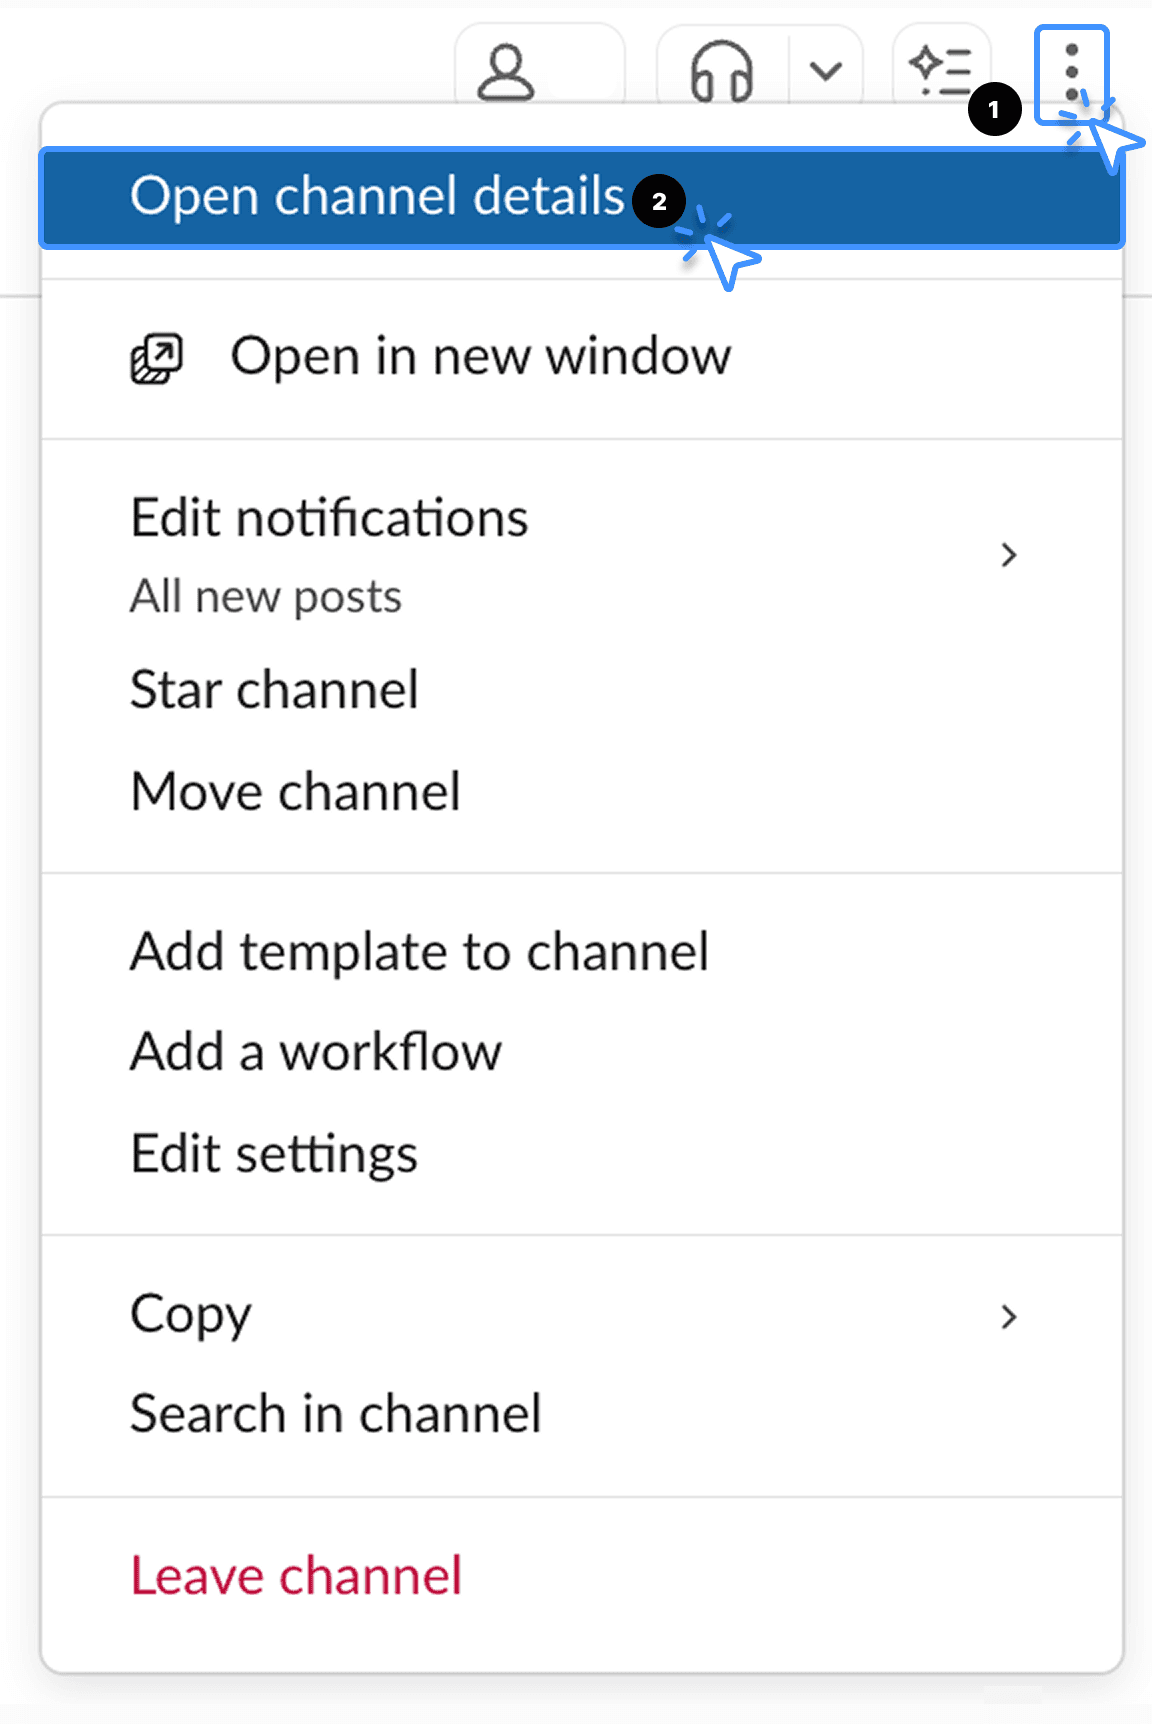
This tutorial is based on the Slack desktop(PC) version.
In the Slack application, open the channel or direct message window where the bot will send messages.
Click the More options icon in the top-right corner of the message window.
Then, click Open channel details.

When the popup window appears, copy the Channel ID.
You’ll use this value in Step 8.
7-2 ) Invite the Bot
By following the 🔗Slack Credential Guide, you’ll have already configured a Slack bot that can send messages.
Using the bot’s name, invite it to the desired channel or direct message window.
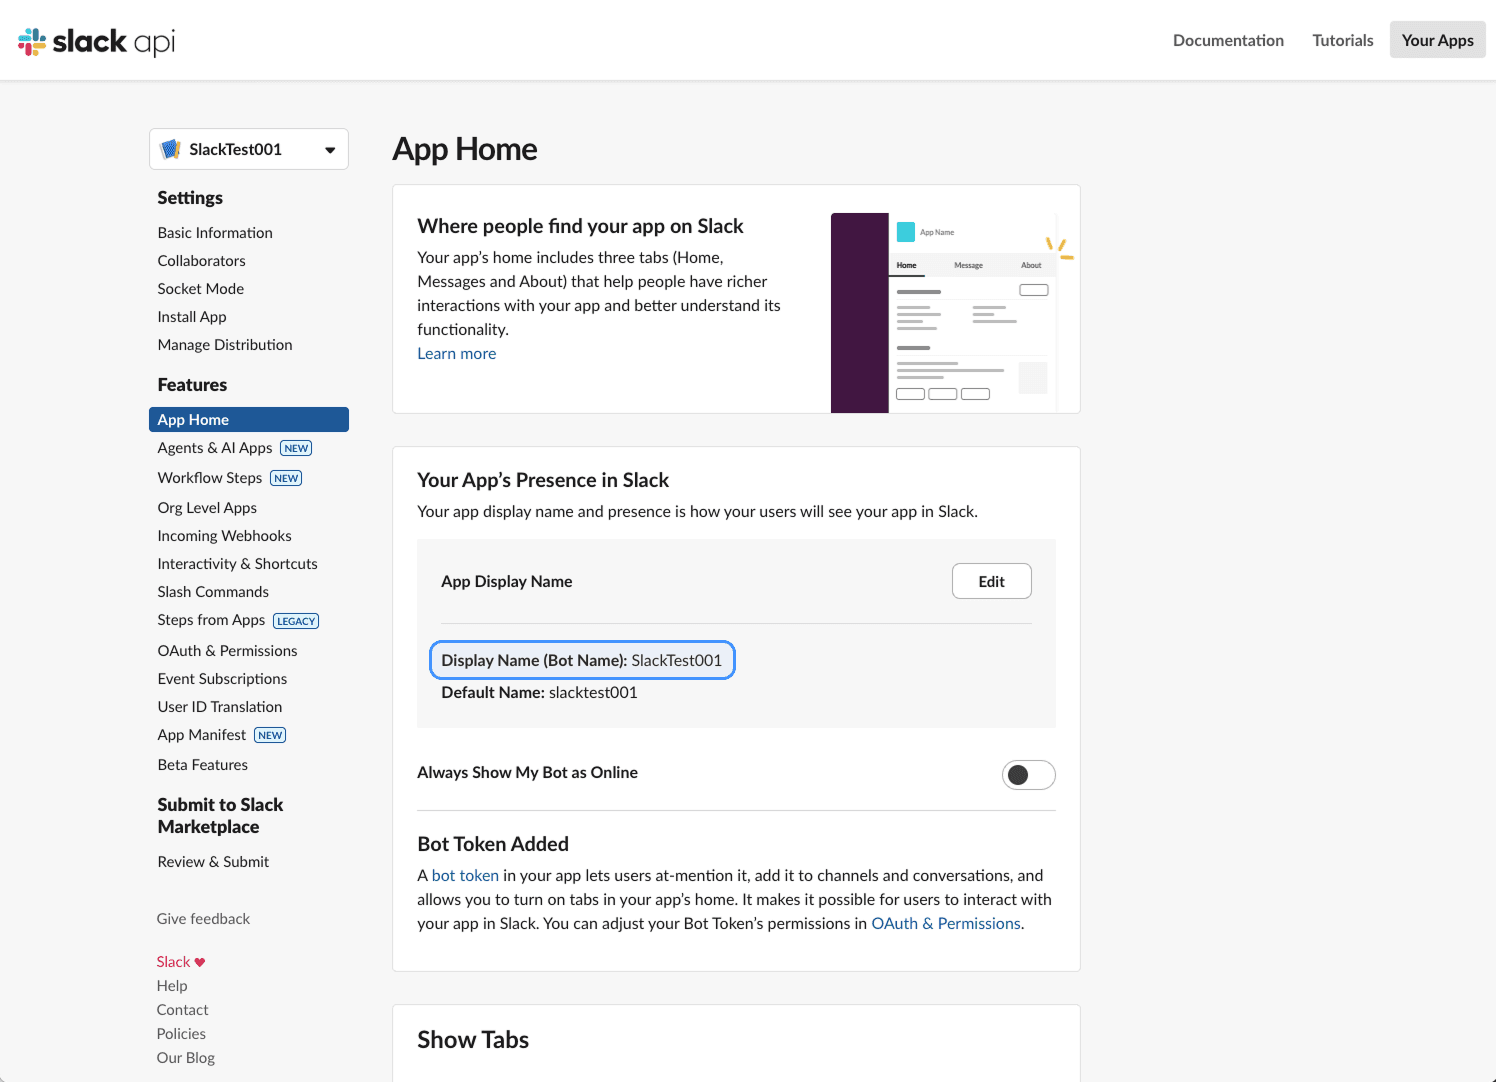
You can check the bot’s name in the App Home tab on the 🔗Slack API site.

In the message input field, search for the bot using the format @Name , press Enter, and send a message to invite it.
Then, click Add to Channel in the popup window.
If the invitation doesn’t work properly, go to the App Home tab in the Slack API site and toggle on Always Show My Bot as Online, then try inviting the bot again.
Step 8: Run a Node Test
After completing the setup, click the TEST button in the Input section of the node editor to perform a node test.
A node test allows you to verify the functionality of an individual node within the editor.
By testing nodes independently, you can ensure they are configured correctly before connecting them — minimizing errors and maintaining stable workflow execution.
Enter the channel and text values, then click Test.
The result section will display the transmission details.
In the Channel field, enter the Channel ID you copied in Step 6.
In the Text field, enter the message content you want the bot to send.
After completing the setup, click the TEST button in the Input section of the editor to run a Node Test.
A Node Test is an individual validation process that can be performed directly within the Node Editor.
This allows you to confirm that the node is properly configured before connecting it to others, minimizing errors and ensuring a stable workflow.
Enter the channel and text values in the input fields, then click Test.
If configured correctly, the transmission details will appear in the output variable result.
In the channel input field, enter the Channel ID copied in Step 7-1.
In the text input field, enter the message content you want the bot to send.

If the bot successfully sends a message in the invited channel or direct message window, the node has been configured correctly.
Step 9: Connect the End Node
Pass the Slack message delivery result to the End Node.
Return to the canvas and connect the Slack Node to the End Node using an edge.
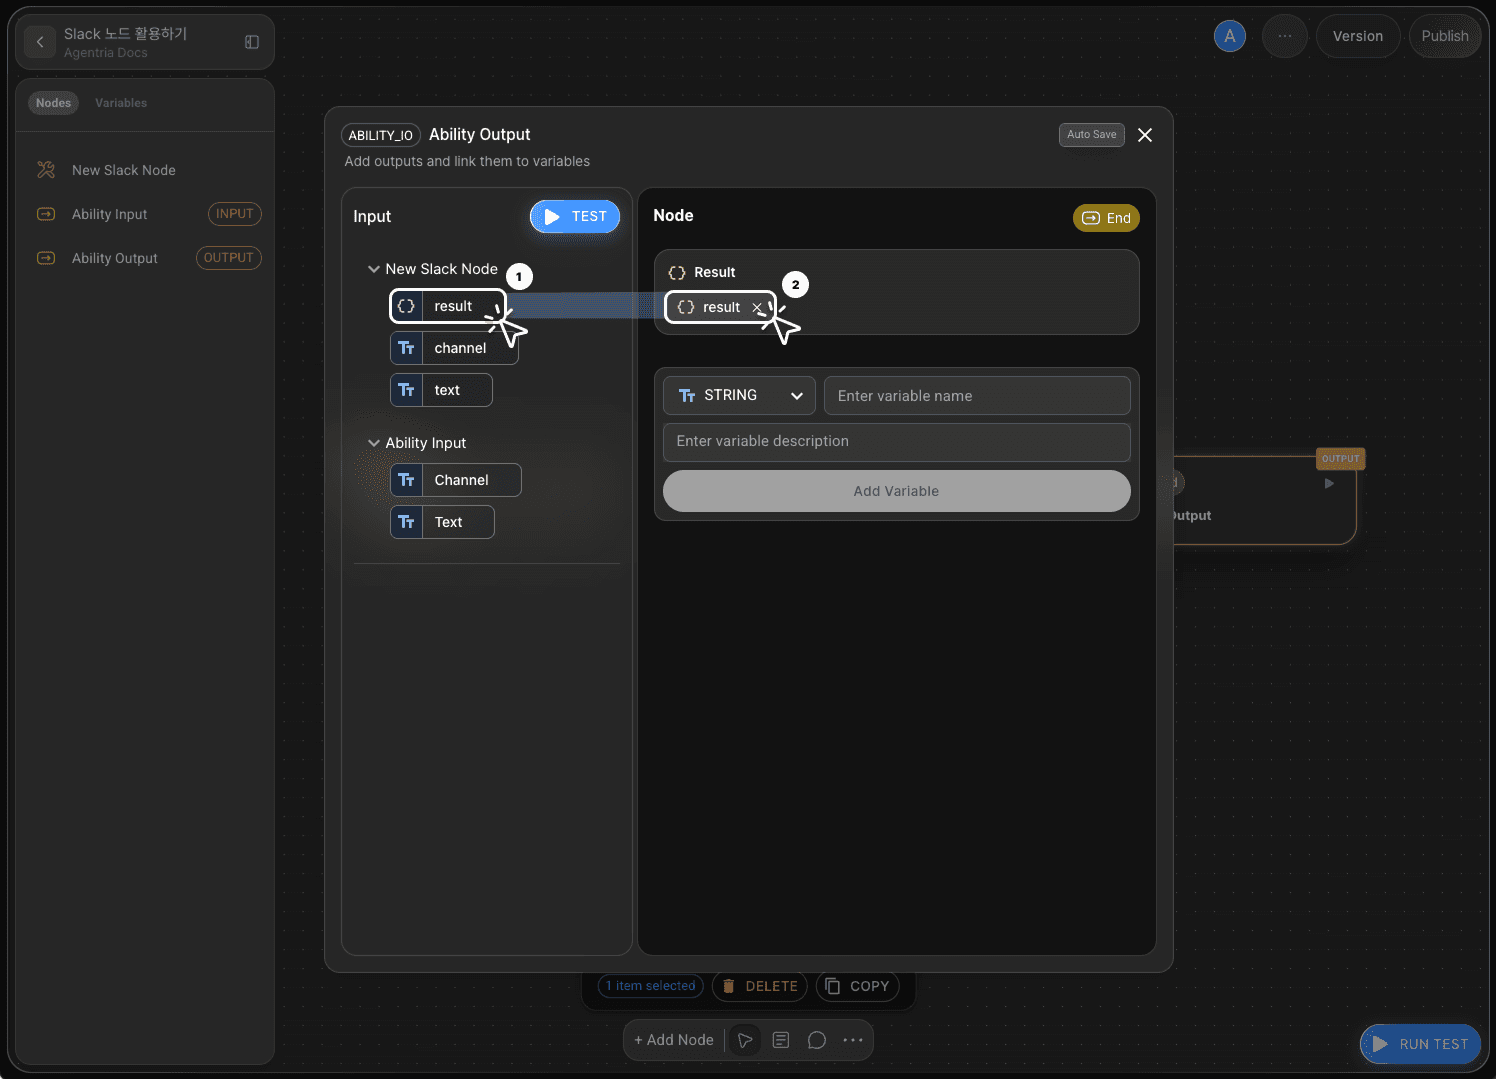
Double-click the End Node to open its editor, then add a variable named Result with the Object data type.
Select or drag and drop the result variable (which contains the output from the Slack Node) and connect it to the Result variable.
Your ‘Send Slack Message’ workflow is now complete.
Step 10: Run the Entire Workflow with Ability Test
Click the Run Test button in the bottom-right corner of the canvas to execute the complete workflow.
Enter the channel and text values in the input fields, then click Test.
The result field will display the transmission details.
If the bot successfully sends a message to the invited channel or direct message window, your node has been configured correctly.
Next Step
🎉 Congratulations! you’ve successfully created ‘Send Slack Message’ workflow using Agentria.
Now, try applying different configurations, reviewing the results, and adding more variables to expand your workflow.
Agentria is a space where ideas turn into reality.
With your imagination, workflows can expand infinitely.
For more Ability examples, visit the 🔗Ability Guide.
For Agent-based examples, visit the 🔗Agent Guide.