Get Started
Learning to Use Nodes — Wait Node
This tutorial walks you through the Wait node in Agentria. The Wait node pauses workflow execution for a specified number of seconds. Enter the delay duration as an integer (in seconds) in the Node Editor — when the workflow reaches this node, it waits for the configured time before moving on to the next node.
The Wait node is useful in situations such as:
Waiting after an API call before checking the result
Pausing until an external system finishes processing
Adding intervals between consecutive requests to prevent overload
In this tutorial, you will build a "Delayed Execution Check" workflow that records the current time using a Python node, waits 10 seconds with the Wait node, then records the time again. The 10-second difference between the two results confirms that the Wait node is working correctly.
Before You Begin
For instructions on how to enter the Agentria Canvas, refer to the 🔗3-Step Core Guide.
After completing this tutorial, you will be able to:
Configure the Wait node's delay duration to pause workflow execution.
Generate code in a Python node using the AI Code Generator.
Declare and bind multiple output variables in the End Node.
Workflow Overview
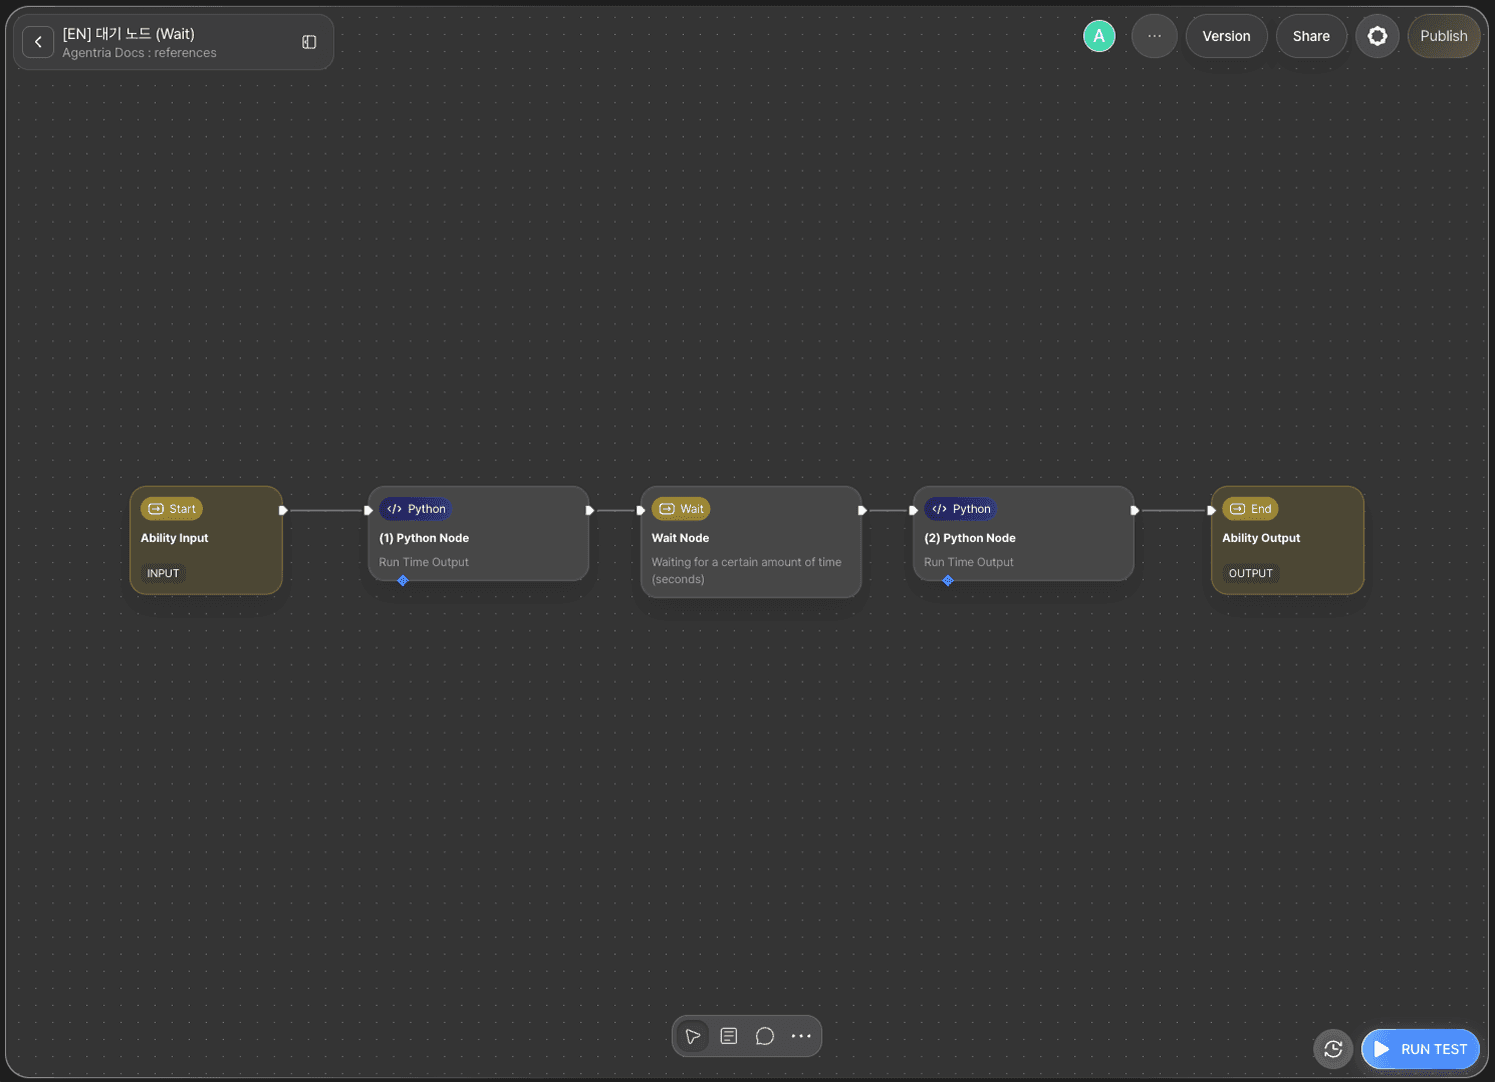
The core of this tutorial is the Wait node.
Python node 1 records the current time, the Wait node pauses execution for 10 seconds, and Python node 2 records the time again. The 10-second difference between the two results confirms that the Wait node is actually delaying execution.
Step 1: Create an Ability
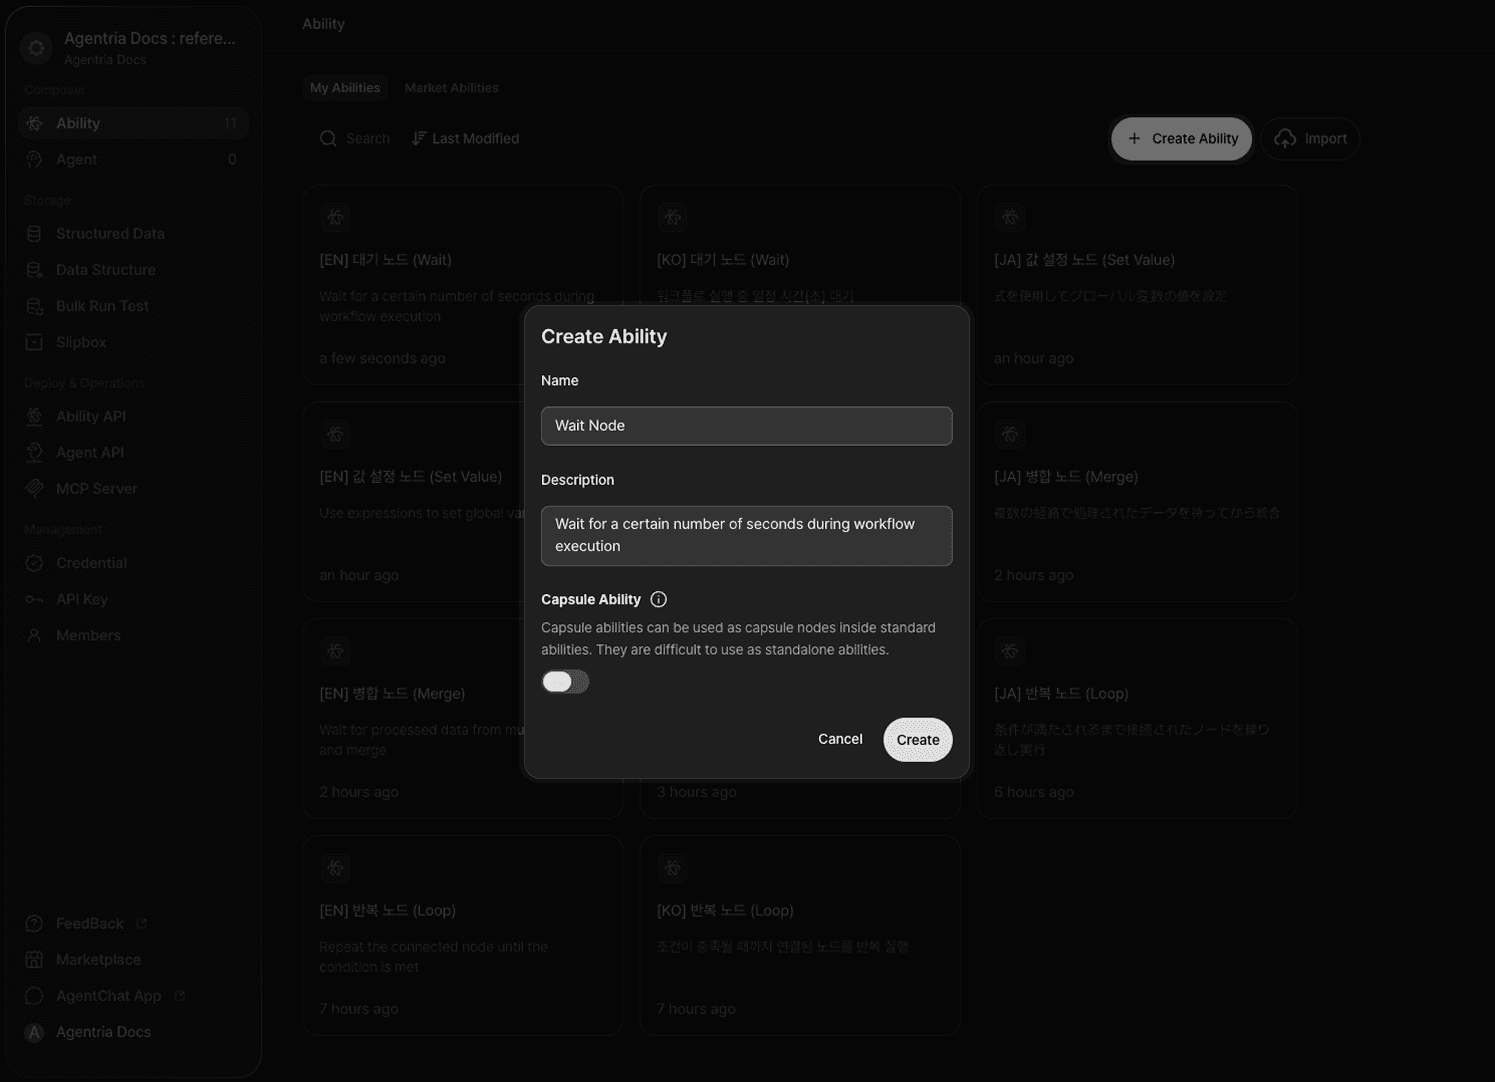
Create a new Ability on the Agentria Canvas.
Step 2: Arrange and Connect the Workflow
Add the following nodes to the Canvas and arrange them as shown in the image.
Python node × 2: Click
+Add Node→ select from theCodecategory.Wait node × 1: Click
+Add Node→ select from theFlow Controlcategory.
Once arranged, connect the edges in the following order.
Out-Pin of Start Node → In-Pin of Python node 1
Out-Pin of Python node 1 → In-Pin of Wait node
Out-Pin of Wait node → In-Pin of Python node 2
Out-Pin of Python node 2 → In-Pin of End Node
Step 3: Python Node 1 — Open the AI Code Generator
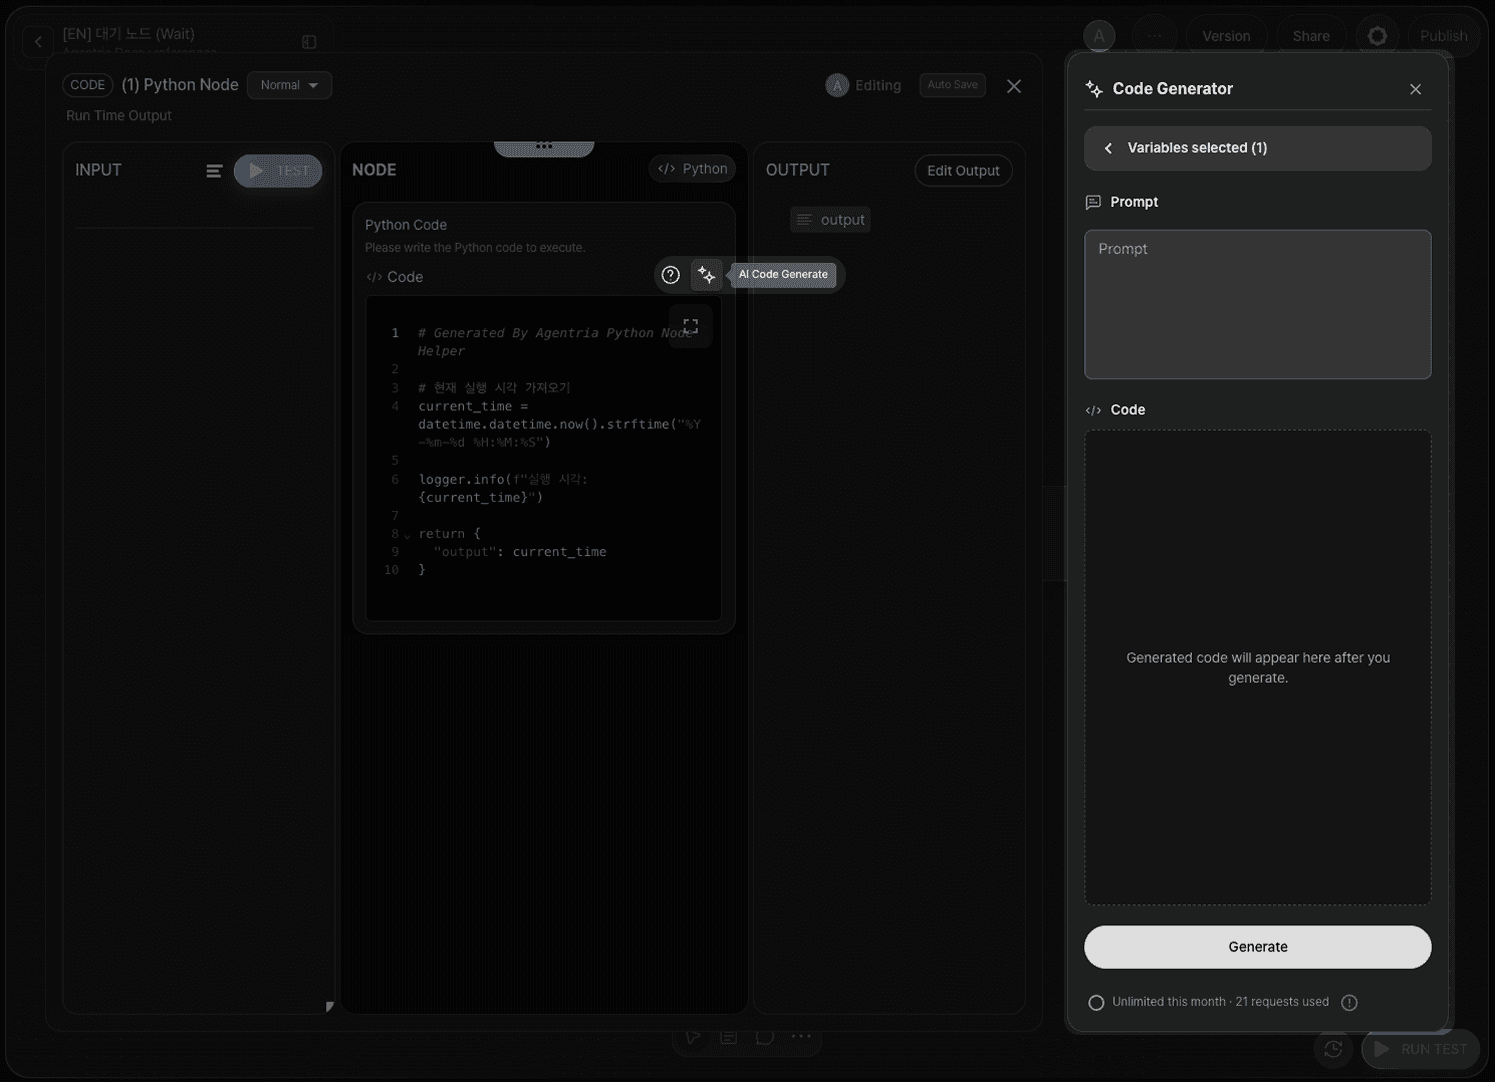
Double-click Python node 1 to open the Node Editor.
Click the icon at the top of the Edit Section to open the AI Code Generator. You can either enter code directly or generate it automatically using the AI Code Generator.
Step 4: Python Node 1 — Generate and Apply Code
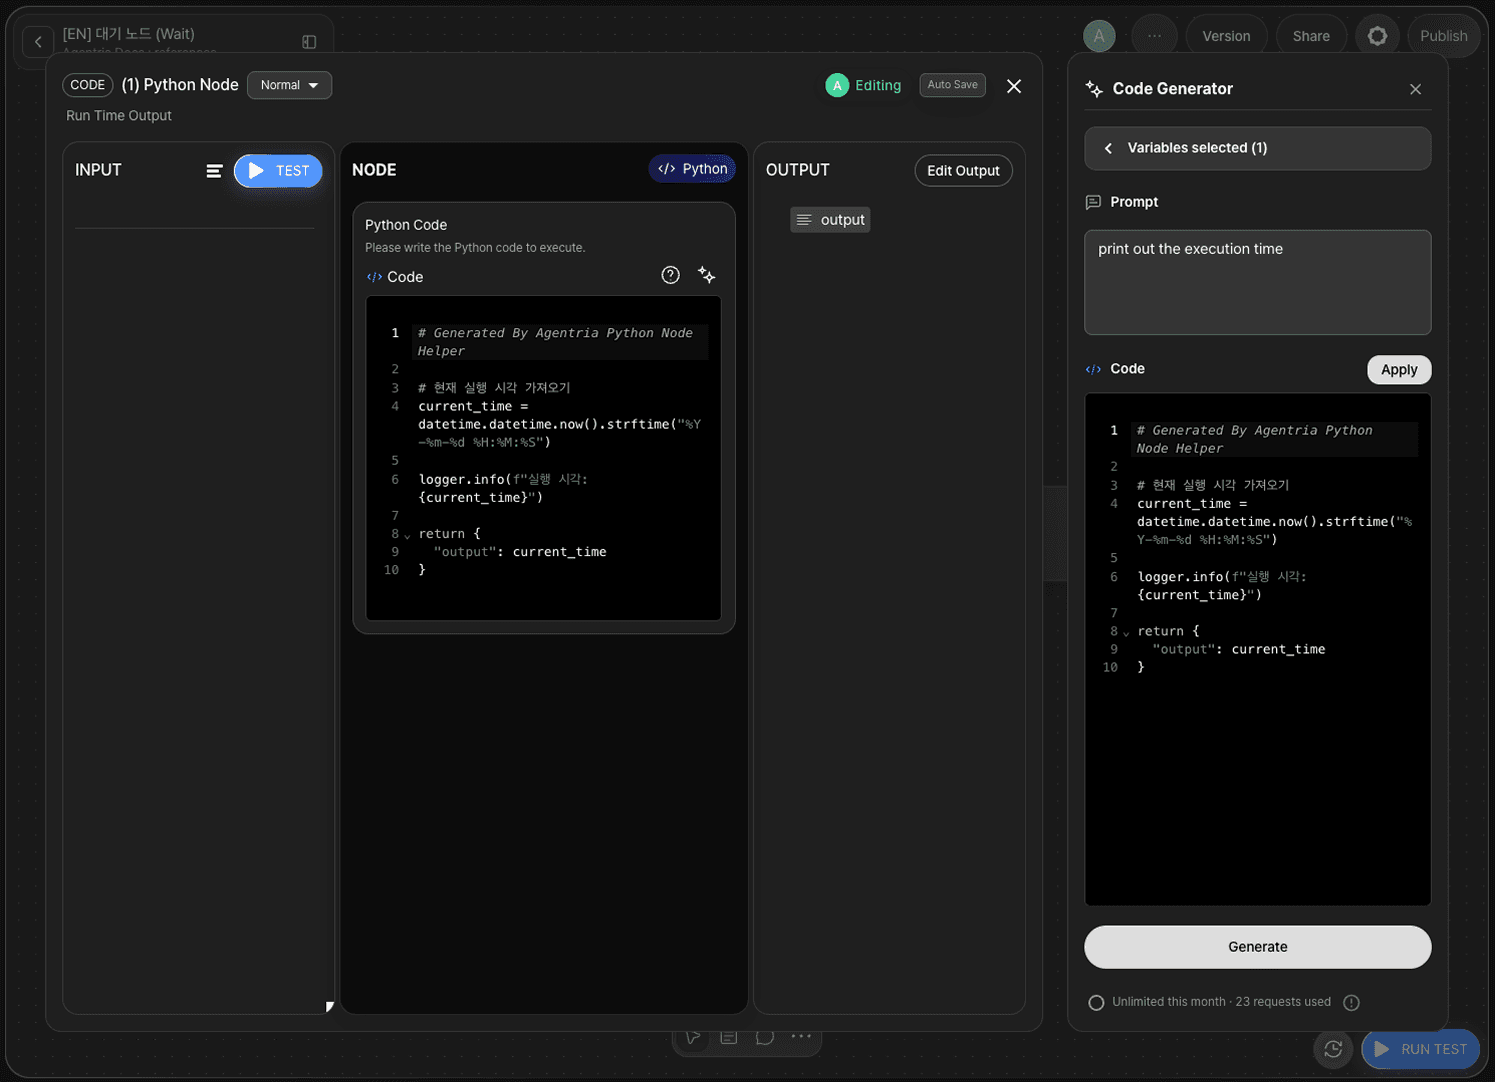
Enter a prompt describing the desired behavior in the AI Code Generator input field, then click Generate.
In this tutorial, generate code that returns the current execution time as a string.
Once the code is generated, click Apply to apply it to the node.
An output variable is added automatically in the Output Section. If it is not added automatically, add a result (String) variable manually.
Step 5: Configure the Wait Node
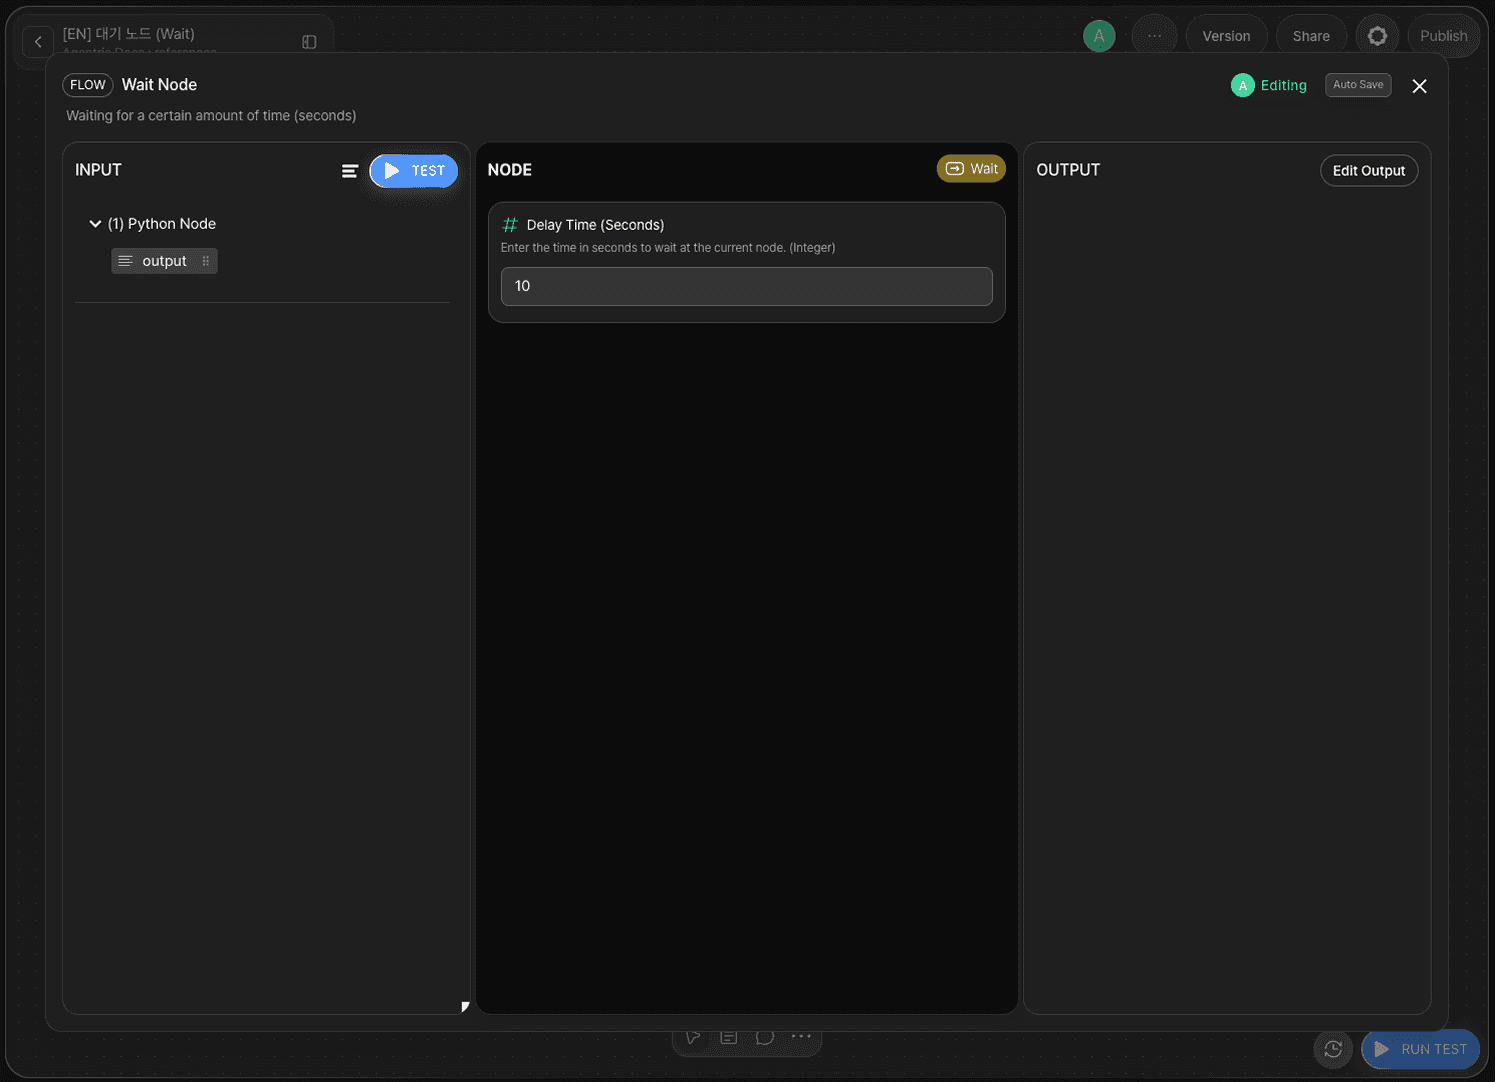
Double-click the Wait node to open the Node Editor.
The Wait node provides the following option.
Option | Required | Description |
|---|---|---|
| Required | Time to wait. Enter as an integer in seconds. Default: 5 |
Enter 10 in the Delay field. The Wait node has no output — once the configured time elapses, the workflow automatically proceeds to the next node.
Step 6: Configure Python Node 2
Double-click Python node 2 to open the Node Editor.
Follow the same steps as Steps 3–4. Enter the same code as Python node 1 to return the current execution time.
Click Apply to apply it to the node, and confirm that a result (String) variable appears in the Output Section.
Step 7: Check the Start Node
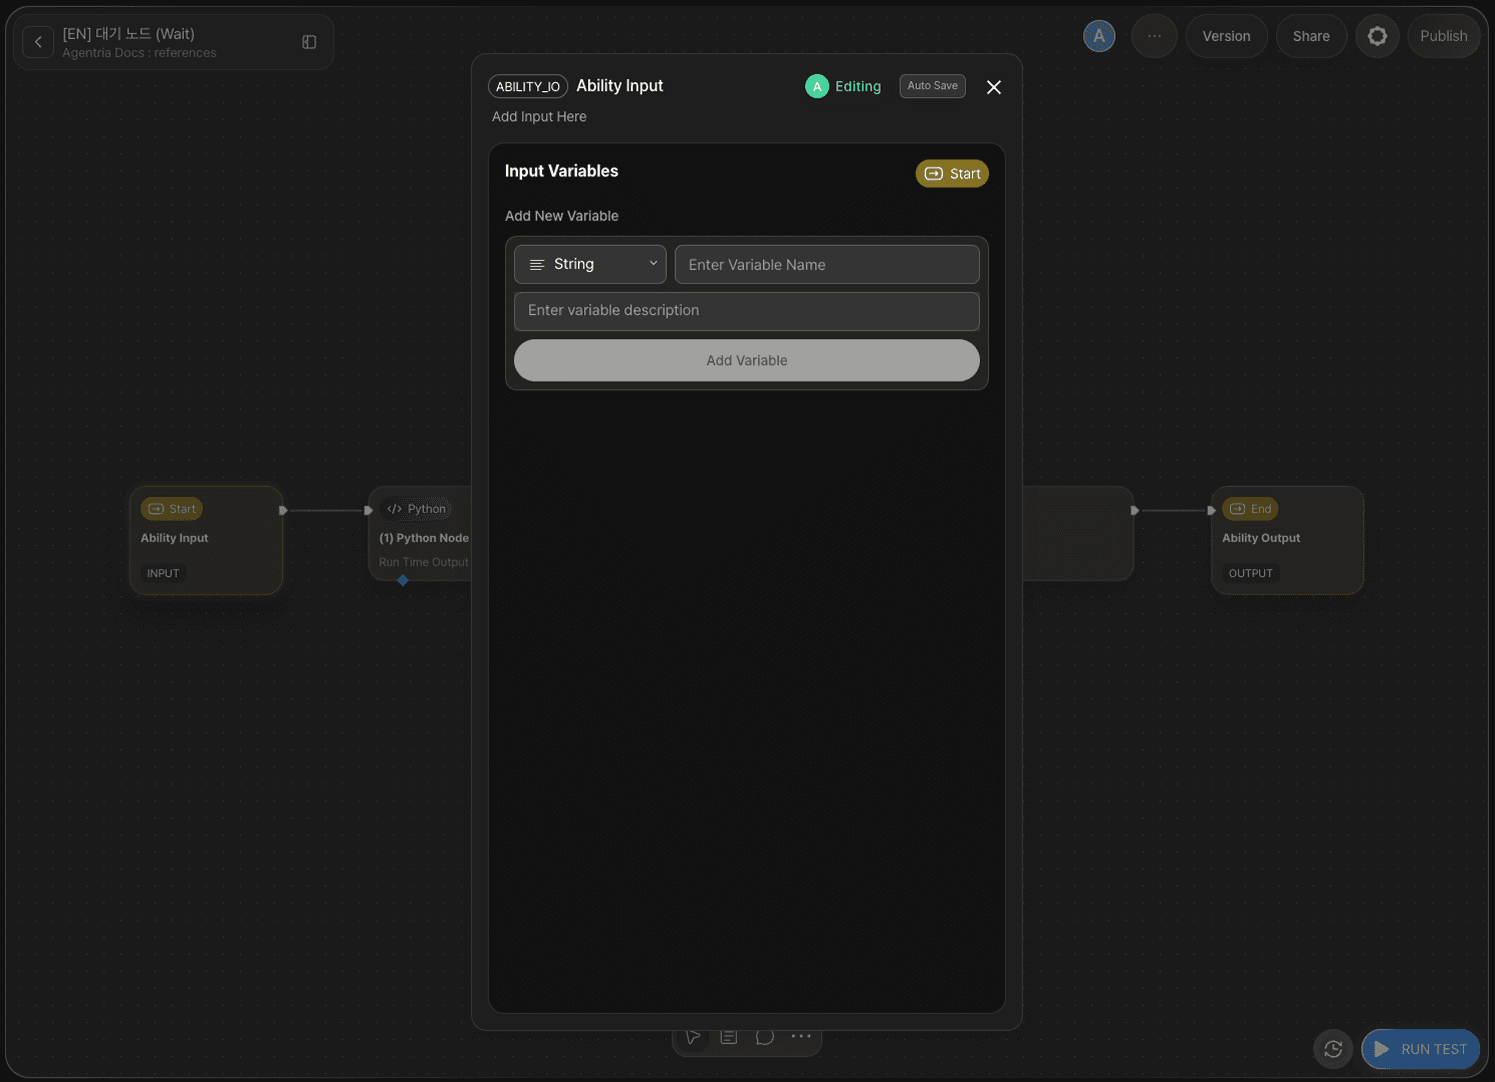
This tutorial requires no input values, so no Input variables need to be declared in the Start Node. Leave the Start Node as is.
Step 8: Configure the End Node
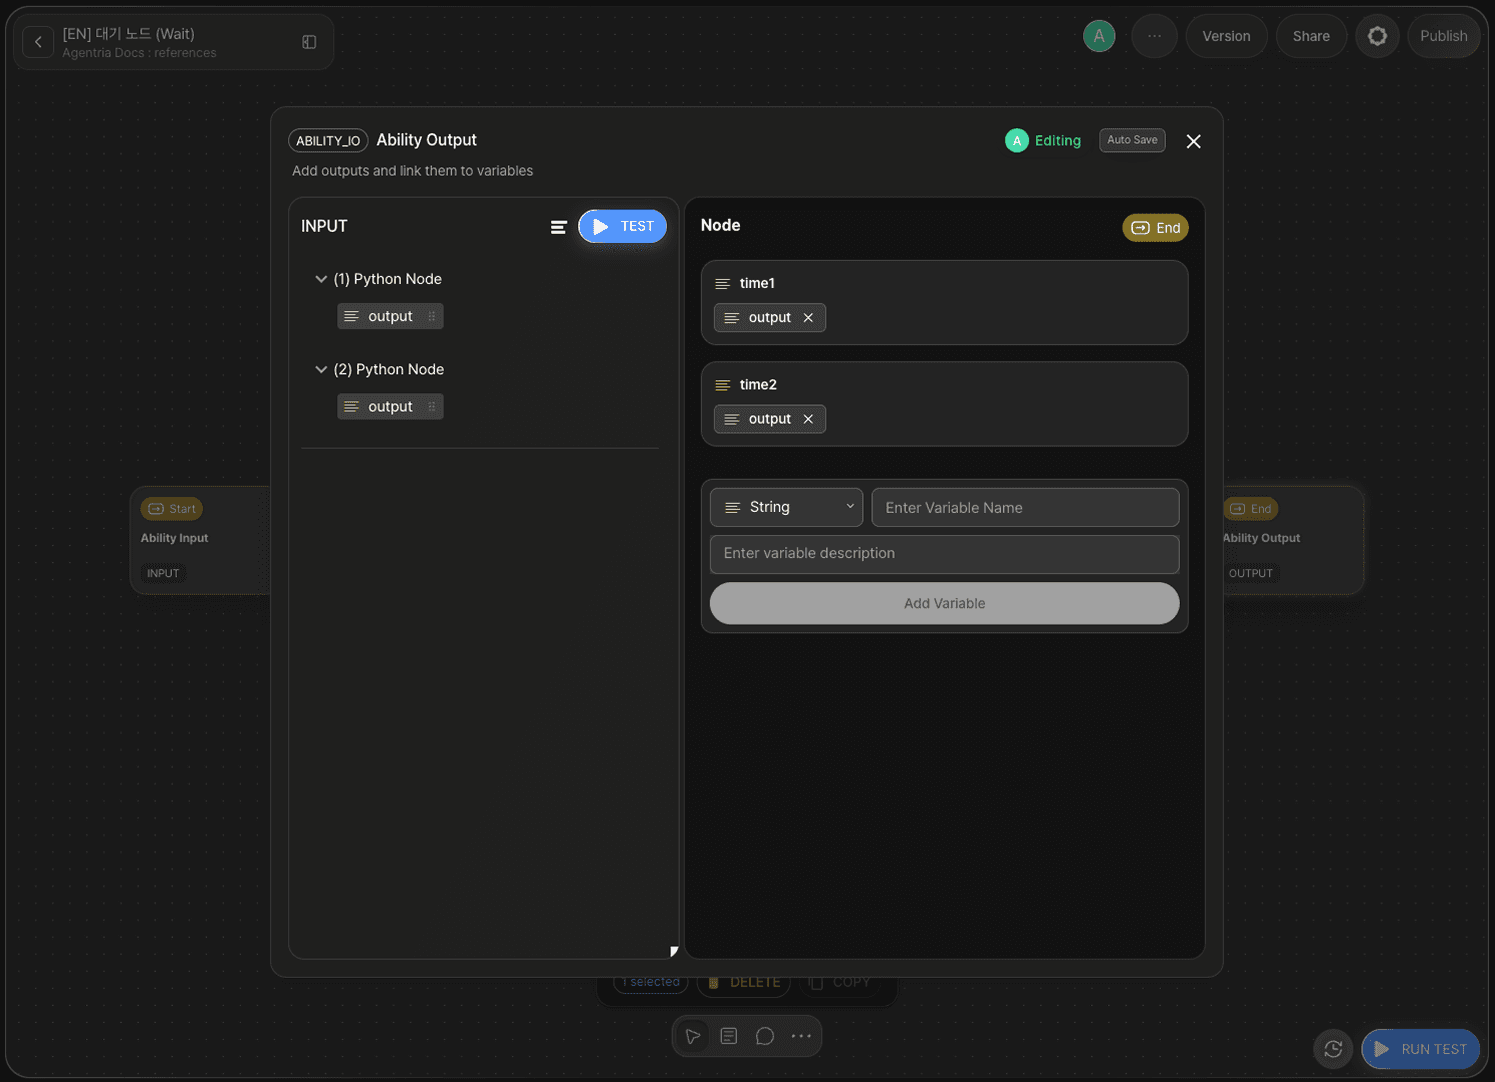
Double-click the End Node to open the Node Editor.
Add the following variables in the Output Section.
Variable | Type |
|---|---|
| String |
| String |
Drag and drop the output value of Python node 1 to bind it to time1, and the output value of Python node 2 to bind it to time2.
Step 9: Run the Ability Test
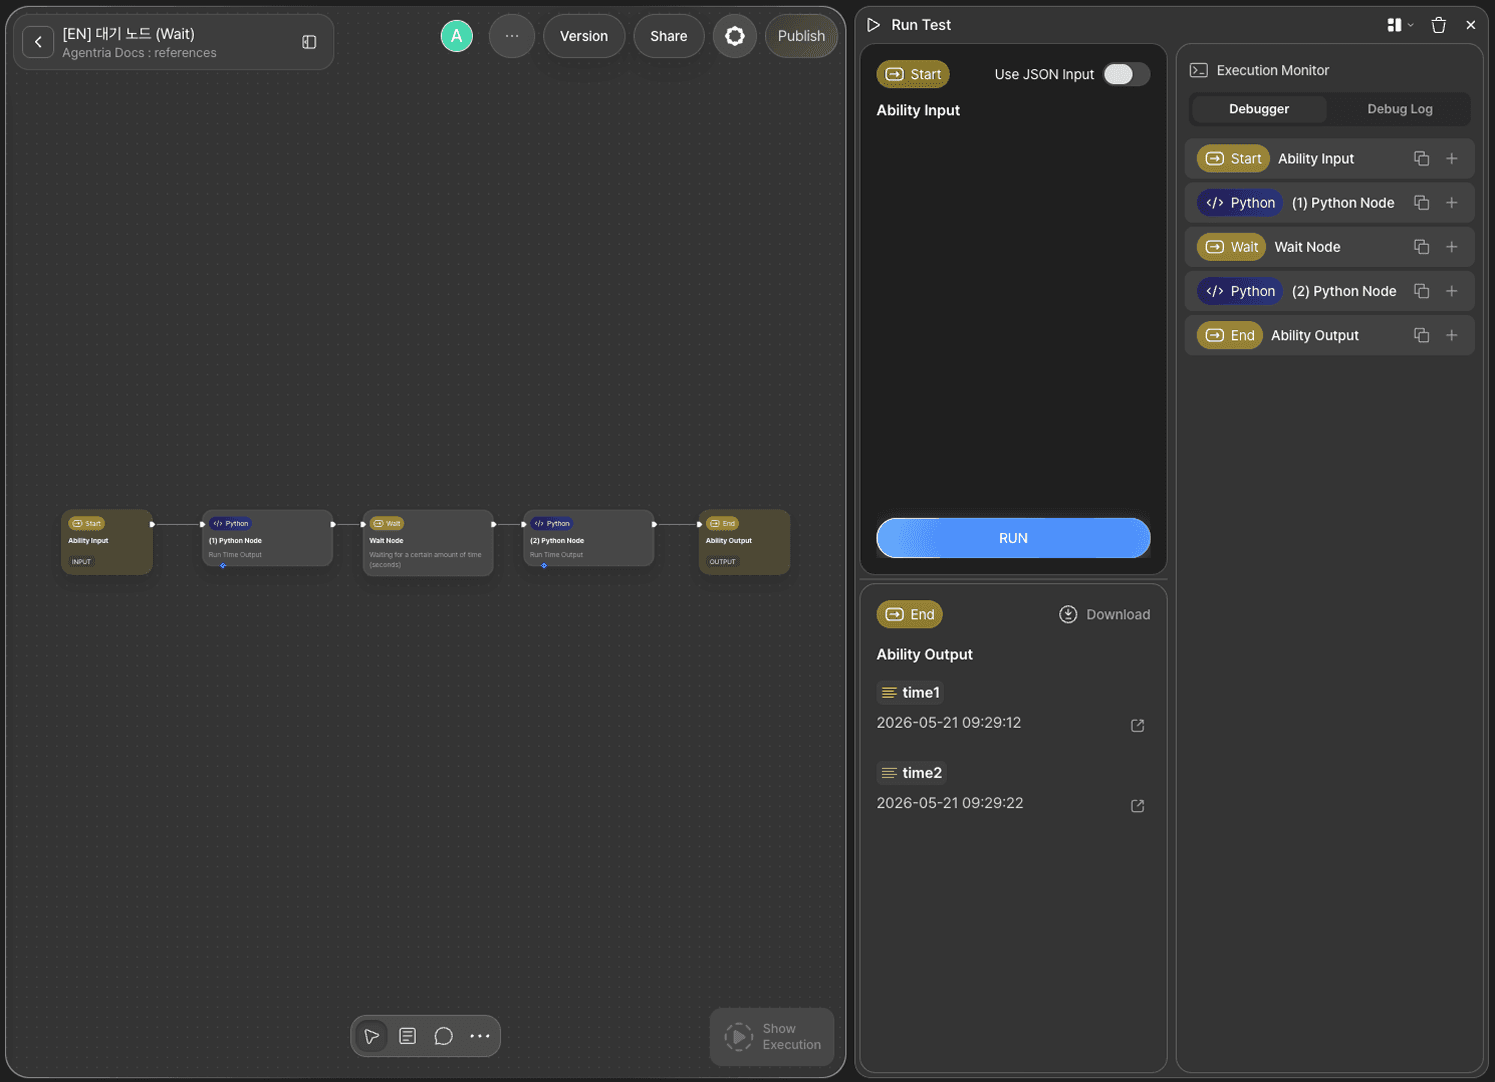
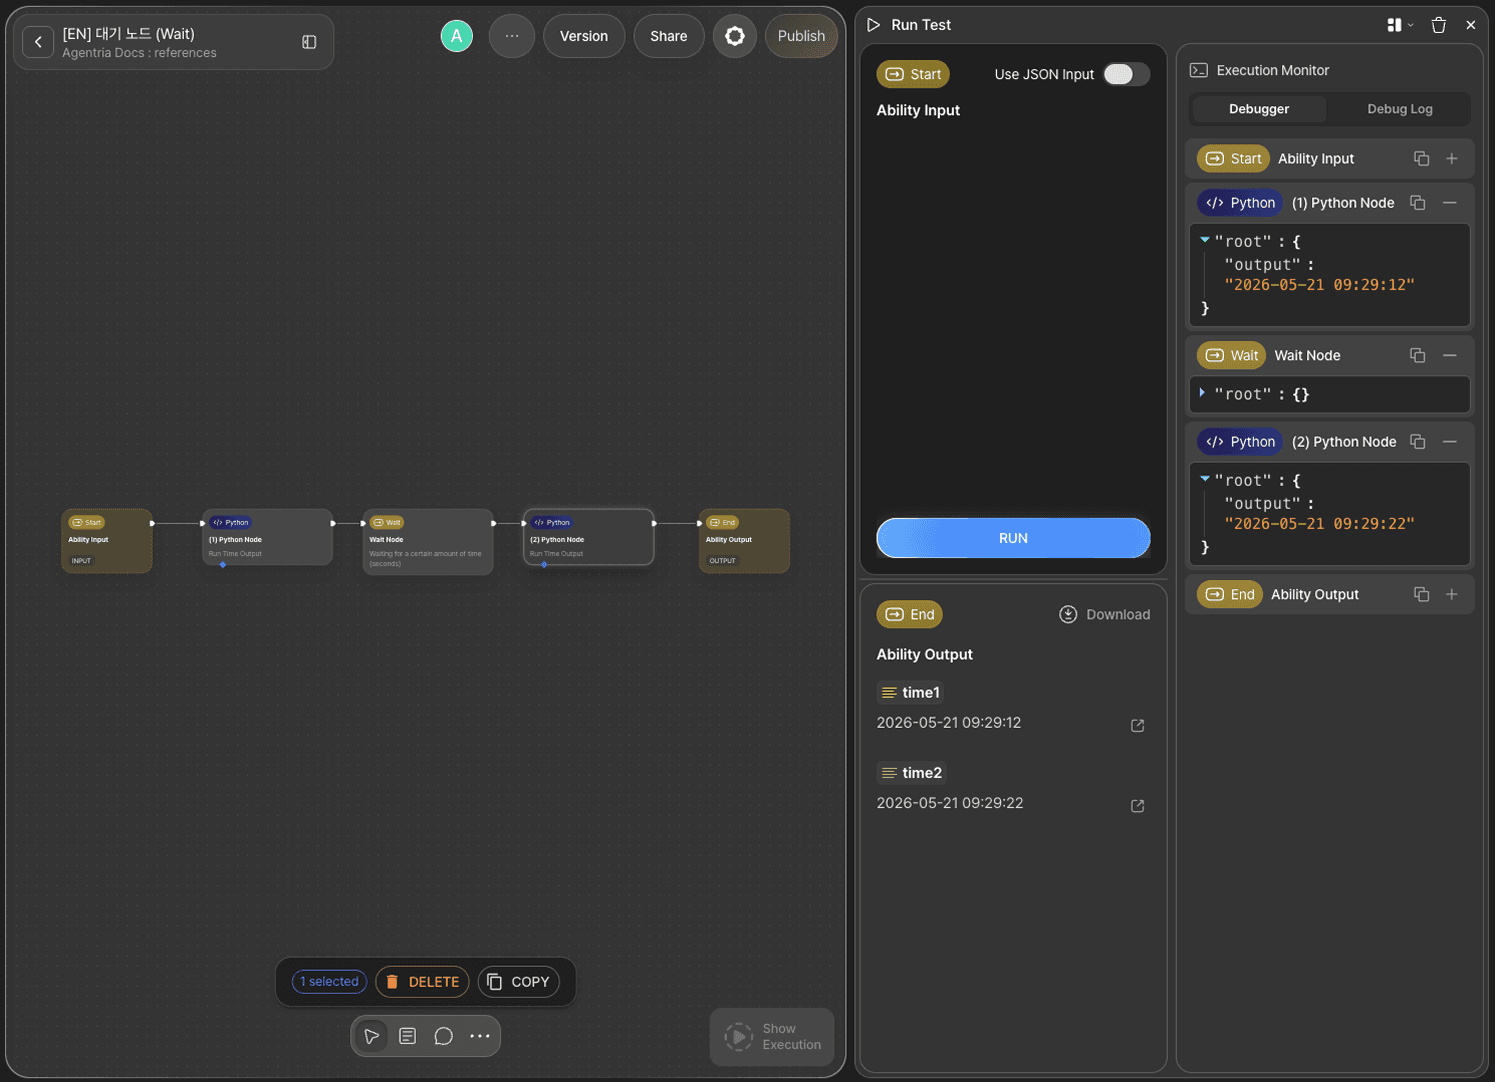
Click the Run Test button in the bottom-right corner of the Canvas. Proceed through Run Test → Run Test → Run to execute the full test.
This tutorial has no input values, so the test runs immediately without any input.
Python node 1 records the current time, the Wait node pauses for 10 seconds, then Python node 2 records the time again. Since the delay is set to 10 seconds, confirm that the difference between time1 and time2 is 10 seconds.
Variable | Example result |
|---|---|
|
|
|
|
Step 10: Review Execution Results
In the Execution Monitor panel of the test window, review the step-by-step execution results of each node.
Next Steps
🎉 Congratulations! You've successfully built the "Delayed Execution Check" workflow using Agentria.
Try adjusting the delay duration or combining the Wait node with other nodes to build workflows such as:
A workflow that waits after an API call before checking the result
A workflow that pauses until an external system finishes processing
A workflow that adds intervals between consecutive requests to prevent overload
Agentria is a place where ideas become reality—your workflow can expand infinitely with your creativity.
For more Ability examples, visit the 🔗Ability Guide.
For Agent-based examples, visit the 🔗Agent Guide.