Get Started
Using Database Nodes (DB Updater)
This tutorial covers how to use the DB Updater node in Agentria. The DB Updater node modifies existing records in Data Storage. First, use the DB Reader node to retrieve the target record, then use a Python node to build the update data before passing it to the DB Updater node.
In this tutorial, you will build a workflow that looks up a customer by name and updates that customer's data with new input values.
Before You Begin
For instructions on accessing the Agentria canvas, refer to the 🔗3-Step Core Guide.
The DB Updater node requires Data Storage to be configured in advance. Refer to the 🔗Data Storage Guide.
After completing this tutorial, you will be able to:
Use the DB Reader node to retrieve the target record for editing.
Use a Python node to build update data that includes
data_record_id.Use the DB Updater node to modify records in Data Storage.
Workflow Overview
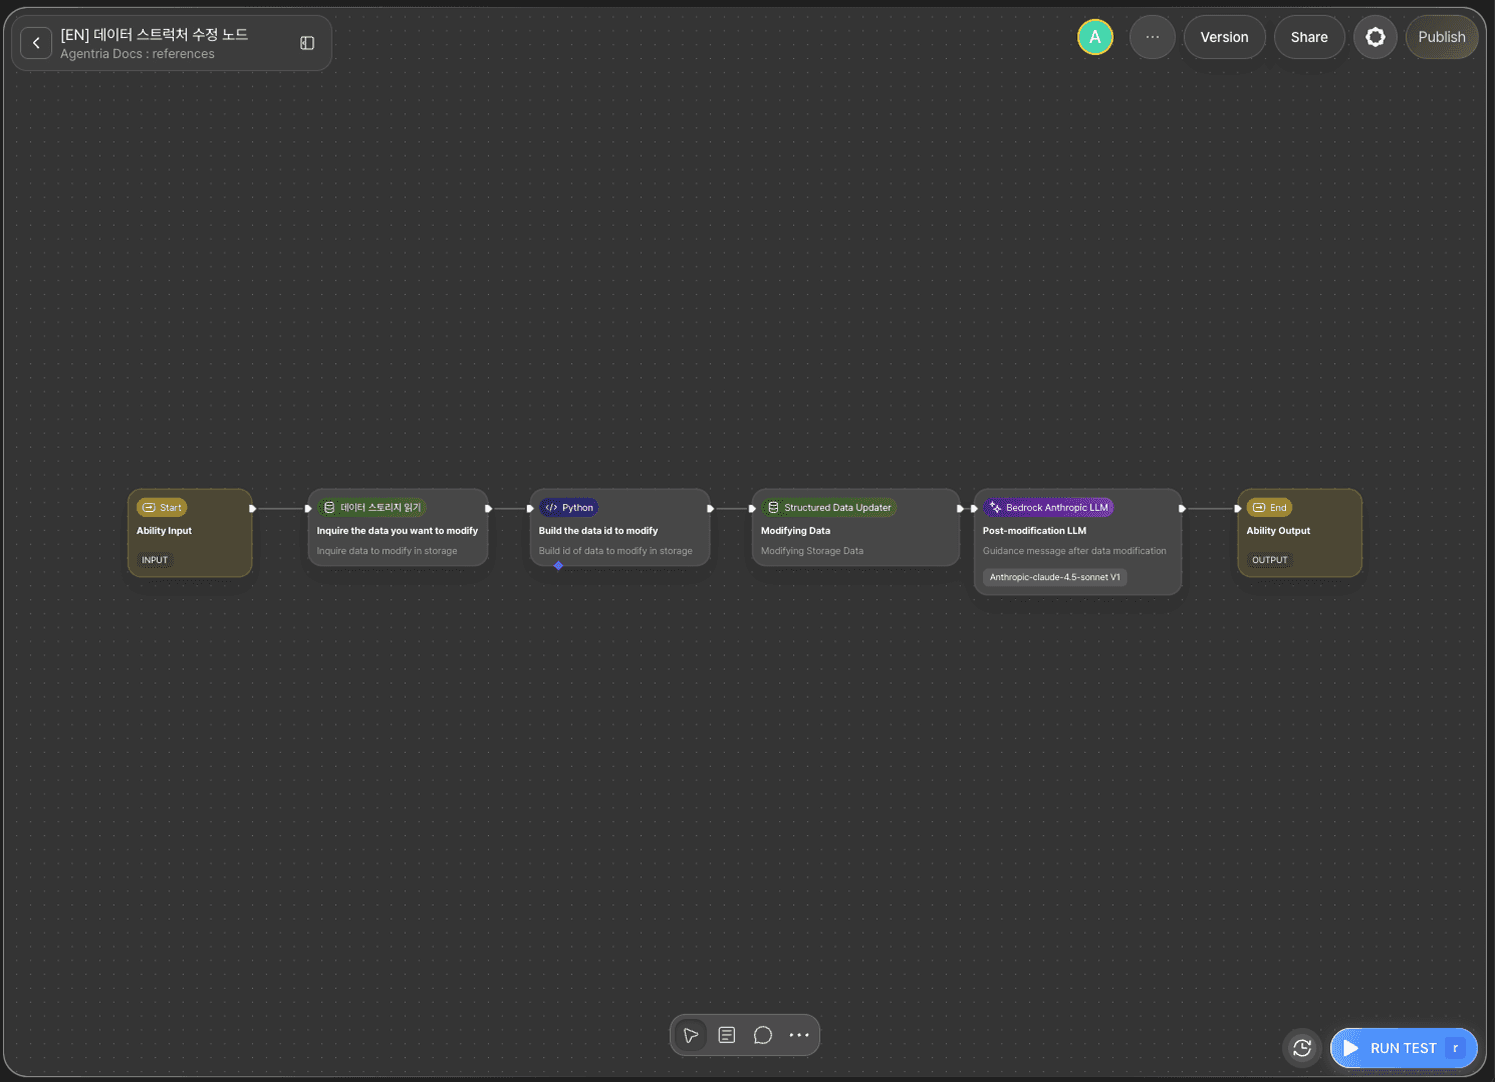
The core of this tutorial is the DB Updater node.
The DB Updater node identifies existing records by data_record_id and overwrites them with new values. The record ID is included in the DB Reader node's query results — the Python node extracts it and builds the update data.
For detailed instructions on the DB Reader node, refer to the 🔗DB Reader Node Guide.
Step 1: Create an Ability

Create a new Ability on the Agentria canvas.
Use the +Add Node button to add a DB Reader node, a Python node, a DB Updater node, and an LLM node to the canvas.
Step 2: Declare Input Variables

Double-click the Input Node to open the Node Editor.
Declare input variables to match the column structure of the storage to update. The storage used in this tutorial is Customer Data.
Variable | Type | Description |
|---|---|---|
| String | Customer name to search by |
| String | Updated phone number |
| String | Updated customer grade |
| String | Updated memo |
Step 3: Configure the DB Reader Node
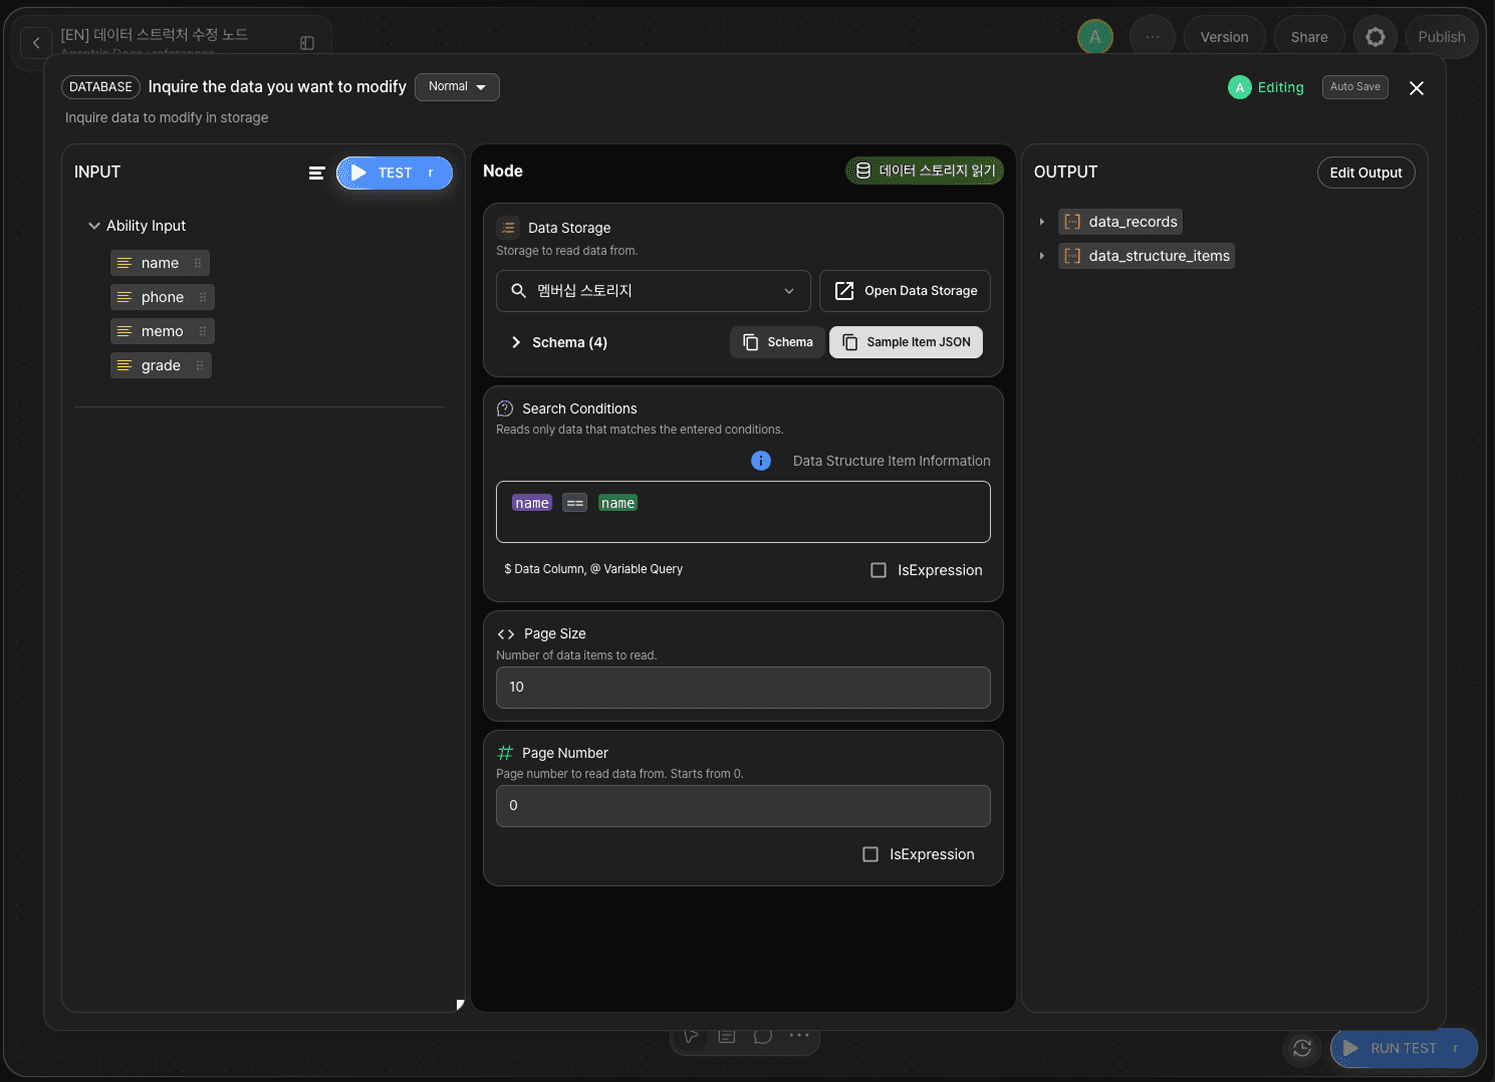
Double-click the DB Reader node to open the Node Editor. First, retrieve the target record to update.
Select Storage

Click the Select Storage button to open the selection screen. Select the storage that holds the customer data.
Search Condition and Page Settings
Option | Value | Description |
|---|---|---|
|
| Retrieve target record by customer name |
|
| Maximum records to retrieve at once |
|
| First page |
Step 4: Configure the Python Node

Double-click the Python node to open the Node Editor.
The Python node extracts data_record_id from the records returned by the DB Reader node and builds the update data with new input values.
Enter the code below. Drag and drop each variable from the left input panel.
Code logic:
data_records— the list of records returned by the DB Reader nodedata_record_id— unique ID that identifies which record to update (included in DB Reader output)name— kept from the existing record without changephone,grade,memo— replaced with new values from the Input Node
Important: In the Output Section of the Python node, set the type of the
outputvariable to Array.
Step 5: Configure the DB Updater Node

Double-click the DB Updater node to open the Node Editor.
The DB Updater node provides the following options.
Option | Required | Description |
|---|---|---|
| Required | Select the storage to update |
| Required | Record data to update (must include |
Select Storage
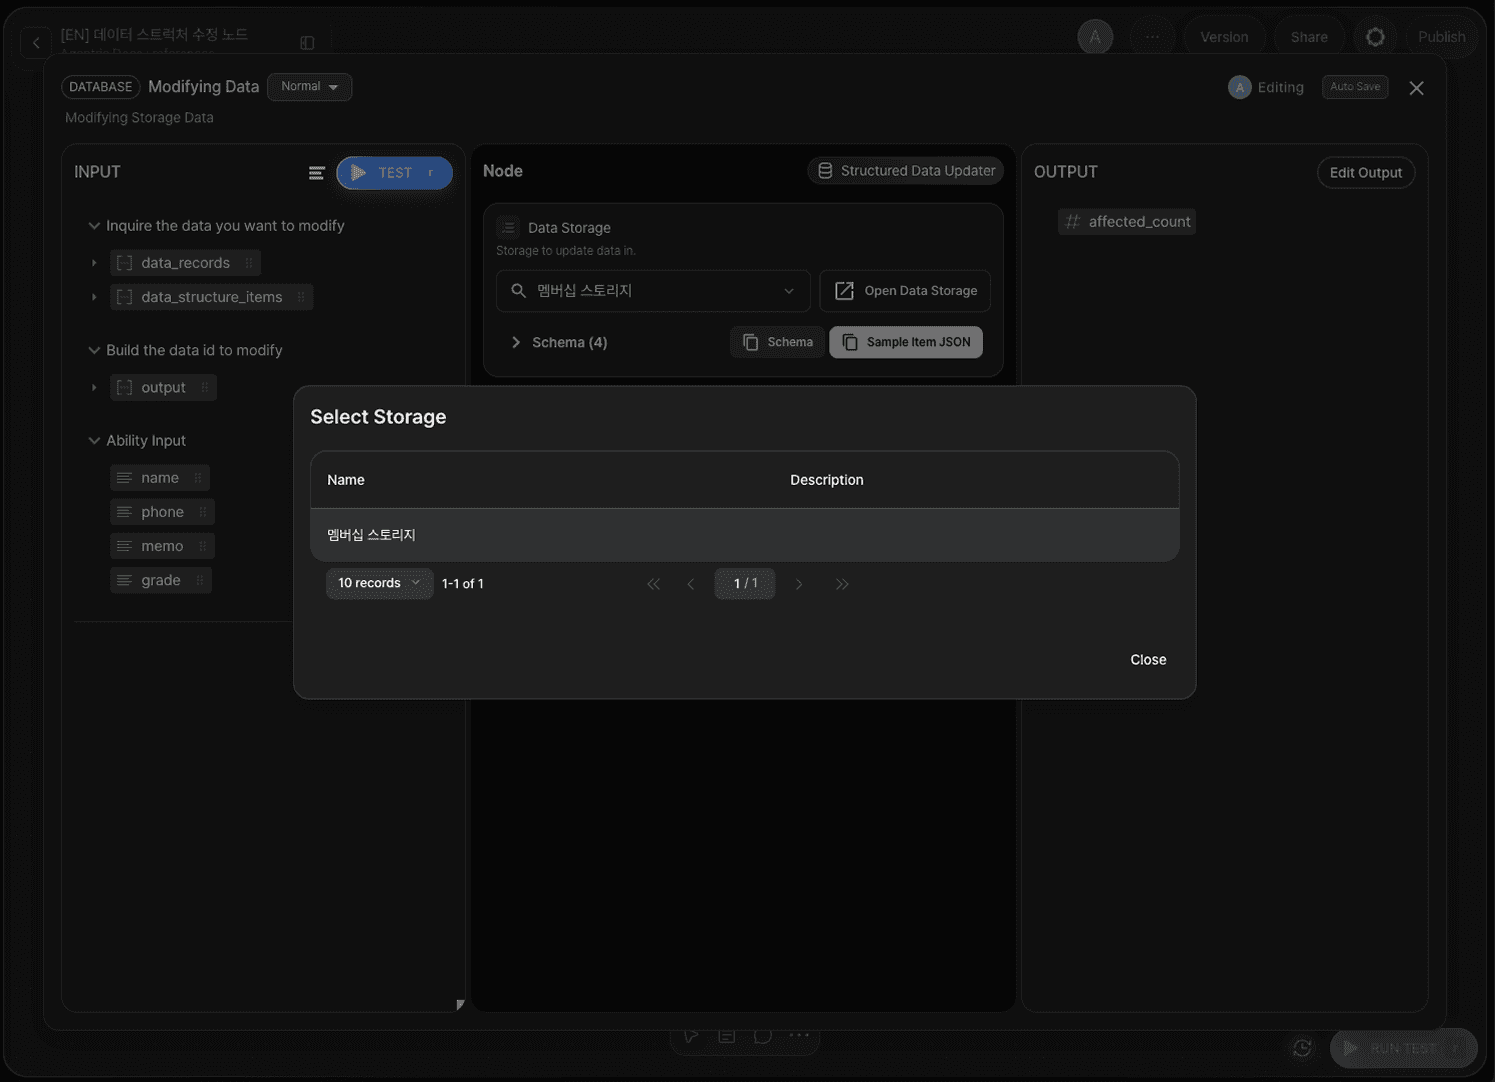
Click the Select Storage button to open the selection screen. Select the storage that holds the customer data.
Set record_items
Drag and drop the Python node's output onto the record_items adapter variable.
Step 6: Configure the LLM Node (Optional)
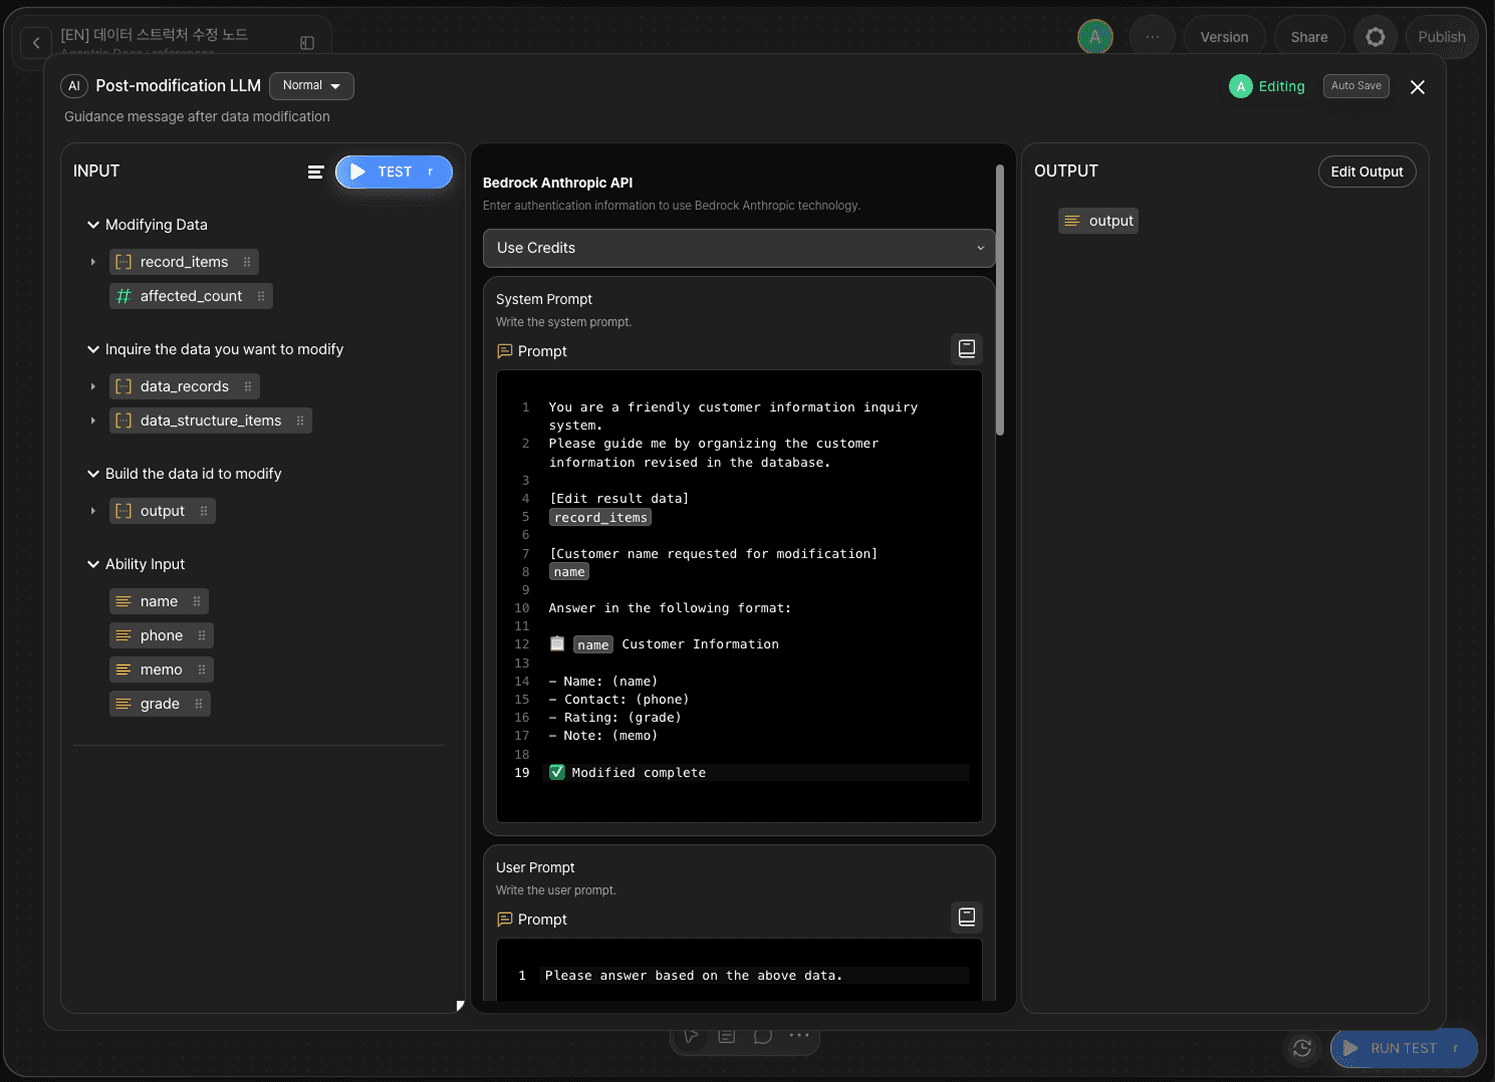
To output a confirmation message after the update, add a prompt to the LLM node. Double-click the LLM node to open the Node Editor and enter the following in the System Prompt field.
The LLM node is optional. If omitted, connect the DB Updater node's Out-Pin directly to the Output Node.
Step 7: Configure the Output Node
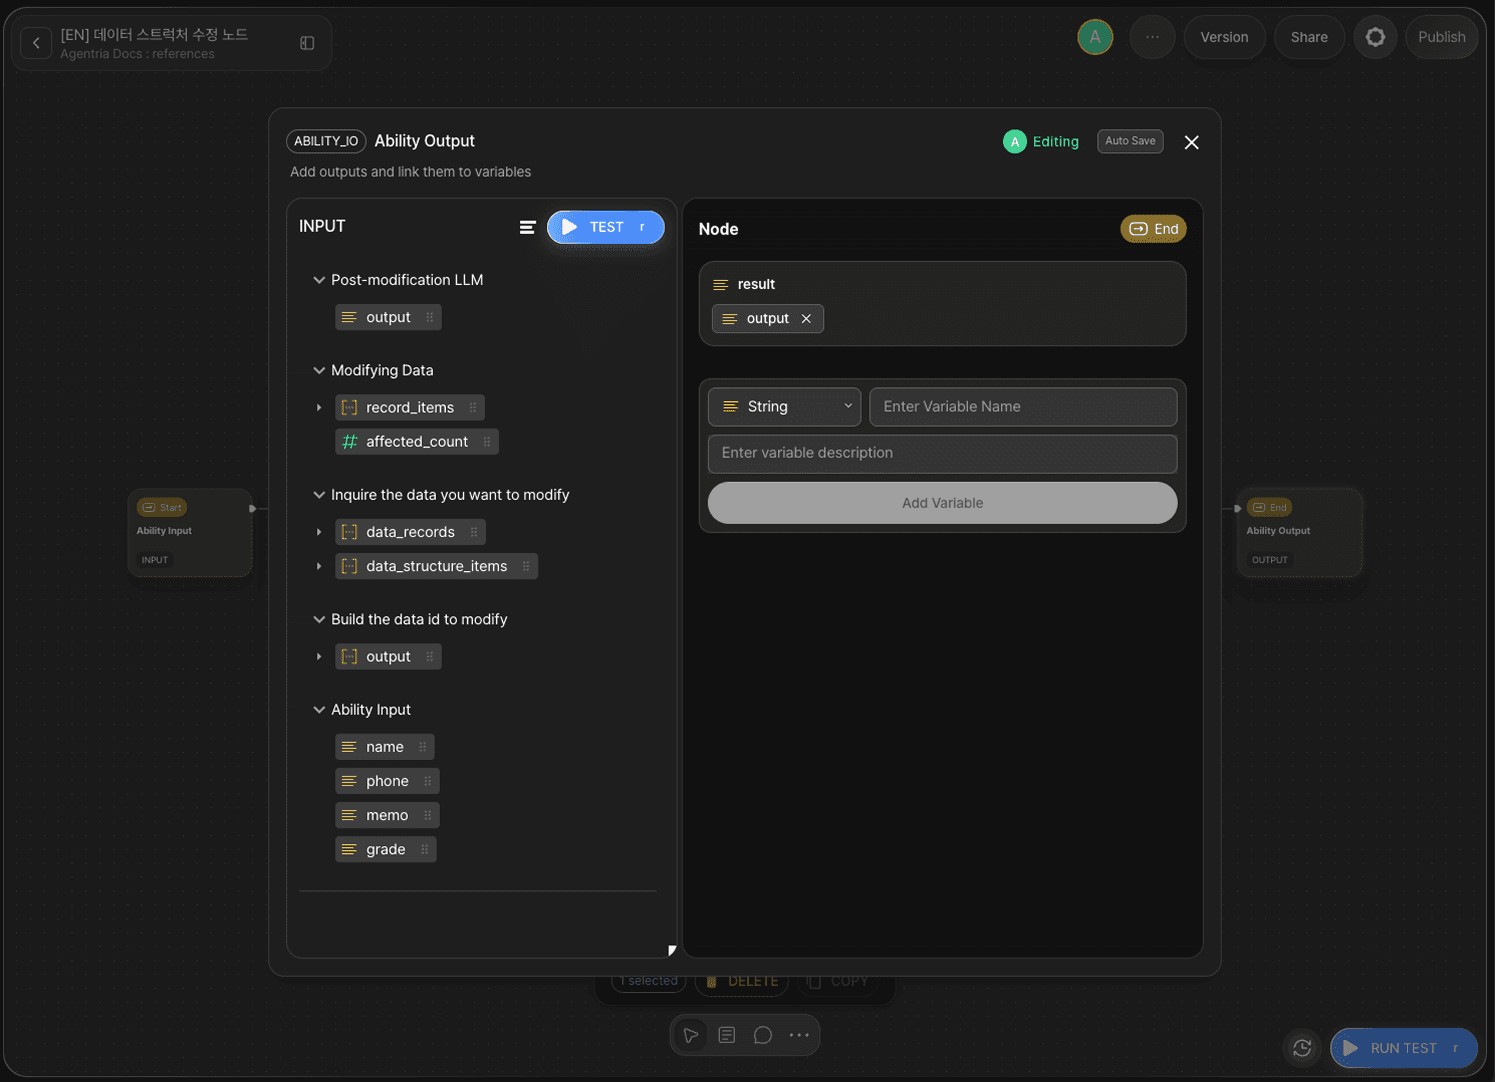
Double-click the Output Node to open the Node Editor. Add the following variable to the Output Section.
Variable | Type |
|---|---|
| String |
Drag and drop the output variable from the LLM node onto the result variable in the Output Node.
Connect the edges.
Out-Pin of
Input Node→ In-Pin ofDB Reader nodeOut-Pin of
DB Reader node→ In-Pin ofPython nodeOut-Pin of
Python node→ In-Pin ofDB Updater nodeOut-Pin of
DB Updater node→ In-Pin ofLLM nodeOut-Pin of
LLM node→ In-Pin ofOutput Node
Step 8: Run Test
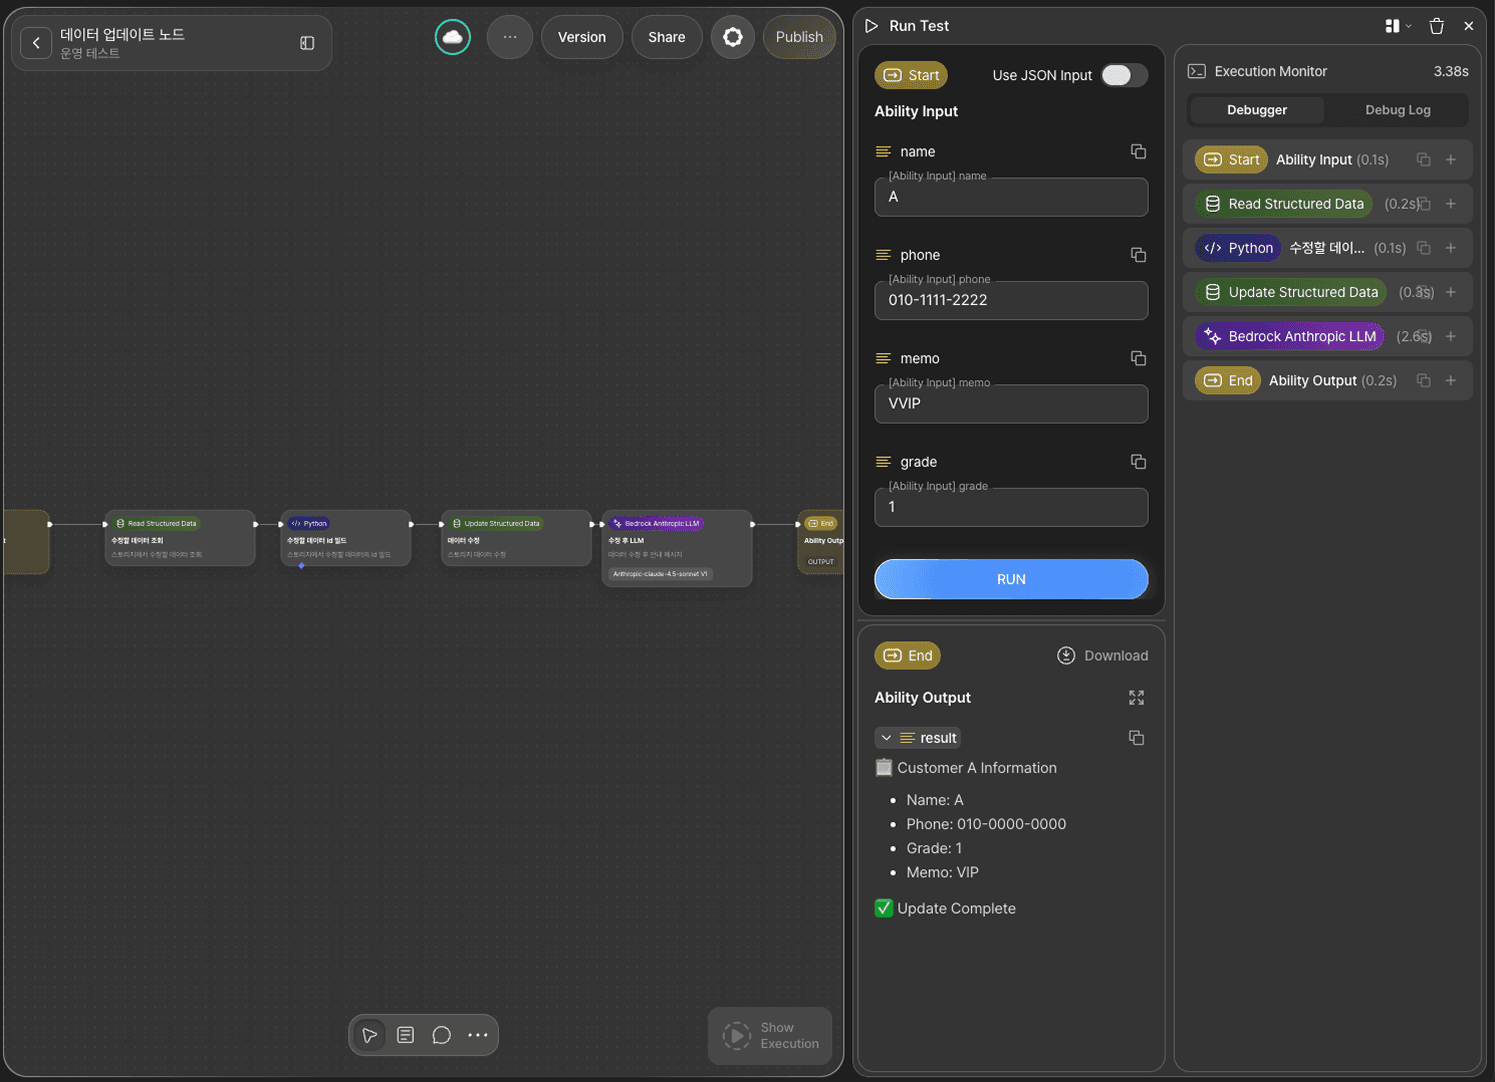
Click the RUN TEST button at the bottom right of the canvas.
Enter the customer name to search by and the new values to update, then run the test — the matching customer's data will be updated.
Step 9: Verify Data Storage

Open Data Storage from the Agentria menu. Confirm that the customer's information has been updated.
Next Steps
🎉 Congratulations! You've successfully built the "Customer Data Update" workflow using Agentria.
Try modifying the search condition to update multiple records at once, or extend the workflow by adding a DB Deletor node to remove unnecessary records.
Agentria is a place where ideas become reality—your workflow can expand infinitely with your creativity.
For more Ability examples, visit the 🔗Ability Guide.
For Agent-based examples, visit the 🔗Agent Guide.