Key Concepts
Data Storage Setup
Agentria's Data Storage is a built-in database where you can store, retrieve, update, and delete data within a workflow. To use the DB Writer, DB Reader, DB Updater, and DB Deletor nodes, you must configure Data Storage first.
This guide walks you through creating a Data Structure, setting up a storage, and entering data.
Step 1: Open the Data Storage Menu
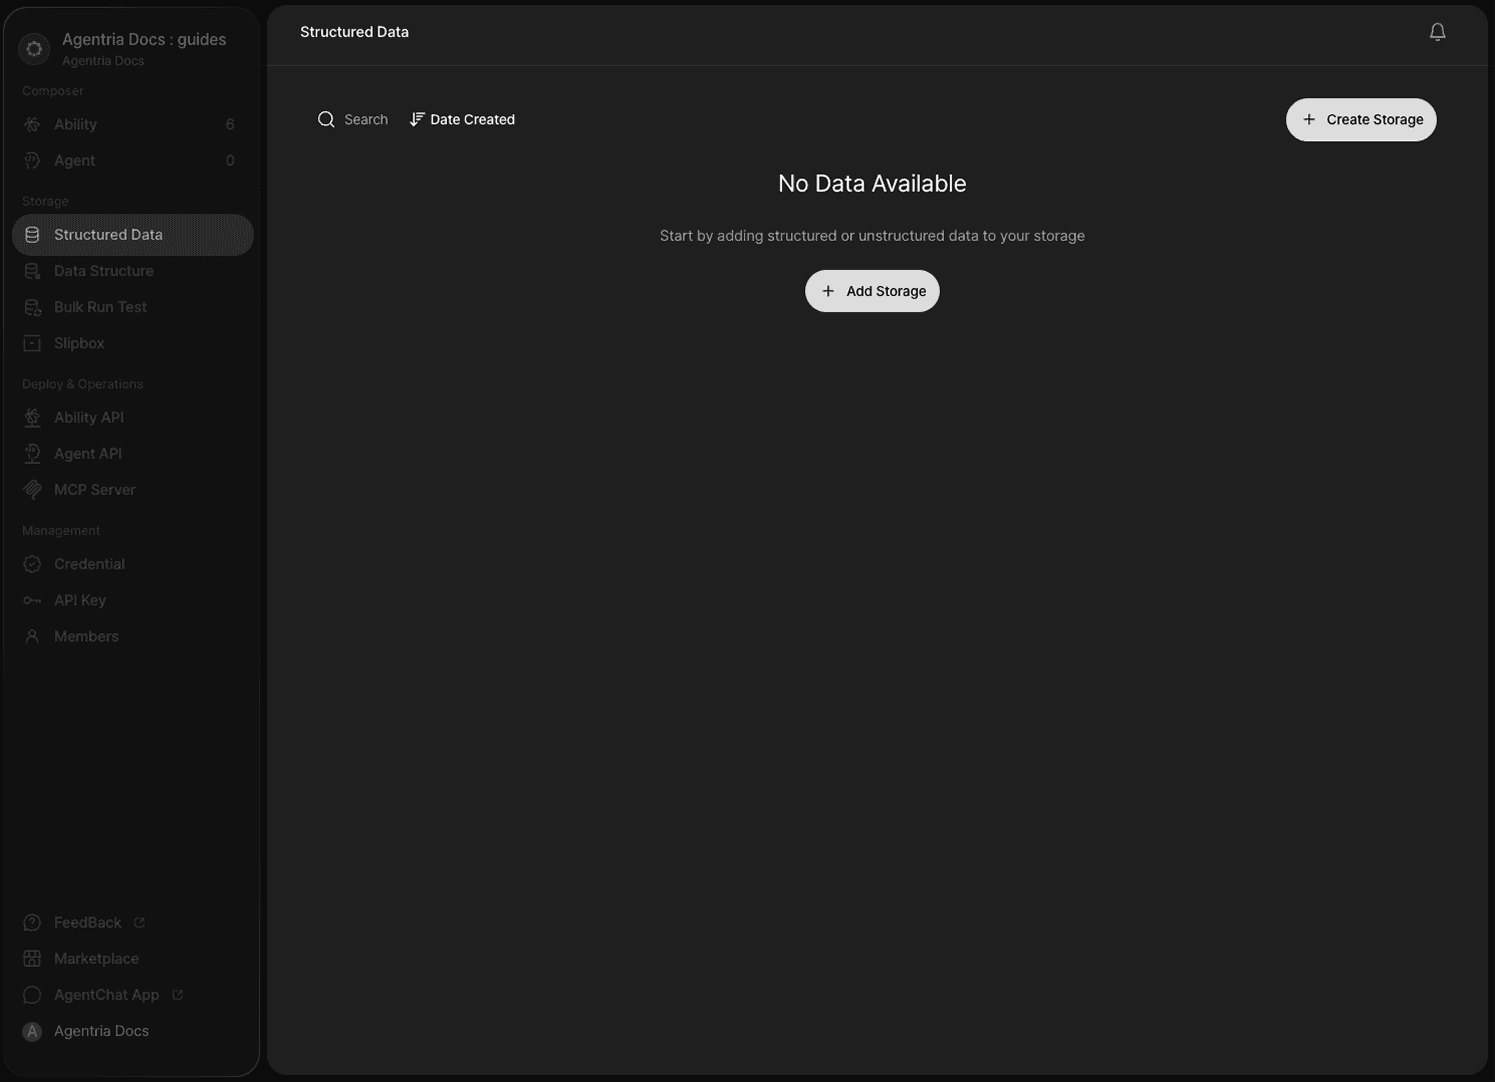
Click Data Storage in the left panel of your project.
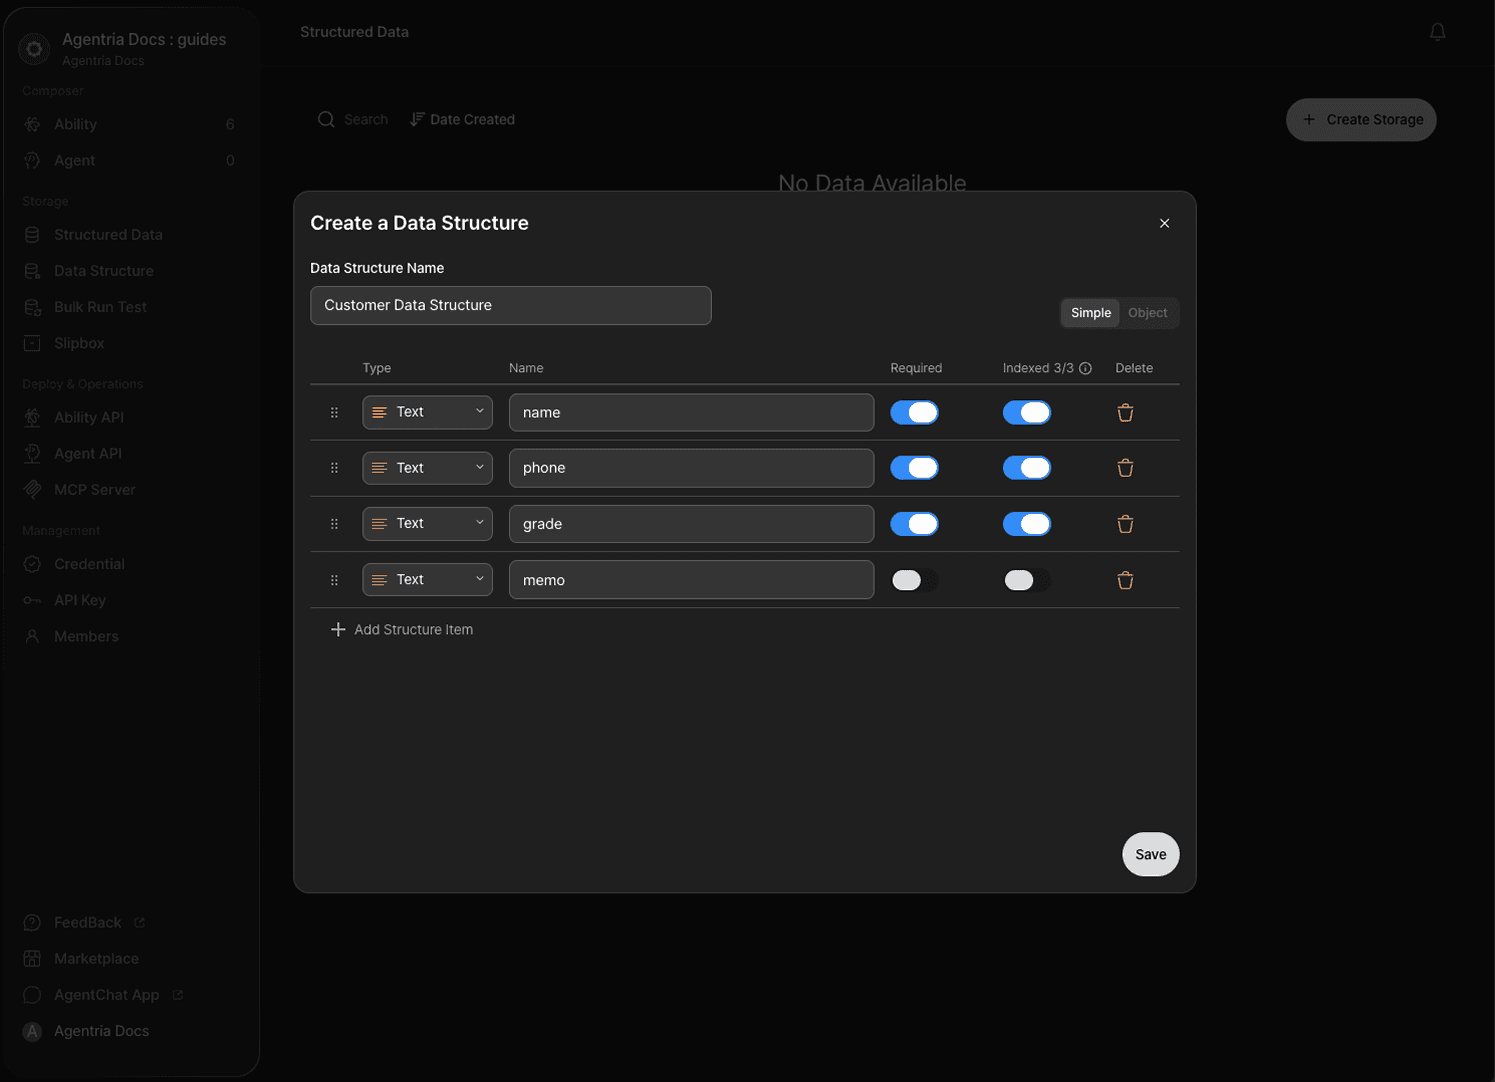
Step 2: Create a Data Structure
Before creating a data storage, you first need a Data Structure. A Data Structure defines the columns and data types for the records stored in your storage.
Click the Create Data Structure button to create a new data structure.
Add fields and configure the following properties for each.
Property | Description |
|---|---|
Name | Field name (column name) |
Data Type | String, Number, Boolean, etc. |
Required | Whether a value is mandatory for this field |
Indexing | Whether to enable indexing for faster search and filtering |
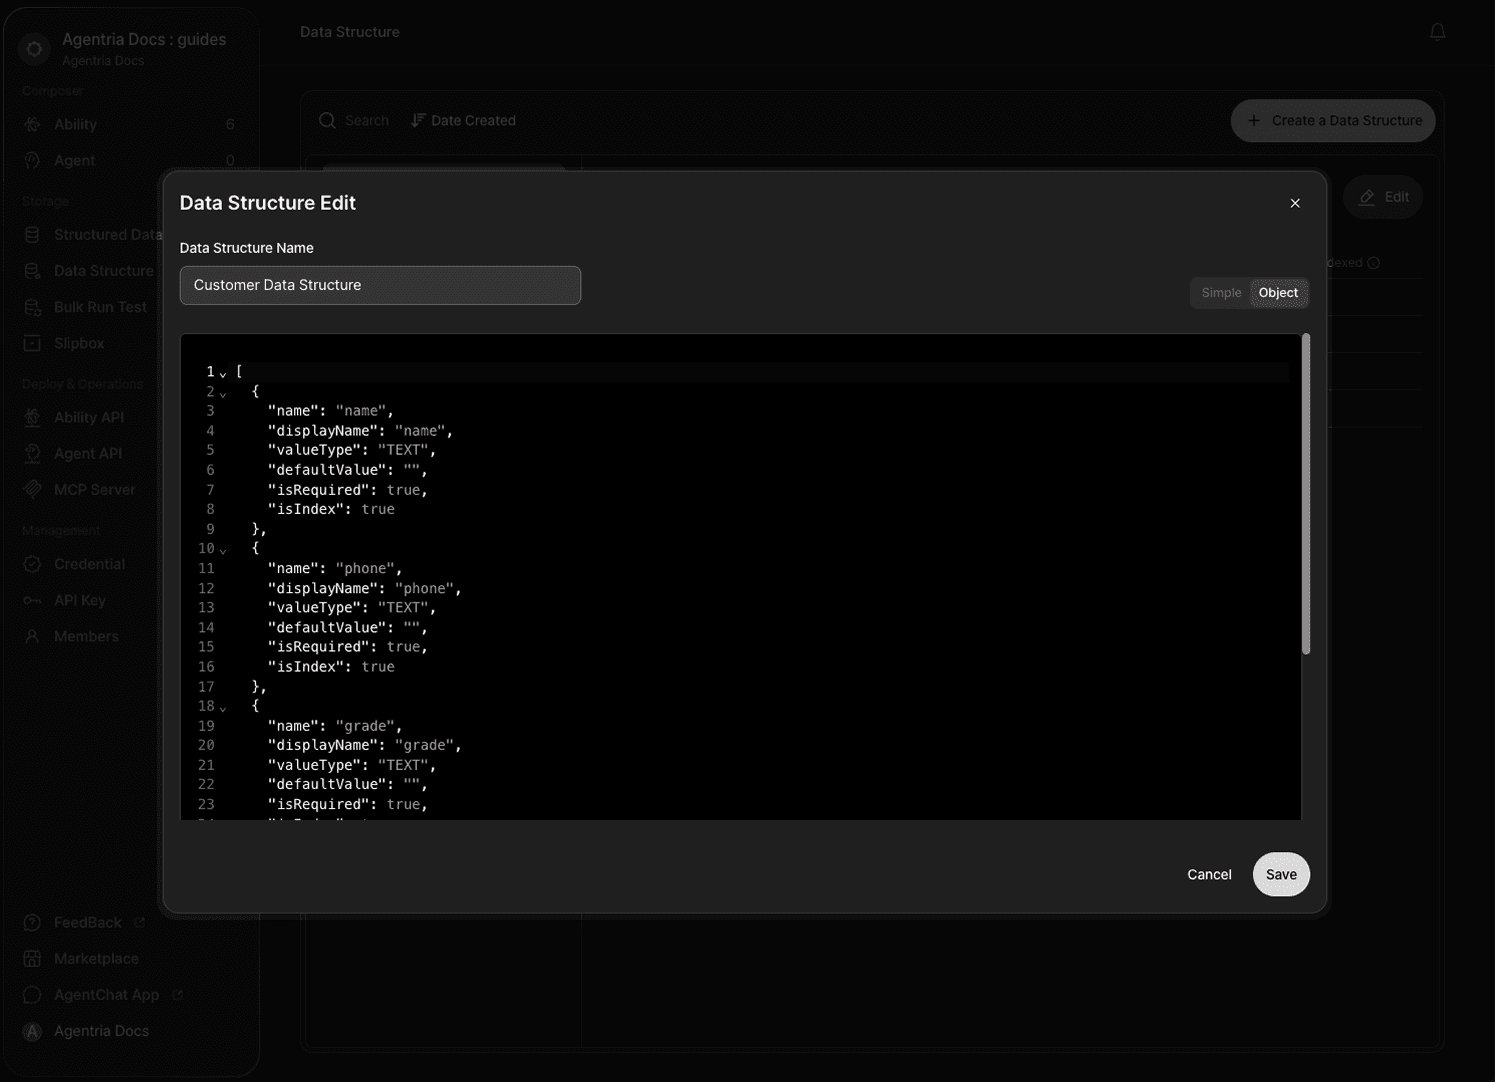
View as Object
Click the Object tab at the top of the editor to view the data structure in JSON format.
What is an Index?
Indexed fields allow the DB Reader node to search and filter records faster. You can index up to 3 fields per data structure. Apply indexing to columns you search frequently.

Once you have configured all fields, click Save to create the data structure.
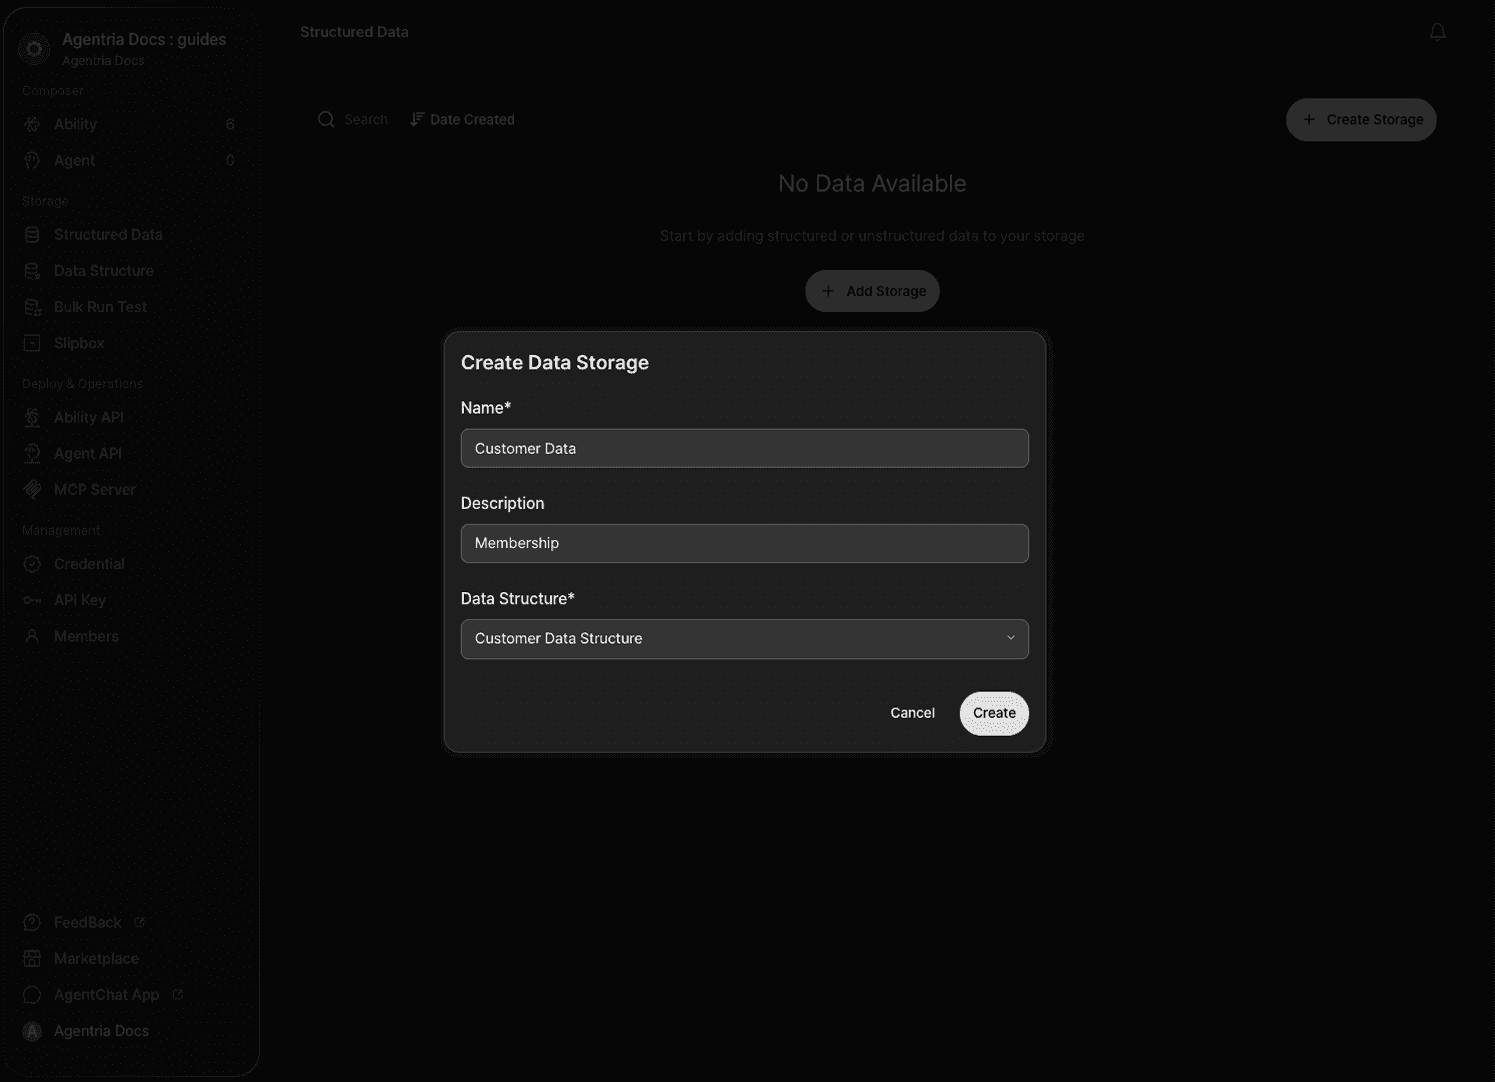
Step 3: Create a Data Storage

Click the Create Storage button. Enter a name for the storage and select the data structure you just created. Click Create to finish.

Your data storage is ready. The columns defined by the selected data structure are displayed in a table layout.
Step 4: Enter Data
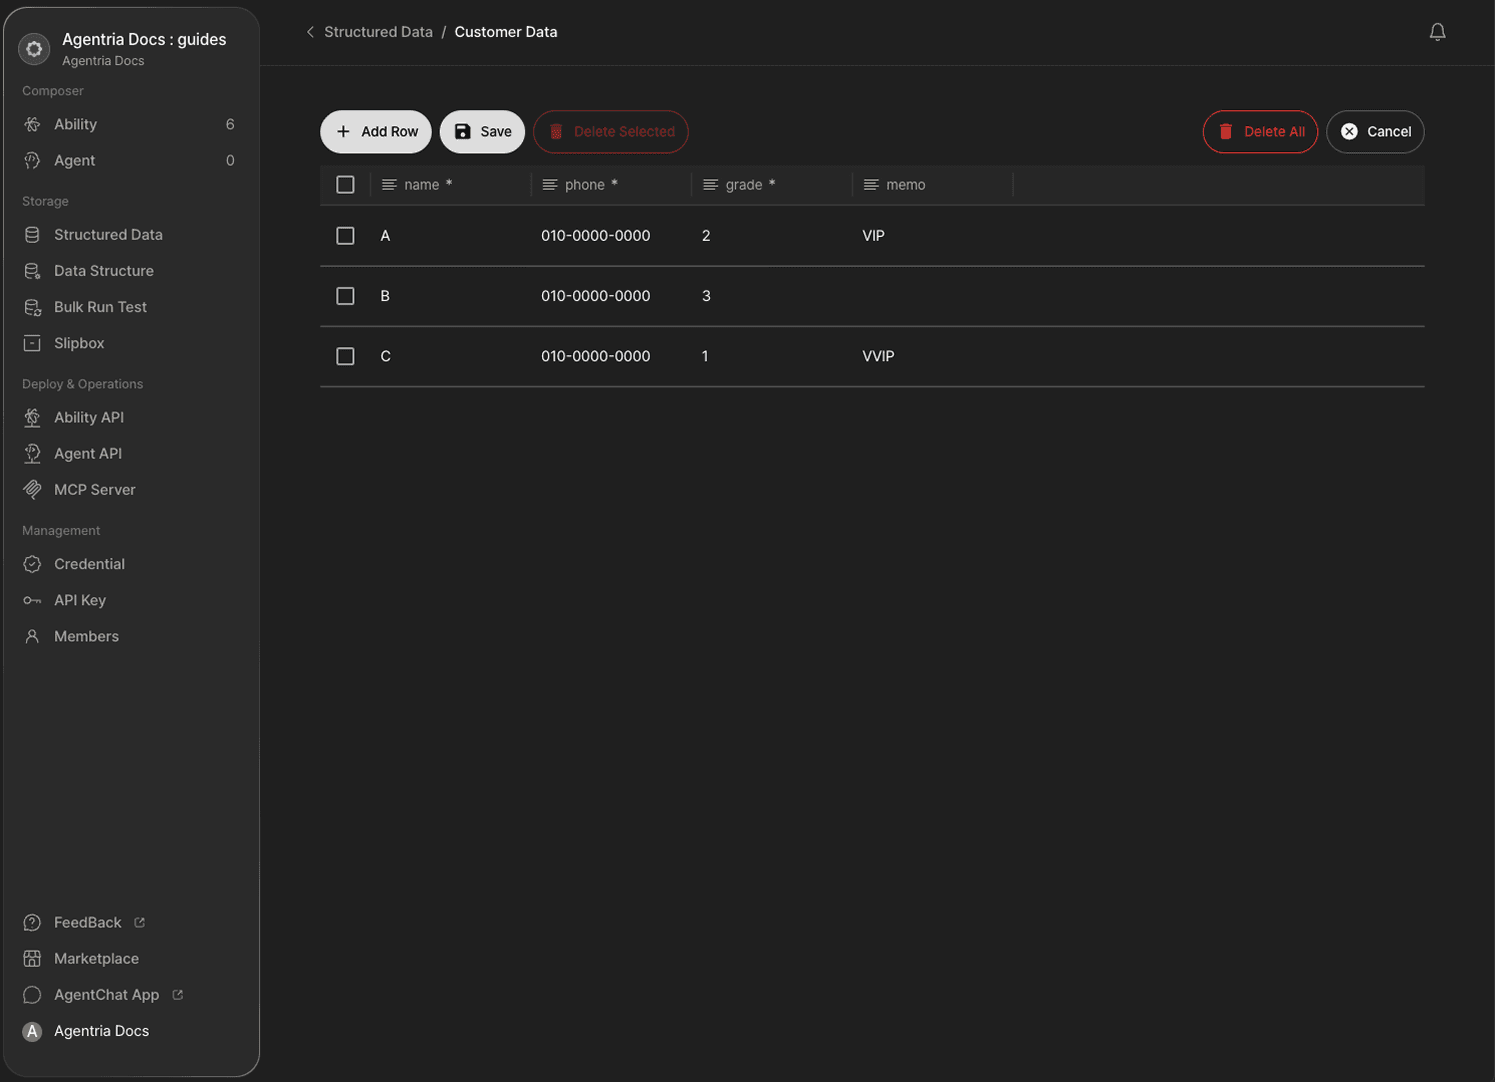
Click the Edit button, then click + Add Row to enter data manually. Fill in each column and save.
Data can also be added automatically through a workflow using the DB Writer node.
Next Steps
Setup is complete.
You can now build workflows that use Data Storage.
🔗DB Writer Node Guide — Save data to storage.
🔗DB Reader Node Guide — Retrieve data from storage.
🔗DB Updater Node Guide — Update records in storage.
🔗DB Deletor Node Guide — Delete records from storage.
🔗Bulk Run Test Guide — Run large-scale tests using storage data.