Get Started
Using Database Nodes (DB Writer)
This tutorial covers how to use the DB Writer node in Agentria. The DB Writer node saves new records to Data Storage. Combined with a Global Variable and a Set Value node, you can easily add user input data to your storage.
In this tutorial, you will build a workflow that accepts a customer's name, phone number, grade, and memo, saves the data to a customer Data Storage, and outputs a confirmation message.
Before You Begin
For instructions on accessing the Agentria canvas, refer to the 🔗3-Step Core Guide.
The DB Writer node requires Data Storage to be configured in advance. Refer to the 🔗Data Storage Guide.
After completing this tutorial, you will be able to:
Declare a Global Variable and structure the data to save.
Use a Set Value node to prepare records for storage.
Use the DB Writer node to add new records to Data Storage.
Verify that data was saved correctly with a Run Test.
Workflow Overview
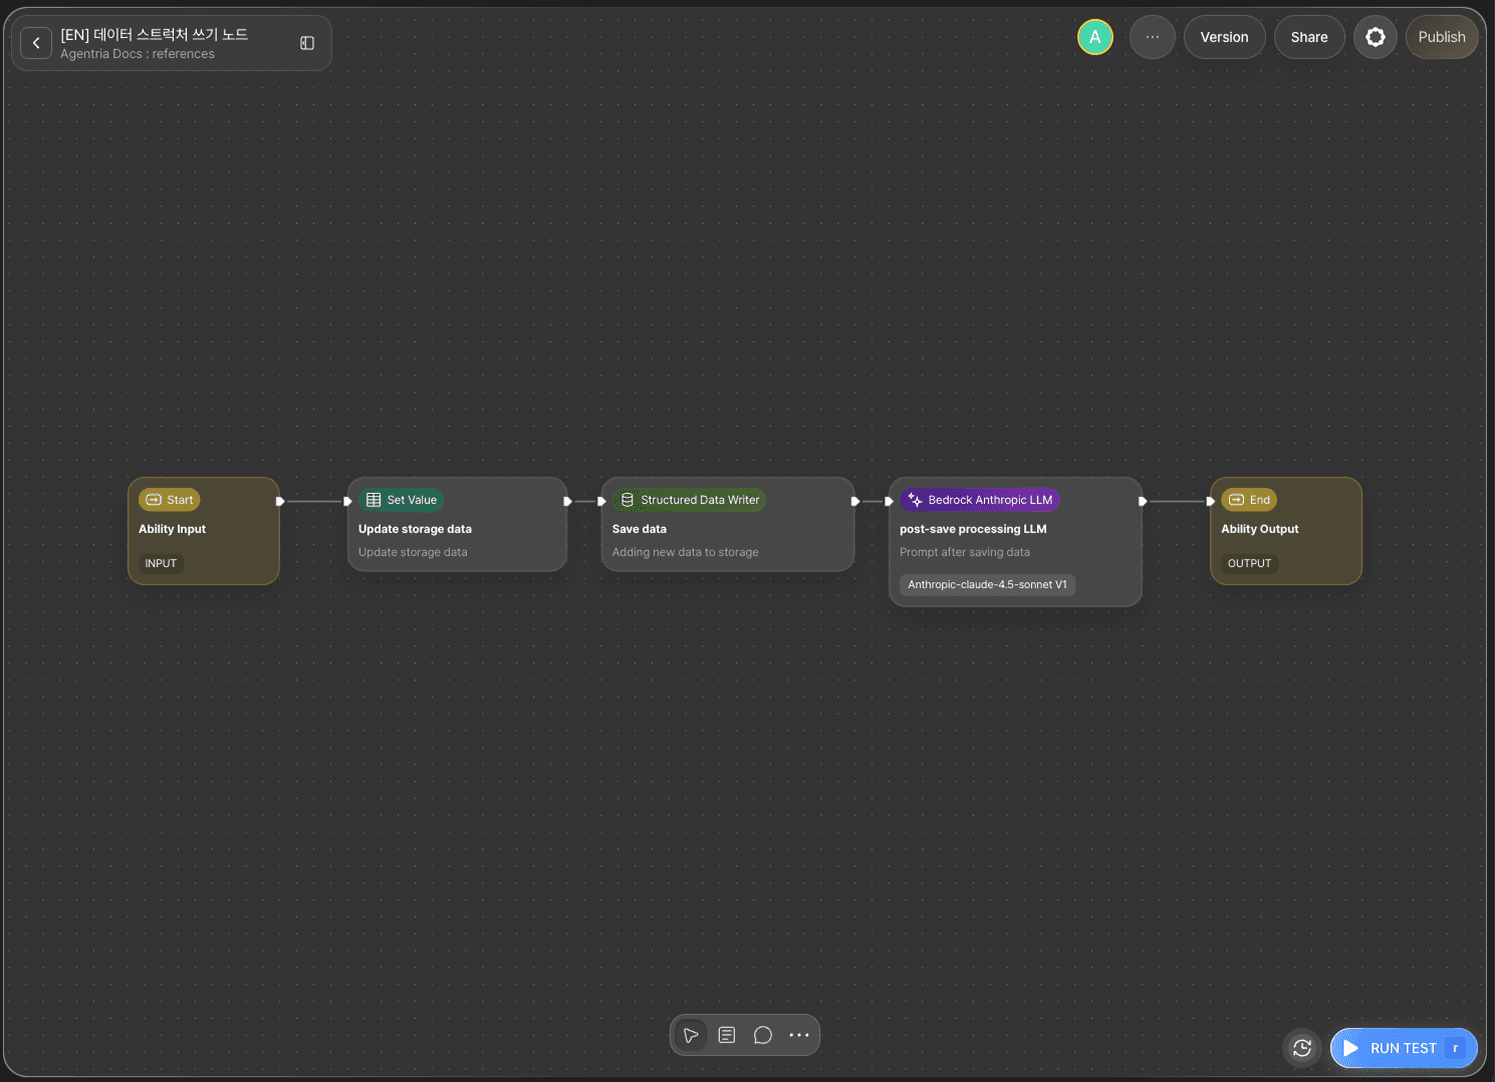
The core of this tutorial is the DB Writer node.
The DB Writer node saves record data stored in a Global Variable to the specified Data Storage. Bind the data to the record_items adapter variable and select the target storage — a new record will be added.
For detailed instructions on the Set Value node, refer to the 🔗Set Value Node Guide.
Step 1: Create an Ability
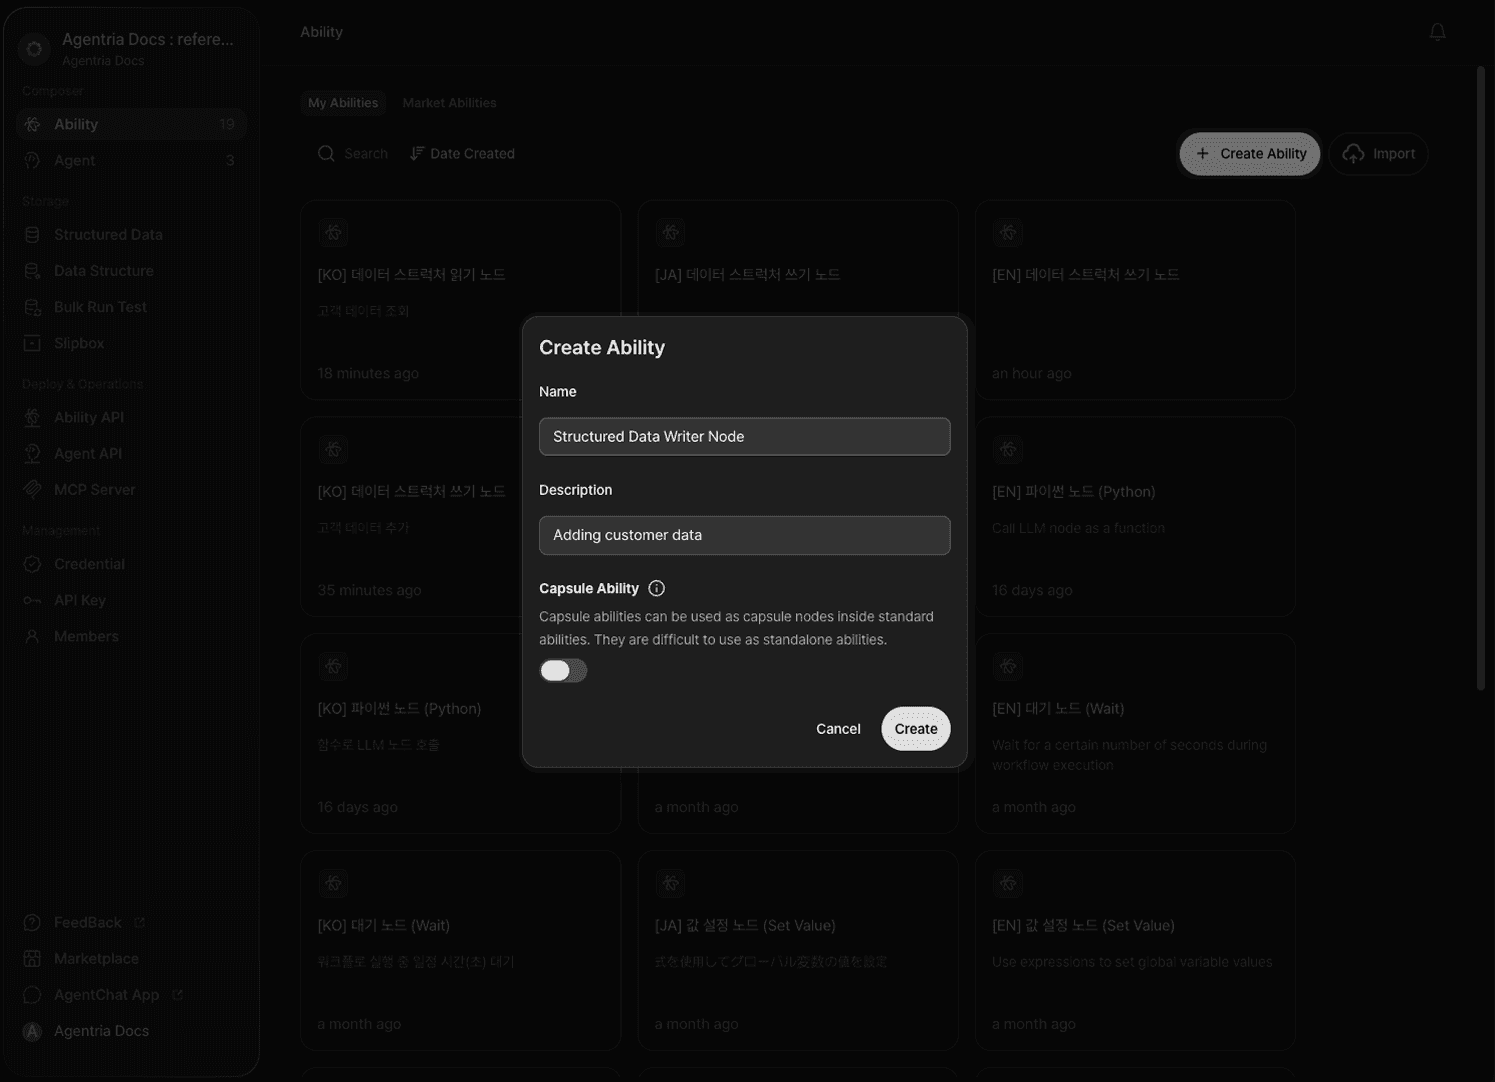
Create a new Ability on the Agentria canvas.
Use the +Add Node button to add a Set Value node, a DB Writer node, and an LLM node to the canvas. Renaming the nodes to match their purpose makes them easier to manage in later steps.
Step 2: Declare a Global Variable

To add values to Data Storage, first declare a Global Variable. This variable will hold the data to pass to the DB Writer node. Open the Global Variable menu at the top of the canvas and add a new variable.
Field | Value |
|---|---|
Name |
|
Type | Array |
Default |
|
Step 3: Declare Input Variables
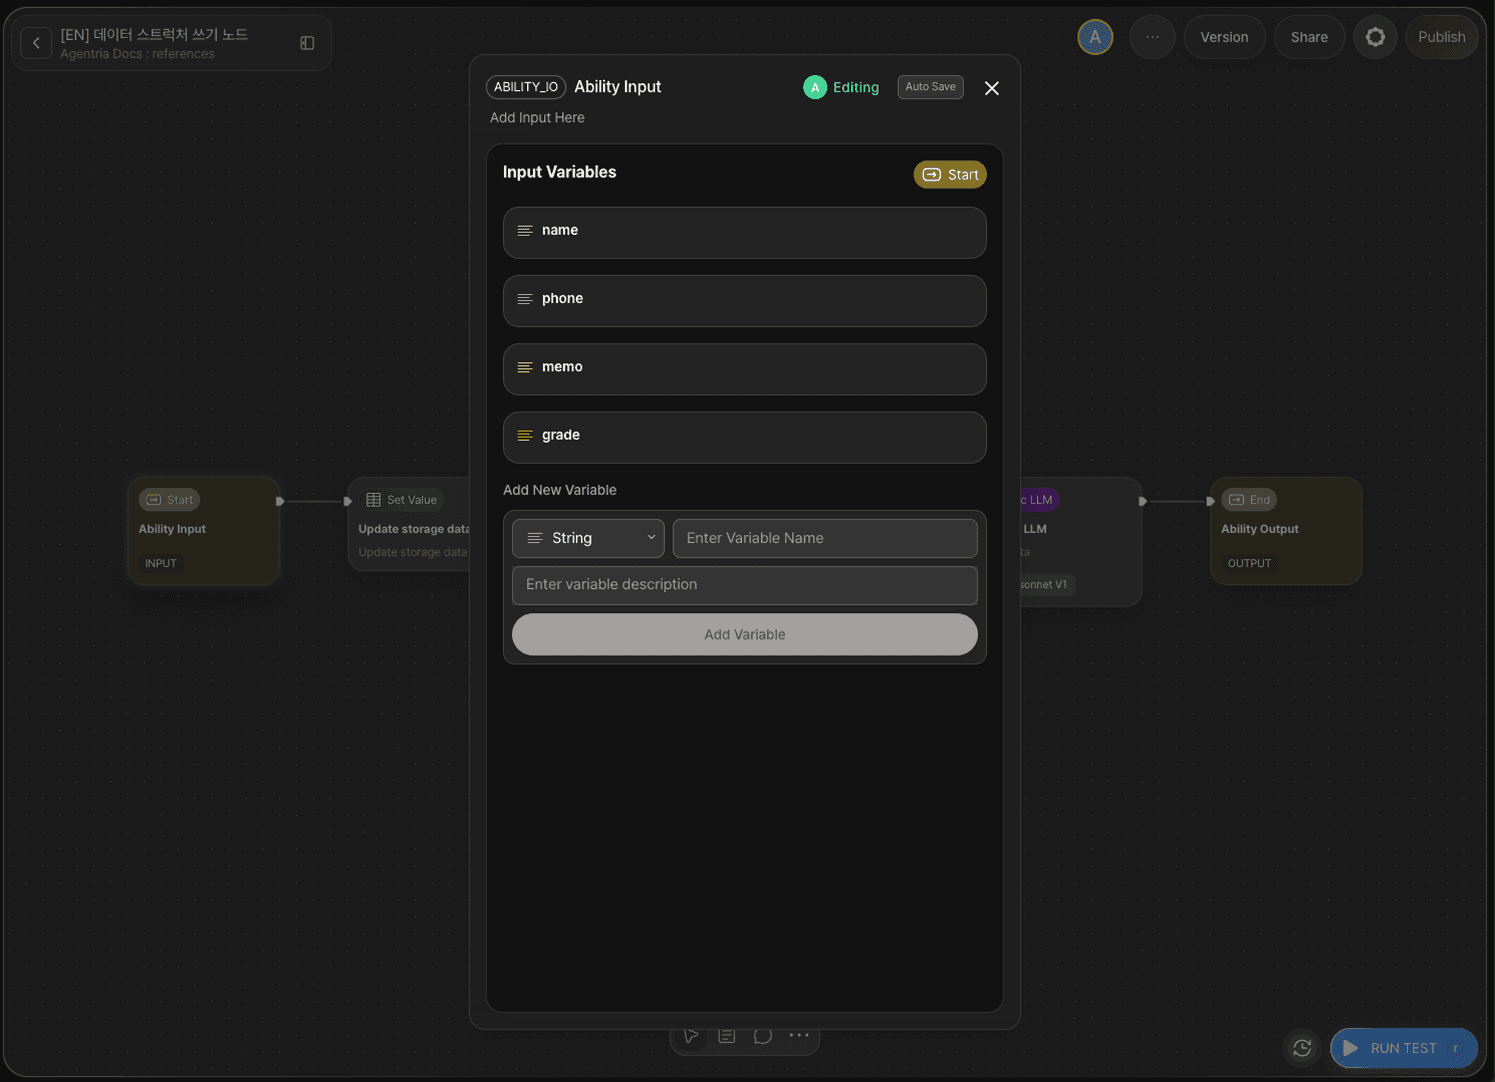
Double-click the Input Node to open the Node Editor.
The storage used in this tutorial is Customer Data, with the column structure below. Declare input variables to match the storage columns.
Variable | Type | Description |
|---|---|---|
| String | Customer name |
| String | Phone number |
| String | Customer grade |
| String | Memo |
Step 4: Configure the Set Value Node

Double-click the Set Value node to open the Node Editor.
In the Set Value node, configure the data structure to store in the data_storage Global Variable.
Select
data_storageas the Global Variable.Enter the following JSON format in the value field.
Drag and drop the name, phone, grade, and memo variables from the left input panel.
Step 5: Configure the DB Writer Node

Double-click the DB Writer node to open the Node Editor.
The DB Writer node provides the following options.
Option | Required | Description |
|---|---|---|
| Required | Select the storage to save data to |
| Required | Record data to save (Array type) |
This tutorial configures both storage and record_items.
Select Storage

Click the Select Storage button to open the modal. Select the storage that holds the customer data.
Set record_items
Drag and drop the data_storage Global Variable onto the record_items adapter variable.
Step 6: Configure the LLM Node (Optional)
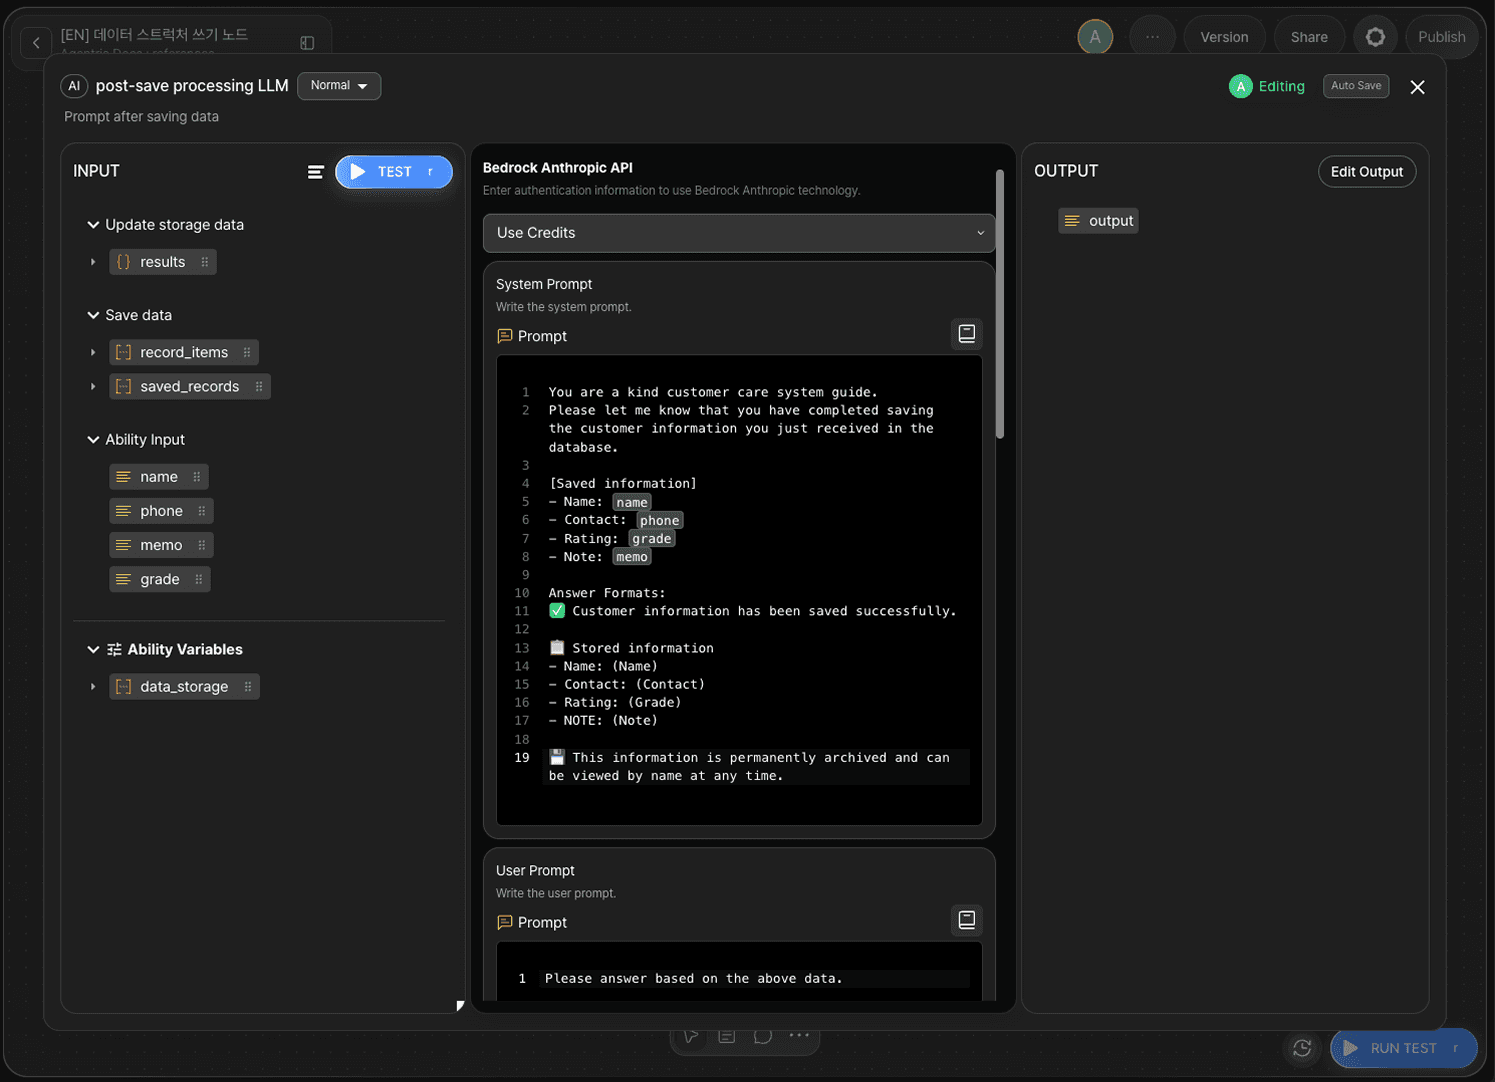
To output a confirmation message after saving, add a prompt to the LLM node. Double-click the LLM node to open the Node Editor and enter the following in the System Prompt field.
The LLM node is optional. If omitted, connect the DB Writer node's Out-Pin directly to the Output Node.
Step 7: Configure the Output Node
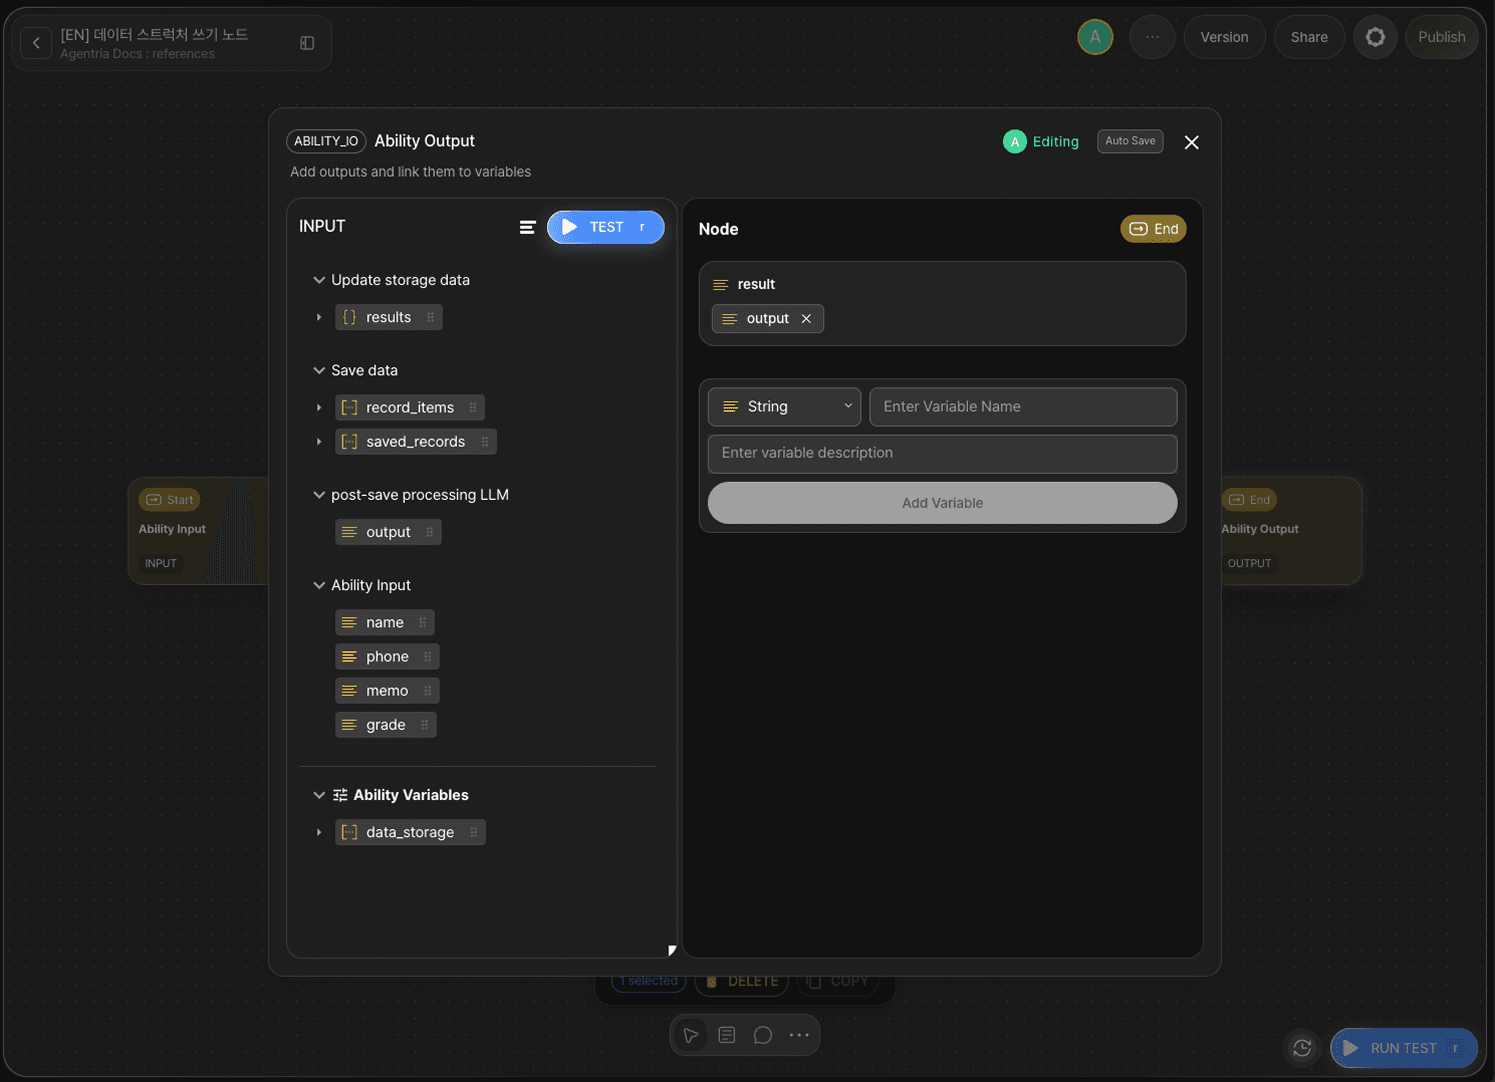
Double-click the Output Node to open the Node Editor. Add the following variable to the Output Section.
Variable | Type |
|---|---|
| String |
Drag and drop the output variable from the LLM node onto the result variable in the Output Node.
Connect the edges.
Out-Pin of
Input Node→ In-Pin ofSet Value nodeOut-Pin of
Set Value node→ In-Pin ofDB Writer nodeOut-Pin of
DB Writer node→ In-Pin ofLLM nodeOut-Pin of
LLM node→ In-Pin ofOutput Node
Step 8: Run Test

Click the RUN TEST button at the bottom right of the canvas.
Enter customer information and run the test — a save confirmation message will appear as output. Check the debugger panel on the right to verify that all nodes ran correctly.
Sample Input
Variable | Value |
|---|---|
| John Doe |
| 010-1234-5678 |
| VIP |
| First-time customer |
Step 9: Verify Data Storage
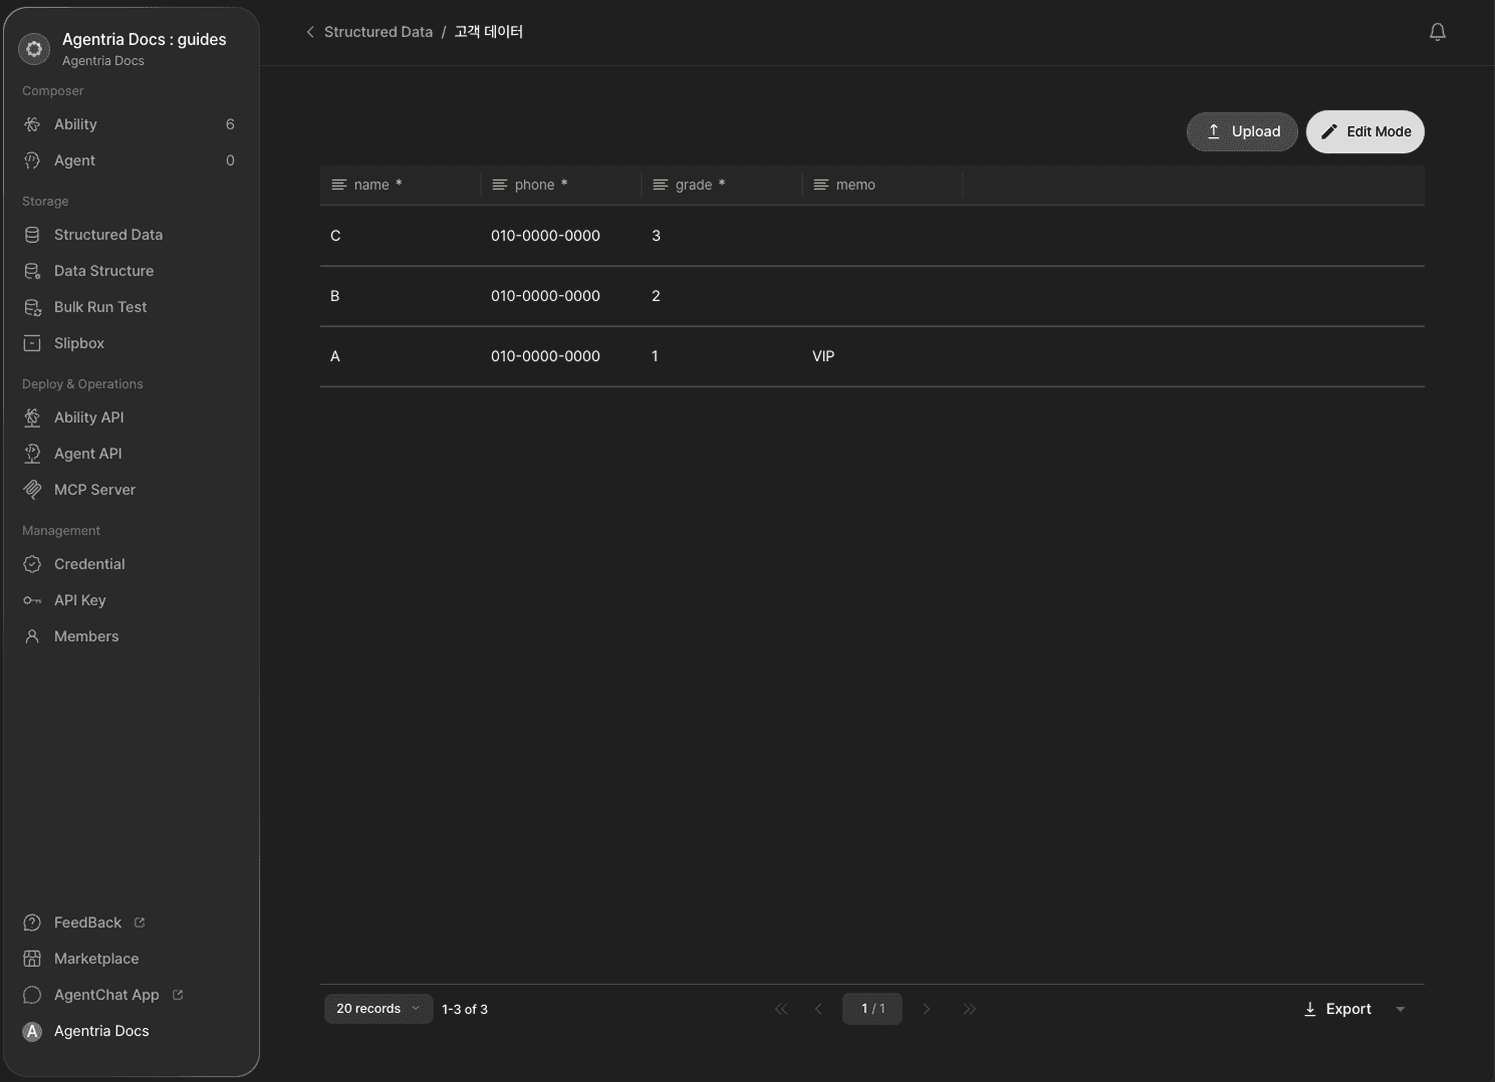
Open Data Storage from the Agentria menu. Confirm that the customer data you just saved has been added to the storage.
Next Steps
🎉 Congratulations! You've successfully built the "Customer Data Save" workflow using Agentria.
The saved customer data can be retrieved with the DB Reader node, updated with the DB Updater node, or deleted with the DB Deletor node.
Agentria is a place where ideas become reality—your workflow can expand infinitely with your creativity.
For more Ability examples, visit the 🔗Ability Guide.
For Agent-based examples, visit the 🔗Agent Guide.