Get Started
Learning to Use Nodes — Loop Node
This tutorial walks you through the Loop node in Agentria. The Loop node repeatedly executes connected nodes while the Loop Condition expression is true. When the condition becomes false, the flow proceeds to the next node via the pass pin. While the condition is true, the flow returns to the previous node via the loop pin to repeat the process. The loop also ends when the maximum iteration count is reached.
In this tutorial, you will build a "+1 Counter" workflow that starts the global variable num at 0, increments it by 1 in a Set Value node, and returns the final value once num reaches 10.
Before You Begin
For instructions on how to enter the Agentria Canvas, refer to the 🔗3-Step Core Guide.
After completing this tutorial, you will be able to:
Declare a global variable and set its initial value.
Configure the
Loop Conditionand maximum iteration count of the Loop node.Connect edges by distinguishing between the
passpin and thelooppin.Update a global variable using the Set Value node.
Workflow Overview
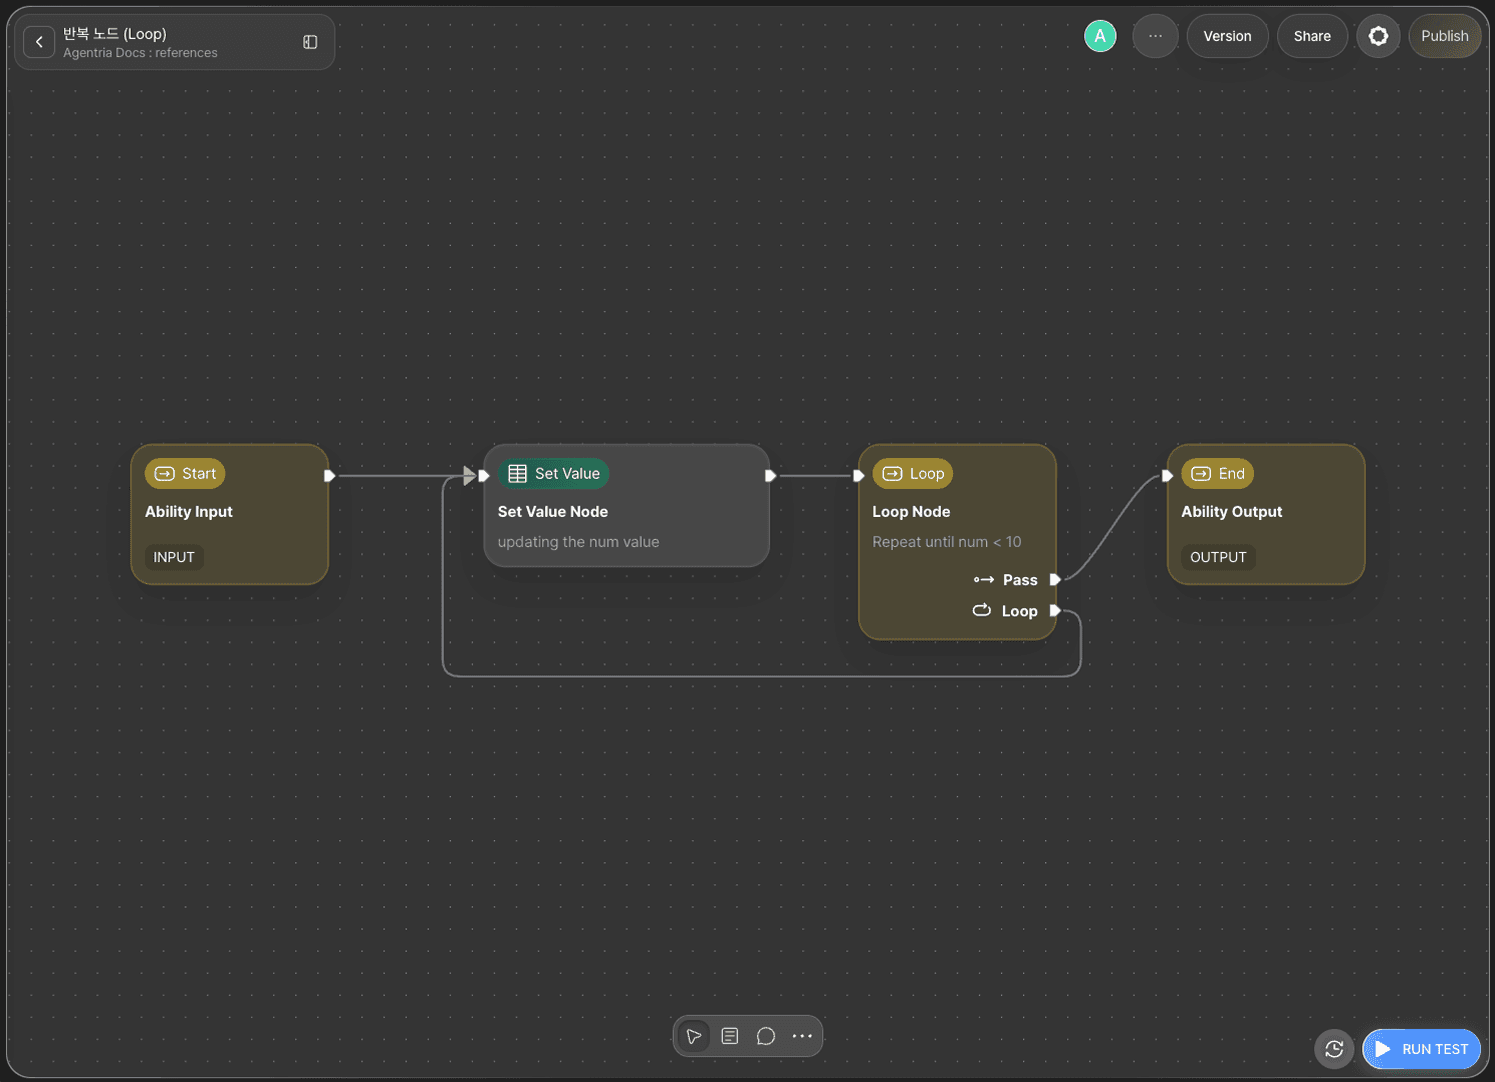
Full flow: Start Node → Set Value node → Loop node →(pass)/(loop)→ End Node
The core of this tutorial is the Loop node and global variables.
While the Loop Condition expression is true, the Loop node returns to the Set Value node via the loop pin. The global variable num increments by 1 with each iteration in the Set Value node. When num reaches 10, the condition becomes false and the flow proceeds to the End Node via the pass pin.
Step 1: Create an Ability
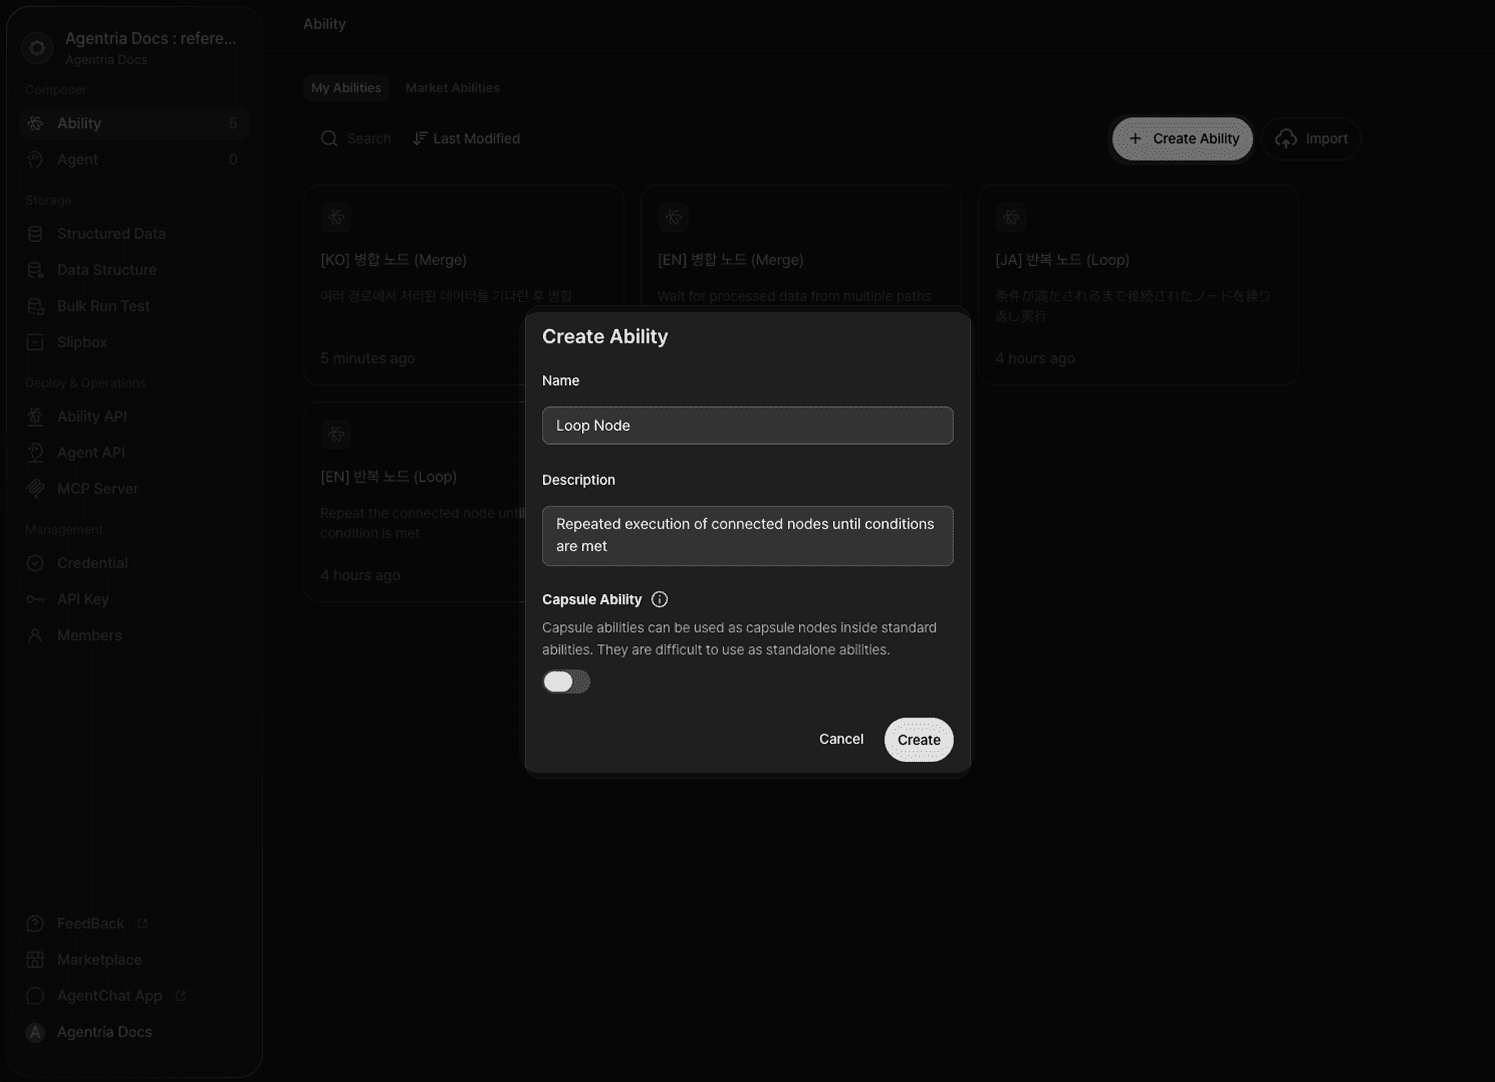
Create a new Ability on the Agentria Canvas.
Step 2: Arrange and Connect the Workflow
Add the following nodes to the Canvas and arrange them as shown in the image.
Loop node: Click
+Add Node→ select from theFlow Controlcategory.Set Value node: Click
+Add Node→ select from theDatacategory.
Once arranged, connect the edges in the following order.
Out-Pin of Start Node → In-Pin of Set Value node
Out-Pin of Set Value node → In-Pin of Loop node
pass pin of Loop node → In-Pin of End Node
loop pin of Loop node → In-Pin of Set Value node
The
looppin returns to the previous node while the condition is true. Thepasspin exits the loop when the condition becomes false.
Step 3: Open the Global Variables Tab
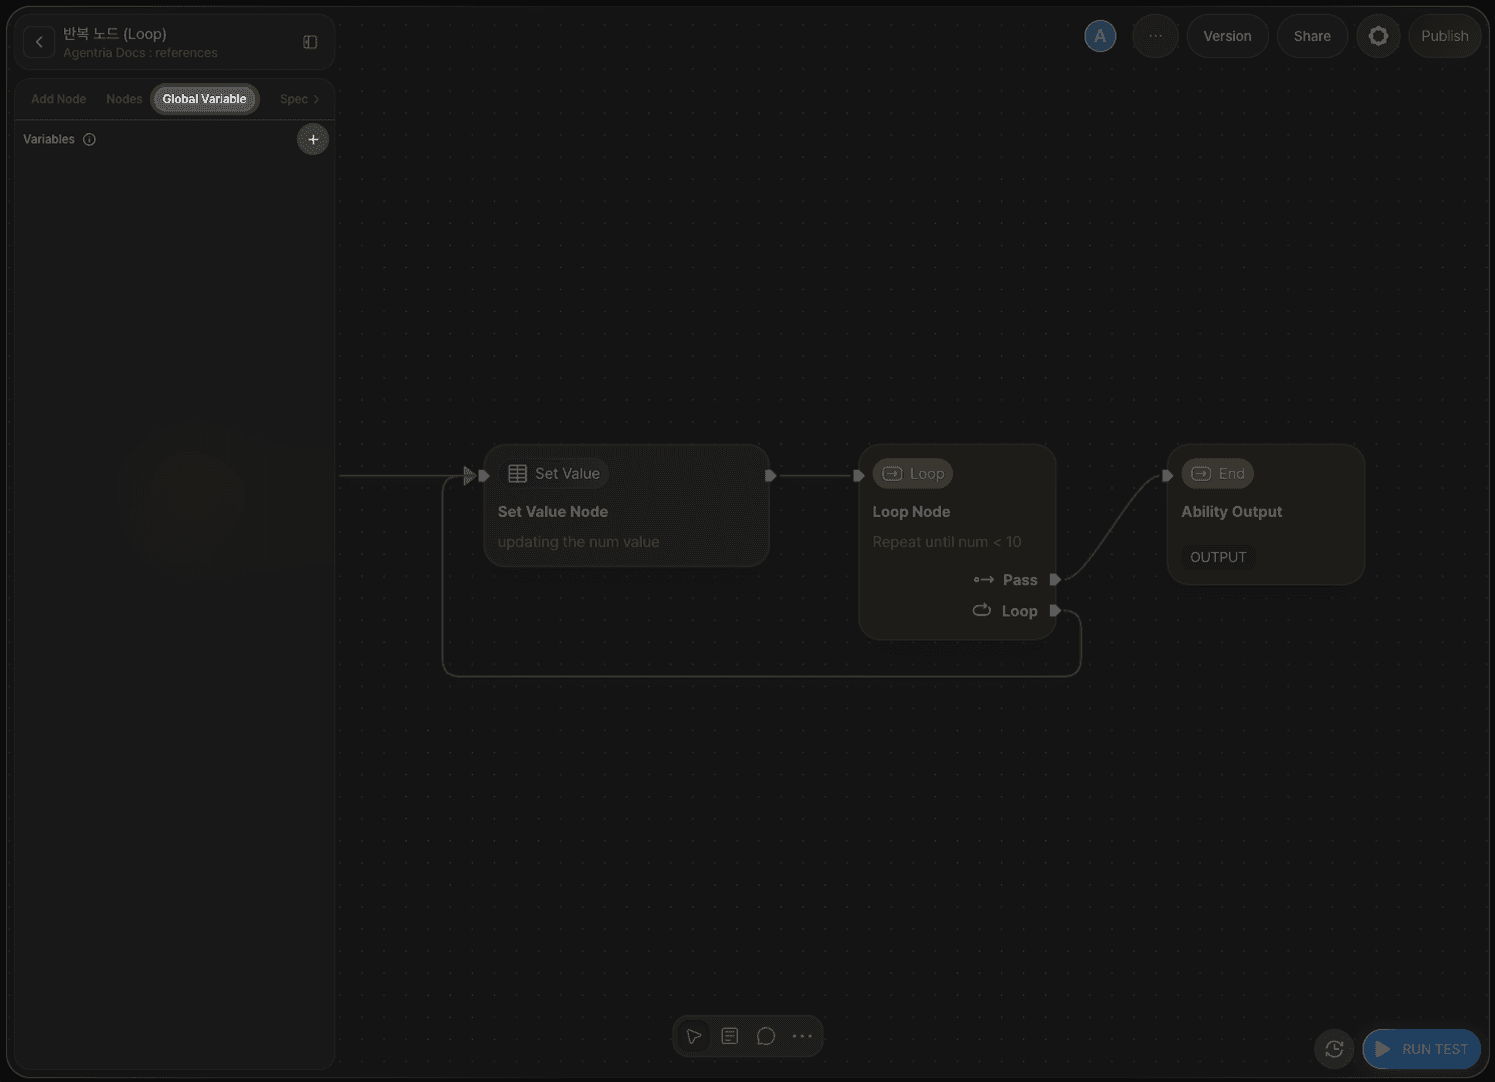
Open the left side panel on the Canvas and navigate to the Global Variables tab. Click + to start adding a global variable.
Step 4: Declare a Global Variable

Configure the global variable as follows.
Field | Value |
|---|---|
Type | Integer |
Name |
|
Default |
|
num is the counter's starting value. This tutorial uses the global variable's default value (0) as the counter's initial value.
Step 5: Configure the Loop Node
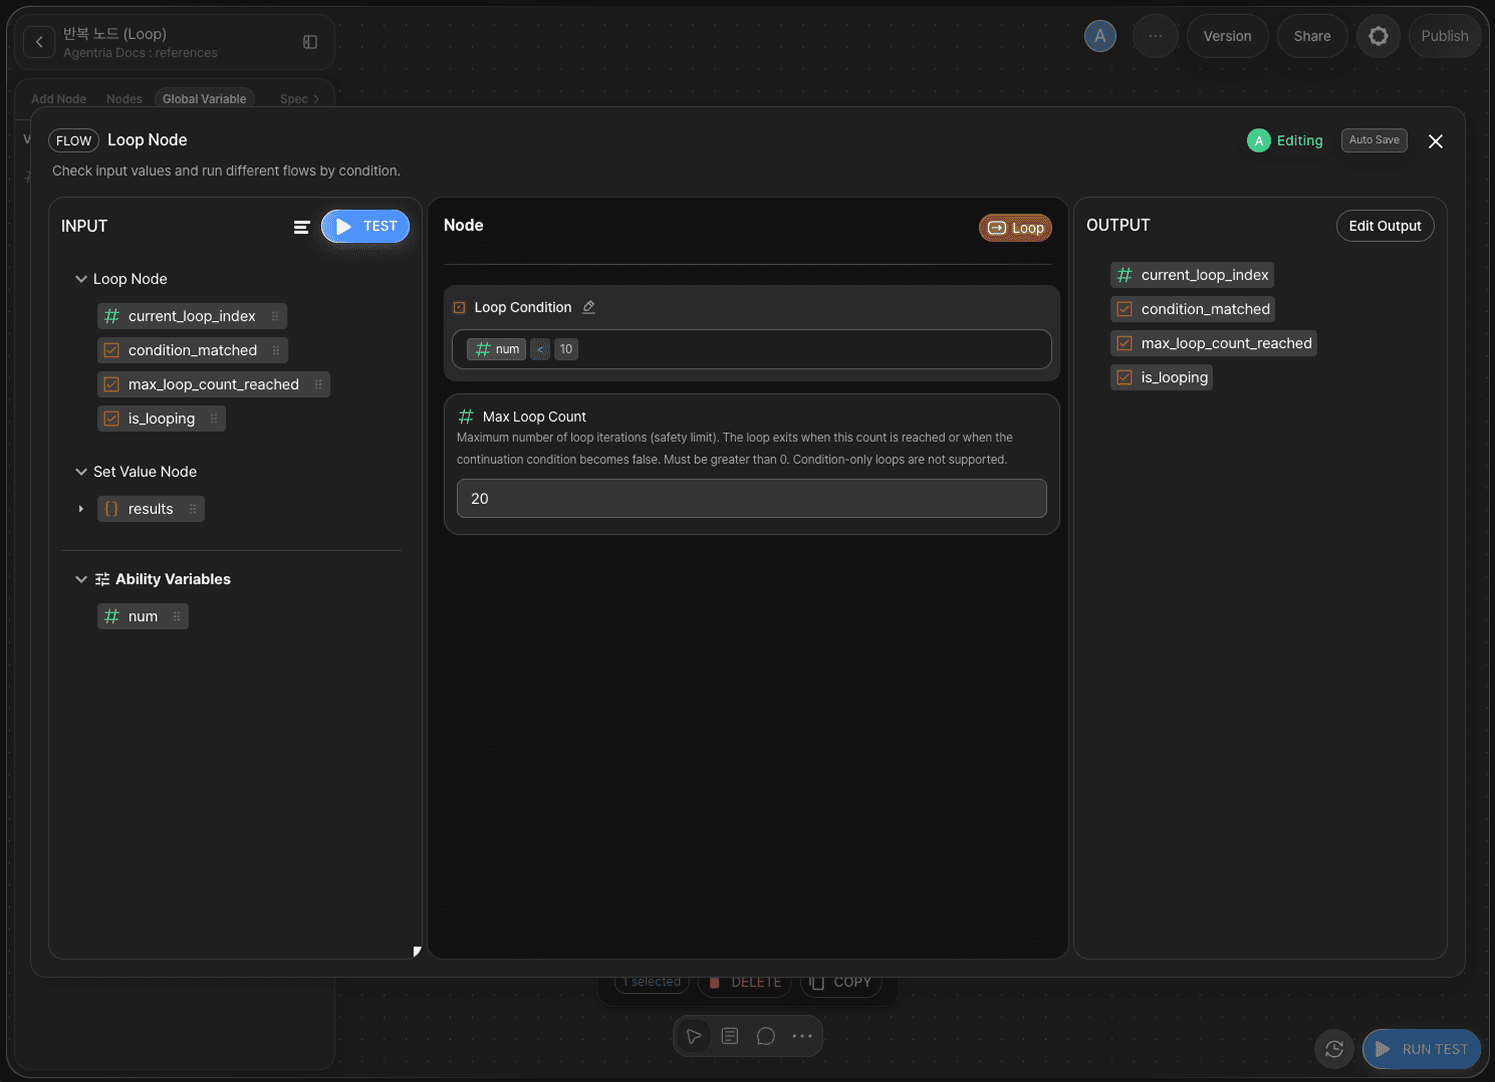
Double-click the Loop node to open the Node Editor.
The Loop node provides the following options.
Option | Required | Description |
|---|---|---|
| Required | Condition expression that determines whether to continue looping. Repeats via the |
Max Iterations | Required | Safety limit (int, default: 10, must be greater than 0). The loop ends when this count is reached, regardless of the condition. |
Setting the Loop Condition
Enter the following expression in the Loop Condition field. You can drag and drop num from Ability Variables on the left to complete the expression.
num < 10 keeps looping while the counter value is less than 10. When num reaches 10, the condition becomes false and the flow proceeds to the End Node via the pass pin.
Setting Max Iterations
Enter 20 in the Max Iterations field. The loop ends if it reaches 20 iterations before the condition is met.
Step 6: Configure the Set Value Node
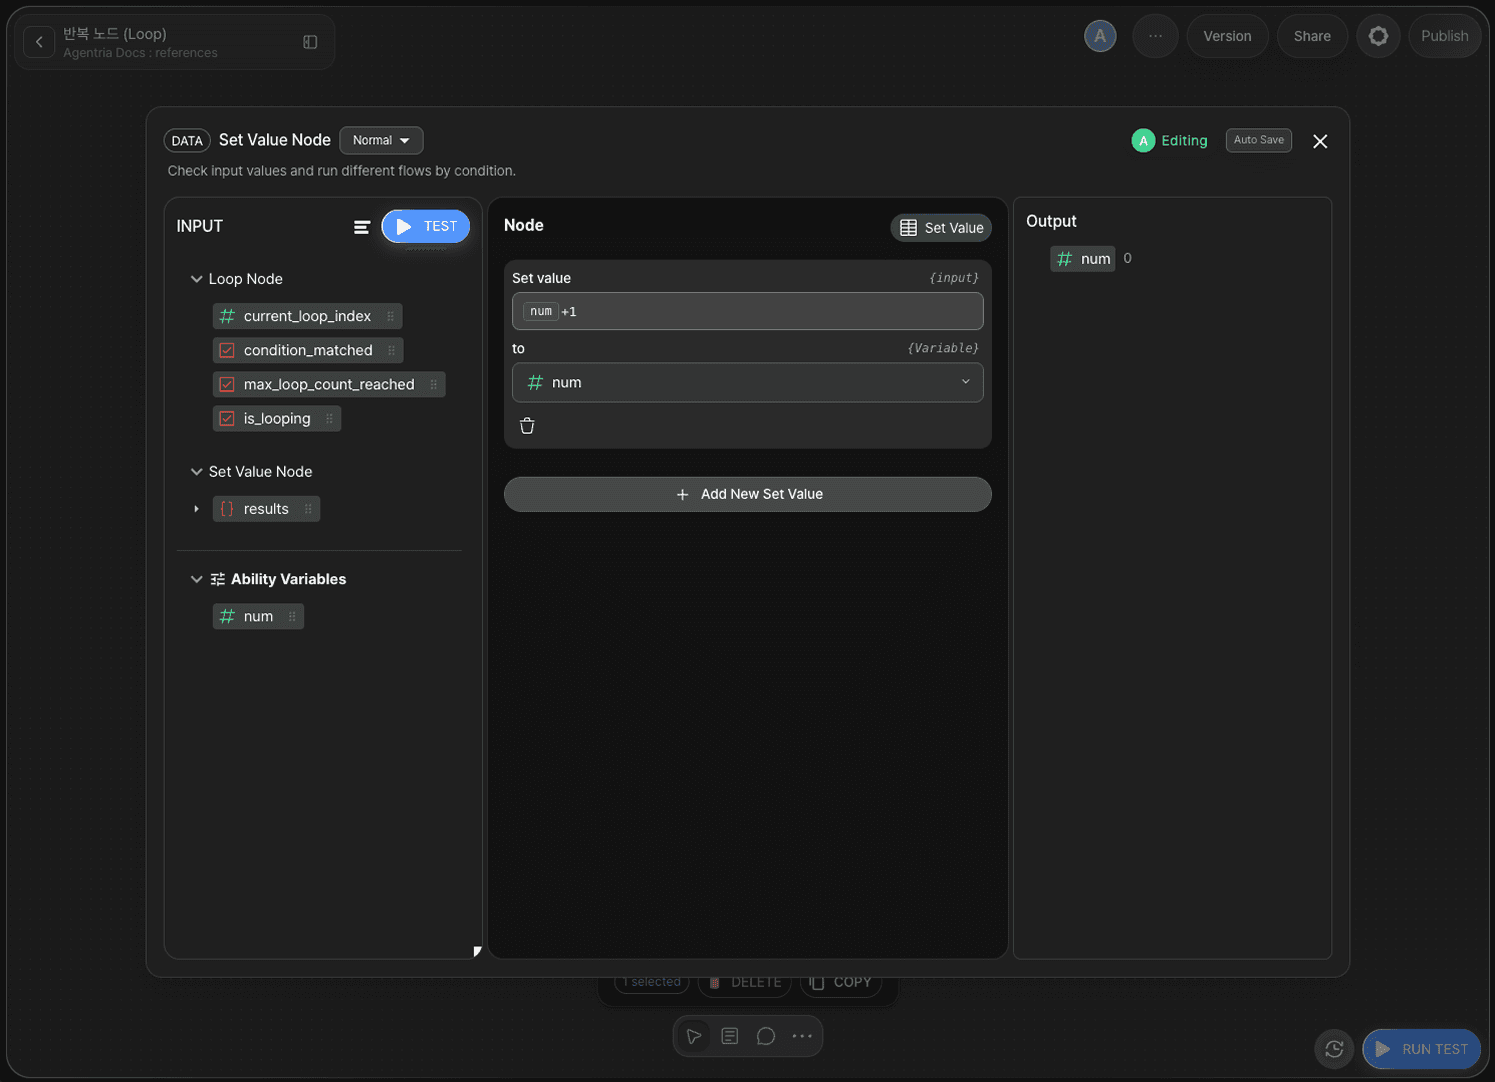
Double-click the Set Value node to open the Node Editor.
In the Set Value area, configure the expression as follows. Drag and drop num from Ability Variables on the left to complete the num + 1 expression.
Field | Value |
|---|---|
Expression |
|
to |
|
This updates the global variable num by 1 on each iteration.
Step 7: Check the Start Node
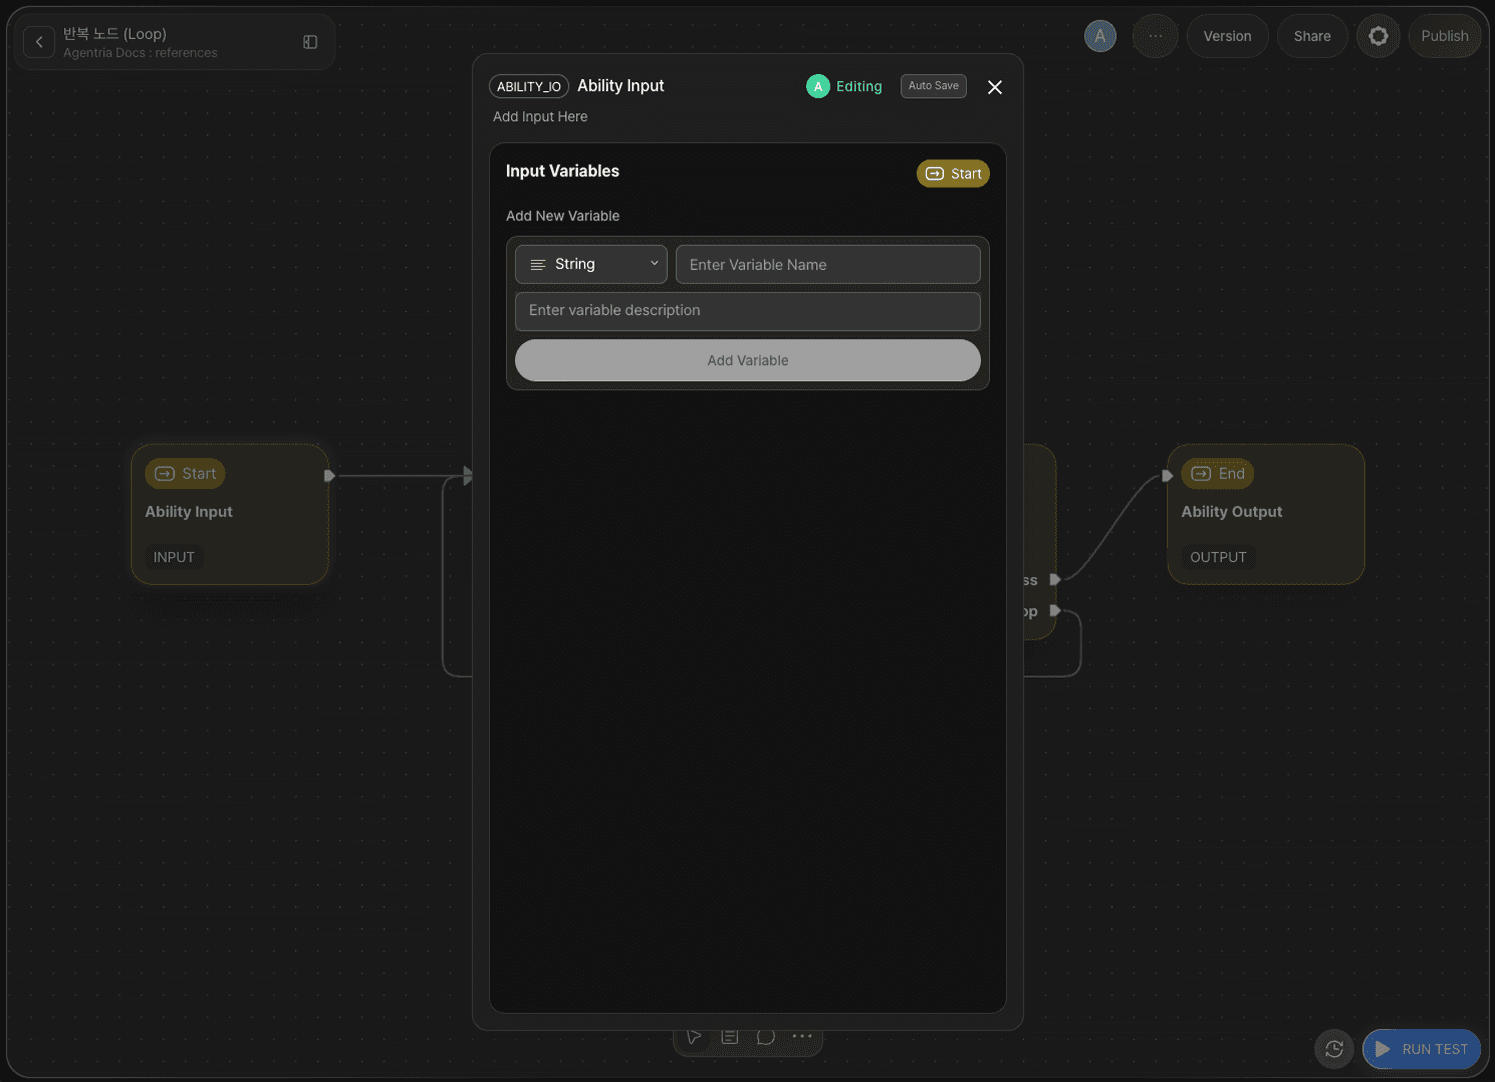
This tutorial uses the global variable's default value (0) as the counter's initial value, so no Input variables need to be declared in the Start Node. Leave the Start Node as is.
Step 8: Configure the End Node
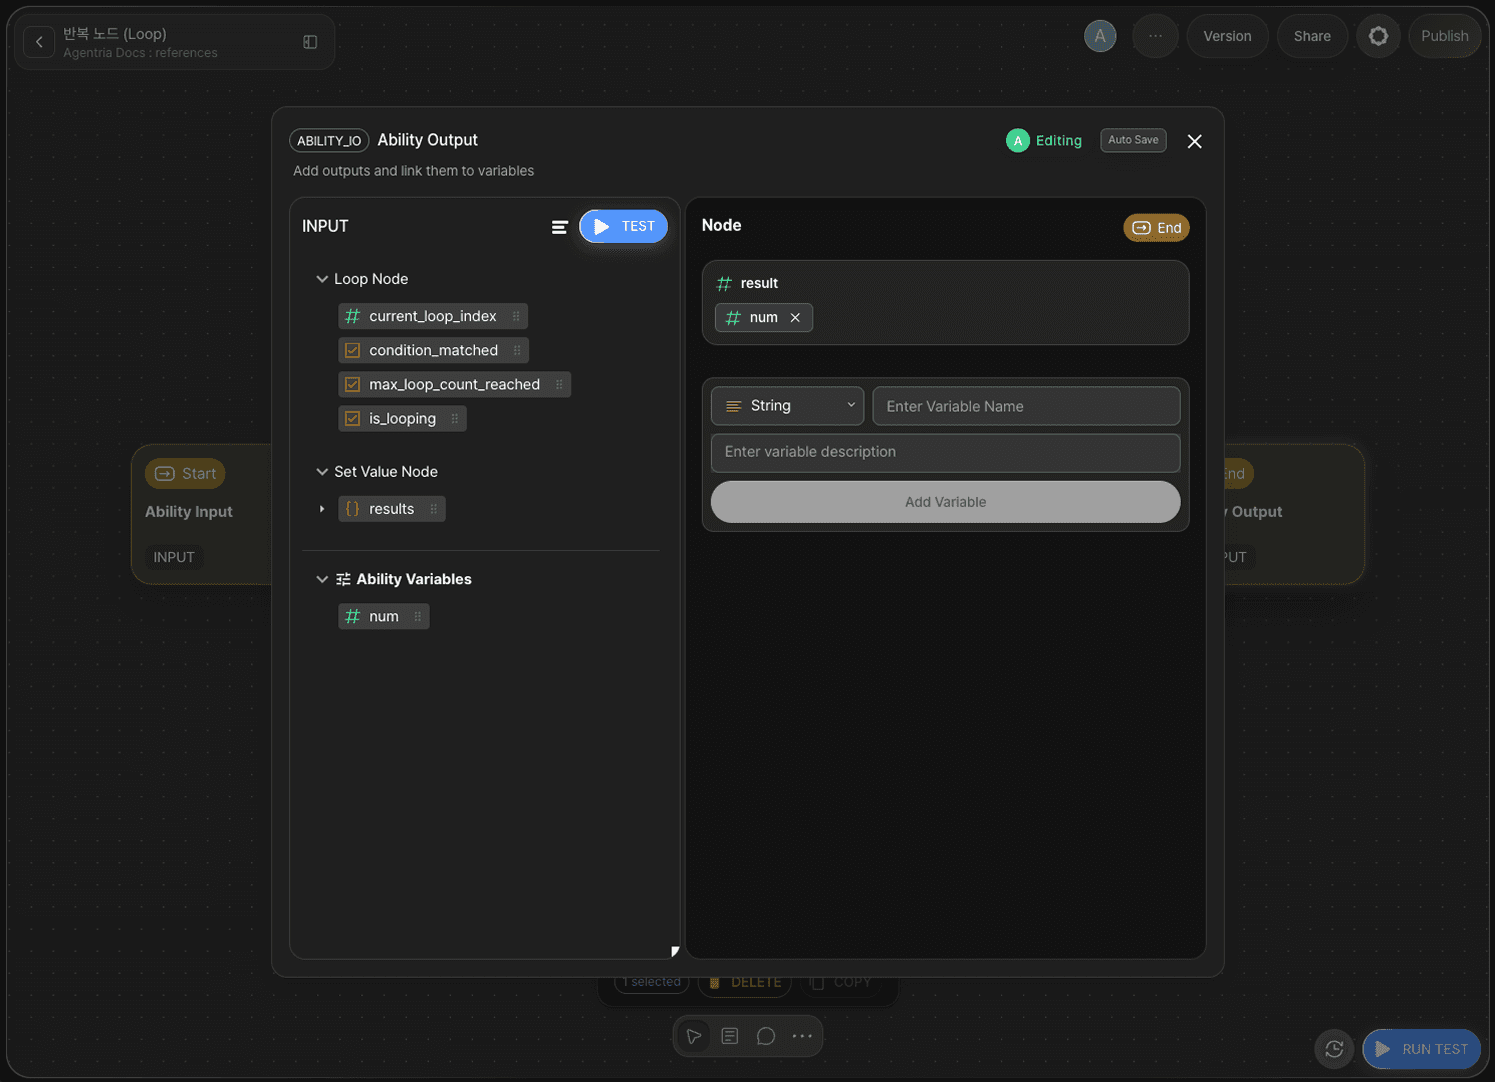
Double-click the End Node to open the Node Editor.
Add the following variable in the Output Section.
Variable | Type |
|---|---|
| Integer |
Drag and drop num from Ability Variables to bind it to result.
Step 9: Run the Ability Test
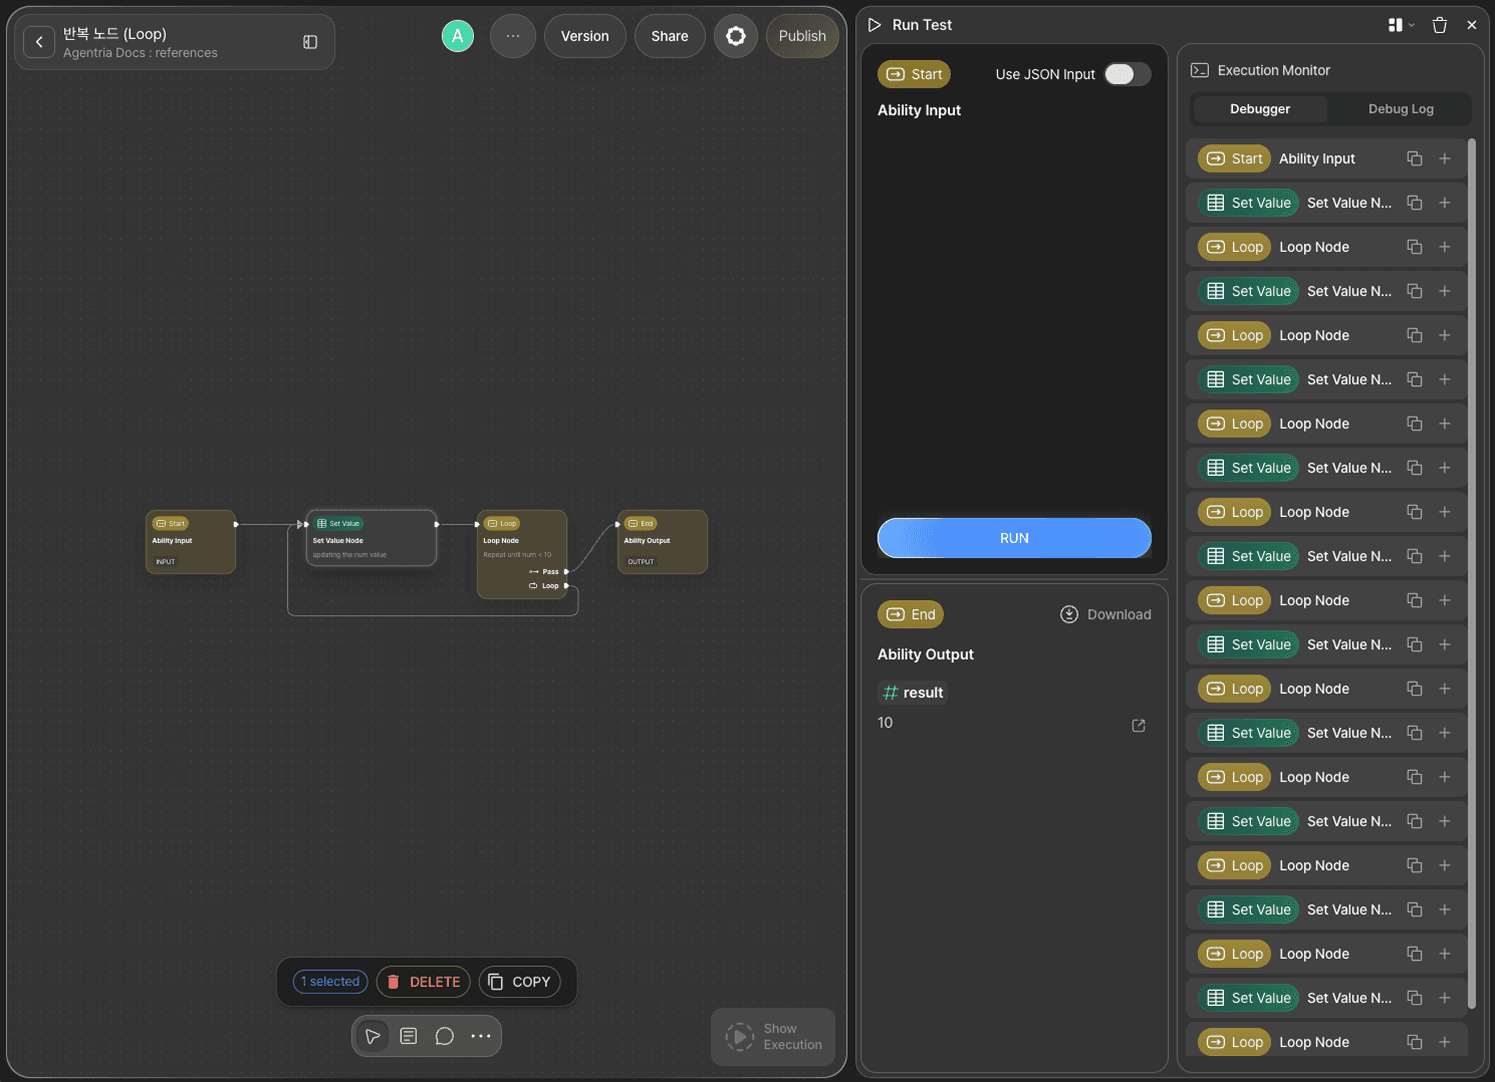
Click the Run Test button in the bottom-right corner of the Canvas. Proceed through Run Test → Run Test → Run to execute the full test.
The global variable num starts at 0. The Set Value node increments num by 1 each iteration, and the Loop node checks the num < 10 condition. When num reaches 10, the condition becomes false and the flow proceeds to the End Node via the pass pin.
Iteration | num (before check) | Condition (num < 10) | Result | num (after) |
|---|---|---|---|---|
1 | 0 | True (loop) | Set Value | 1 |
2 | 1 | True (loop) | Set Value | 2 |
3 | 2 | True (loop) | Set Value | 3 |
4 | 3 | True (loop) | Set Value | 4 |
5 | 4 | True (loop) | Set Value | 5 |
6 | 5 | True (loop) | Set Value | 6 |
7 | 6 | True (loop) | Set Value | 7 |
8 | 7 | True (loop) | Set Value | 8 |
9 | 8 | True (loop) | Set Value | 9 |
10 | 9 | True (loop) | Set Value | 10 |
11 | 10 | False (pass) | End Node | — |
Confirm that result: 10 is returned.
Step 10: Review Execution Results
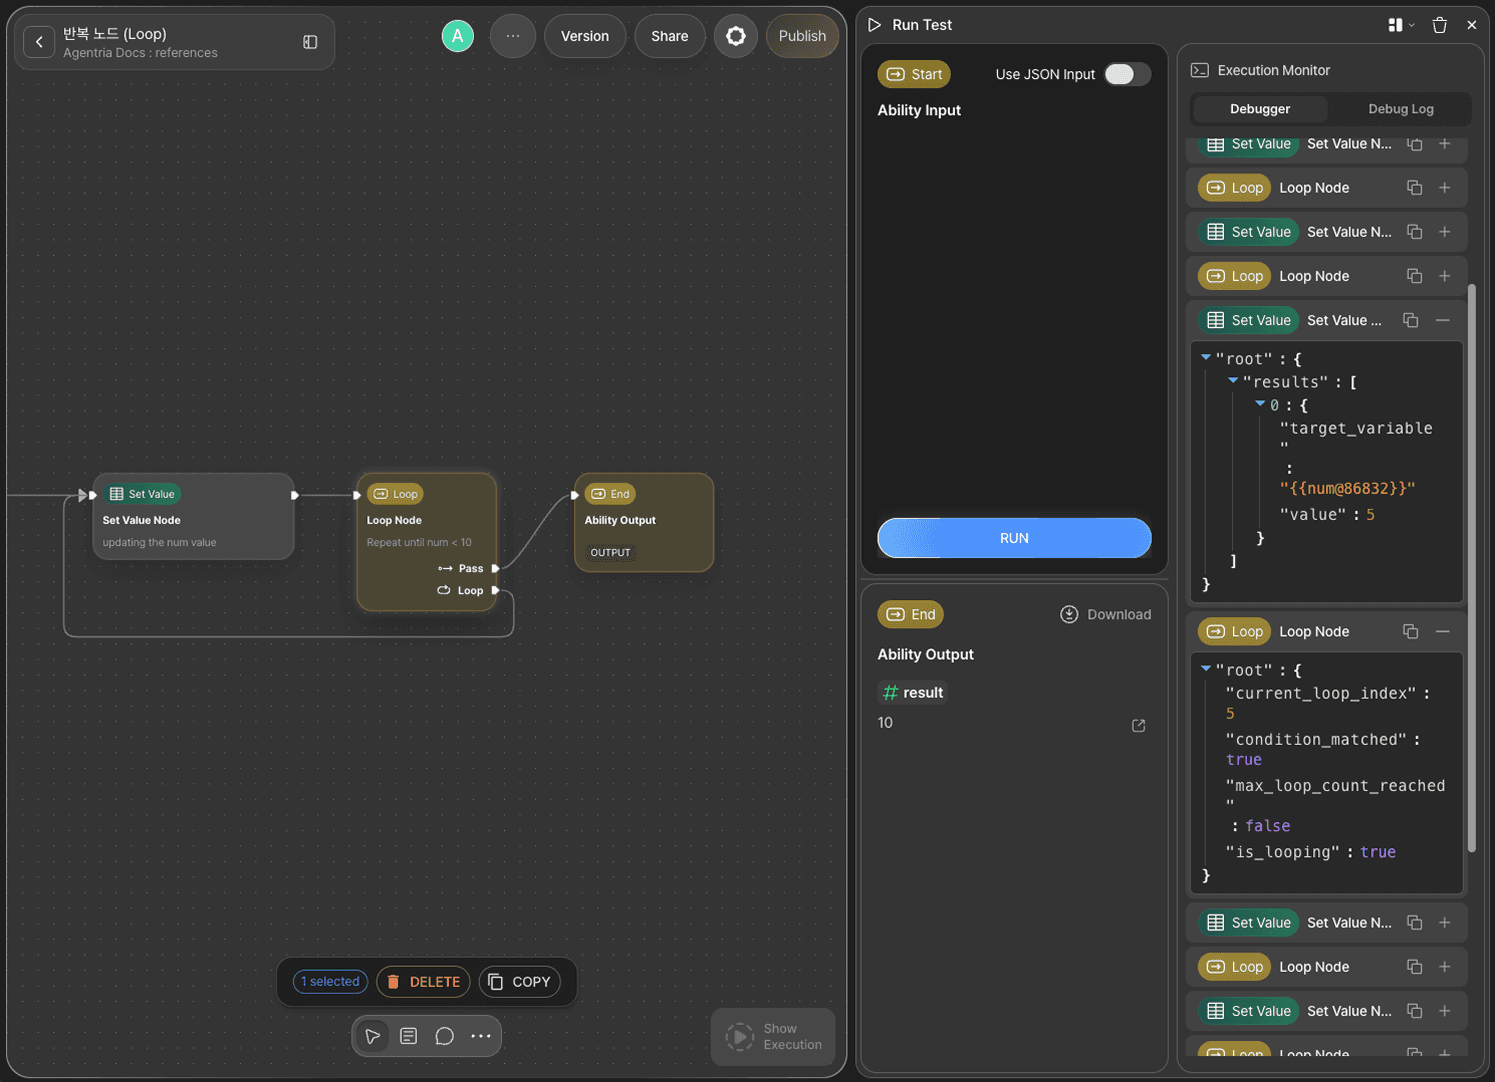
In the Execution Monitor panel of the test window, review the step-by-step execution results of each node.
Next Steps
🎉 Congratulations! You've successfully built the "+1 Counter" workflow using Agentria.
Try changing the condition expression and maximum iterations in the Loop node, or swap out the Set Value node's expression to build a wider variety of looping workflows.
Agentria is a place where ideas become reality—your workflow can expand infinitely with your creativity.
For more Ability examples, visit the 🔗Ability Guide.
For Agent-based examples, visit the 🔗Agent Guide.