Get Started
The ability guide tutorial covers the most fundamental yet essential steps for newcomers to Agentria.
In this exercise, you will activate the Gmail node, connect your Google account, and build an Ability that sends an email.
Prerequisites
To begin, create a Project in Agentria and open the Ability Canvas.
For details on how to enter the canvas, see Step 1 (Create a Project and Select a Composer) in the 🔗3-Step Core Guide.
By completing this tutorial, you will learn how to:
Add nodes
Declare variables in the Start Node
Connect nodes
Register Gmail credentials
Link your Google account
Configure credentials in the Gmail node
Set up email delivery in the Gmail node
Run the workflow and check the results with Ability Test
Step 1: Create Google OAuth
To use the Gmail Node, you must configure authentication credentials based on the access keys provided by Google.
Google’s access tokens can only be issued through the OAuth(Open Authorization) flow.
If you’re creating a Google OAuth for the first time, refer to the 🔗Google Credential Guide for detailed instructions.
Step 2: Register Gmail Credentials
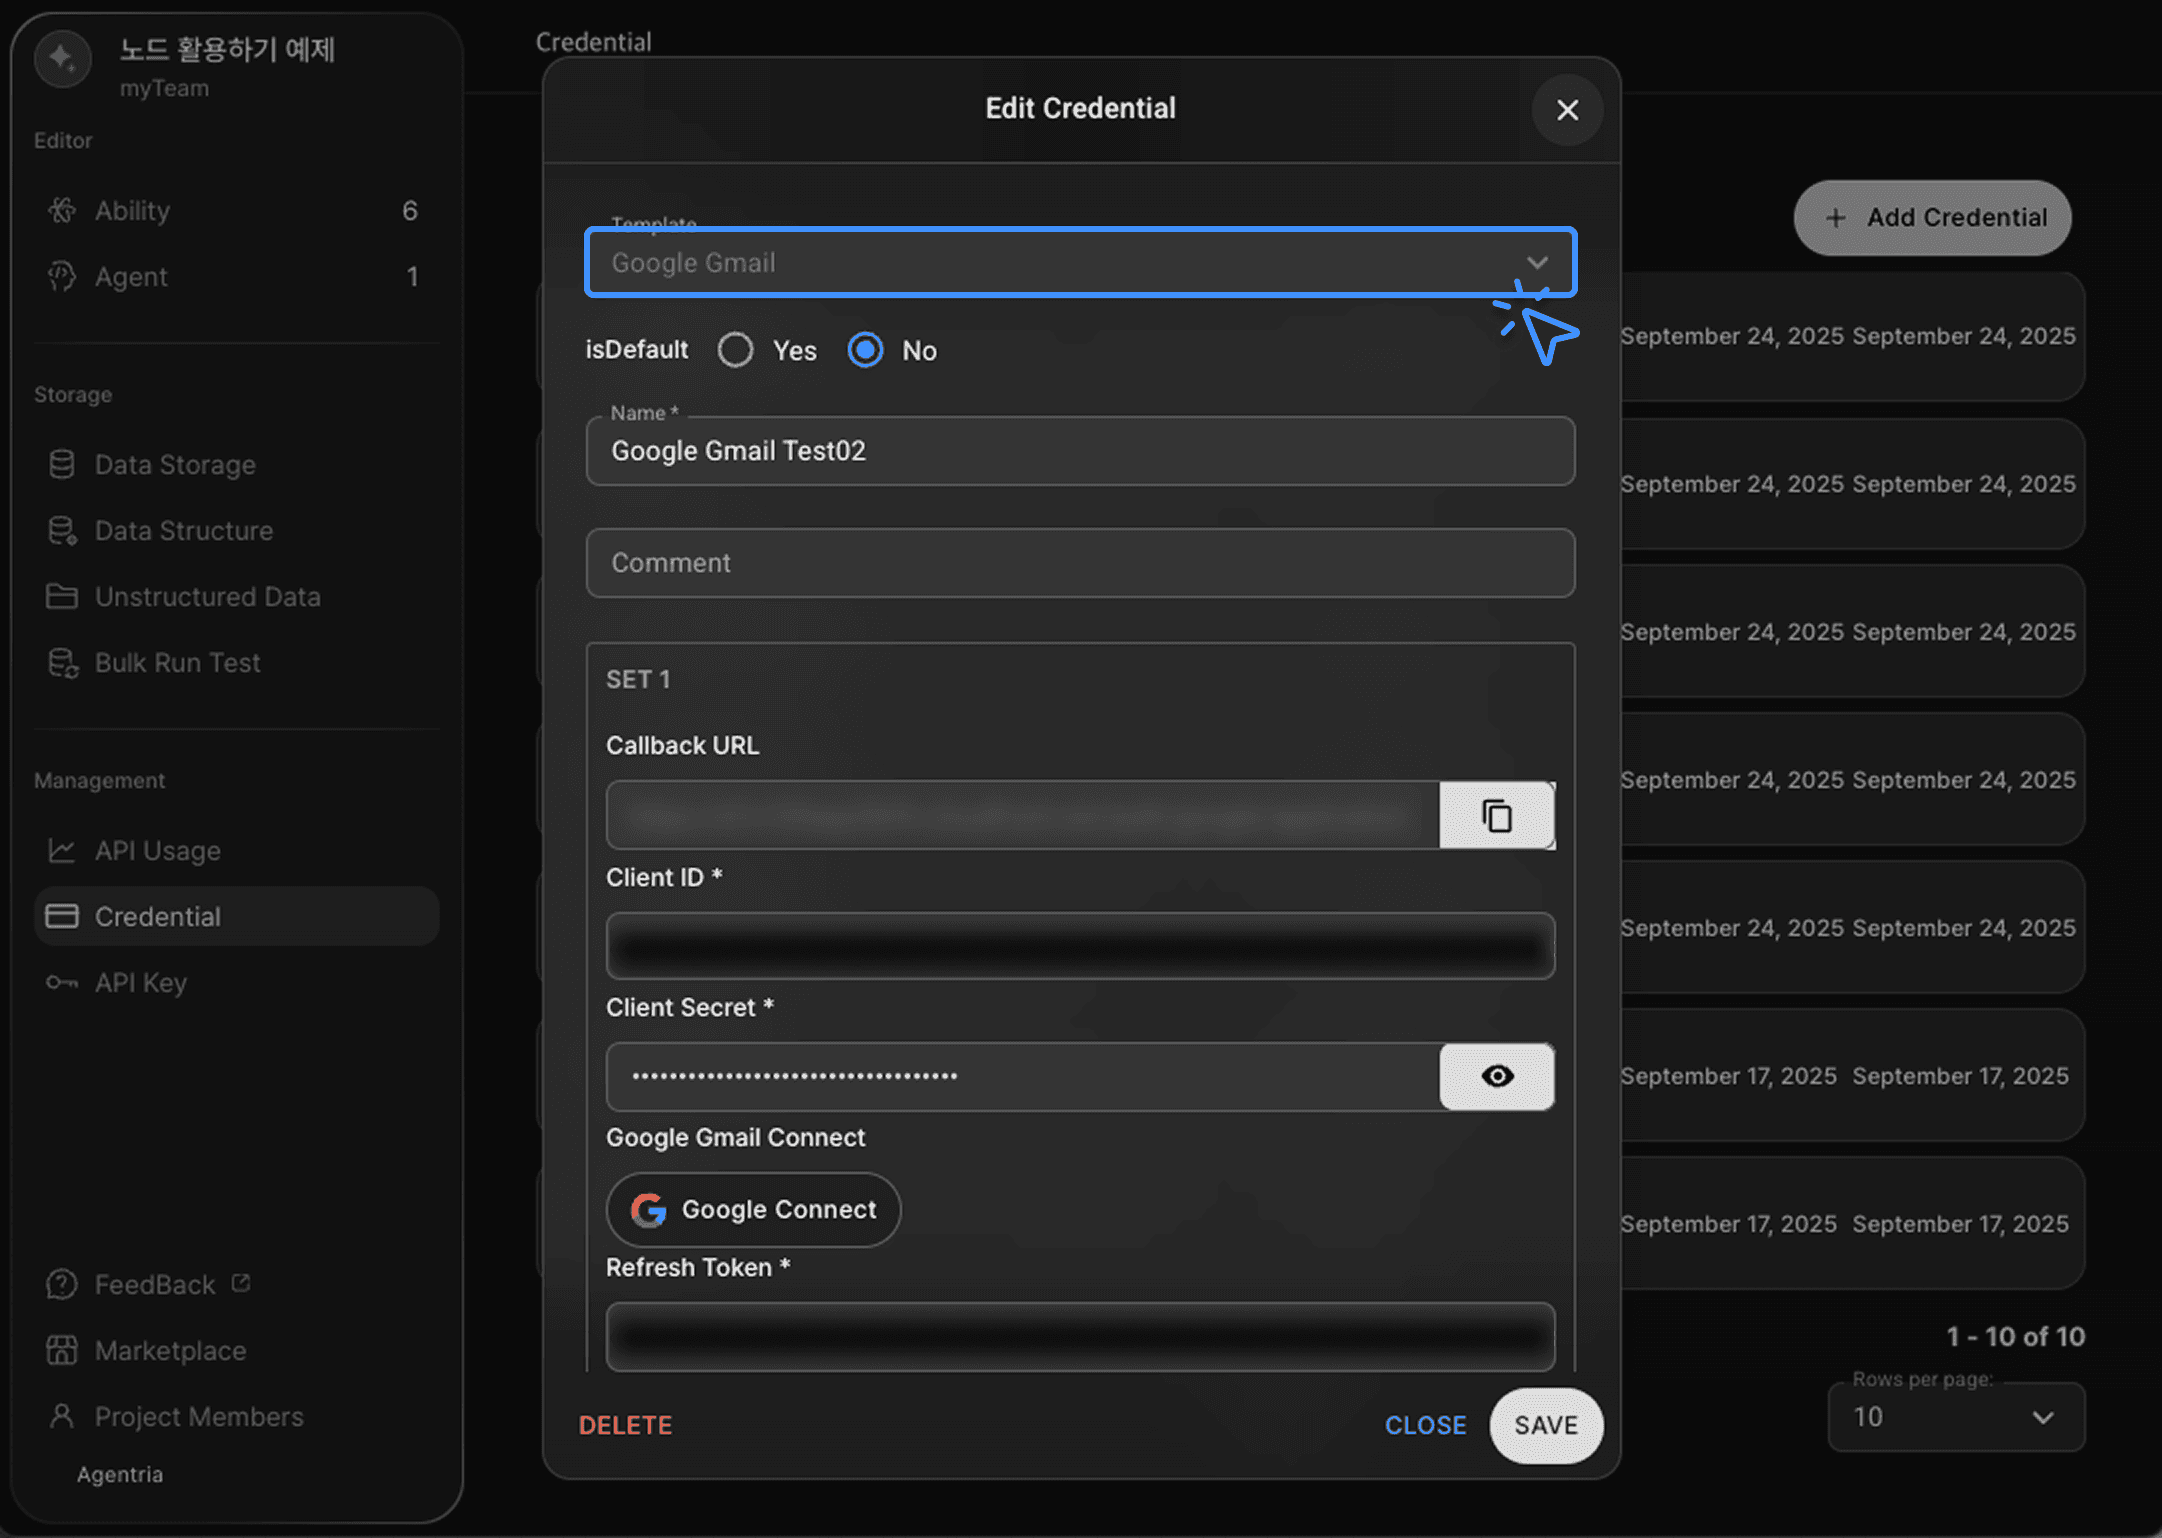
Credentials are authentication details required for users to securely access a system or service.
For this tutorial, select the Google Gmail template when registering your credential.
Once your Gmail credentials are registered using the guide, proceed to Step 3.
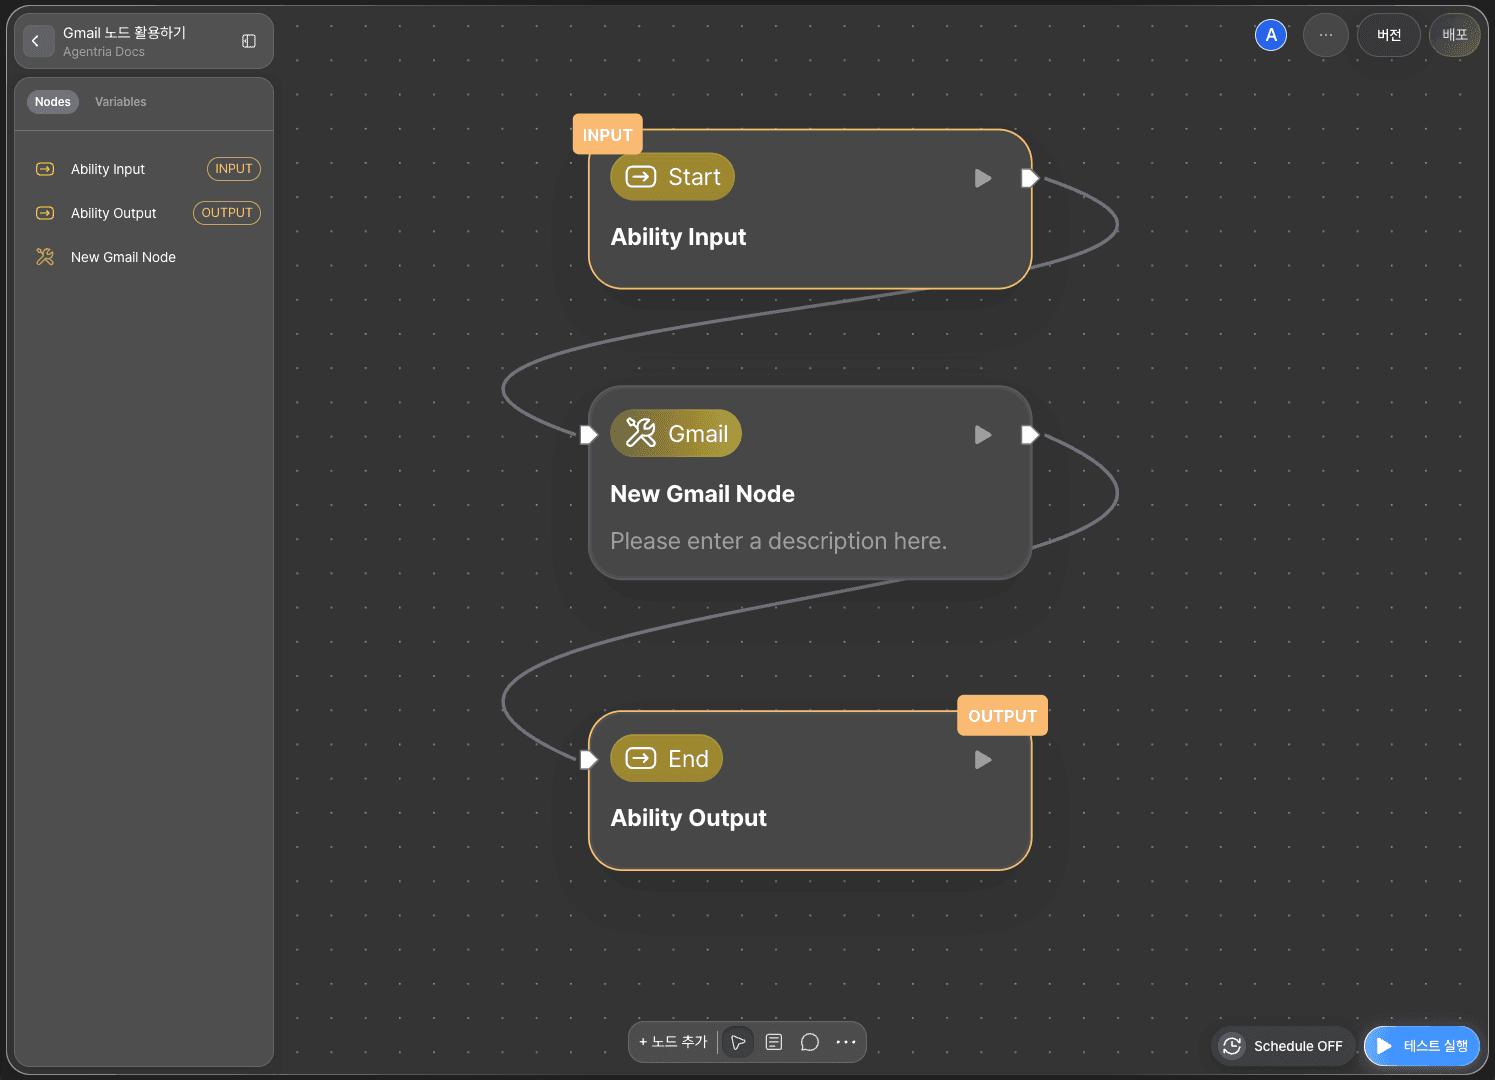
Step 3: Add a Gmail Node
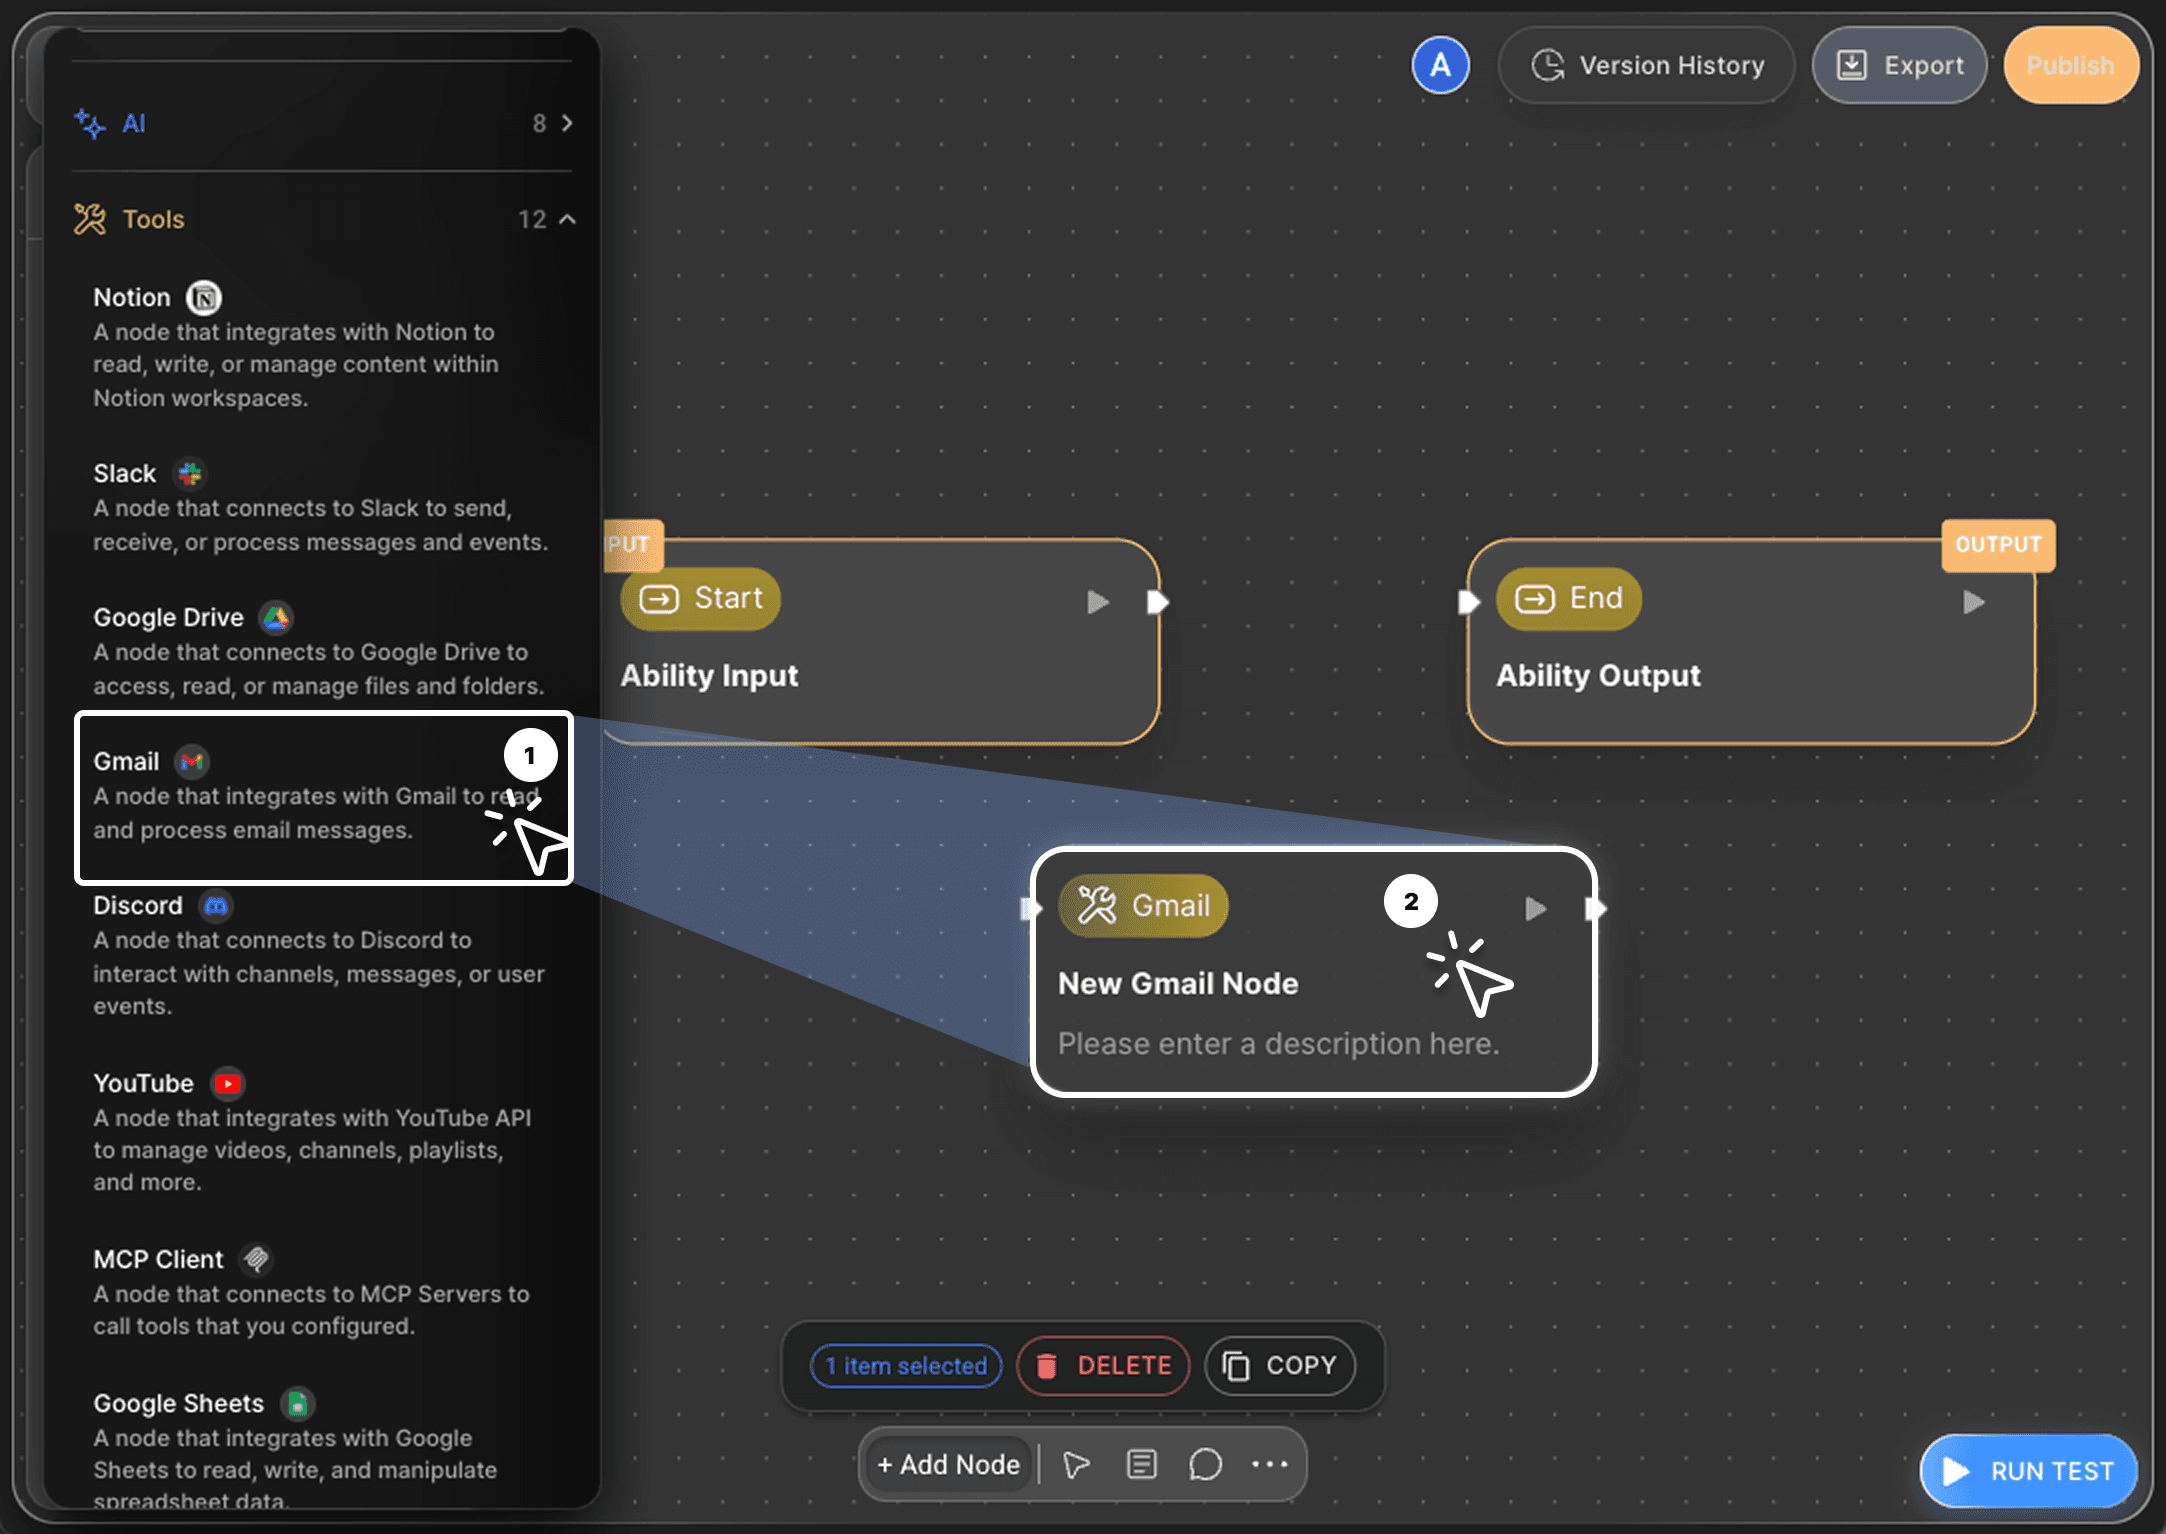
Click the +Add Node button at the bottom of the canvas. In the sidebar’s Tools category, drag and drop the Gmail node onto the canvas.
Hover over the node and click the Edit icon to open its options.
Rename the node to Send Gmail Node.
Since Gmail nodes can perform multiple operations (Send, Get, List, Delete), it’s best to name them according to their function.
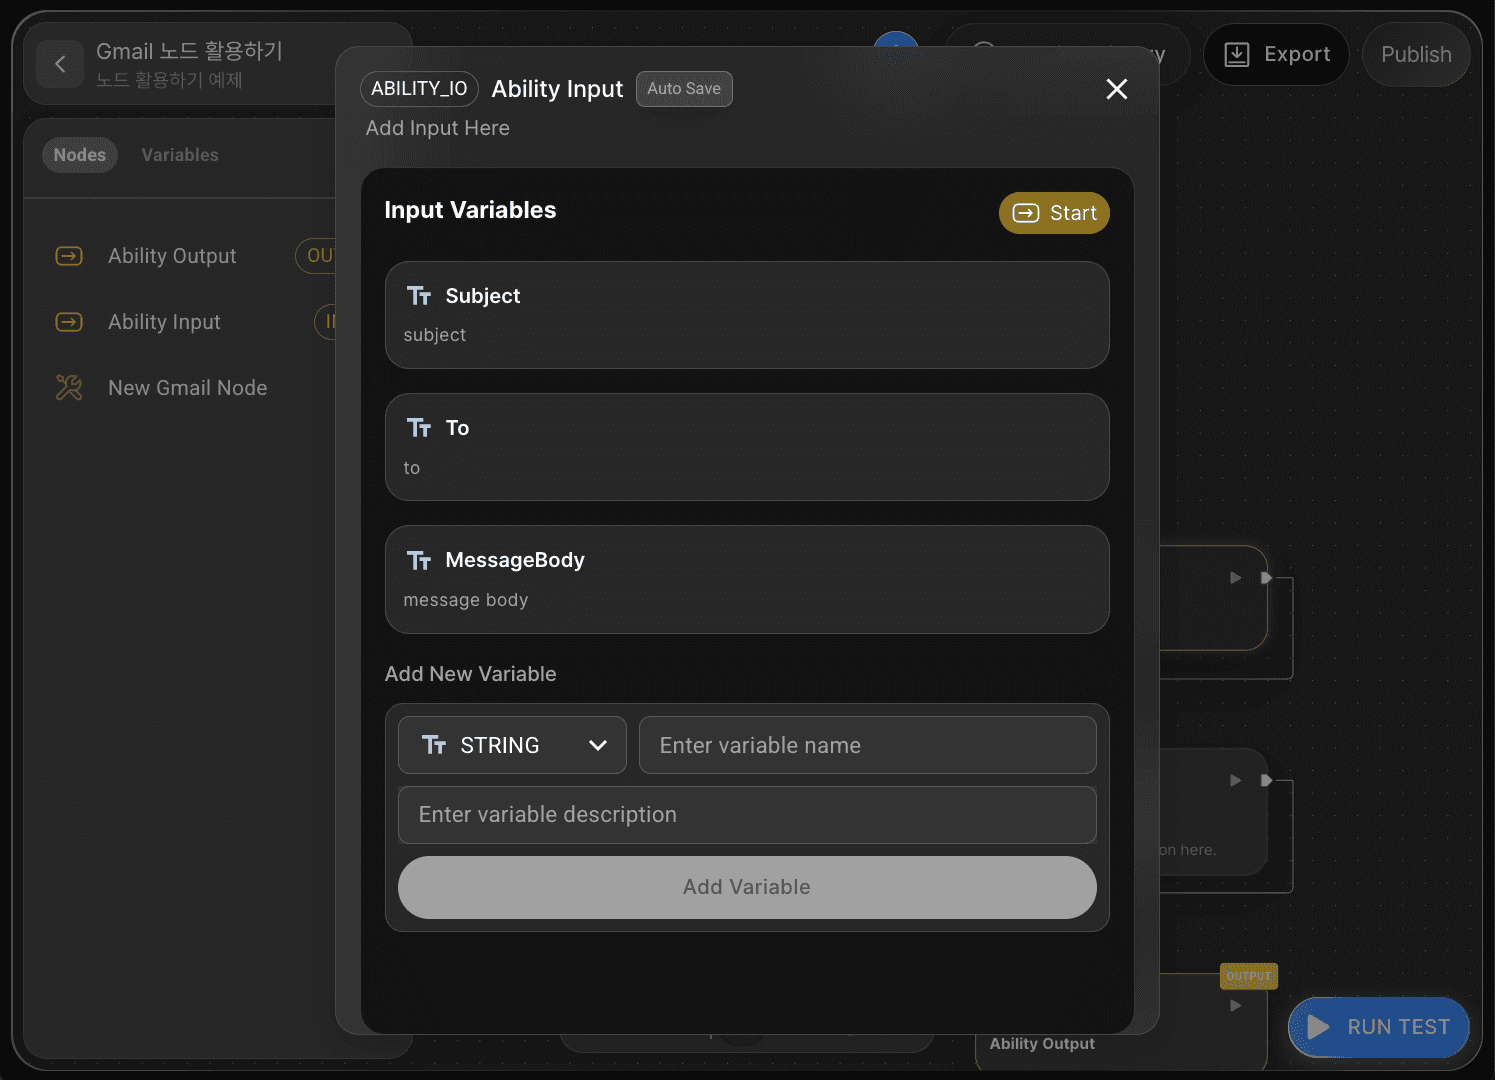
Step 4: Declare Input Variables
Every Agentria canvas includes a Start Node and an End Node.
The Start Node triggers the workflow.
The End Node closes the workflow.
Double-click the Start Node to open the editor. Here, you can set data types, names, and descriptions.
For sending an email, declare three String variables:
ToSubjectMessageBody
When finished, return to the canvas.
Step 5: Connect Nodes with Edges
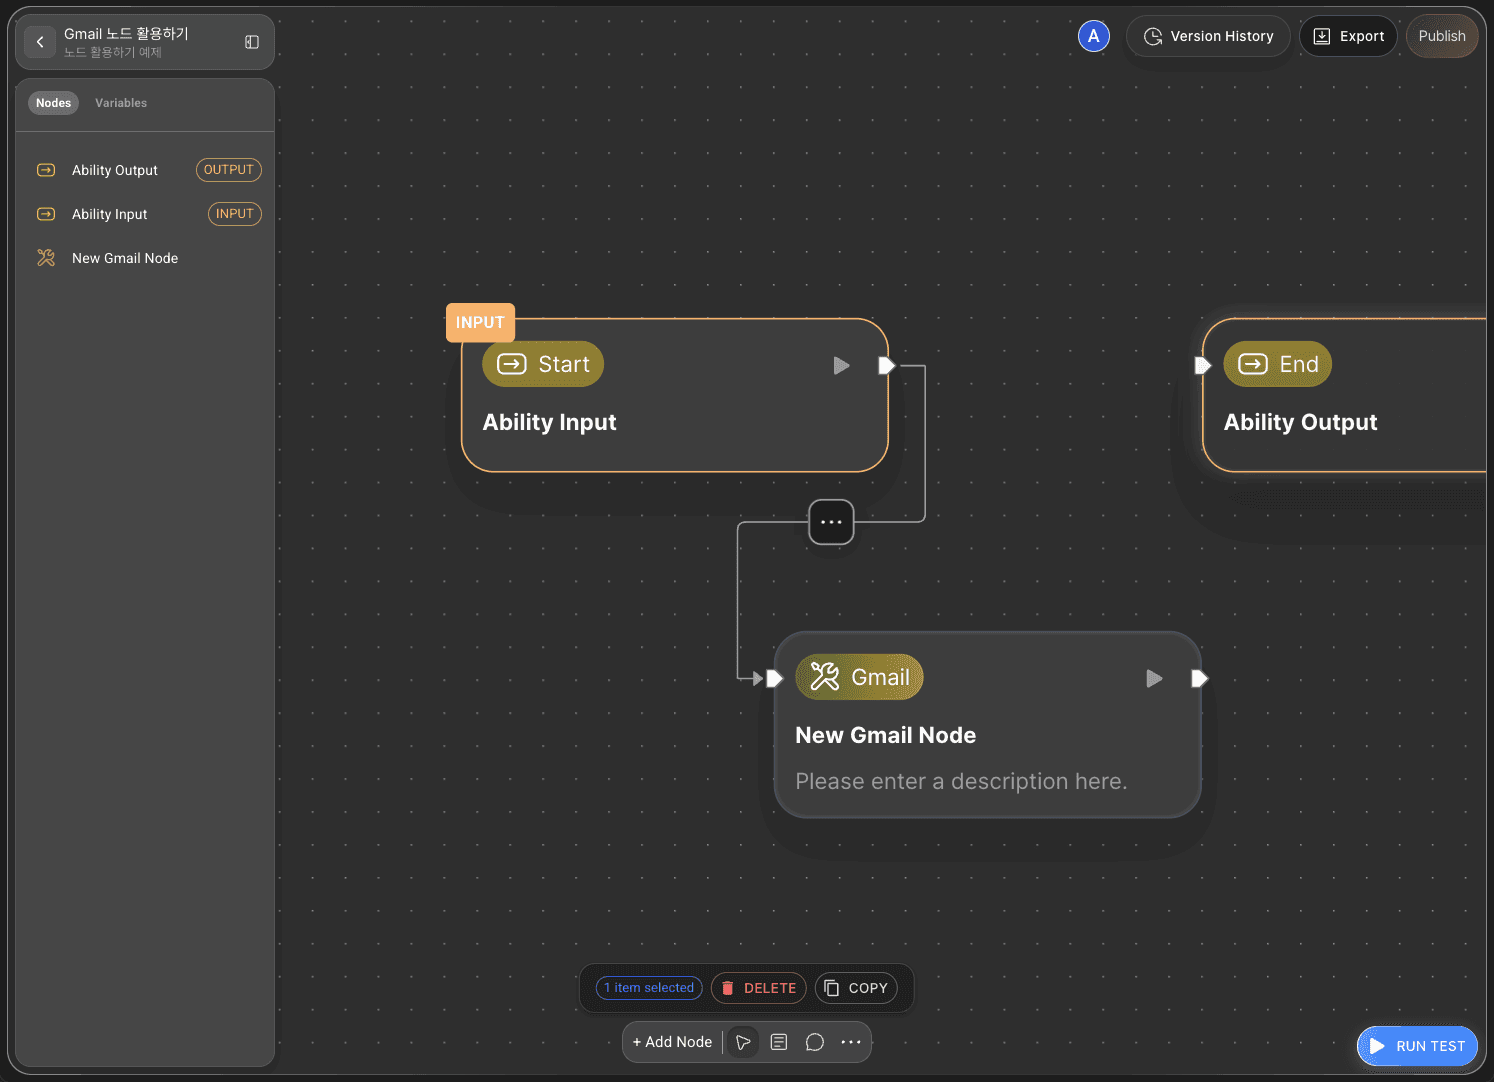
To pass input variables from the Start Node to the Gmail Node, connect them with an edge.
Connect the Start Node’s right-side Out-Pin to the Gmail Node’s left-side In-Pin.
This delivers the input values to the Gmail node.
Step 6: Configure the Gmail Node
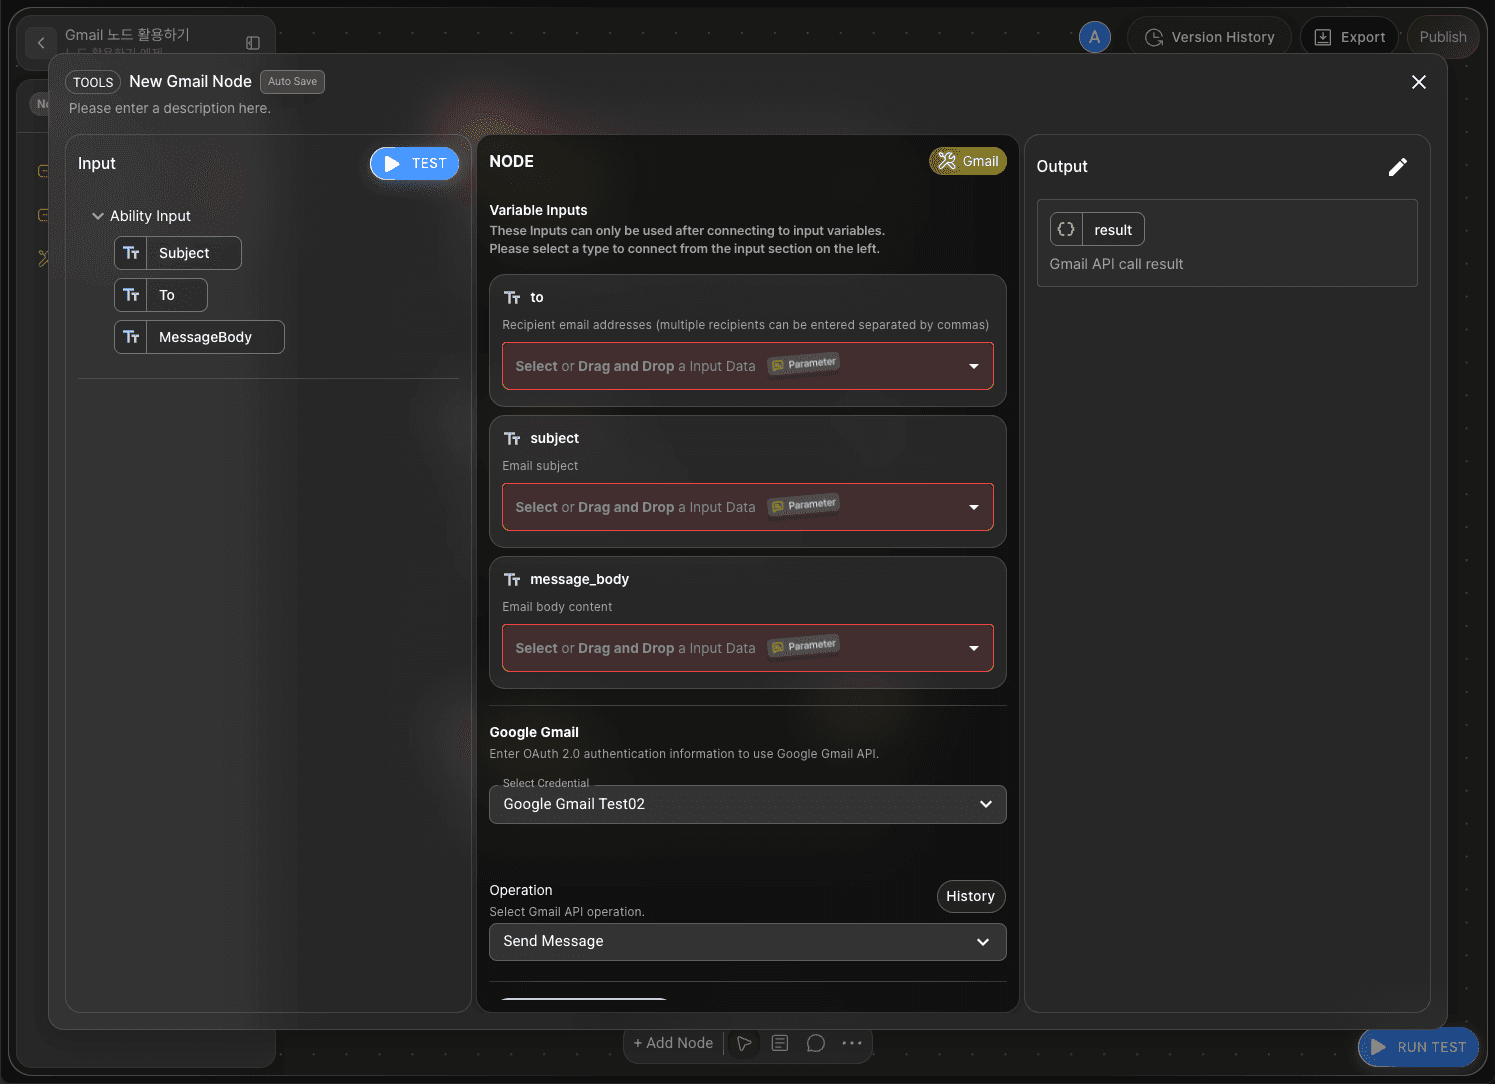
Double-click the Gmail Node to open the Node Editor.
Select and load the Gmail Credential you previously registered.
In the Operation settings, choose how you want to Gmail Node to be used.
For this tutorial, select Send Message.
To send an email, the Start node declared To, Subject, and MessageBody as variables.
You must select an Adapter variable to receive and use the input.
Click the Show Optional Variables button and click +Add Optional Variables to see various options available for email.
Select the following variables.
tosubjectmessage_body
The Gmail node will output results in Object format.
Step 7: Bind Variables with Drag and Drop
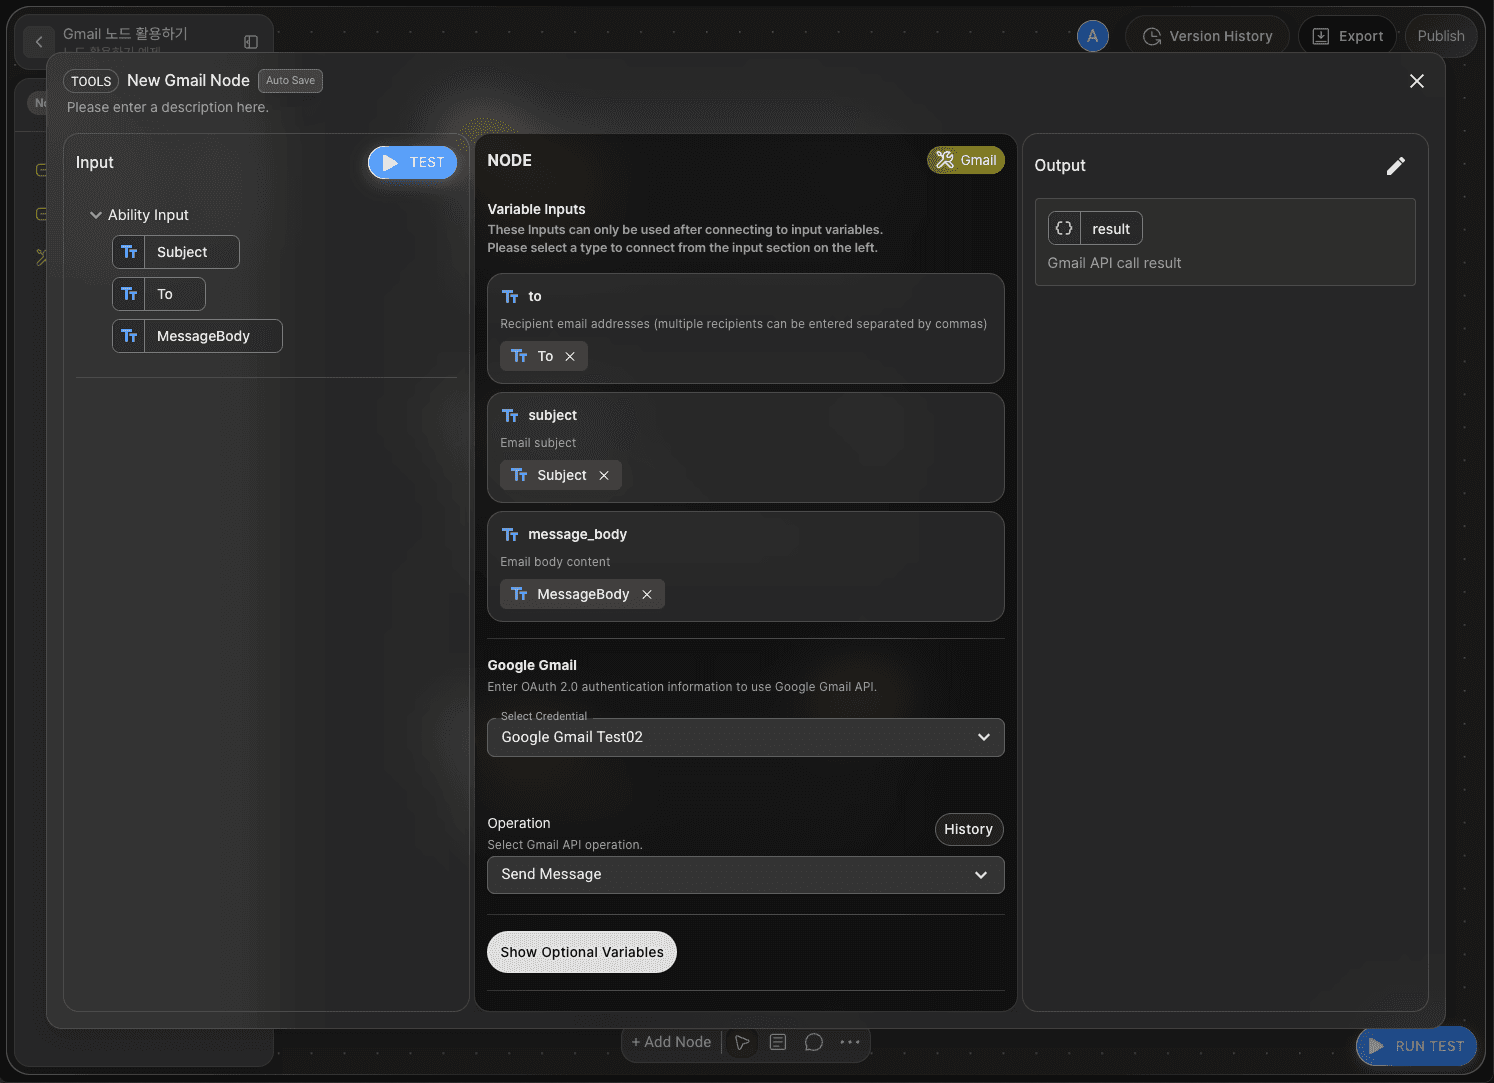
Agentria allows you to easily retrieve variables in a drag-and-drop manner without writing code.
Match the variables and adapter variables in the Input area to their name.
to :
Tosubject :
Subjectmessage_body :
MessageBody
Step 8: Run a Node Test

After completing the setup, click the TEST button in the Input section of the editor to verify the node.
A Node Test is an individual validation process that can be performed directly within the Node Editor.
This allows you to confirm that the node is properly configured before connecting it to others, minimizing errors and ensuring a stable workflow.
Enter the recipient’s email address, subject, and message content in the input fields, then click Test.
If the configuration is correct, the transmission details will appear in the output variable result.
You can confirm successful delivery by checking the Sent Mail folder in Gmail or the recipient’s inbox.
Step 9: Connect the End Node
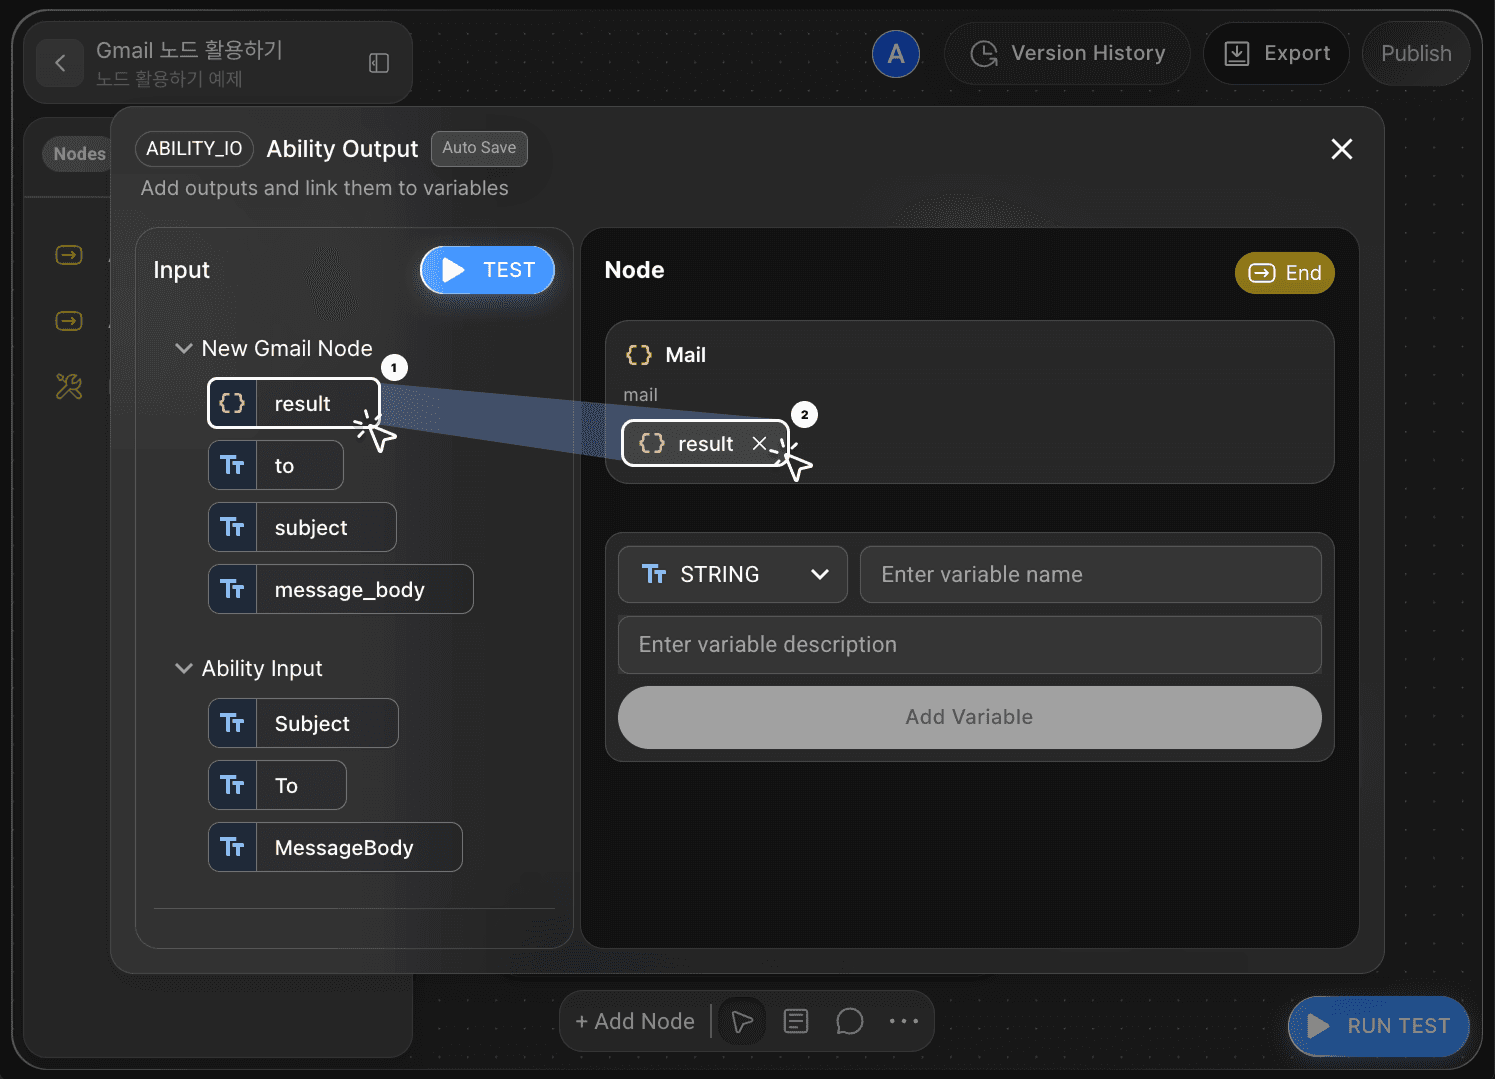
Now pass the email result into the End Node.
On the canvas, connect the Gmail Node to the End Node.
Double-click the End Node, open the editor, and add a Object variable named Mail.
Drag and drop the Gmail Node’s result into Mail.
Your ‘Send Gmail’ workflow is now complete.
Step 10: Run the Entire Workflow with Ability Test
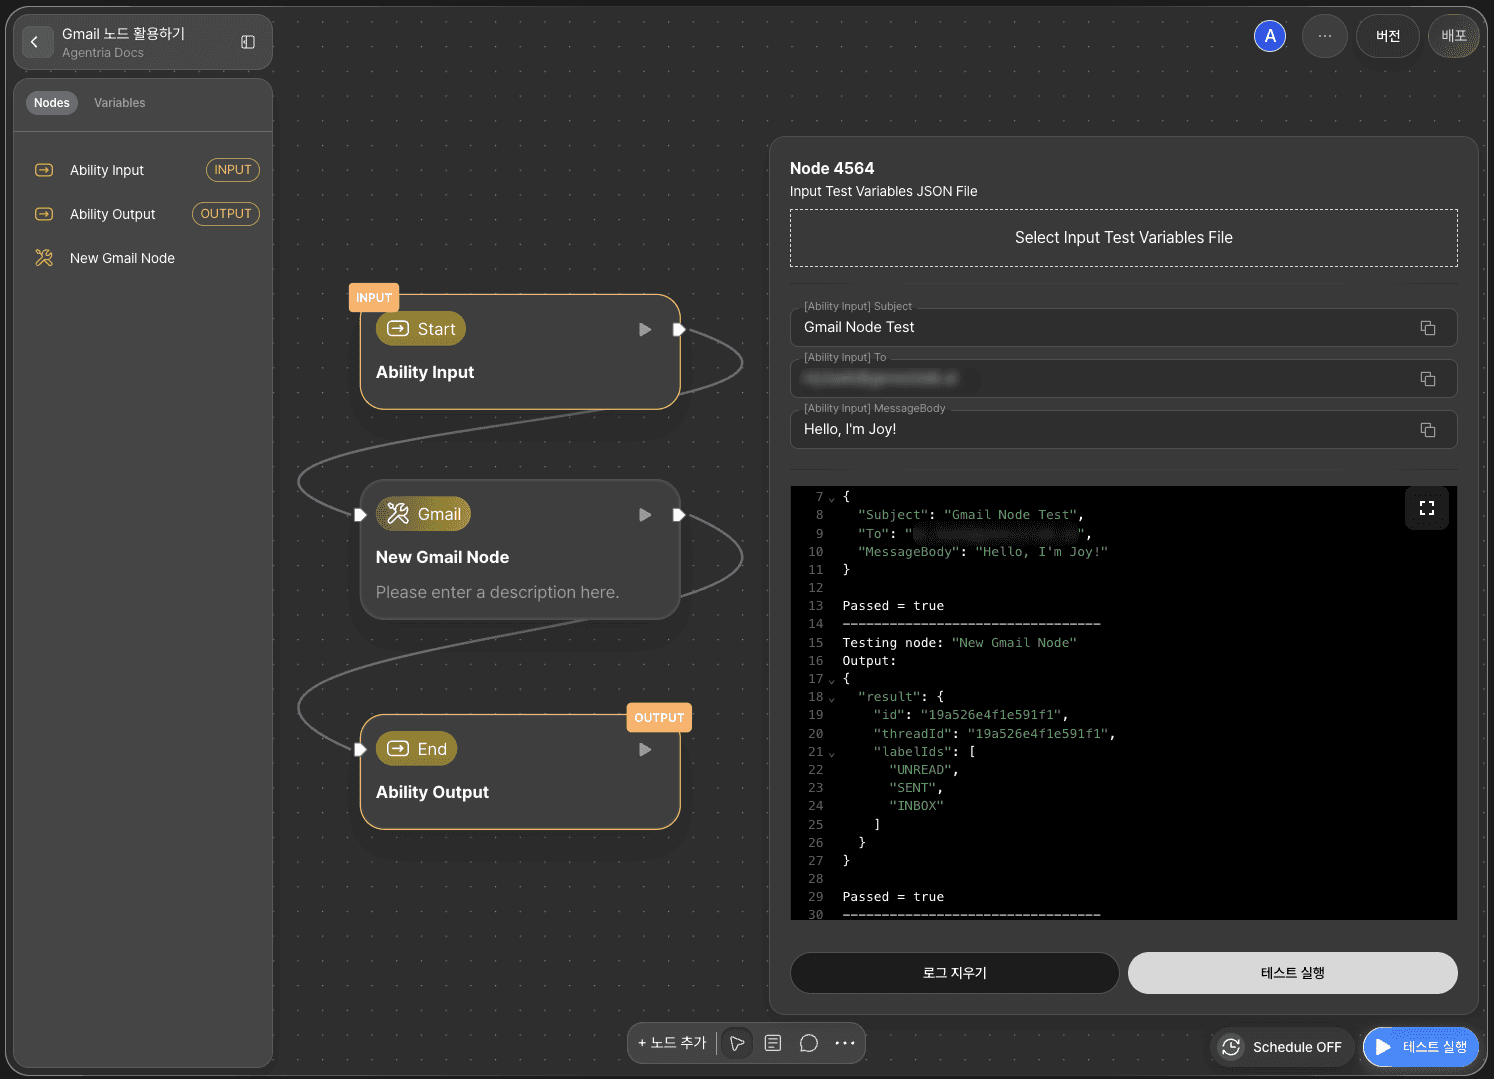
Click the RUN TEST button at the bottom-right corner of the canvas to execute the completed workflow.
Enter the recipient’s email address, subject, and message content in the input fields, then click Run Test.
The transmission details will be displayed in the Mail result.
You can verify that the email was successfully sent by checking the Sent Mail folder in Gmail or the recipient’s inbox.
Next Steps
🎉 Congratulations! You’ve successfully created ‘Send Gmail’ workflow using Agentria.
Now, try expanding it — add operational settings, define new variables, and explore advanced workflows.
Agentria is a space where ideas turn into reality.
With your imagination, workflows can expand infinitely.
For more Ability examples, visit the 🔗Ability Guide.
For Agent-based examples, visit the 🔗Agent Guide.