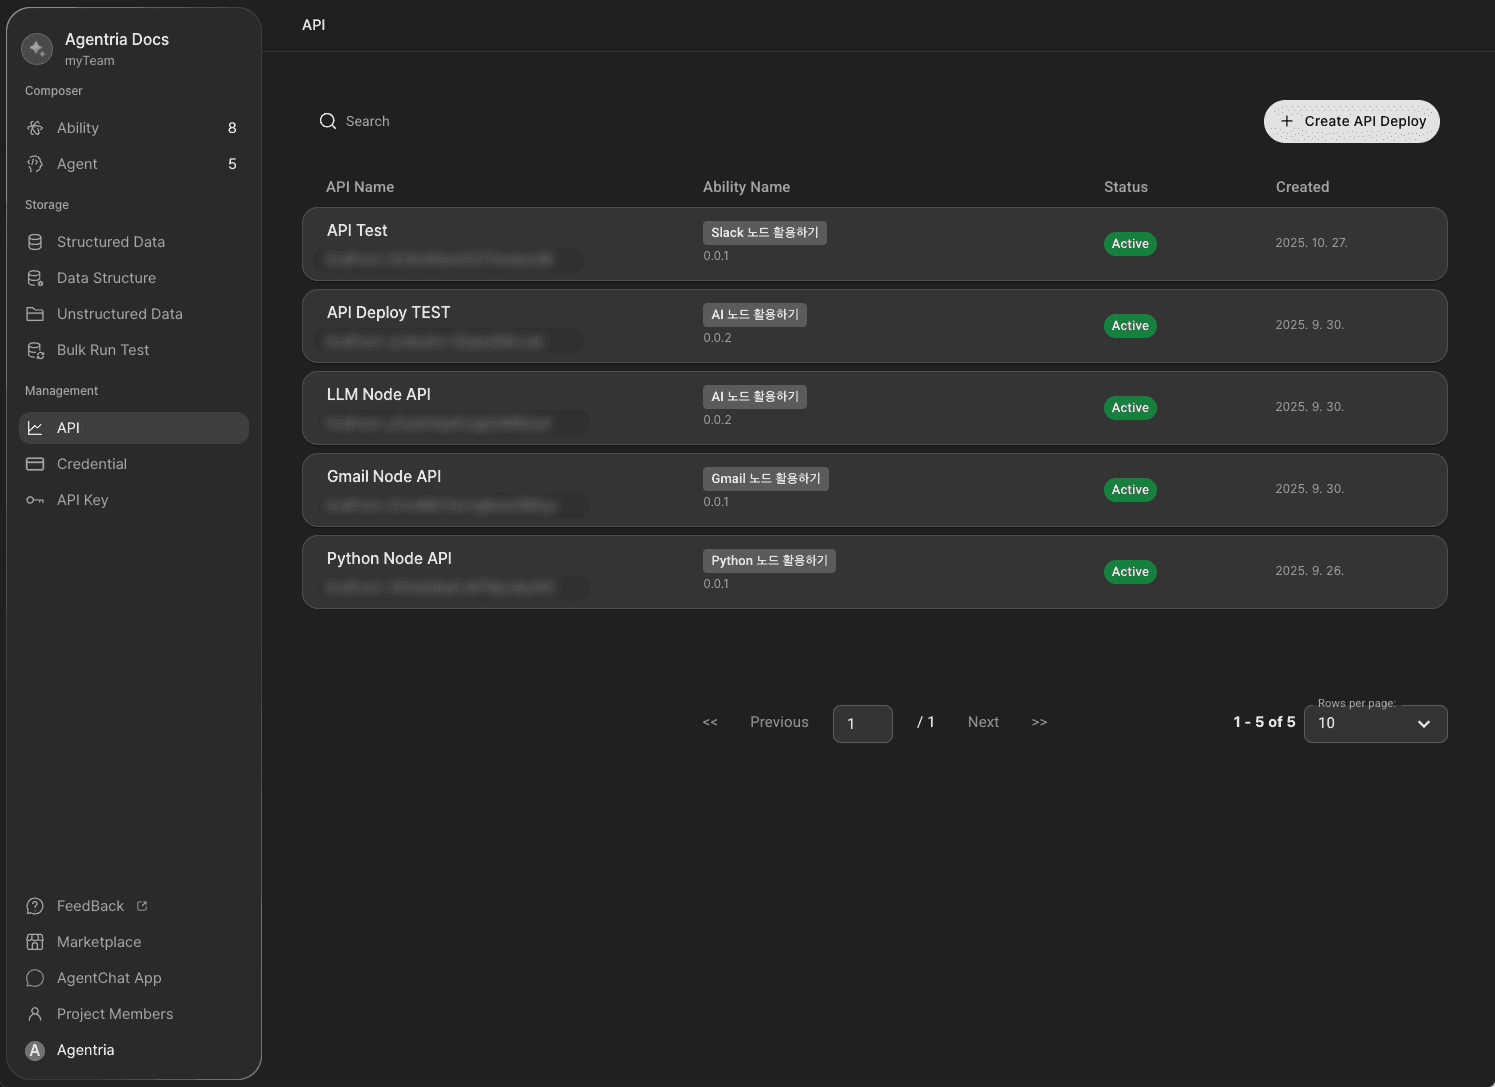
Key Features
If you have completed a workflow in Agentria, you can deploy it as an API to utilize it across various tasks.
To deploy an API, you must first create a 🔗release version of the workflow.
During the API deployment process, version creation can also be carried out in one step.
Step1: Deploying the API

Click the Publish button at the top-right corner of the canvas and select API Release.
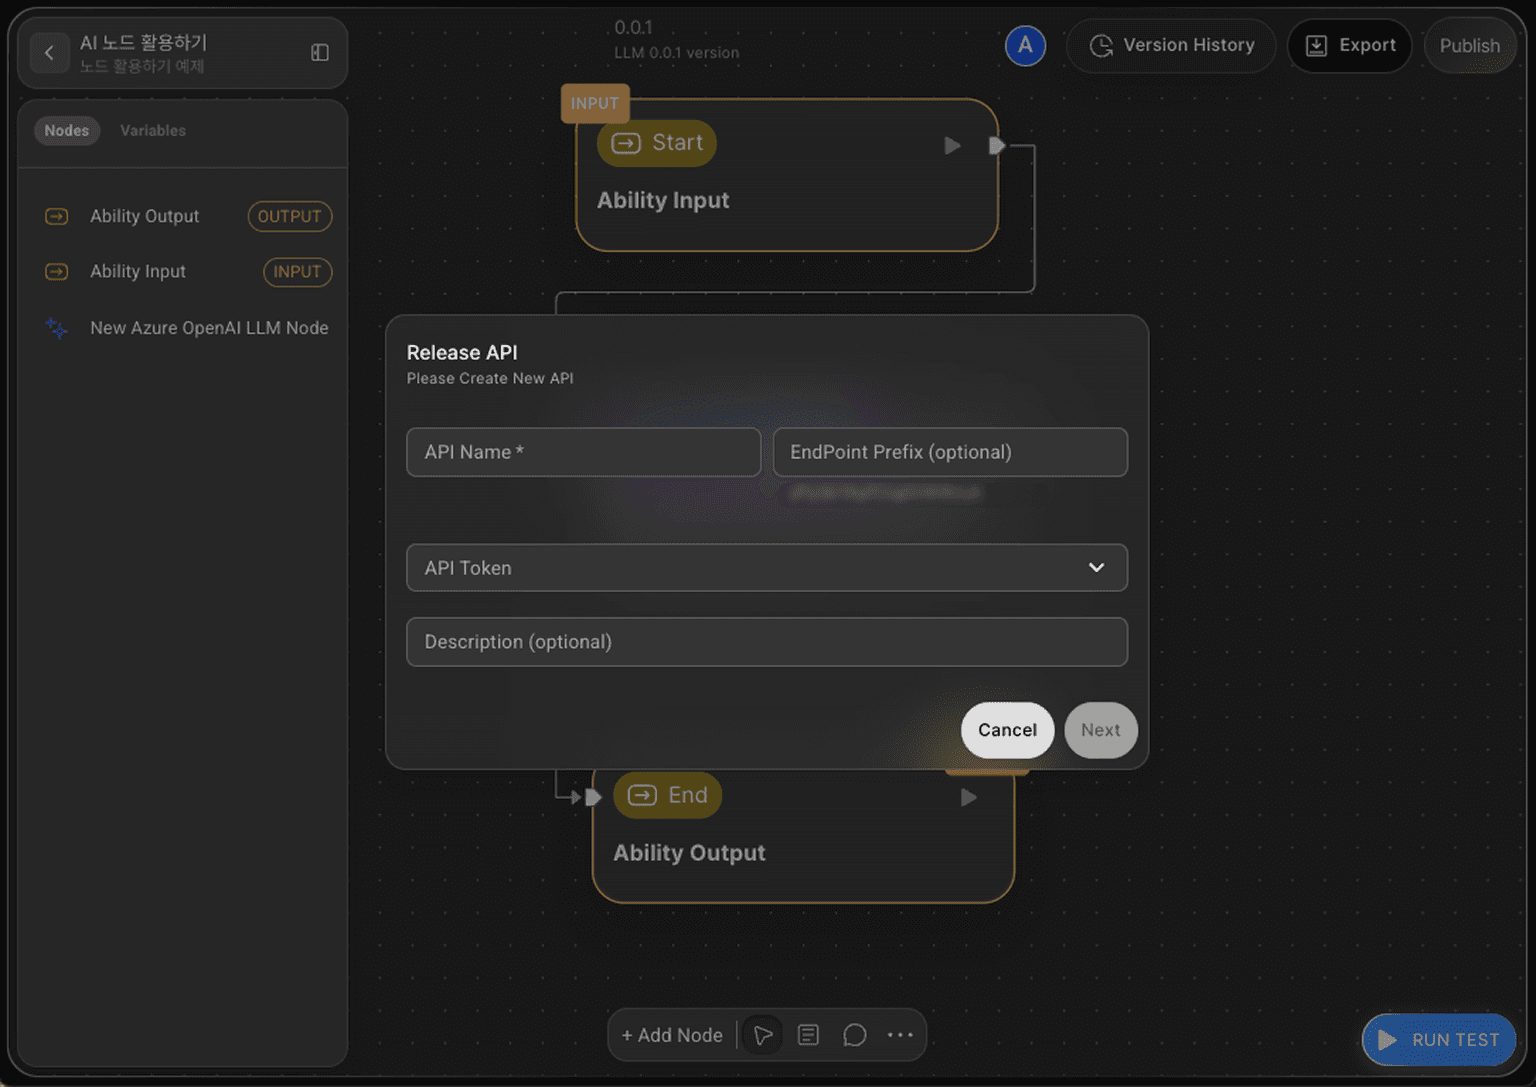
Step2: Issuing an API Token
To deploy a new API, configure the name and token settings.
the endpoint can be specified as needed.
An API token is a string-based authentication credential issued to identify the user and validate permissions when making external API calls.
You may set an expiration date, or leave it unset for indefinite validity.
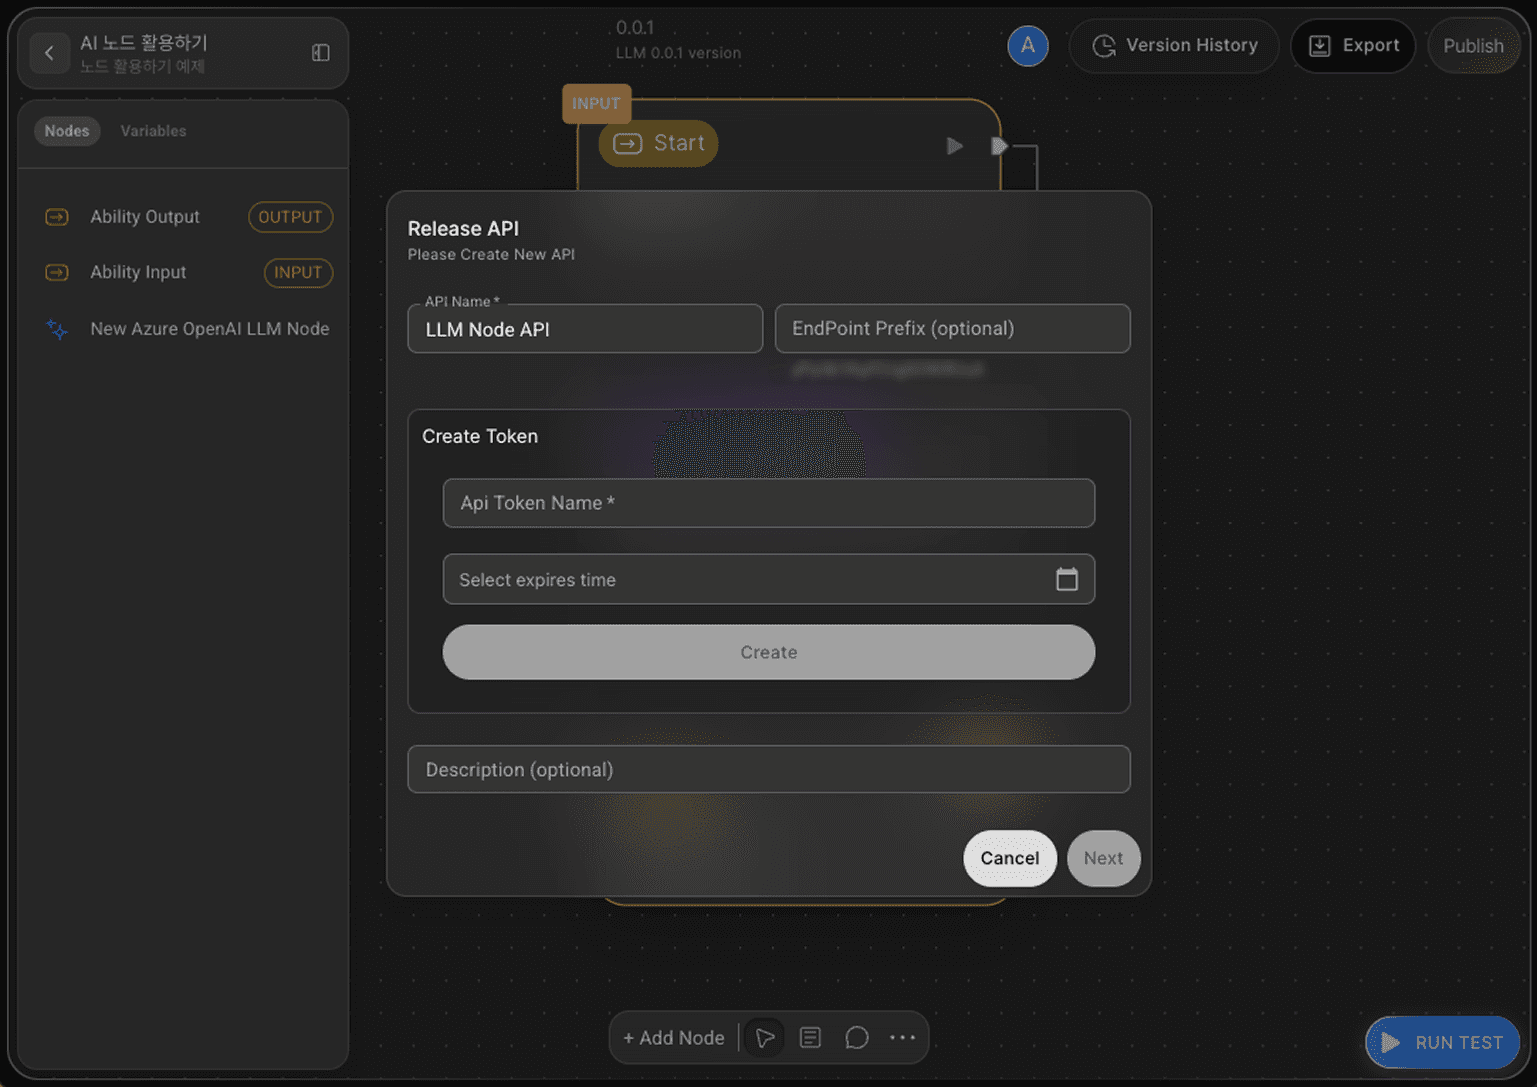
Step 3: Creating and Storing the API Key (Important)
Click Create to generate an API key.
Be sure to store the API key information from the pop-up window in a secure location.
Once the pop-up is closed, the key cannot be viewed again, and you will need to reissue it.

Step 4: Creating a Version
For API deployment, you must select a version.
You may either choose an existing version or click +Create Release to create a new one.
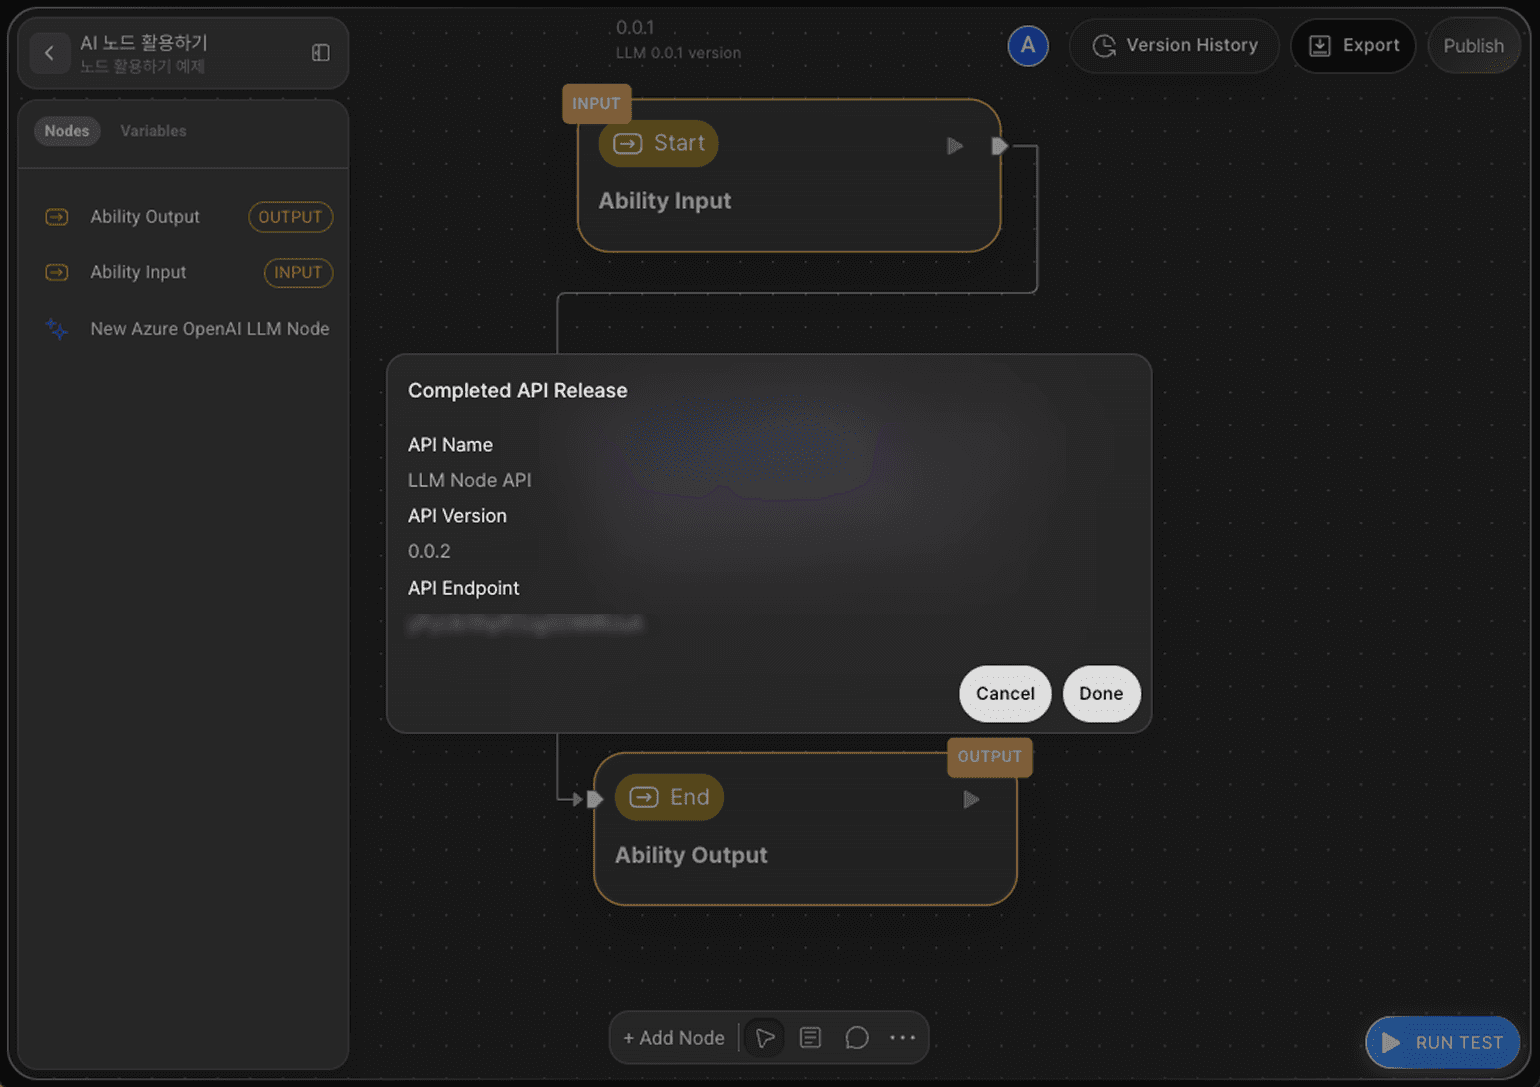
Step 5: Reviewing API Information
After the API deployment is complete, you can review the details.
If you wish to revisit this information later, open the API Usage tab in the project sidebar.