Get Started
Learning to Use Nodes — Merge Node
This tutorial walks you through the Merge node in Agentria. The Merge node waits for data to arrive from all connected paths before continuing the workflow. Selected variables are merged into an array ([]) and passed to the next node.
In this tutorial, you will build a "Data Merge" workflow that processes two strings a and b through separate Python nodes, then merges the results into a single array using the Merge node. This tutorial also covers how to use the AI Code Generator in a Python node.
Before You Begin
For instructions on how to enter the Agentria Canvas, refer to the 🔗3-Step Core Guide.
After completing this tutorial, you will be able to:
Merge variables from multiple paths into an array using the Merge node.
Use the AI Code Generator to automatically generate code in a Python node.
Declare individual output variables by index from a merged array in the End Node.
Workflow Overview
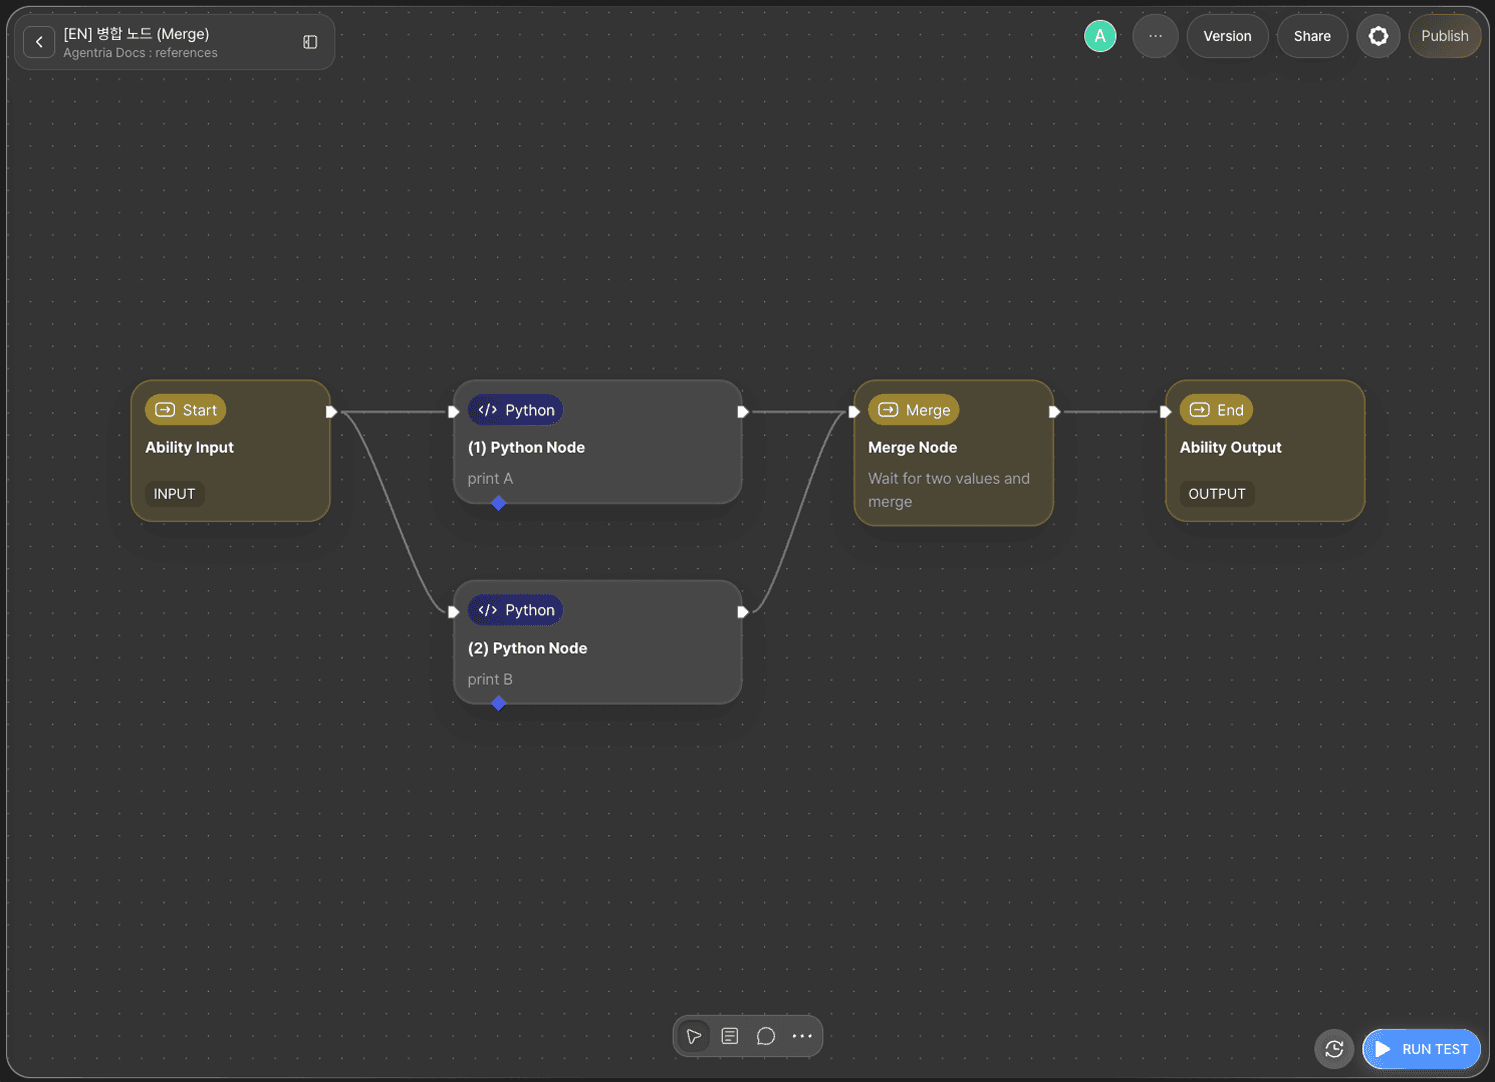
The core of this tutorial is the Merge node.
The flow splits from the Start Node into two paths, each processed by a separate Python node. The Merge node waits until both paths finish processing, then combines the results into a single array and passes it to the End Node.
Step 1: Create an Ability

Create a new Ability on the Agentria Canvas.
Step 2: Arrange and Connect the Workflow
Add the following nodes to the Canvas and arrange them as shown in the image.
Python node × 2: Click
+Add Node→ select from theCodecategory.Merge node × 1: Click
+Add Node→ select from theFlow Controlcategory.
Once arranged, connect the edges in the following order.
Out-Pin of Start Node → In-Pin of Python node A
Out-Pin of Start Node → In-Pin of Python node B
Out-Pin of Python node A → In-Pin of Merge node
Out-Pin of Python node B → In-Pin of Merge node
Out-Pin of Merge node → In-Pin of End Node
The Out-Pin of the Start Node can connect to multiple nodes simultaneously. The In-Pin of the Merge node accepts connections from both Python nodes.
Step 3: Configure the Start Node
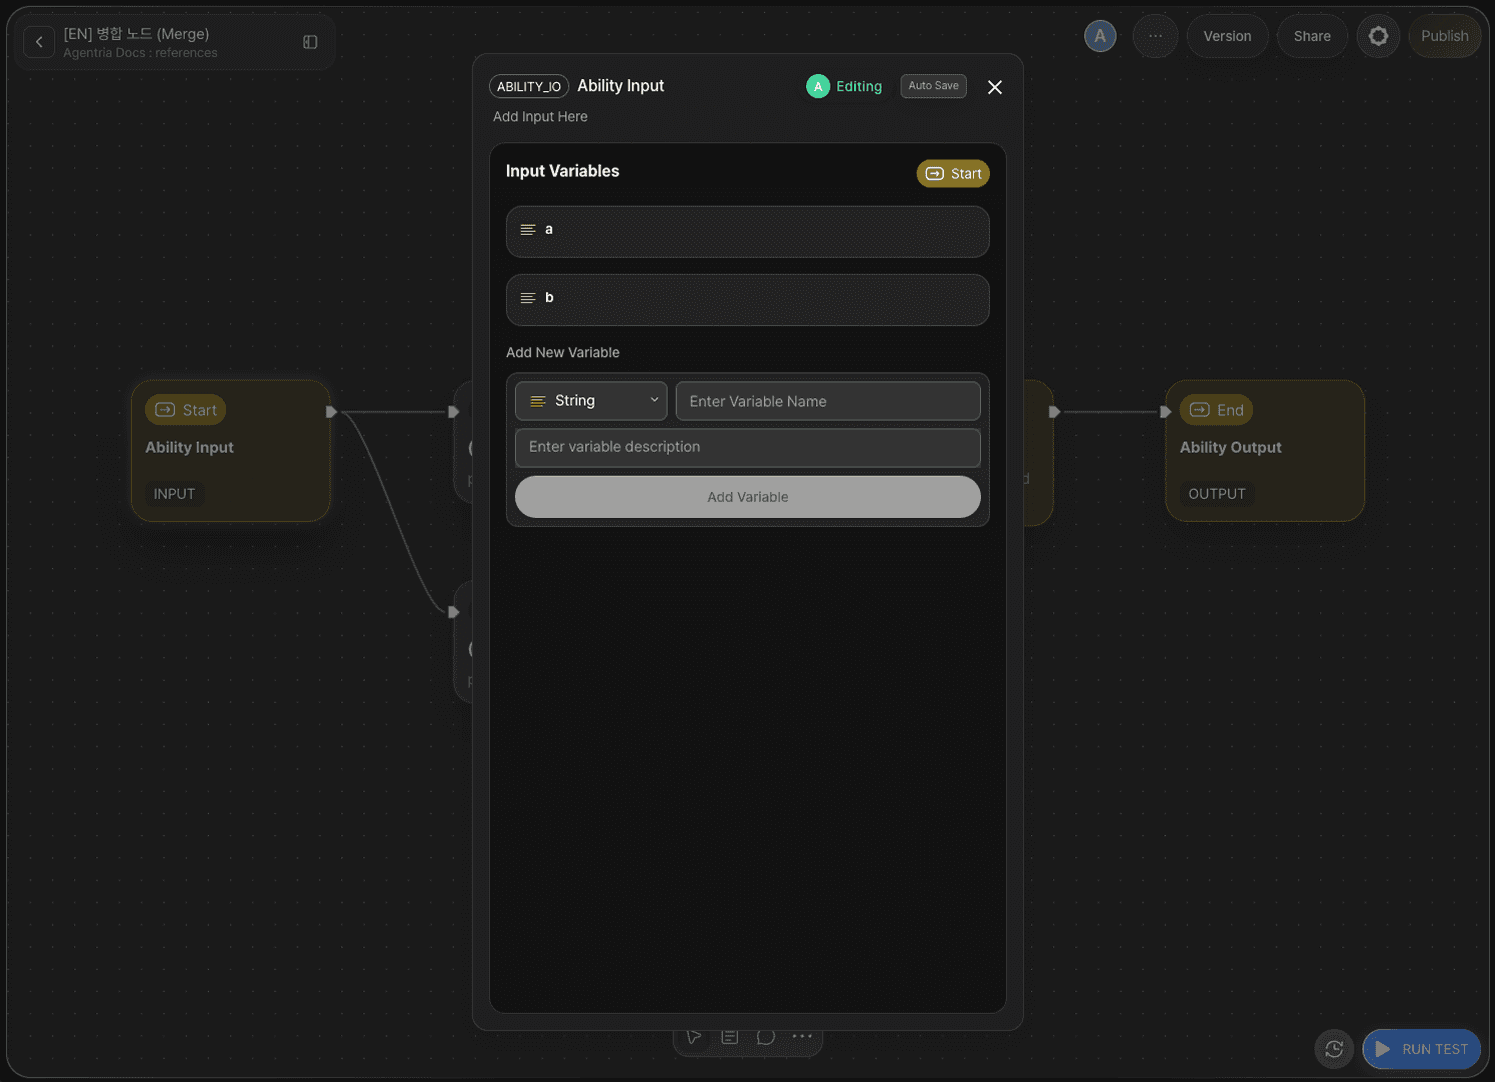
Double-click the Start Node to open the Node Editor.
Add the following variables in the Input Section.
Variable | Type |
|---|---|
| String |
| String |
Step 4: Python Node A — Enter the AI Code Generator
Double-click Python node A to open the Node Editor.
Add a (String) in the Input Section and drag and drop a from the Start Node to connect it.
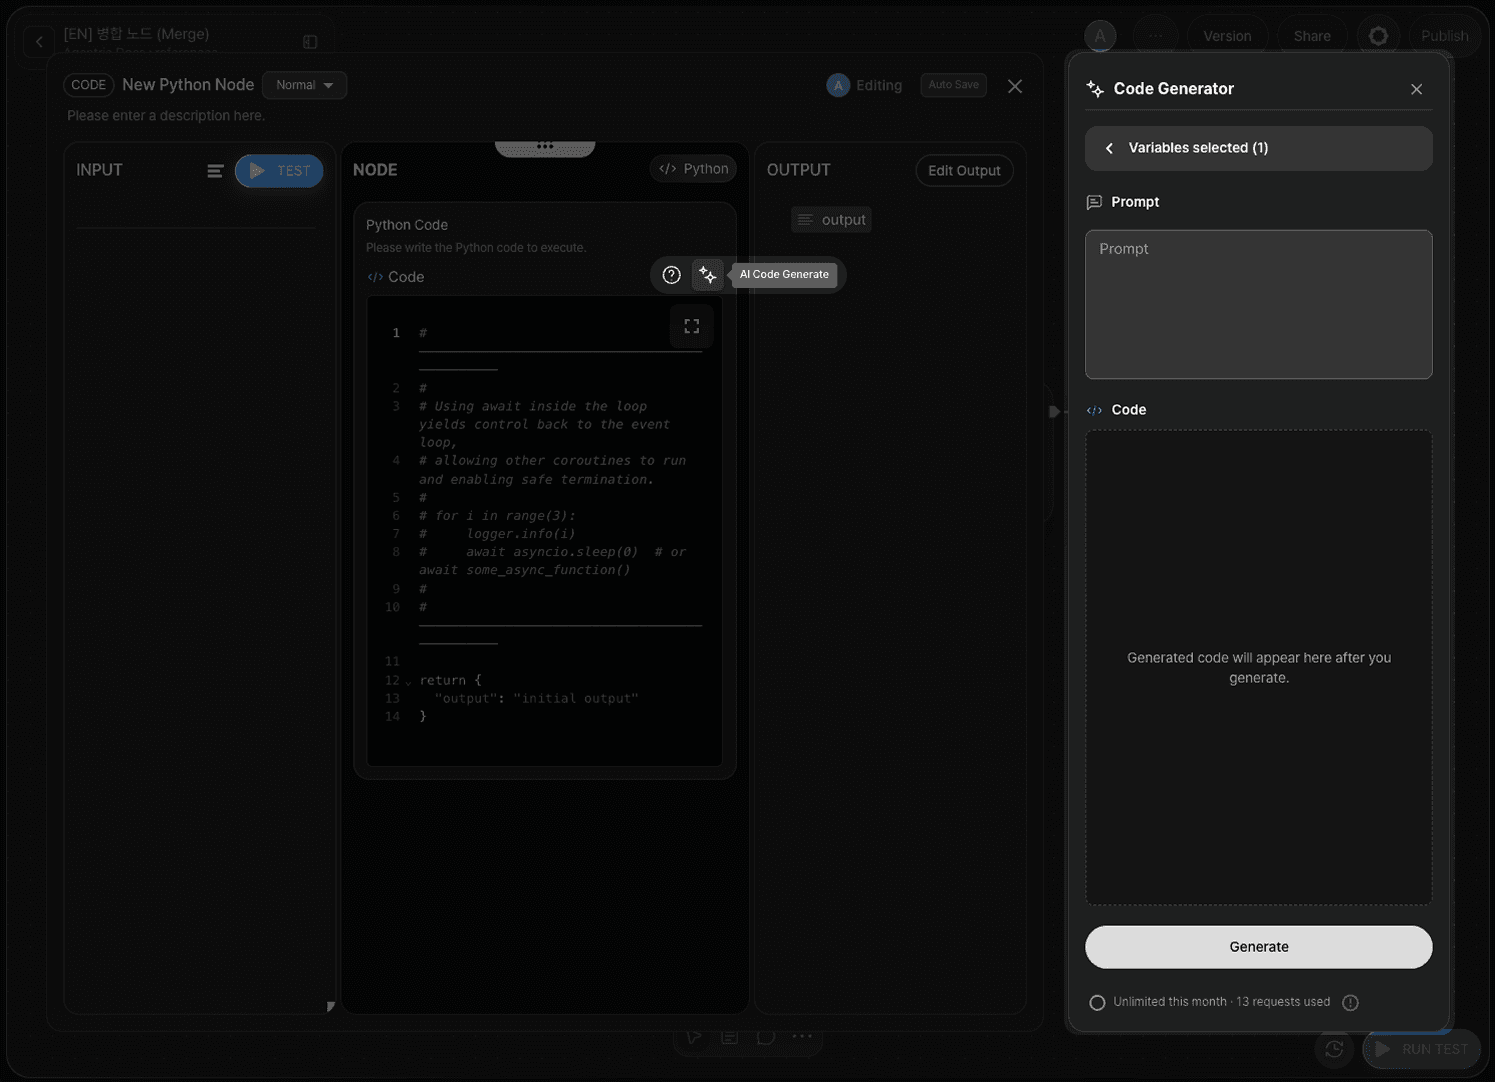
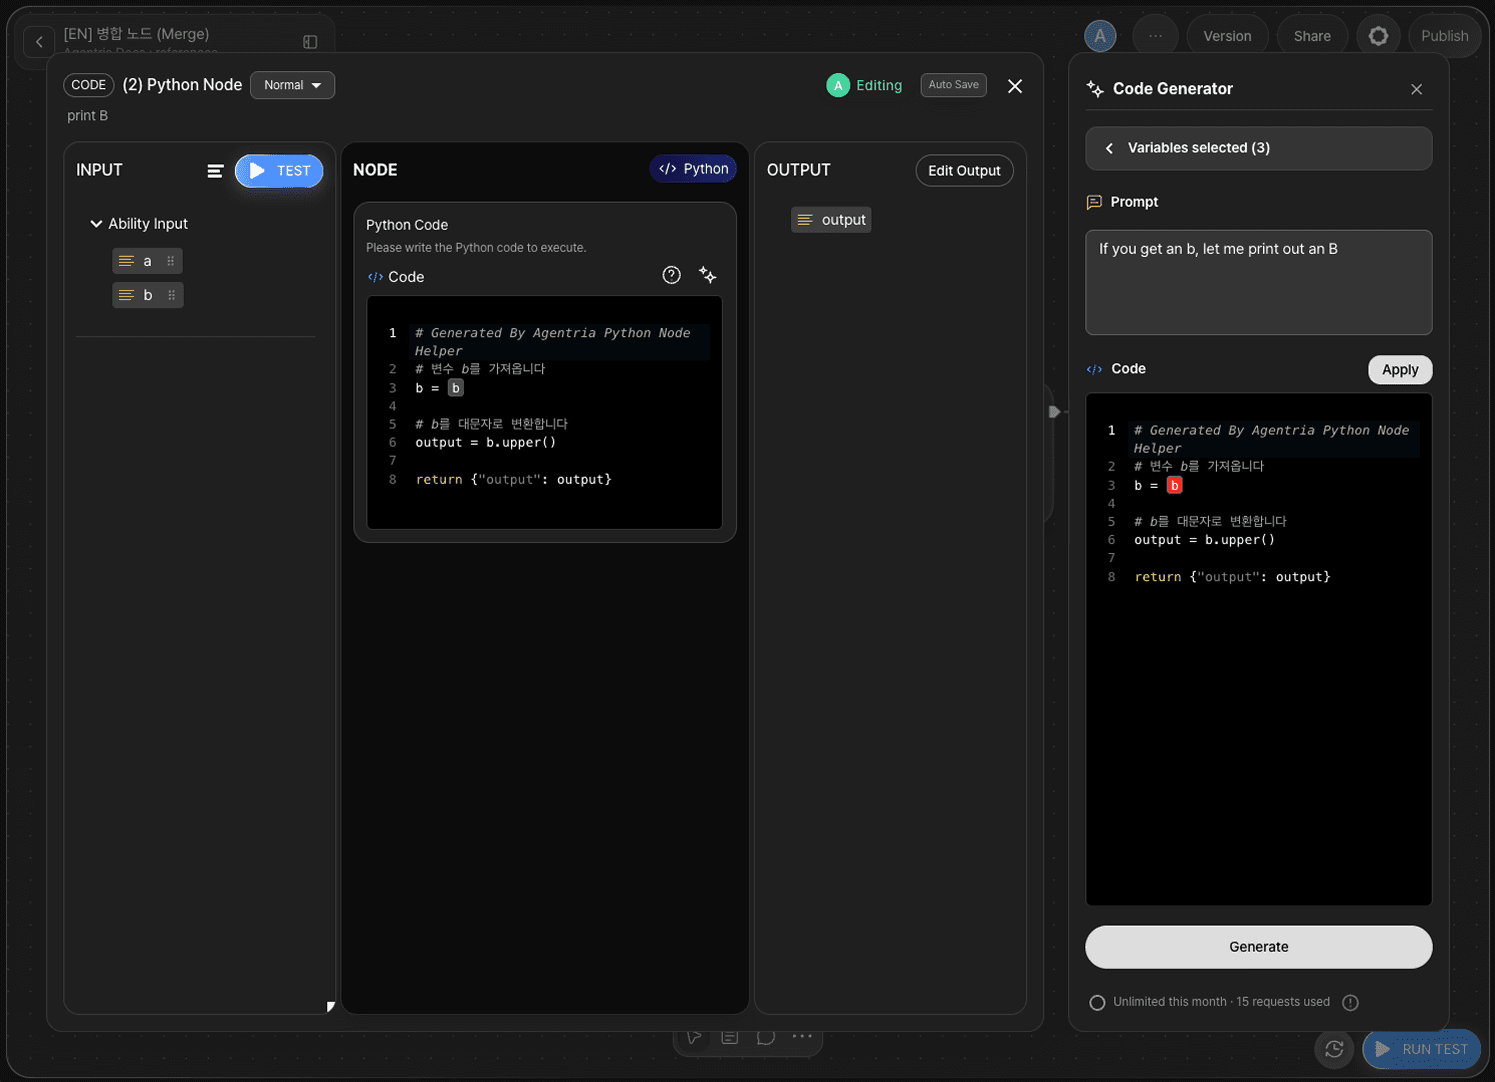
Click the icon at the top of the Edit Section to open the AI Code Generator. You can either write code directly or use the AI Code Generator to auto-generate it.
Step 5: Python Node A — Generate and Apply Code
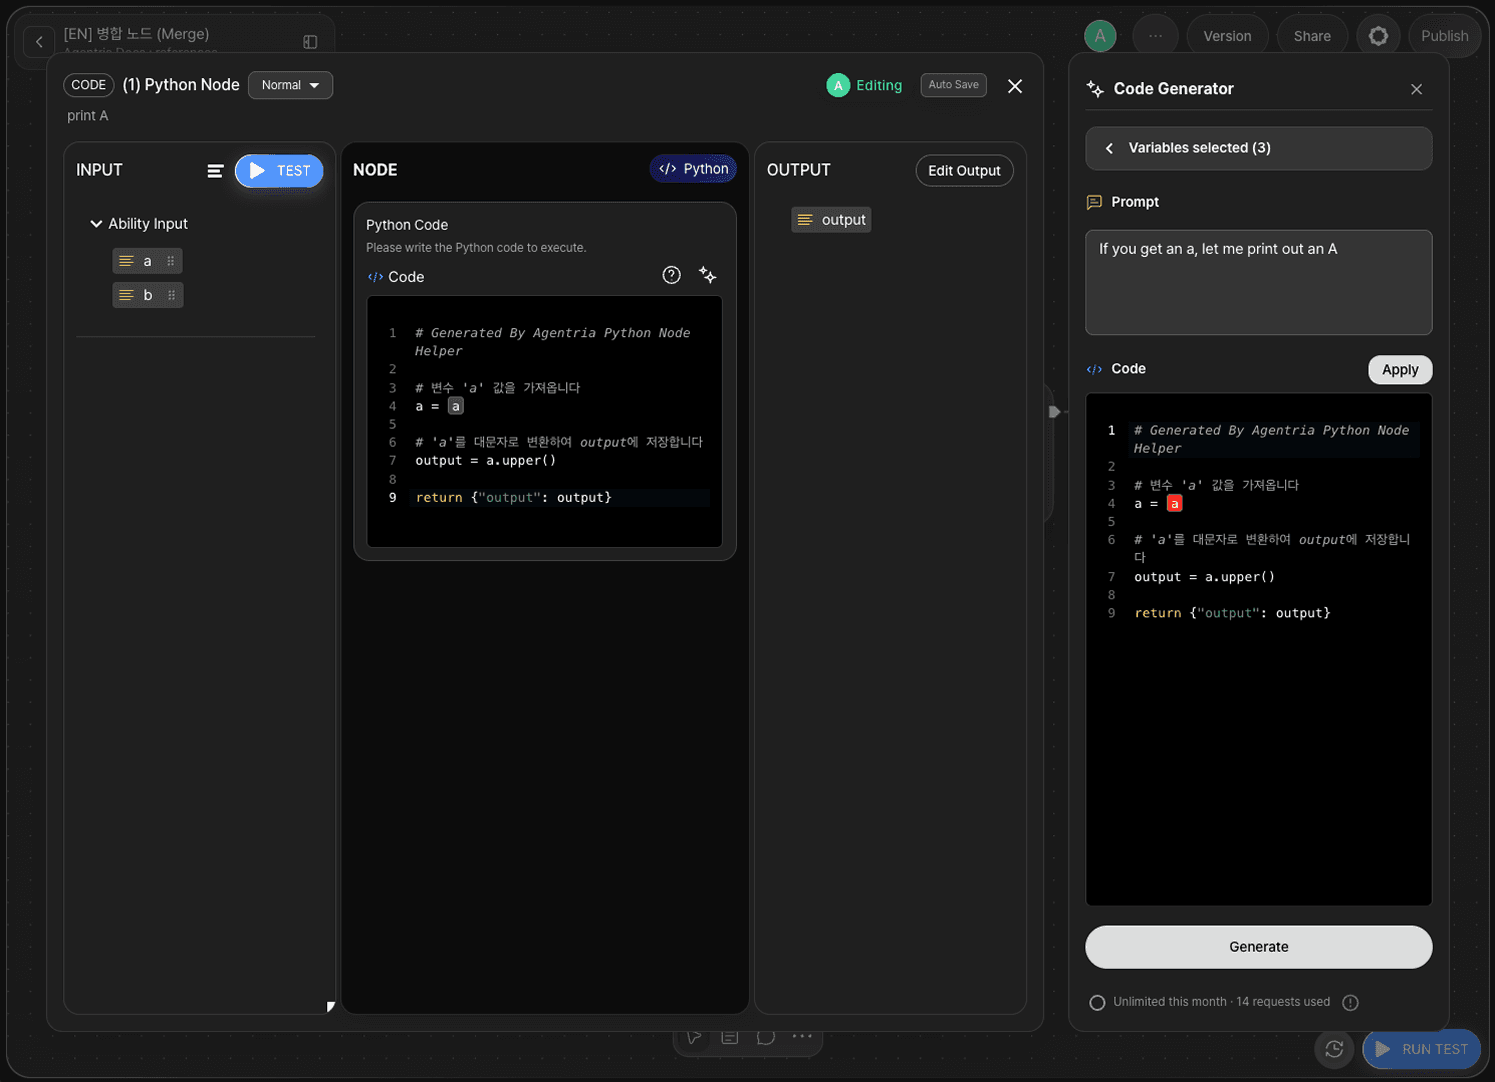
Enter a prompt describing the desired behavior in the AI Code Generator field, then click Generate.
In this tutorial, generate code that capitalizes the first letter of a lowercase string.
Once the code is generated, click Apply to apply it to the node.
Check that an output variable is automatically added to the Output Section. If not, manually add result (String).
Step 6: Python Node B — Generate and Apply Code
Double-click Python node B to open the Node Editor.
Add b (String) in the Input Section and drag and drop b from the Start Node to connect it.
Follow the same steps as Steps 4–5. This time, use variable b.
Click Apply to apply to the node and confirm that result (String) appears in the Output Section.
Step 7: Configure the Merge Node
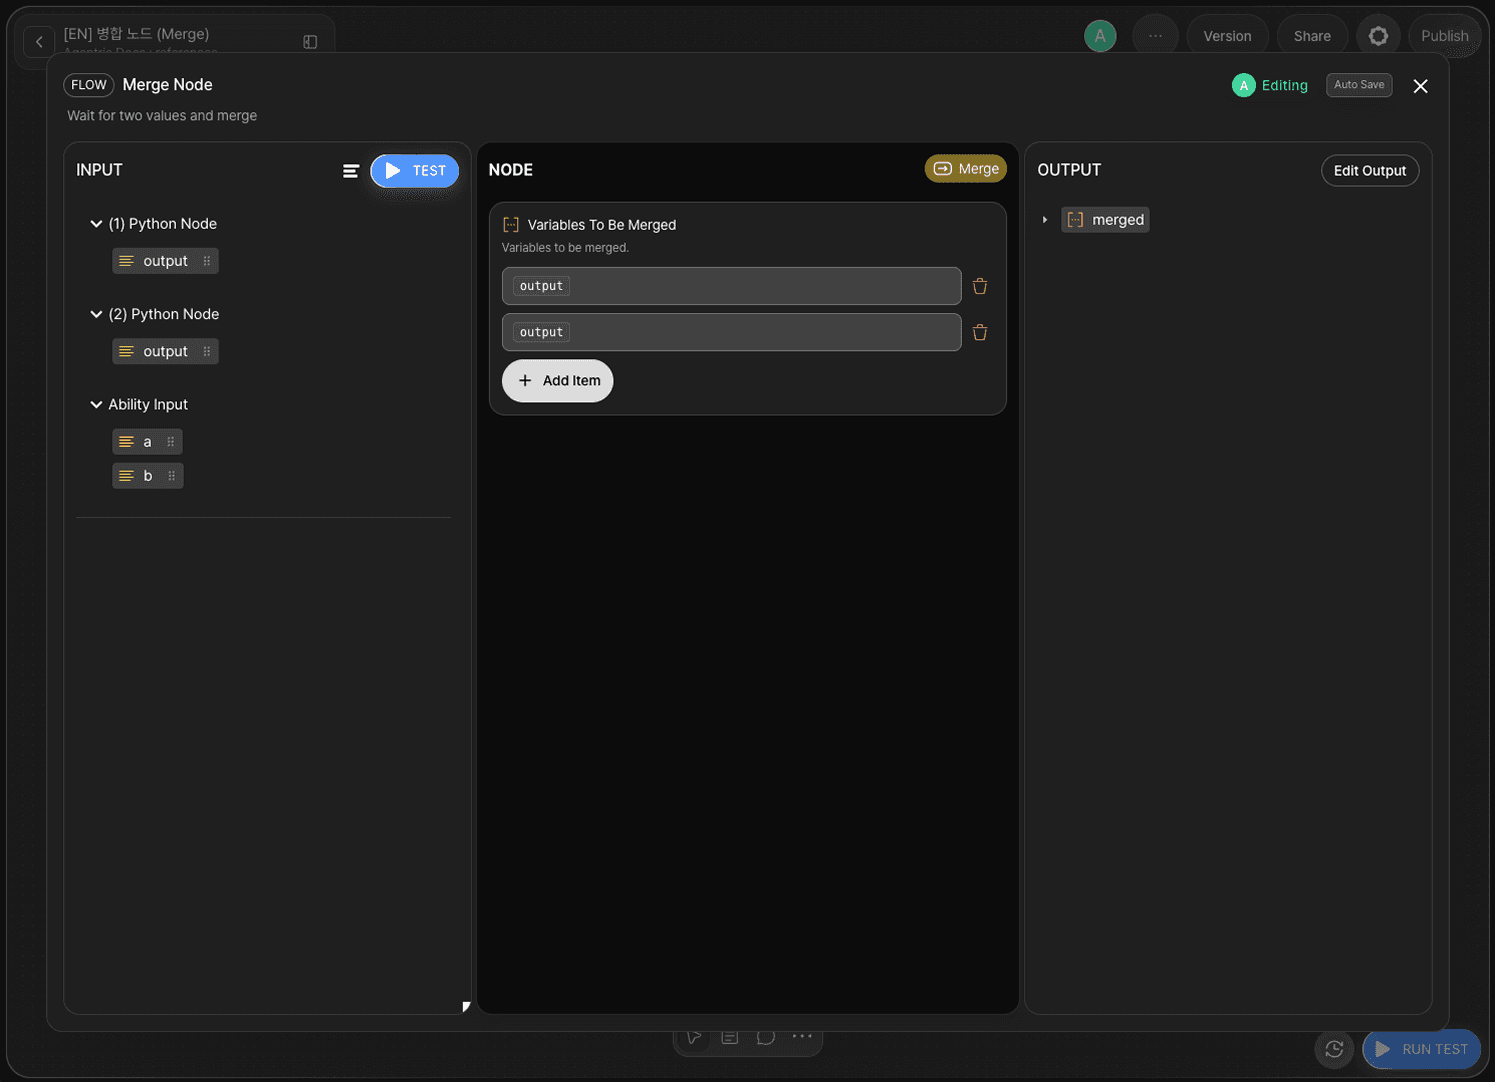
Double-click the Merge node to open the Node Editor.
Click Add Item to add 2 rows. Drag and drop variables into each row as follows.
Row | Variable to connect |
|---|---|
Row 1 |
|
Row 2 |
|
Once configured, the two result values are merged into an array ([]) and output as the merged variable.
Step 8: Configure the End Node
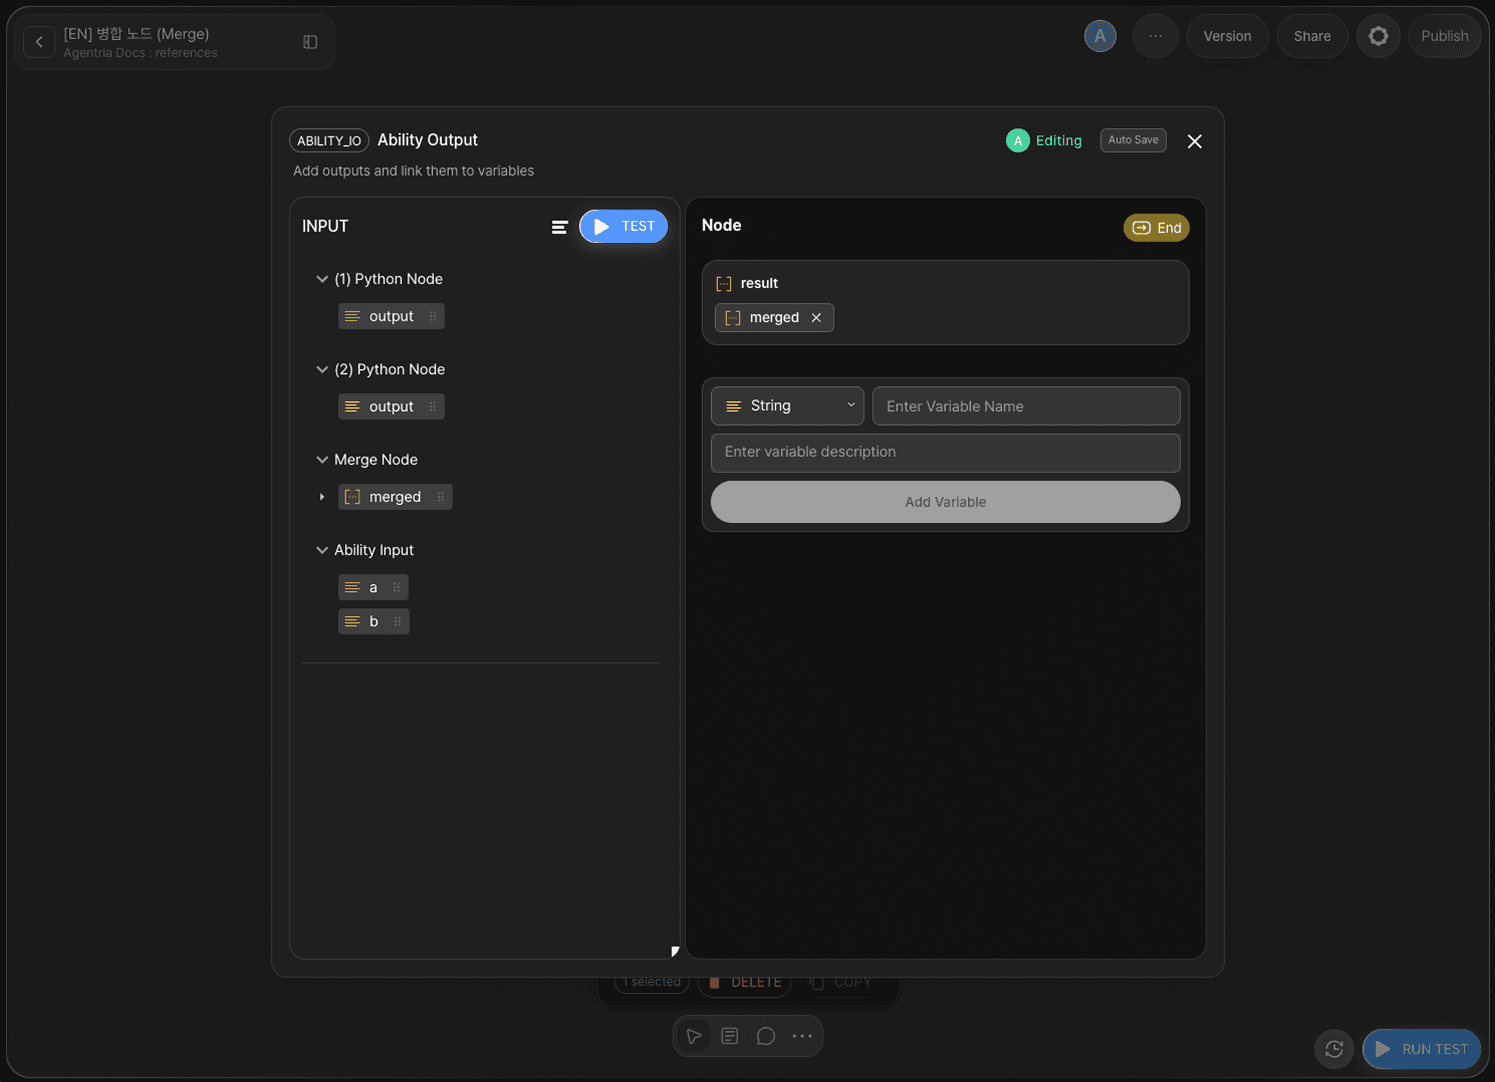
Double-click the End Node to open the Node Editor.
Add the following variable in the Output Section.
Variable | Type |
|---|---|
| Array |
Drag and drop merged from the Merge node to bind it to result.
Step 9: Run the Ability Test
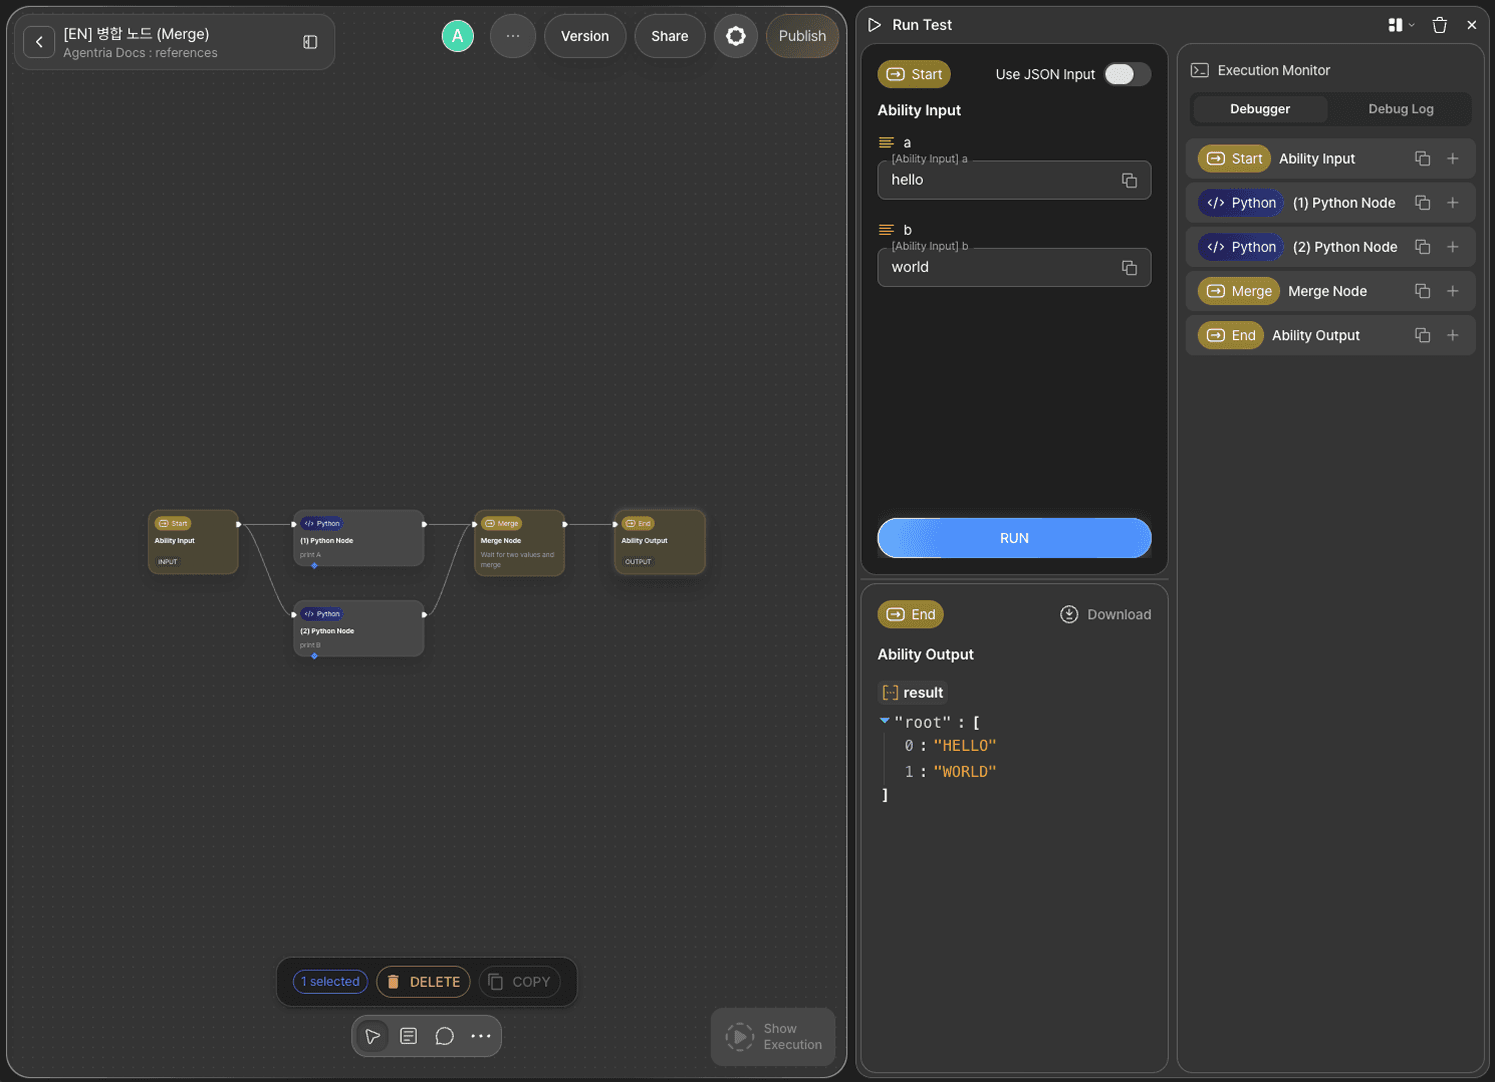
Click the Run Test button in the bottom-right corner of the Canvas. Proceed through Run Test → Run Test to open the input panel.
Enter hello for a and world for b, then click Run.
Once Python node A and B each finish processing, the Merge node combines the two results.
Path | Input | Processing | Output |
|---|---|---|---|
Python node A |
| capitalize |
|
Python node B |
| capitalize |
|
Merge node | — | merge |
|
Confirm that result: ["Hello", "World"] is returned.
Step 10: Review Execution Results
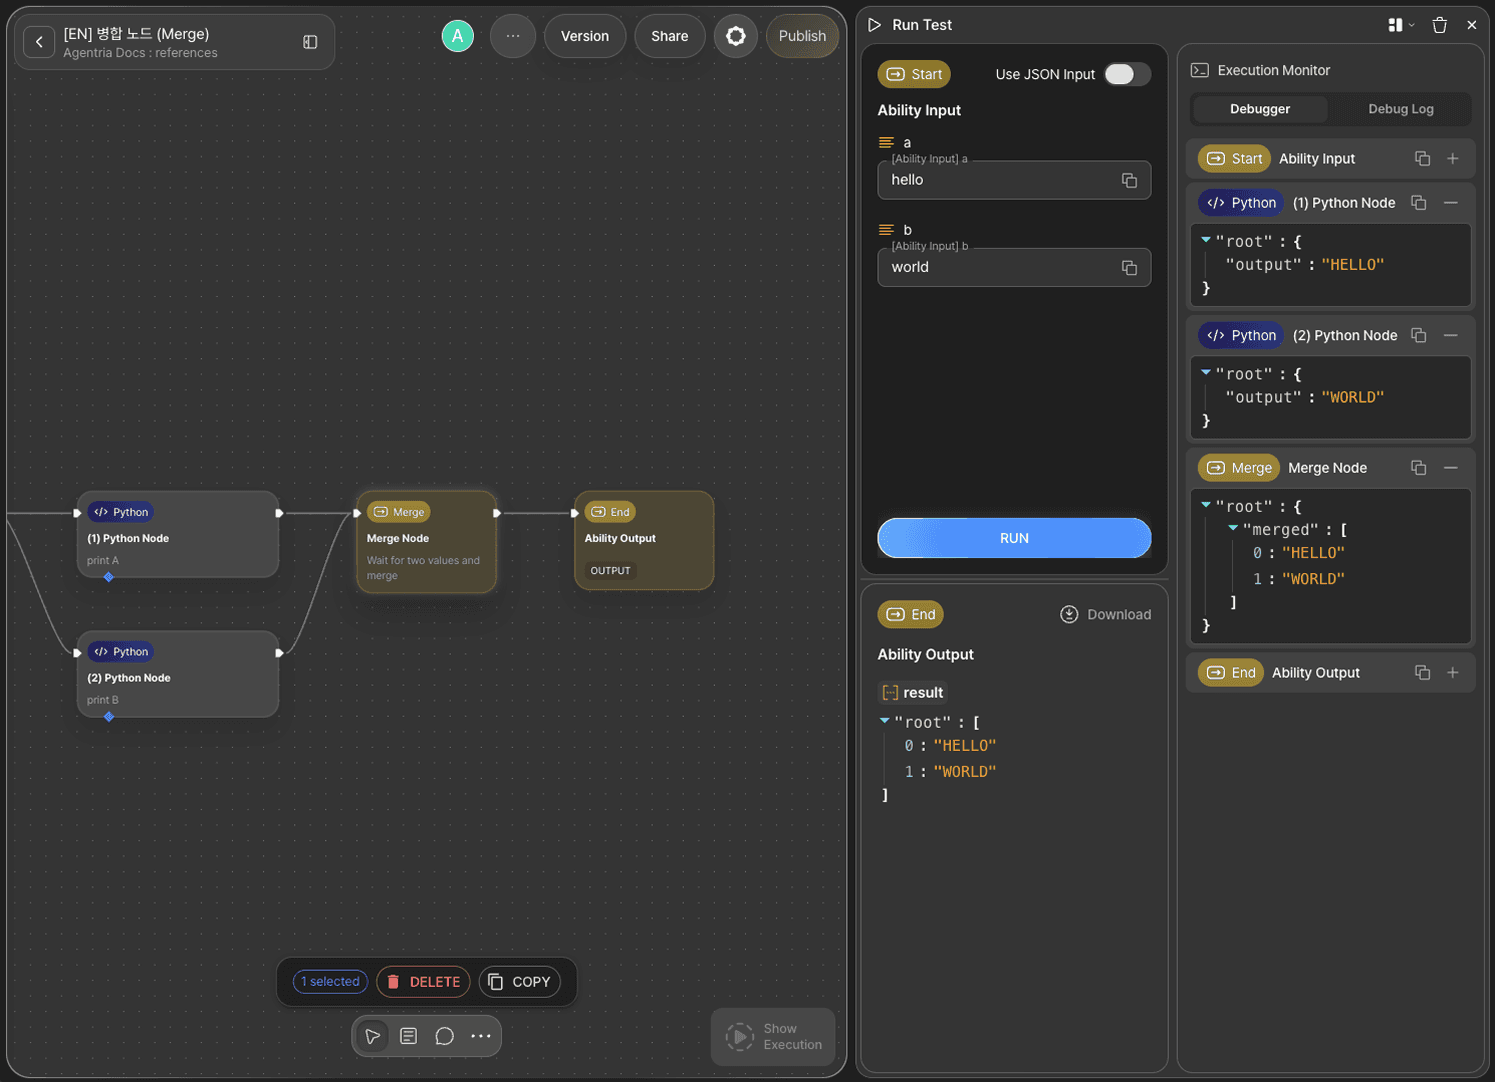
In the Execution Monitor panel of the test window, review the step-by-step execution results of each node.
Step 11: Declare Array Index Outputs
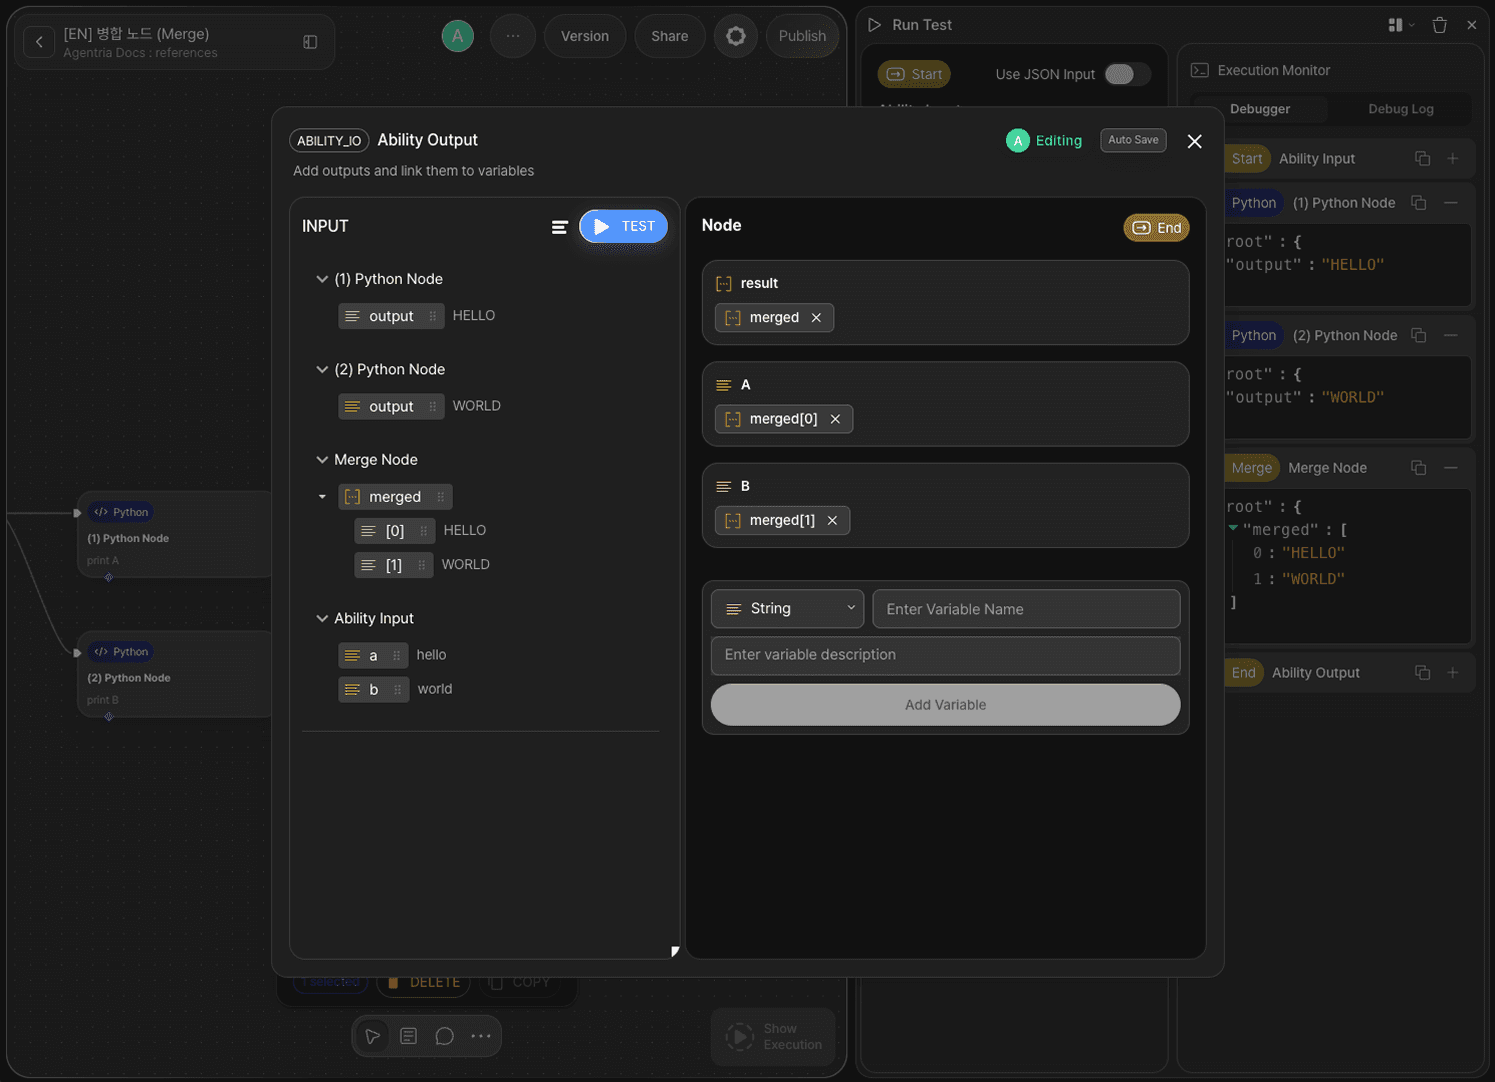
After the first test run, the merged array values become visible in the End Node editor.
Declare individual output variables by index to extract each value separately.
Variable | Value |
|---|---|
|
|
|
|
Step 12: Review Final Results

The final results display the merged array along with each individual indexed value from every path.
Next Steps
🎉 Congratulations! You've successfully built the "Data Merge" workflow using Agentria.
Try adding more Python nodes to create additional parallel paths, or connect the merged array to an AI model node or another Python node to build more advanced batch-processing workflows.
Agentria is a place where ideas become reality—your workflow can expand infinitely with your creativity.
For more Ability examples, visit the 🔗Ability Guide.
For Agent-based examples, visit the 🔗Agent Guide.