Get Started
The tutorial in the Ability Guide covers the most fundamental yet essential steps for beginners getting started with Agentria.
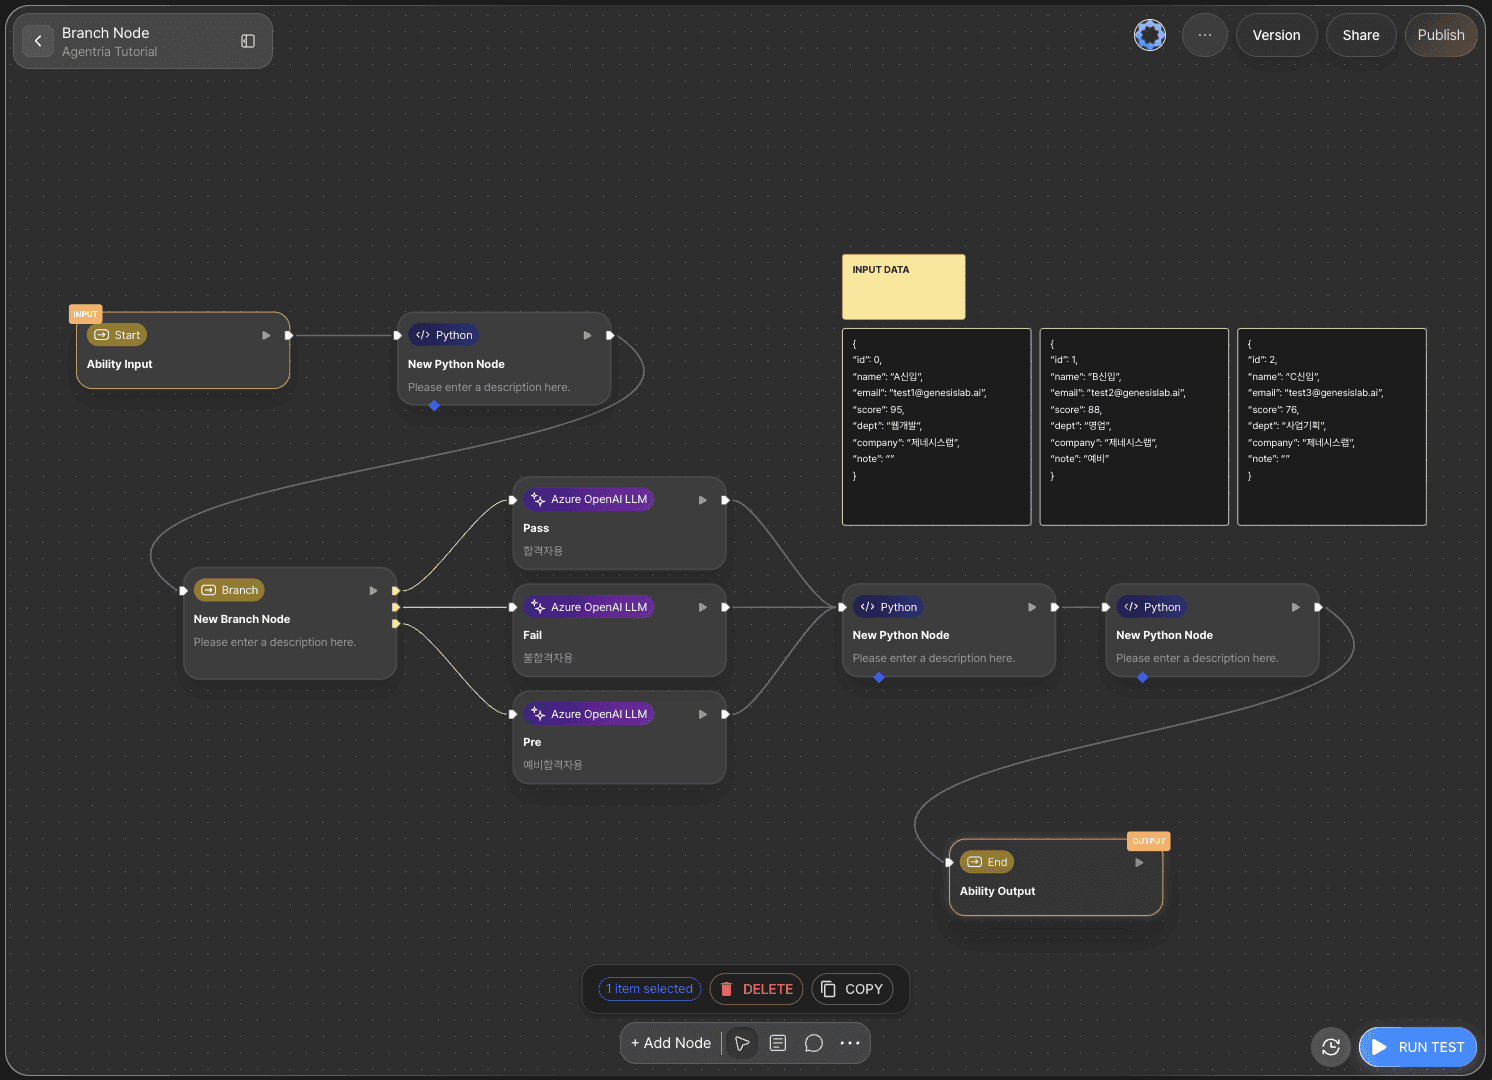
In this tutorial, you will activate a Branch node and directly create and run an Ability that generates email content using an LLM based on specific conditions.
Prerequisites
To get started, create a project in Agentria and then navigate to the Ability Canvas.
For detailed instructions on how to access the canvas, please refer to Step 1 (Project Creation and Composer Selection) in the 🔗3-Step Core Guide.
After completing this tutorial, you will be able to perform the following tasks:
Add nodes
Declare variables in the Start Node
Connect nodes
Use a Branch node
Use an LLM node
Use a Python node
Verify workflow execution results through Ability testing
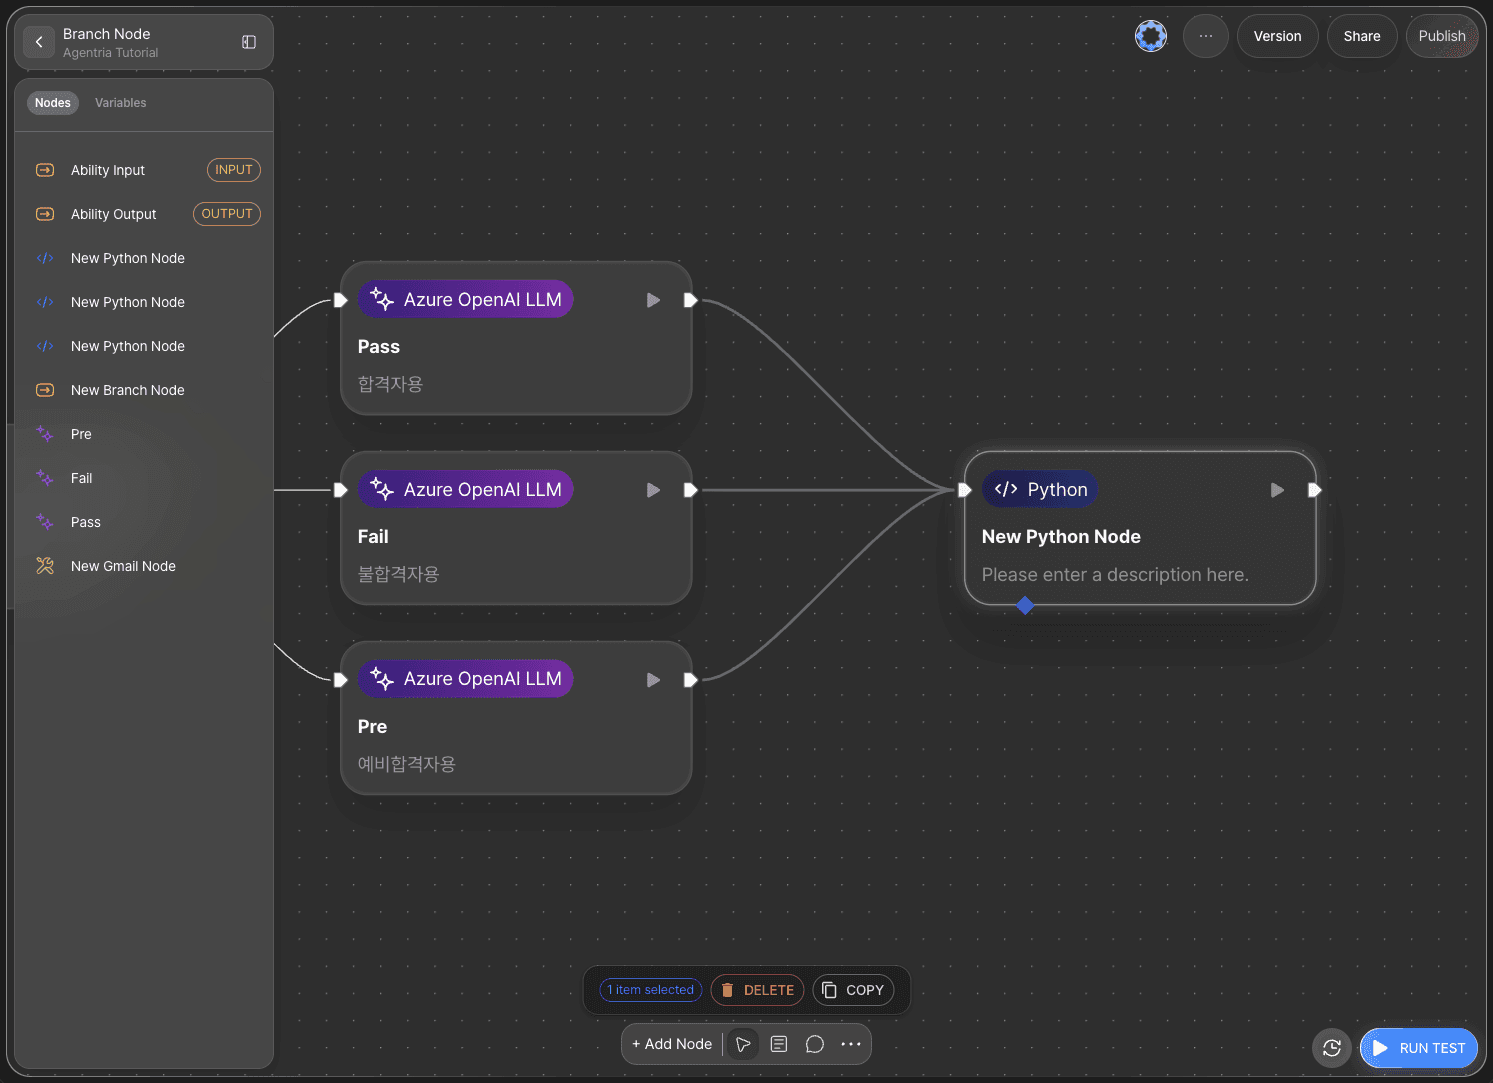
Step 1: Required Nodes
Click the +Add Node button at the bottom of the canvas, then select the required nodes from the Tools category in the sidebar and place them on the canvas using drag and drop.
Hover over a node and click the edit icon to modify the node’s name and description in the options panel.
In actual usage, nodes are added as needed. However, for the sake of clarity, this tutorial places all required nodes on the canvas at once.
Python nodes: 3
Branch nodes: 1
LLM nodes: 3
Gmail node: 1 (optional)
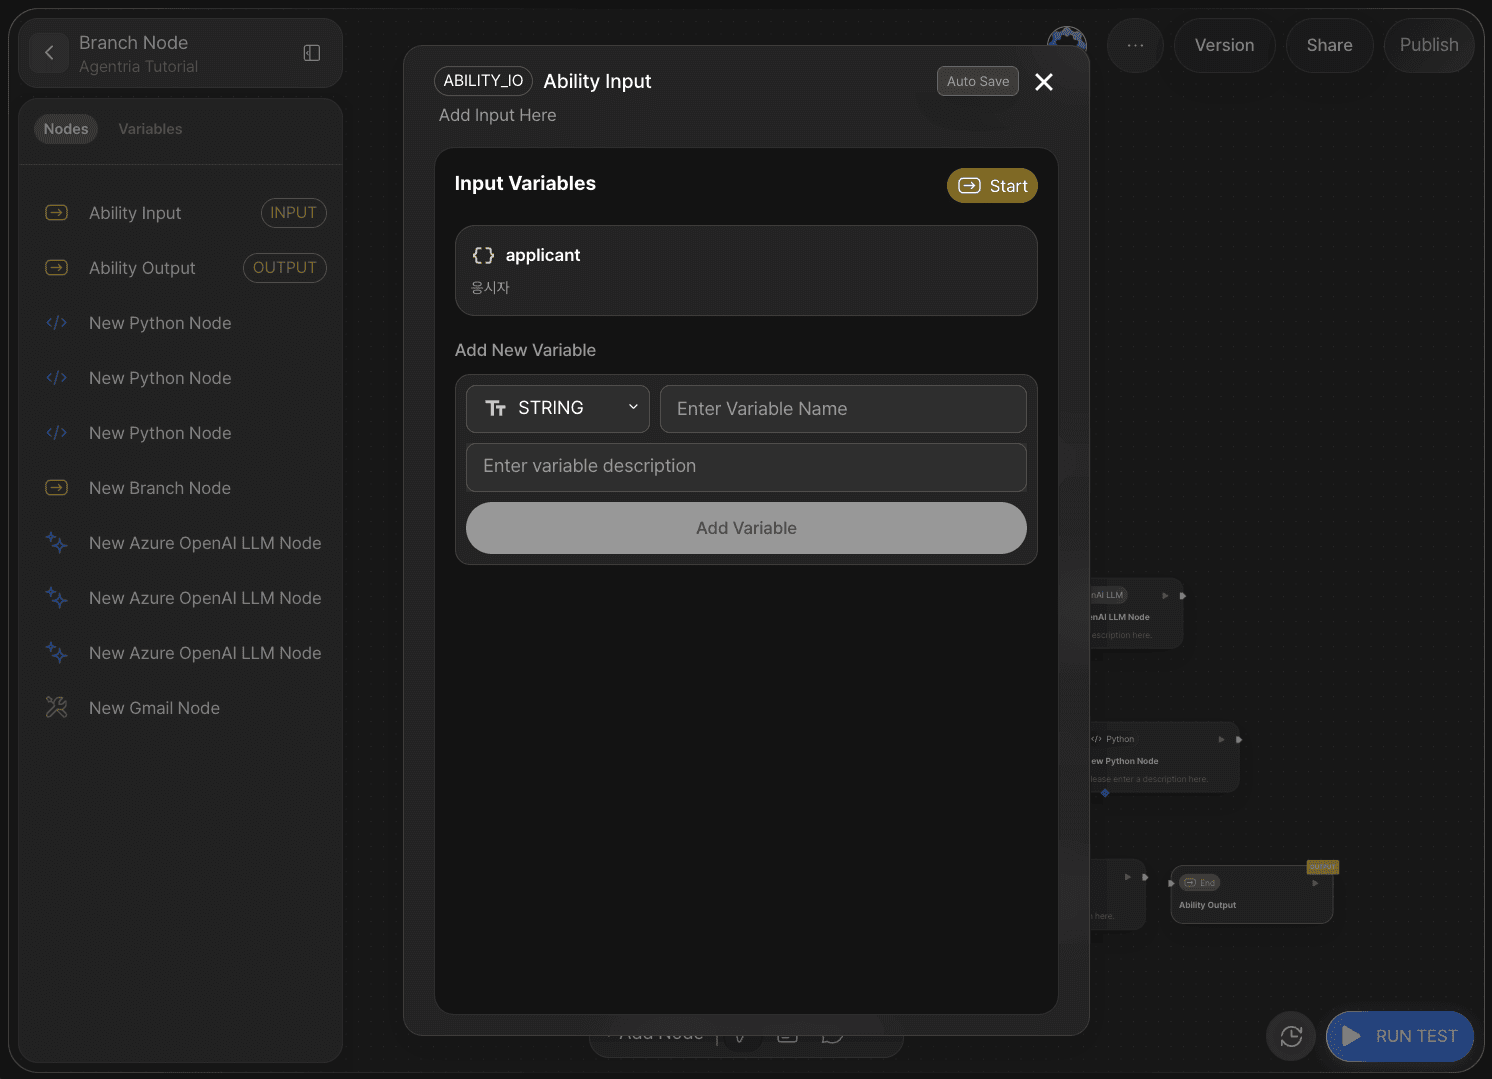
Step 2: Declaring Input Variables
On the Agentria canvas, one Start Node and one End Node are placed by default.
The Start Node initiates the entire workflow.
The End Node terminates the entire workflow.
Double-click the Start Node to open the node editor, where you can configure the data type, variable name, and description.
In this tutorial, conditions are branched based on applicant information, so set the data type to JSON and the variable name to applicant.
Then return to the canvas.
Sample Input Data
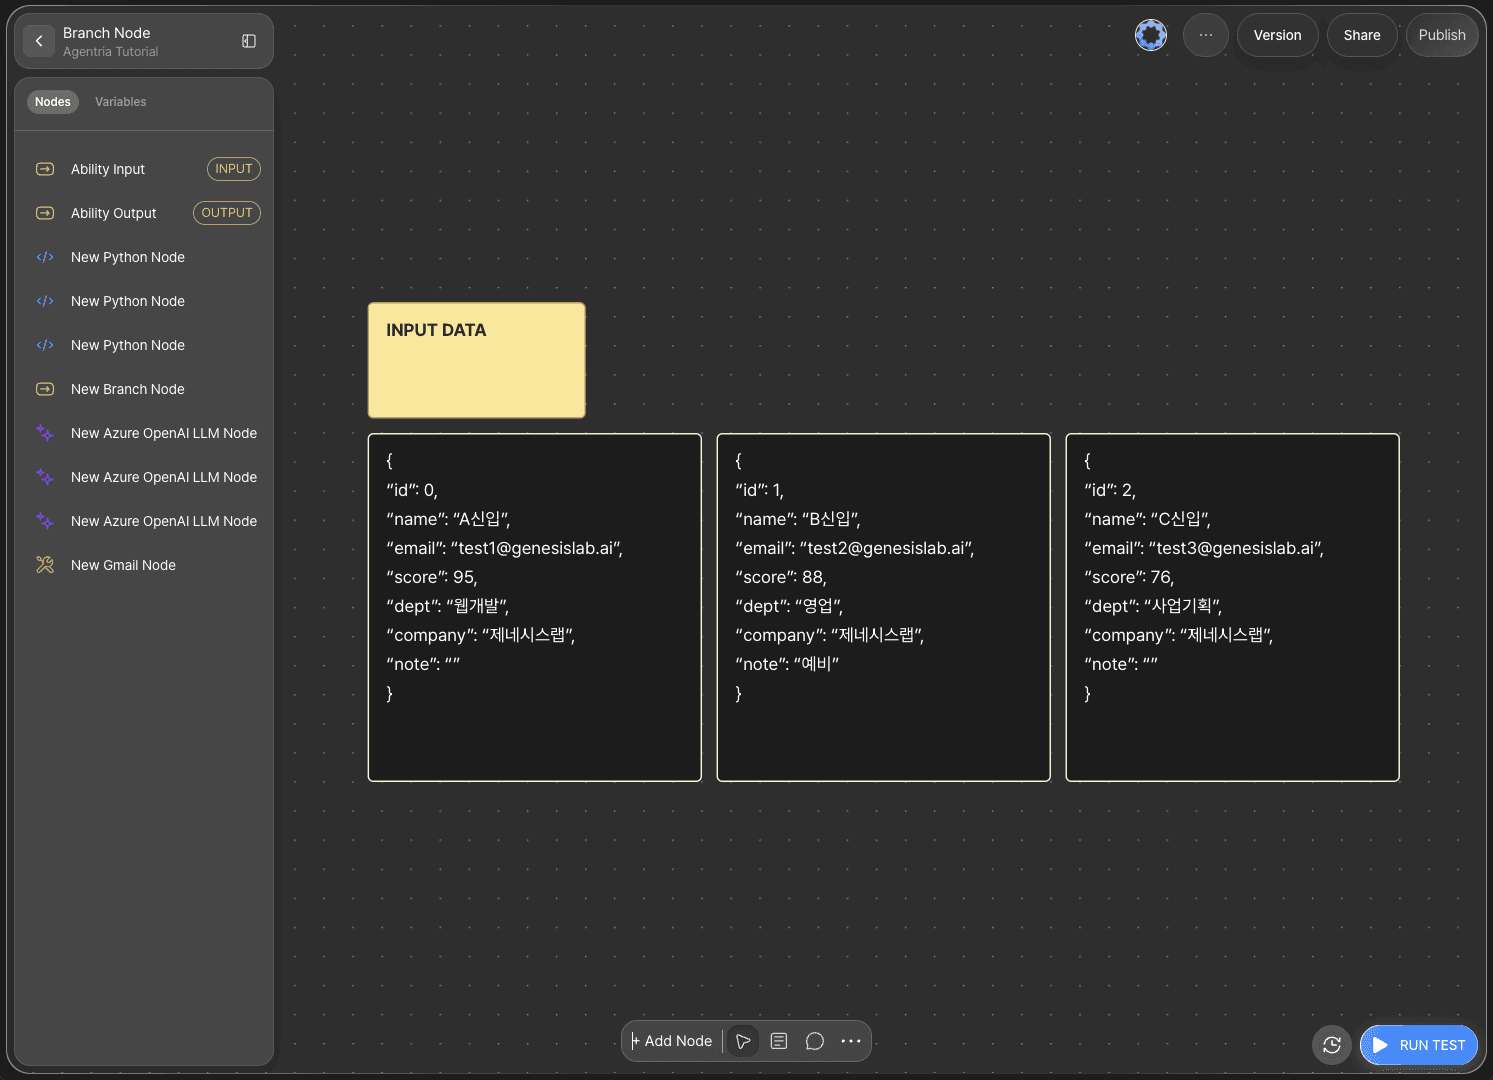
The applicant information is provided in JSON format and includes values for an ID, name, email, score, department, company, and note.
Examples are shown below.
Pass
{
Fail
{
Waitlist
{
Step 3: Connecting Nodes with Edges
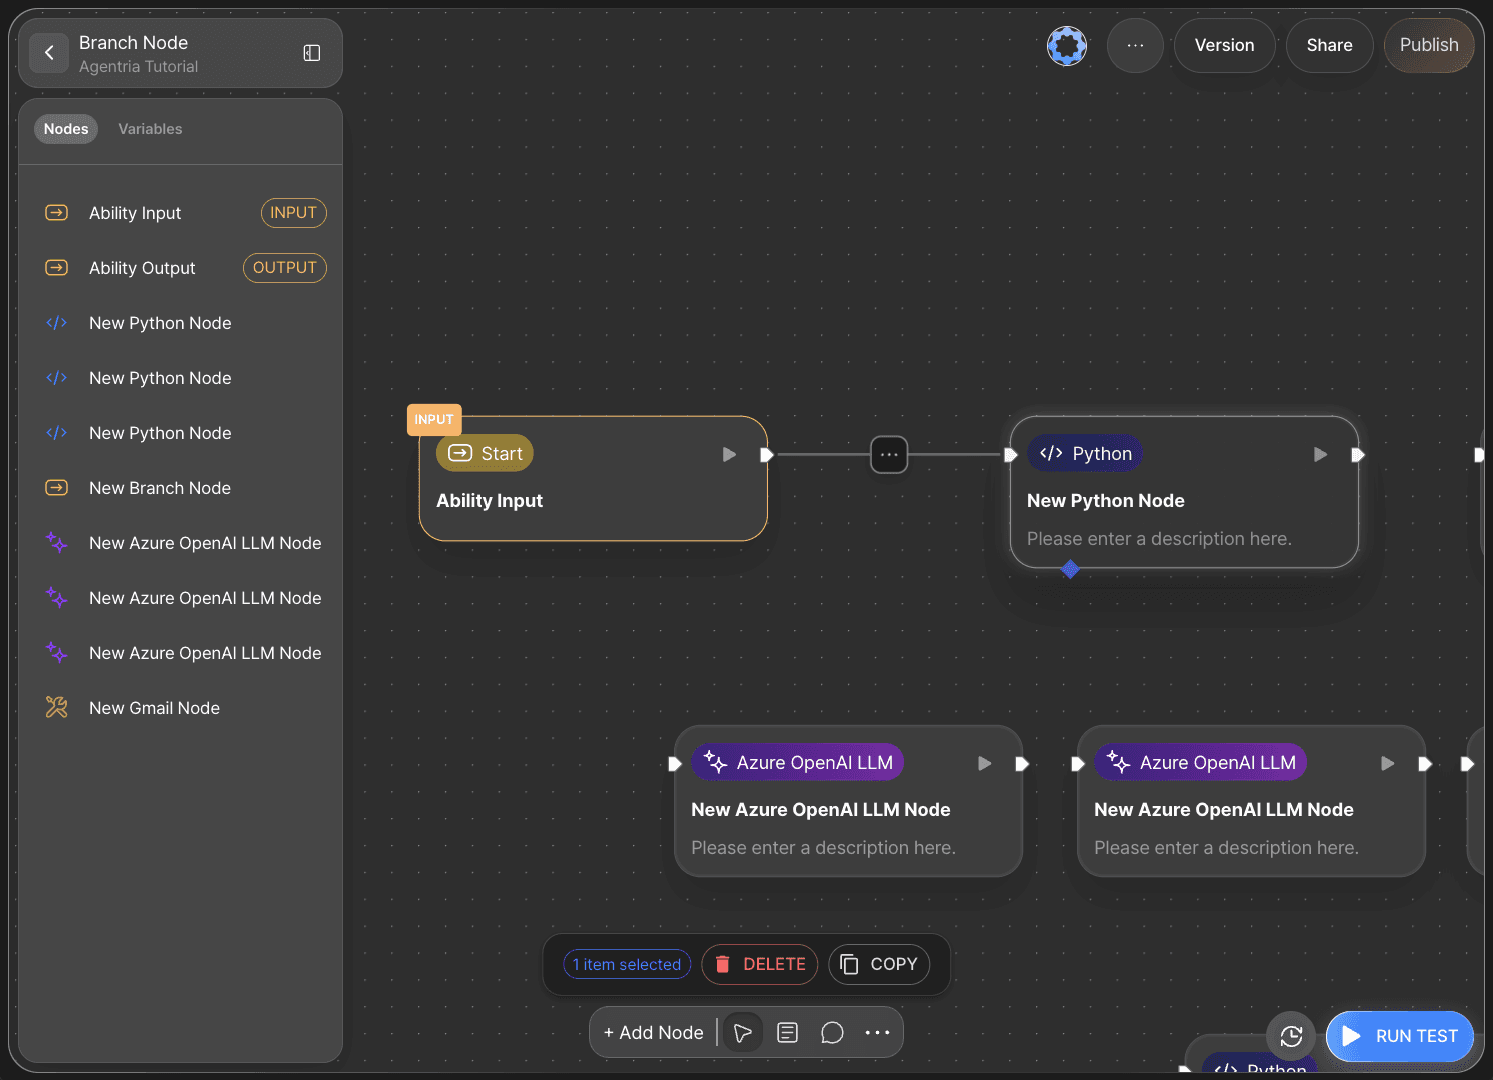
To use variables received from the Start Node in other nodes, you must connect the nodes using edges.
Connect the right Out-Pin of the Start Node to the left In-Pin of a Python node.
This allows the input values from the Start Node to be passed to the Python node.
To use subsequent nodes, you must connect them with edges to create a data flow.
Step 4: Python Node – Creating Conditions
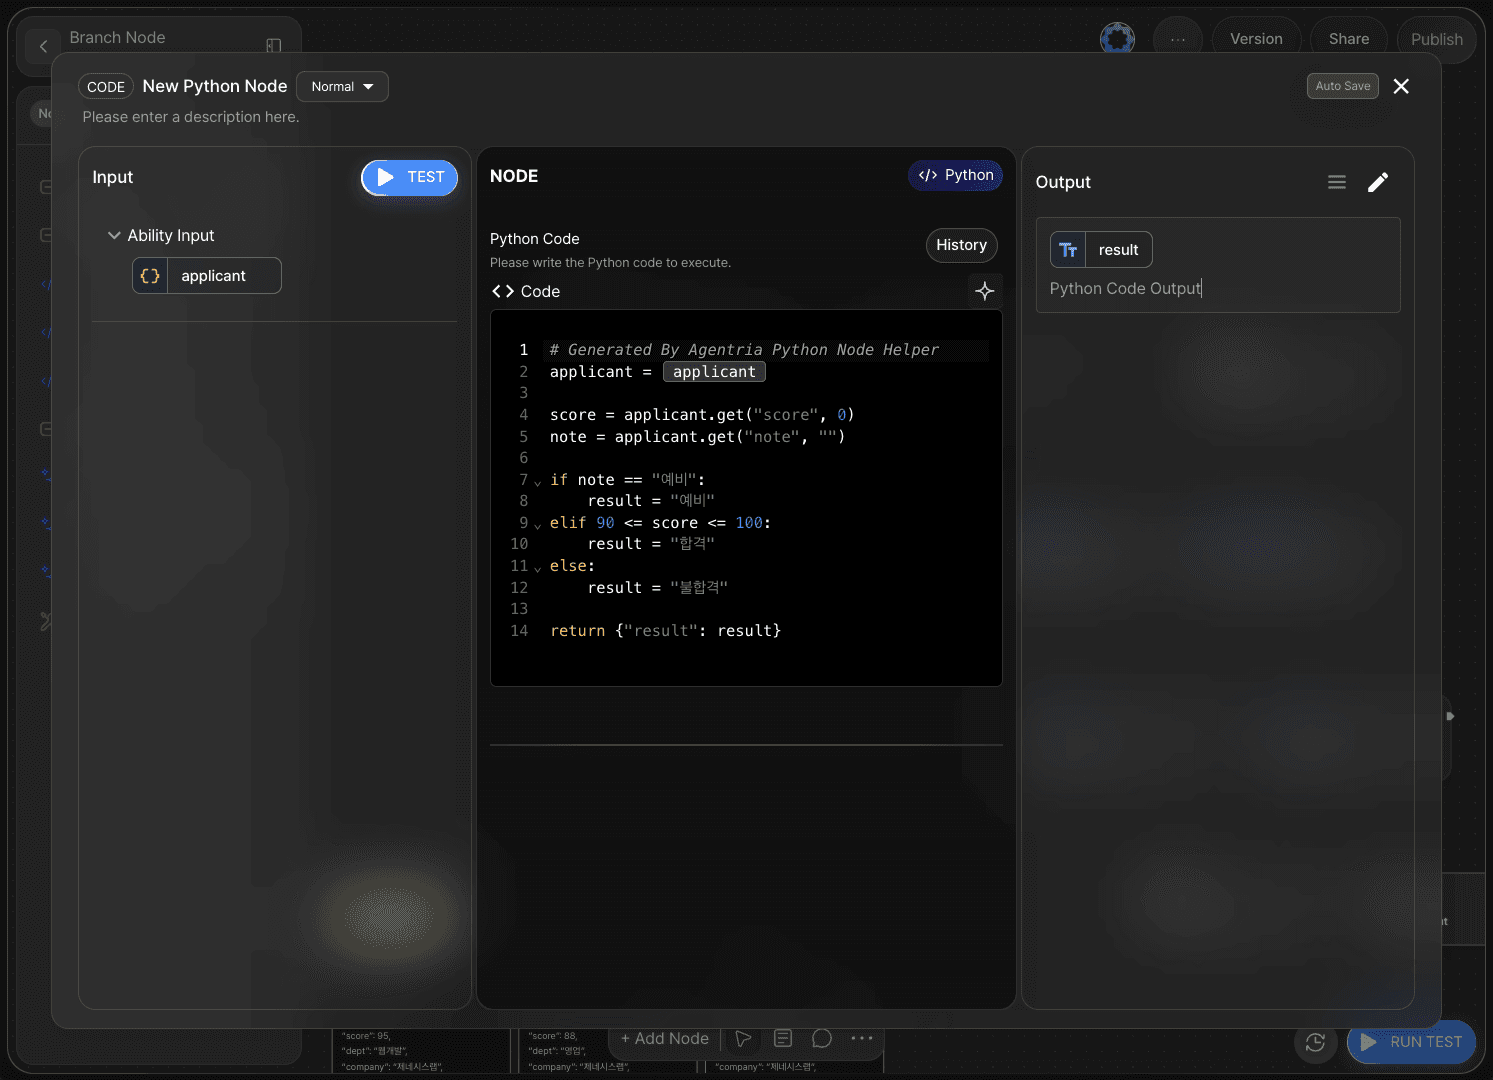
Double-click the Python node to open the node editor.
First, change the output variable name to result.
The Python node provides a Code Generator that can generate code from a simple prompt.
Example prompt:
Generate code that returns the result as 'Pass' if the score value in the applicant information is between 90 and 100, and 'Fail' if it is below 90.
Step 5: Branch Node – Conditional Routing
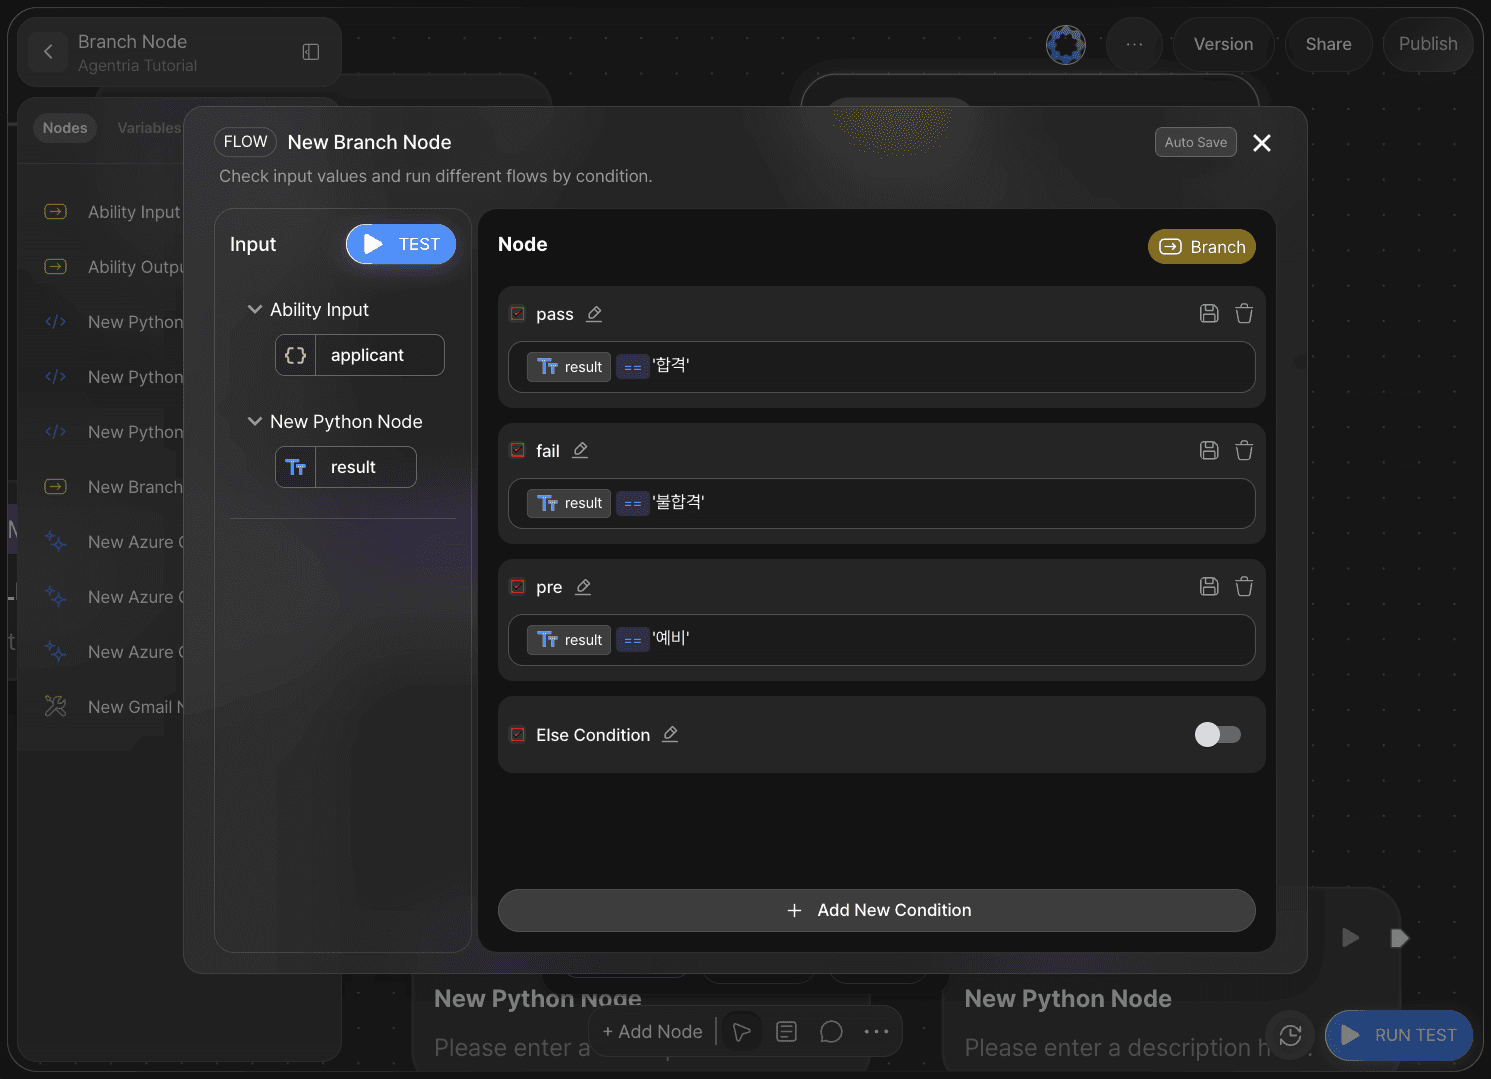
The Branch node supports conditional branching.
While conditions can also be handled through code or functions in a Python node, using a Branch node allows you to build a more intuitive workflow.
Additionally, you can easily verify execution logic during Run Test, which makes debugging easier.
The Branch node operates using condition expressions.
An Else condition can be used if needed.
In this tutorial, conditions are set as Pass, Fail, and Pre.
Renaming the condition titles makes them easier to manage.
The Else condition is not used.
result== 'Pass'result== 'Fail'result== 'Pre'
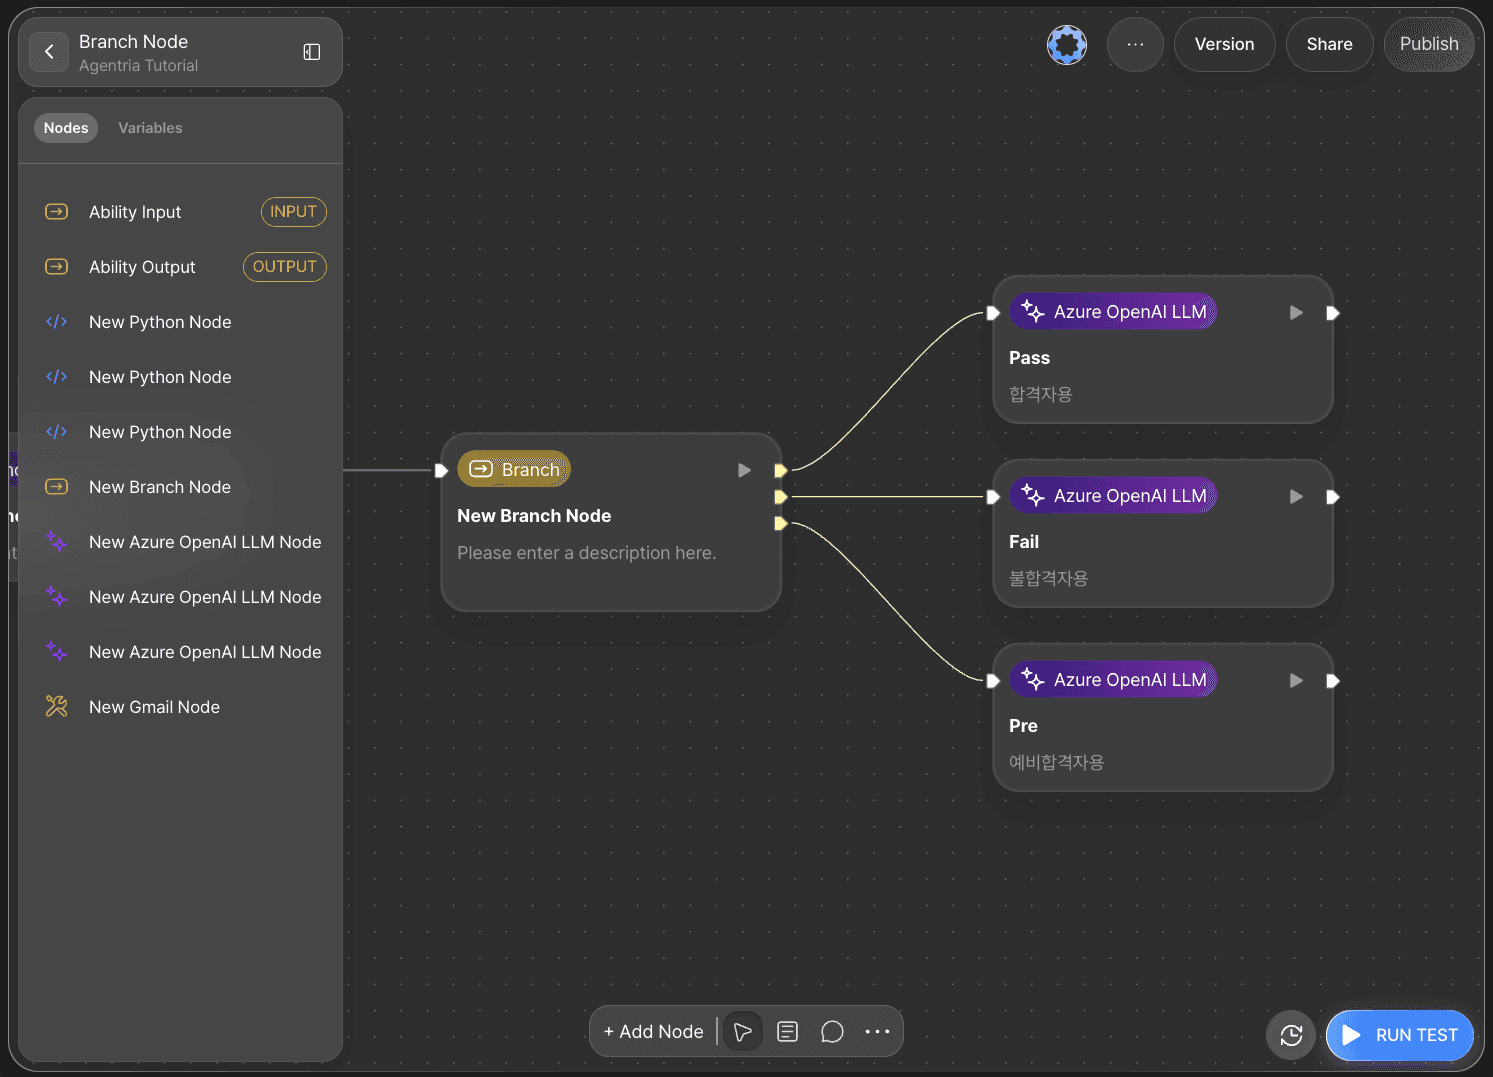
Once the conditions are created, Branch Pins are displayed based on the number of conditions.
Hover over each pin to confirm the condition title and connect it to an LLM node.
For convenience, also update the title and description of each LLM node.
Pass: For successful applicants
Fail: For unsuccessful applicants
Pre: For waitlisted applicants
Step 6: LLM Node – Generating Email Content
6-1) Email for Successful Applicants
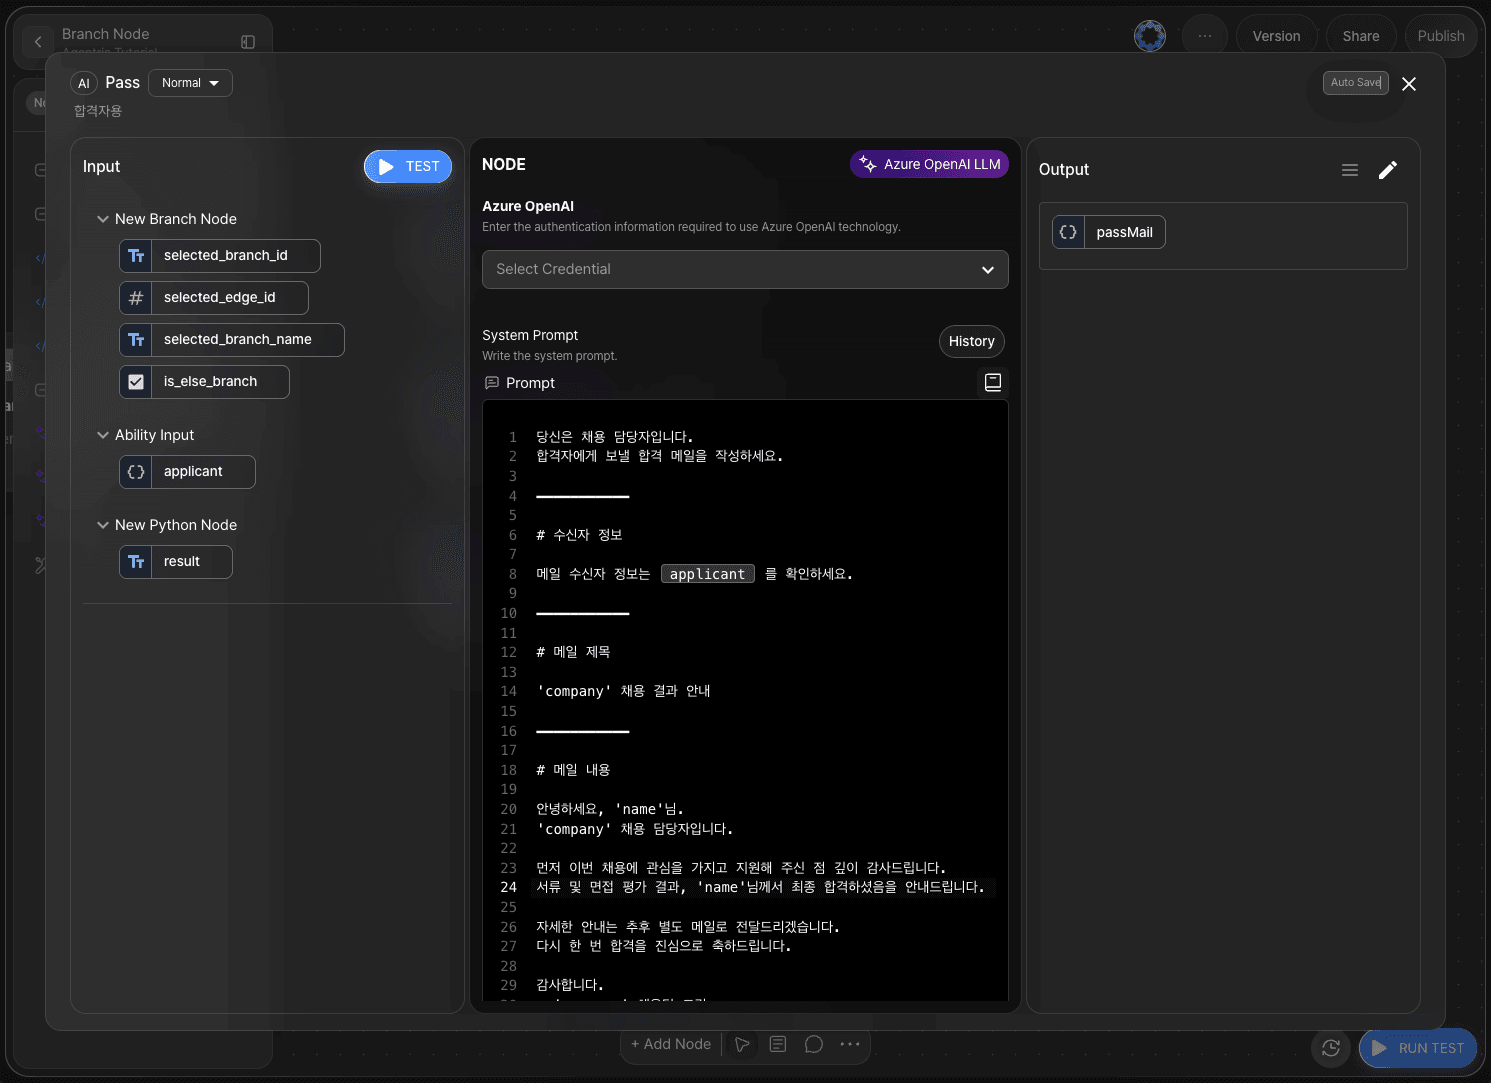
In the system prompt area of the LLM node for successful applicants, write instructions for generating the email content.
Declare the output as passMail in Object format.
Example of a pass email:
You are a hiring manager.
6-2) Email for Unsuccessful Applicants
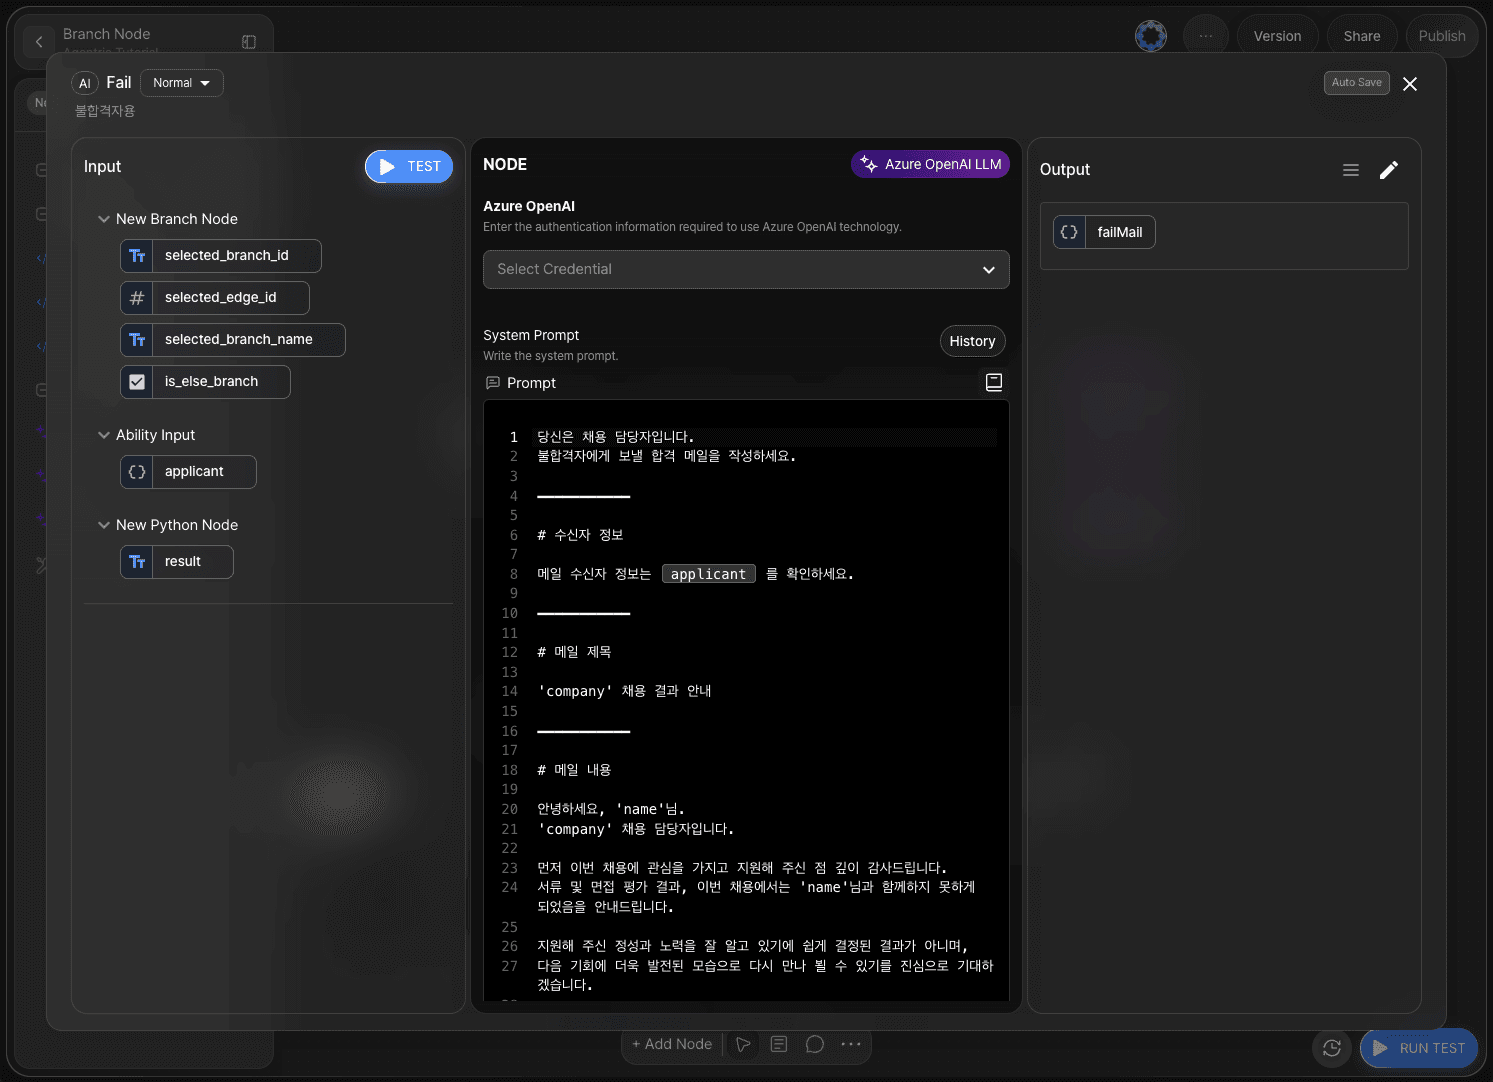
In the system prompt area of the LLM node for unsuccessful applicants, write instructions for generating the email content.
Declare the output as failMail in Object format.
Example of a fail email:
You are a hiring manager.
6-3) Email for Waitlisted Applicants
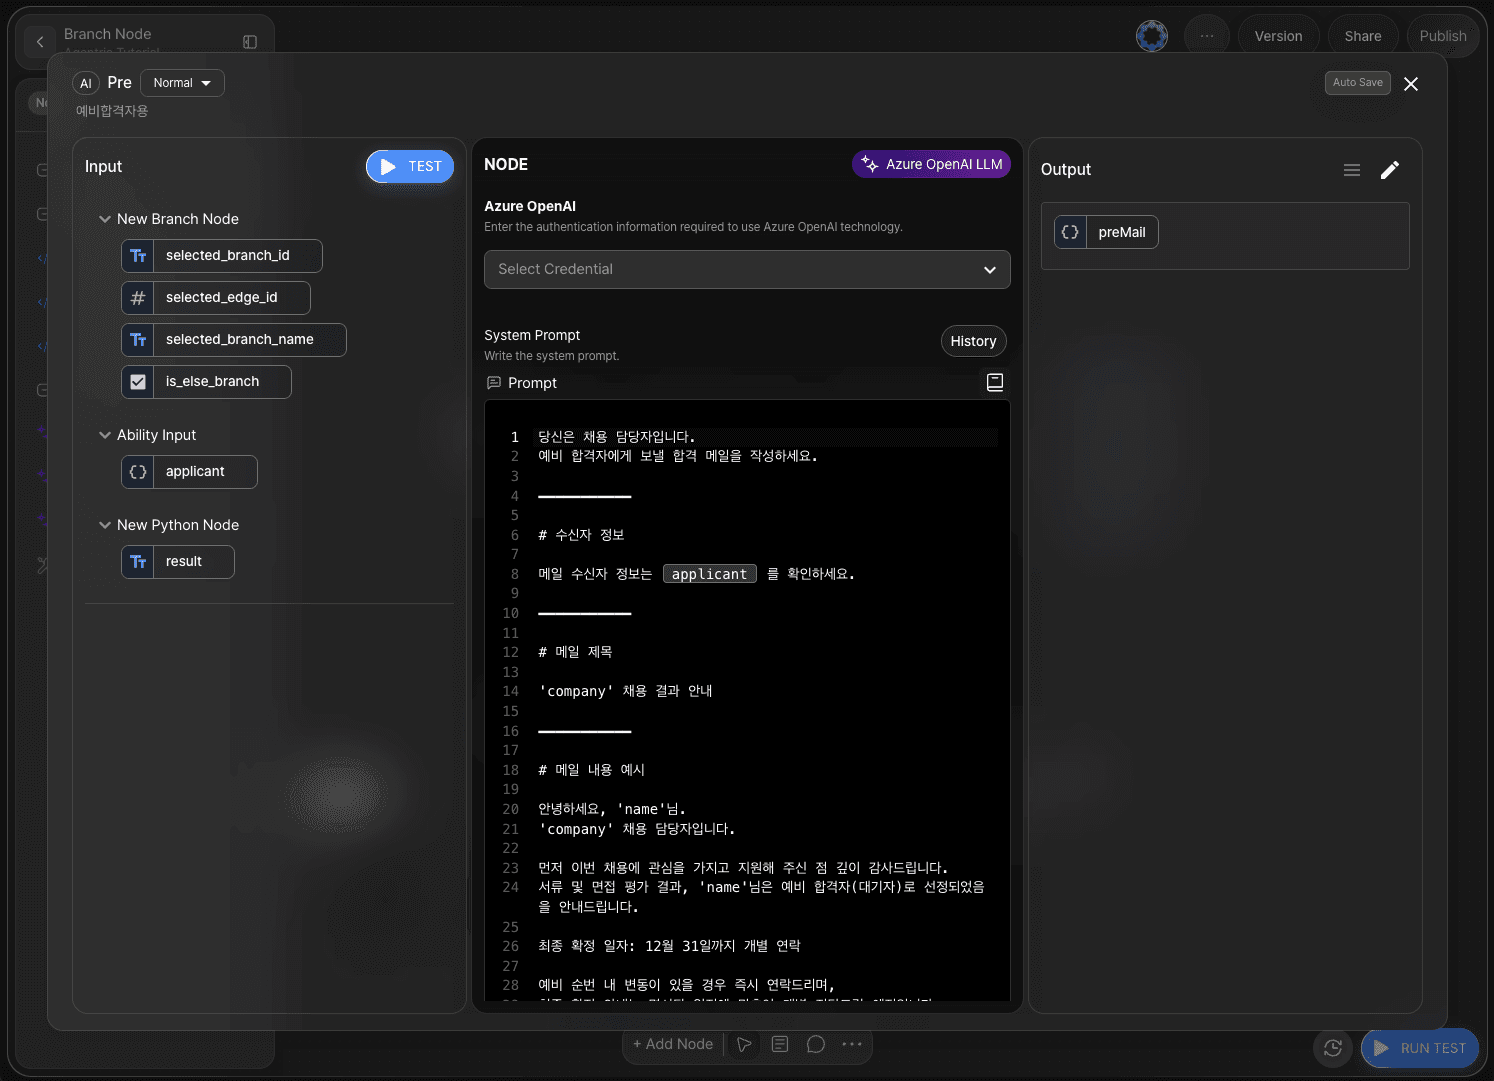
In the system prompt area of the LLM node for waitlisted applicants, write instructions for generating the email content.
Declare the output as preMail in Object format.
Example of a preMail email:
You are a hiring manager.
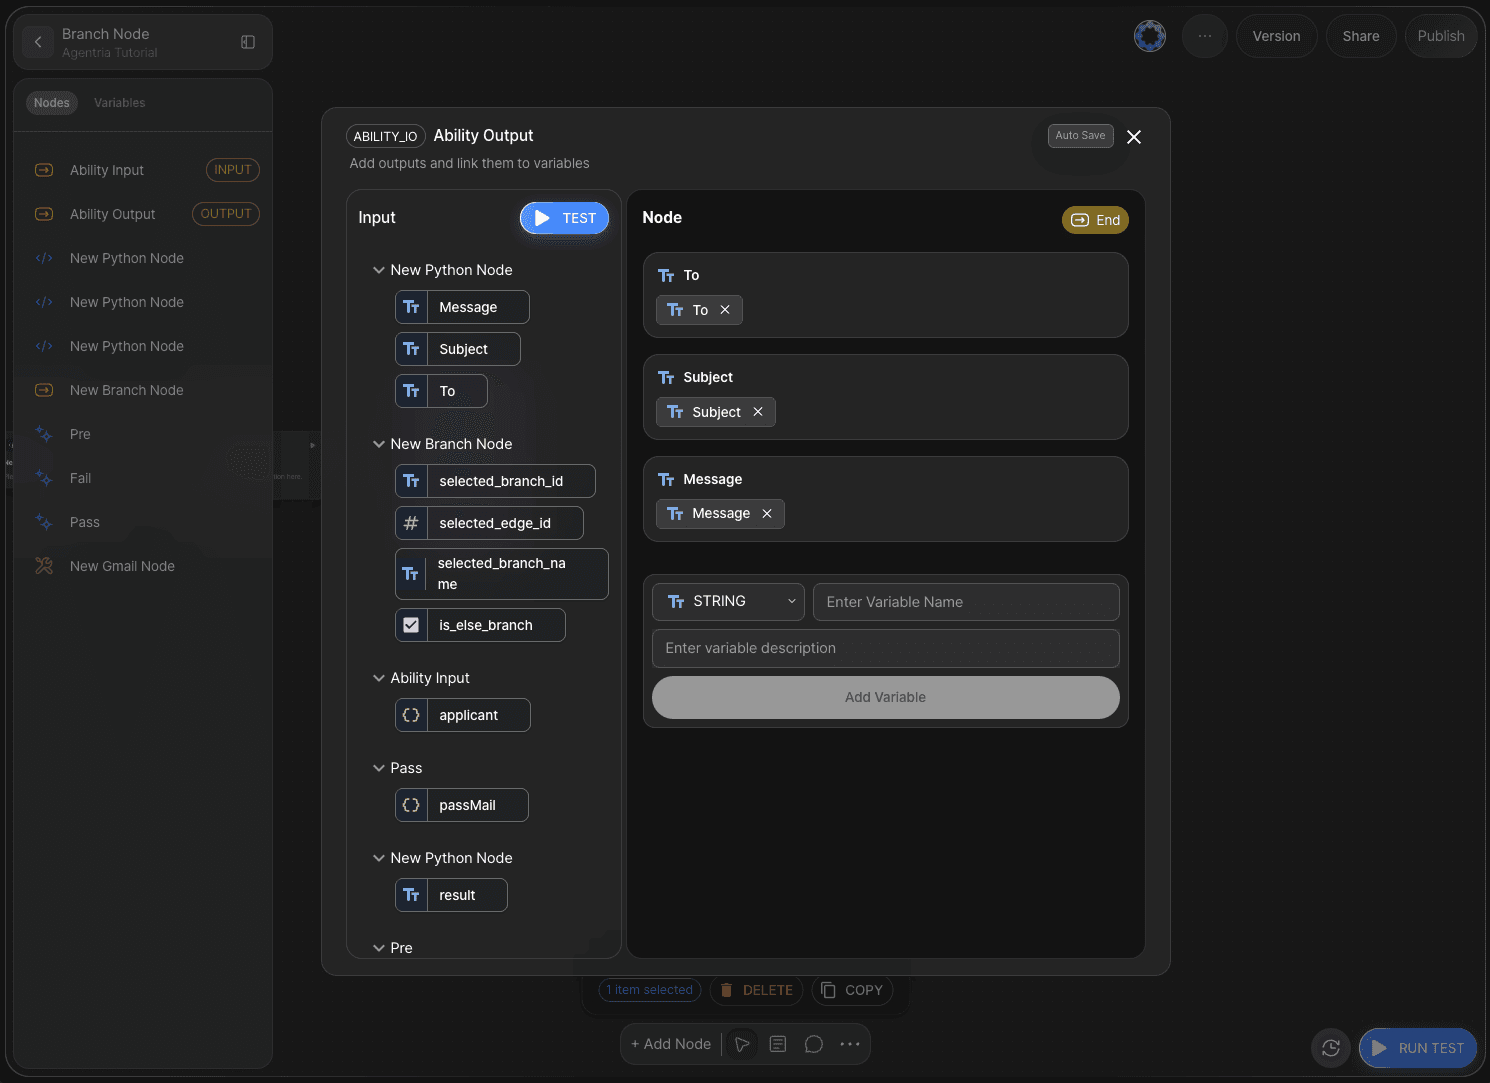
Step 7: Merging Data
The data branched through the Branch node must be merged into a single output.
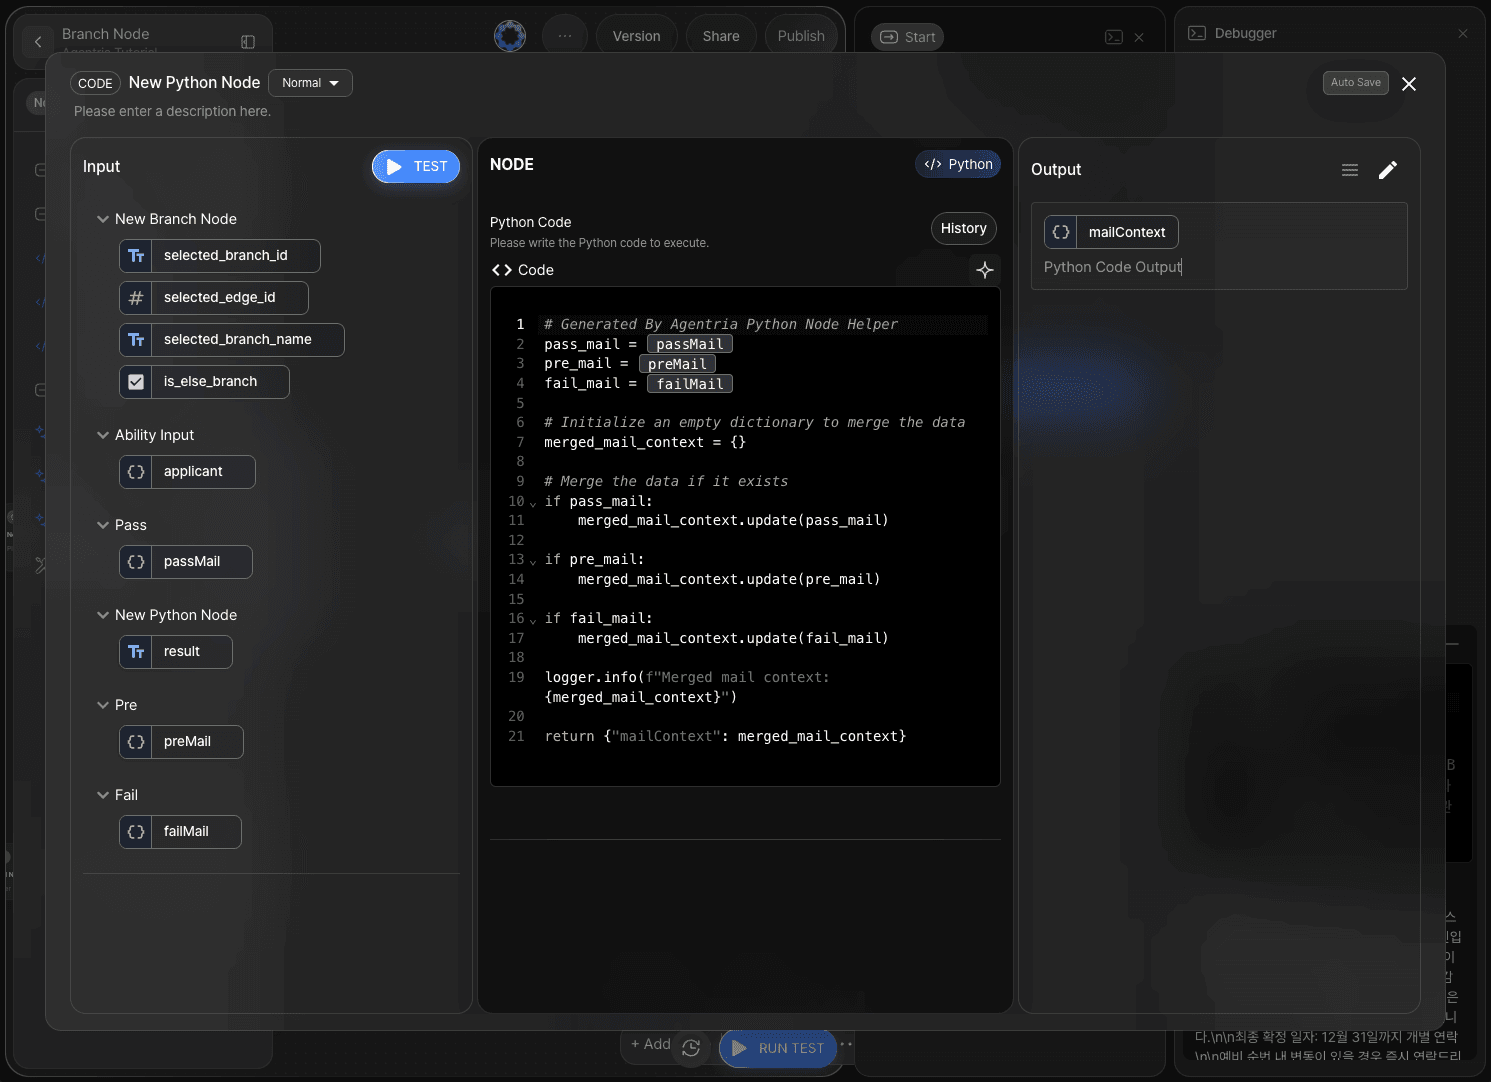
Declare the output as mailContext in Object format and generate the code using the Python code generator.
Example prompt:
Write code to merge passMail, failMail, and preMail.
Step 8: Parsing into Email Format
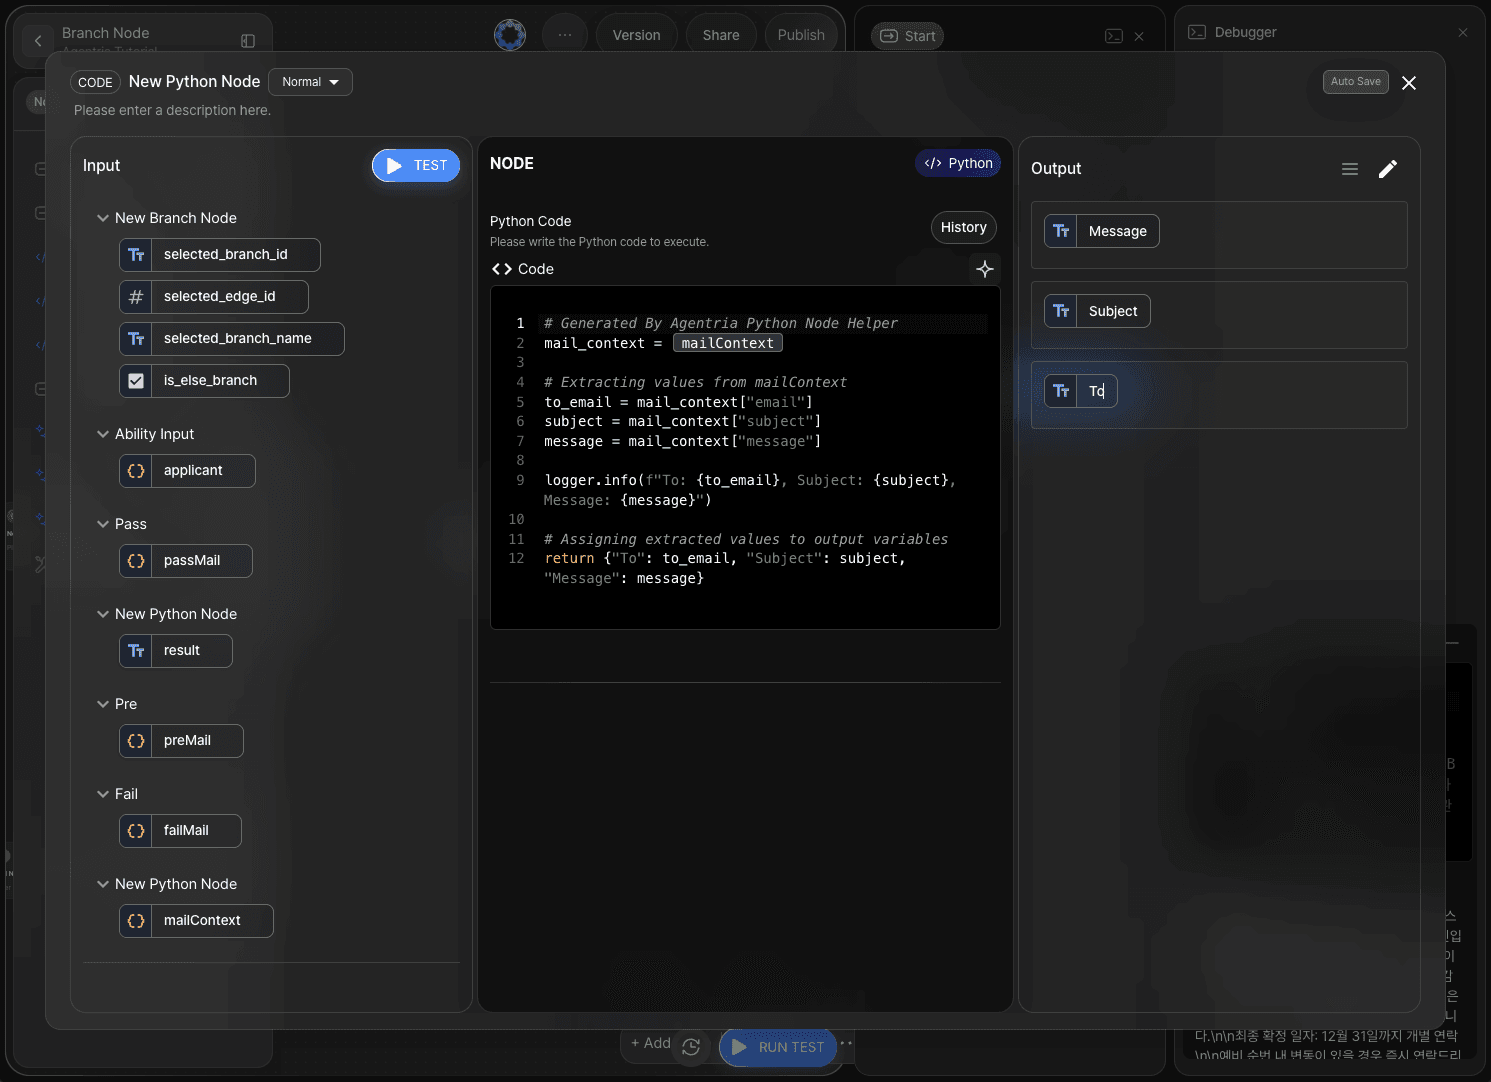
Although parsing could also be handled directly in Step 7, this tutorial performs the parsing step in a new Python node to maintain a clearer workflow structure.
Add output variables To, Message, and Subject with the String type.
Enter the following prompt into the code generator to generate the code.
Example:
Parse values from emailContext and assign them to the output variables.
Step 9: Adding a Gmail Node (Optional)
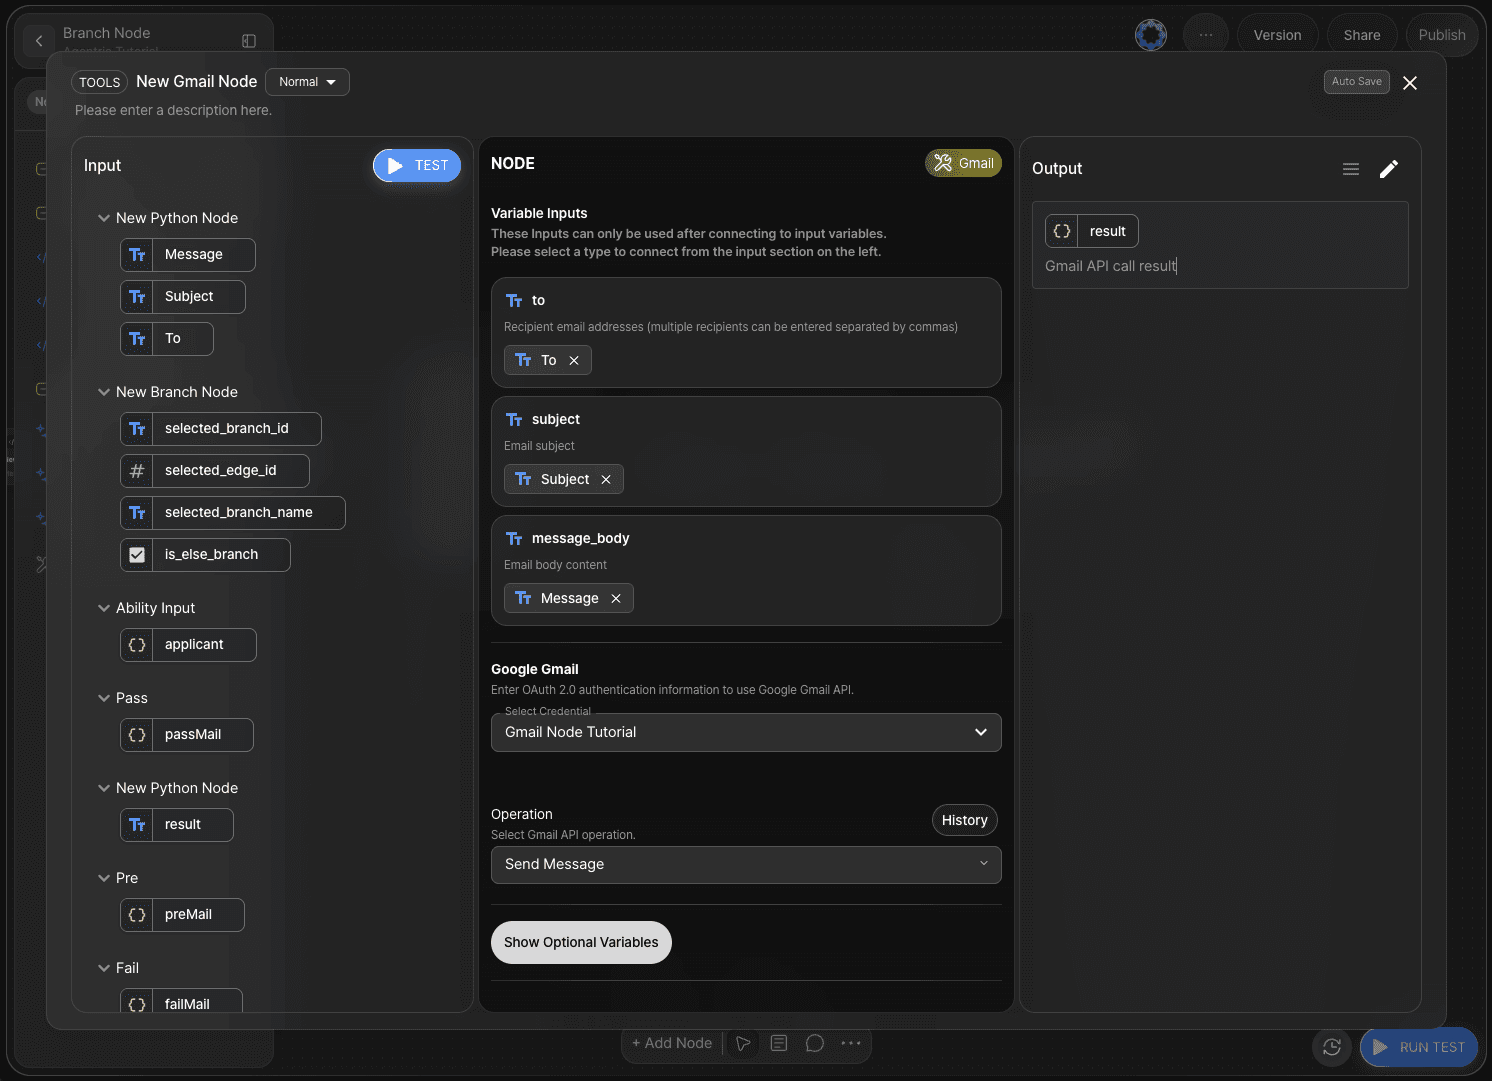
By adding a Gmail node, you can send actual emails.
Refer to the 🔗Gmail Node Tutorial to build an automated email-sending workflow.
In this tutorial, only the value output step is demonstrated.
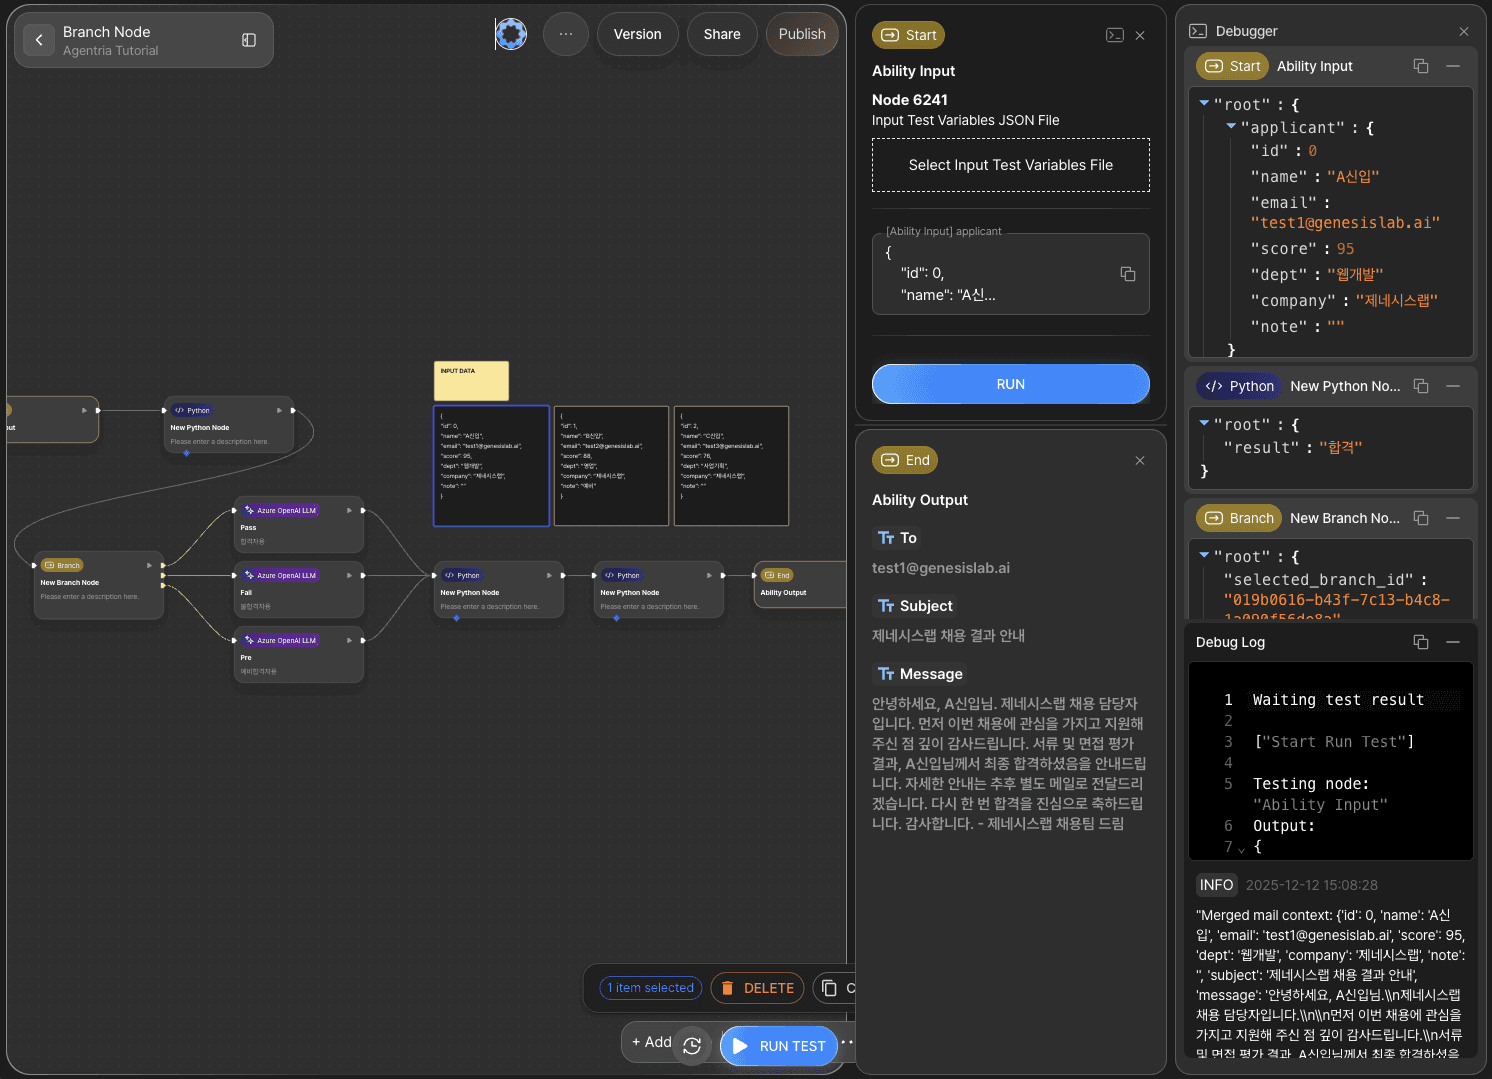
Step 10: Running the Entire Workflow with Ability Test
Click the RUN TEST button in the lower-right corner of the canvas to execute the completed workflow.
Select one of the sample input datasets and enter it into the input field.
If the results are displayed correctly, the workflow has been successfully configured.
Next Steps
🎉 Congratulations! You have completed a ‘Conditional email generation’ workflow using Agentria.
Now, try applying different email formats, reviewing the results, and expanding your workflow by adding more nodes.
Agentria is a space where ideas become reality.
With your imagination, workflows can be expanded infinitely.
For more Ability examples, visit the 🔗Ability Guide.
For Agent-based examples, visit the 🔗Agent Guide.