Get Started
The Advanced Guide Tutorial covers more diverse workflow-building processes that can be created through Agentria.
In this tutorial, you will configure an Agent using the Short-term Memory Reader Node and the LLM Node, and then perform a Chat Test to verify the results.
Through this process, you’ll learn how to build a conversational agent workflow.
Prerequisites
To begin, create a Project in Agentria and open the Agent Canvas.
For detailed steps on how to access the canvas, refer to Step 1 (Create a Project and Select a Composer) in the 🔗3-Step Core Guide.
By completing this tutorial, you will be able to:
Use the Short-term Memory Reader Node
Connect multiple nodes
Configure an agent workflow
Validate workflow results through Chat Test
Step 1: Declare Input Variables
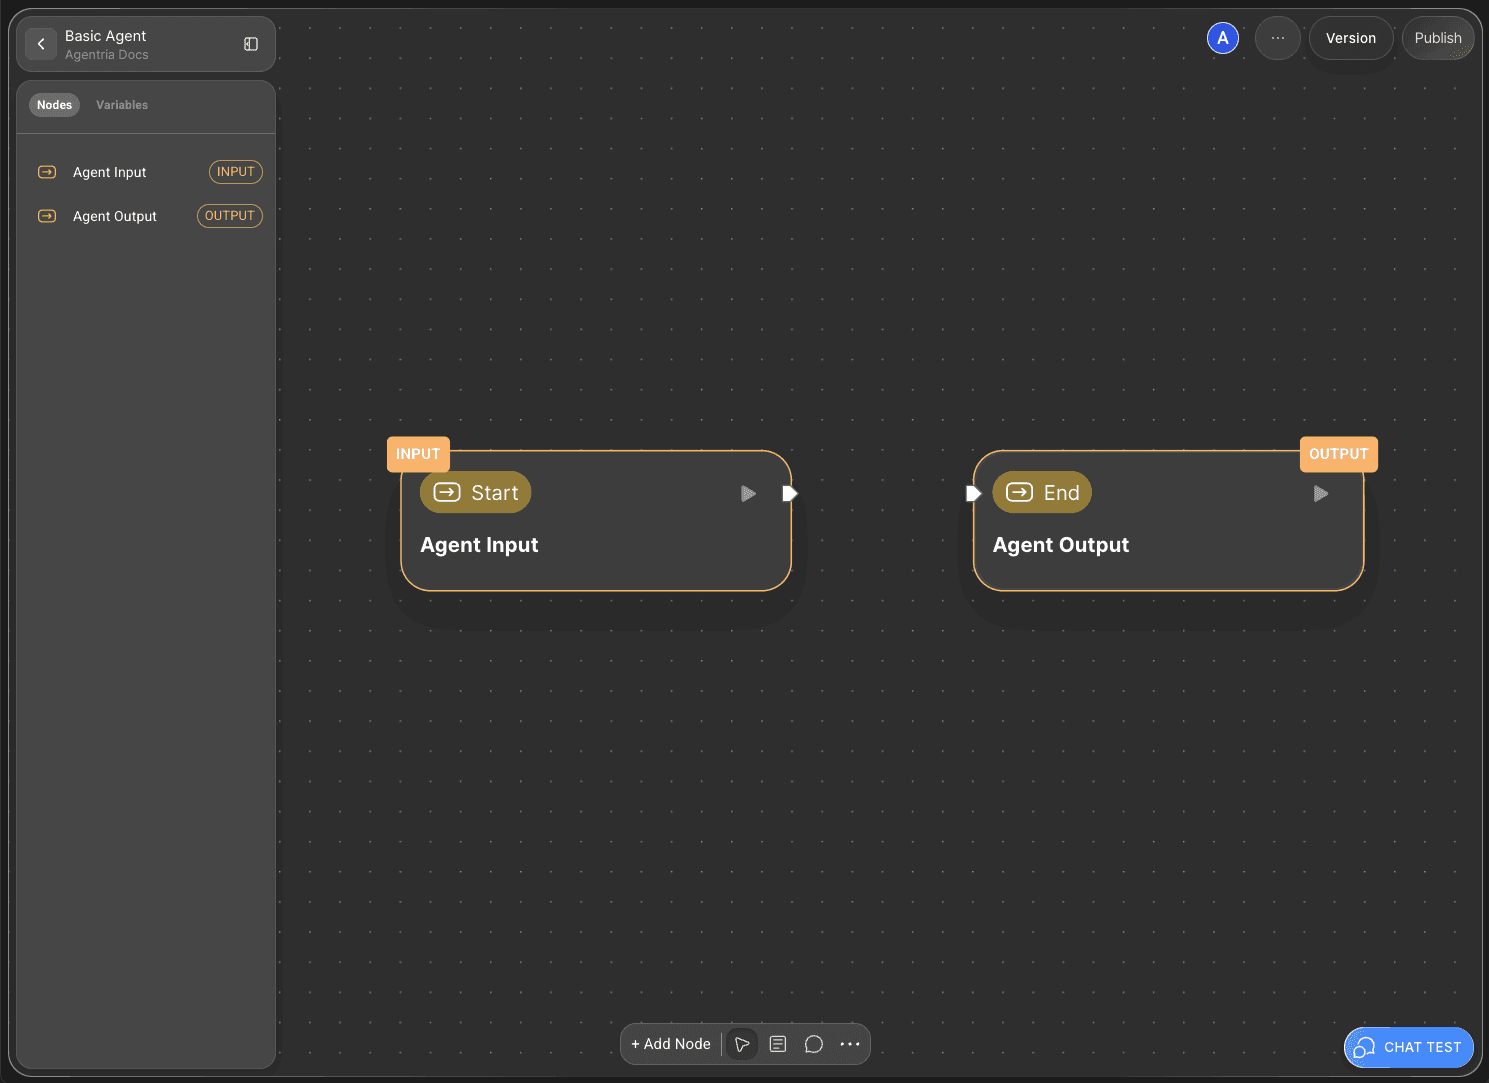
The Agentria Canvas comes with one Start Node and one End Node by default.
The Start Node initiates the entire workflow.
The End Node terminates the workflow.
To build a ‘conversational agent’ workflow, you first need to declare the necessary variables in the Start Node.
Double-click the Start Node to open its Node Editor in a popup window.
Here, you can define variables by setting their data type, name, and description.
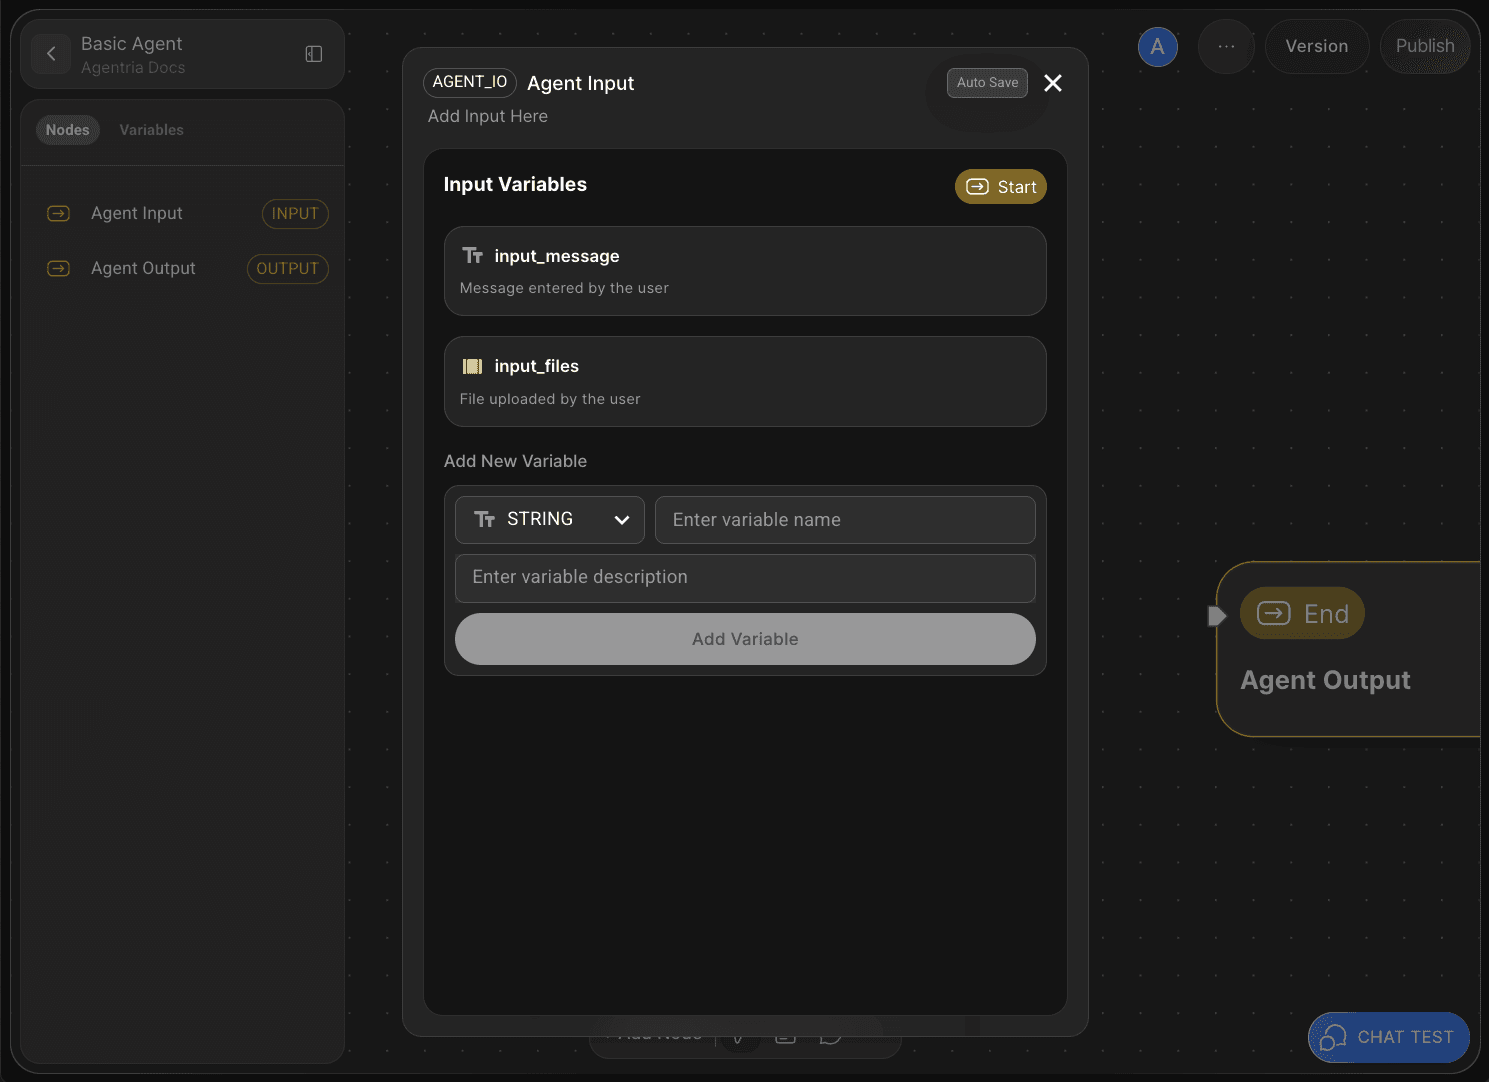
The Agent Start Node includes default input variables for Chat Test.
You can also add additional variables if needed.
In this tutorial, we’ll use only the default variables without adding new ones.
Return to the canvas to continue.
Step 2: Add Nodes via Drag and Drop

Next, you’ll add the nodes that allow the agent to remember user input during the Chat Test.
By using the Short-term Memory Reader Node, your agent can retain and reference user messages throughout the conversation.
Click the +Add Node button at the bottom of the canvas, then open the AI Agent category.
To enable the agent to generate responses based on remembered information, add an LLM Node as well.
In this tutorial, we’ll use the Azure OpenAI LLM Node.
Step 3: Connect Nodes with Edges
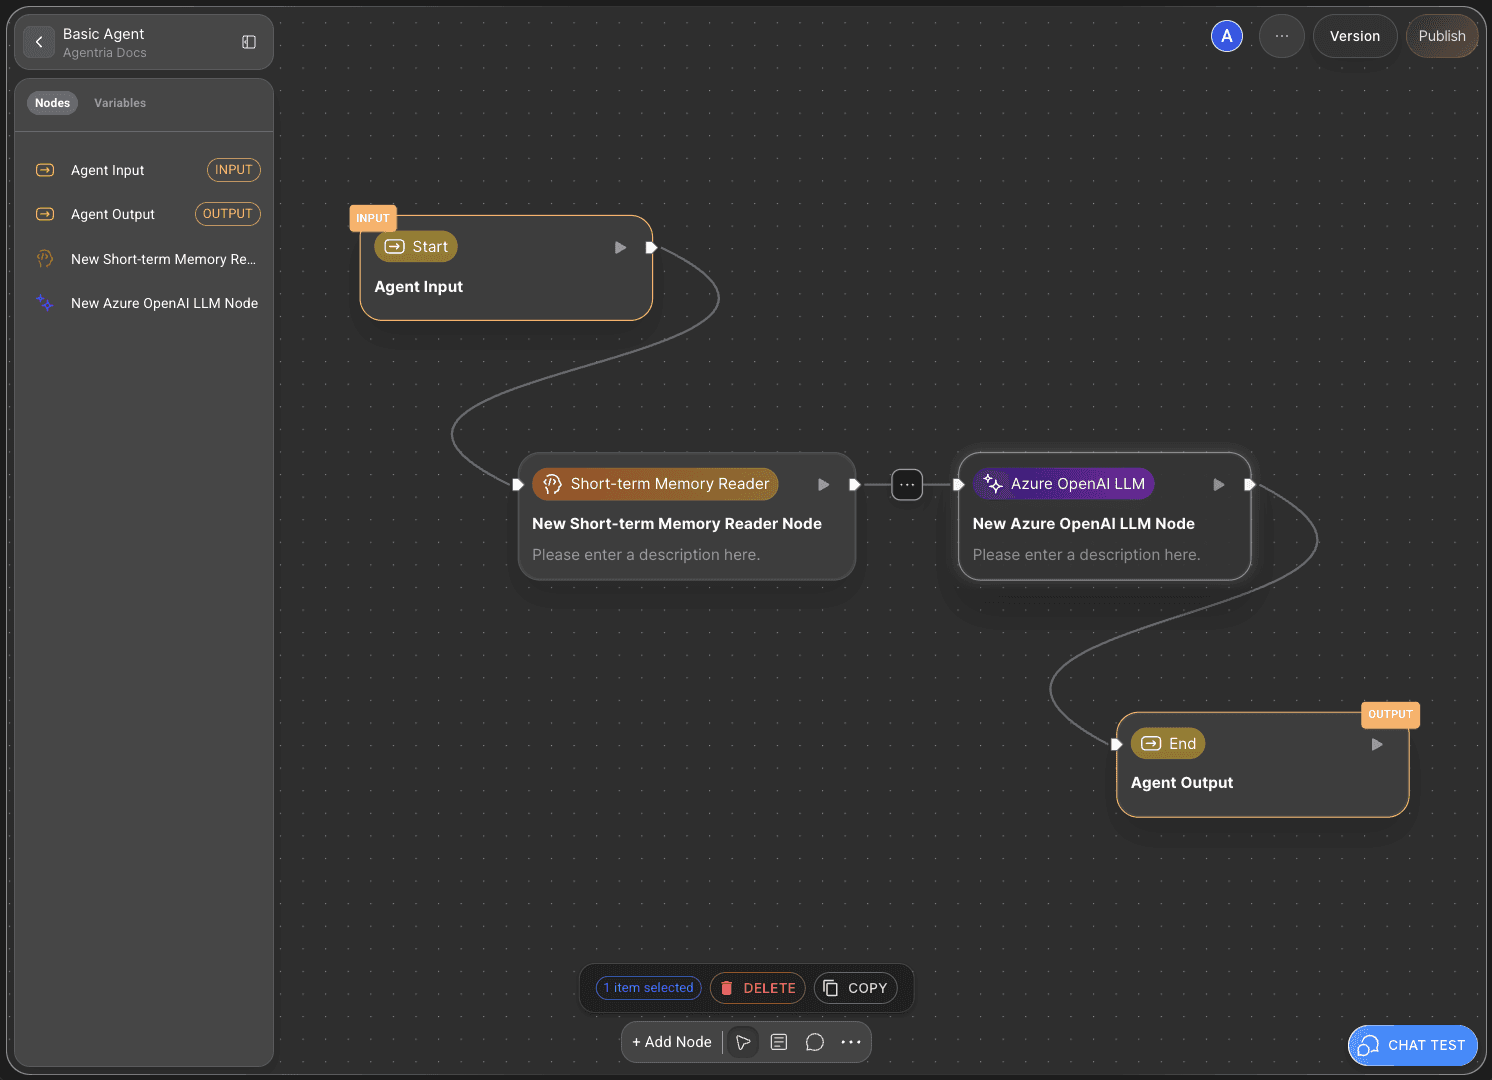
To allow the Short-term Memory Reader Node to use the variables received from the Start Node, the two nodes must be connected.
This connecting line is called an Edge.
Connect the Out-Pin on the right side of the Start Node to the In-Pin on the left side of the Short-term Memory Node — this ensures the input values from the Start Node are passed to the memory node.
Then, connect the Short-term memory Node to the LLM Node in the same way, allowing the processed data to flow into the LLM for response generation.
Step 4: Configure the Short-term Memory Node
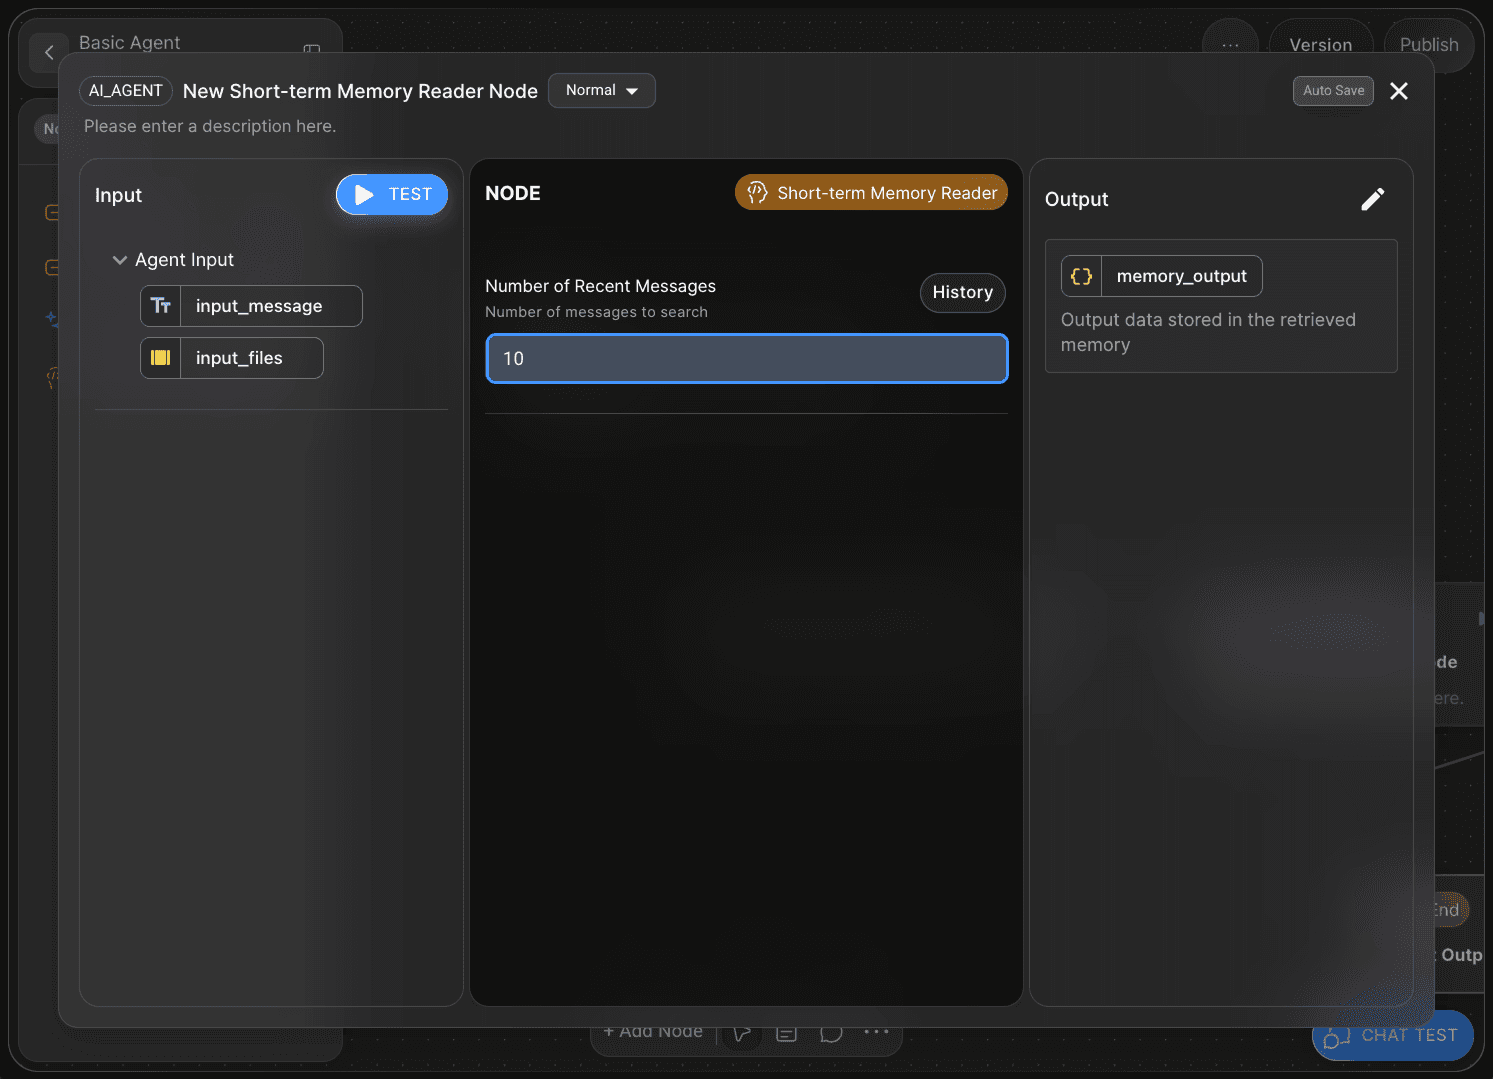
The Short-term Memory Reader Node allows you to specify how many user messages are stored in the memory buffer.
For example, if you set the Number of Recent Messages value to 10, the agent will remember and utilize the last ten user messages during conversation.
In this tutorial, we’ll proceed using the default settings.
Step 5: Write the LLM Node Prompt
By writing the LLM Node Prompt, you can guide the agent to generate appropriate responses.
The more specific the instructions about its role and output format, the higher the quality of the results.
5-1) System Prompt
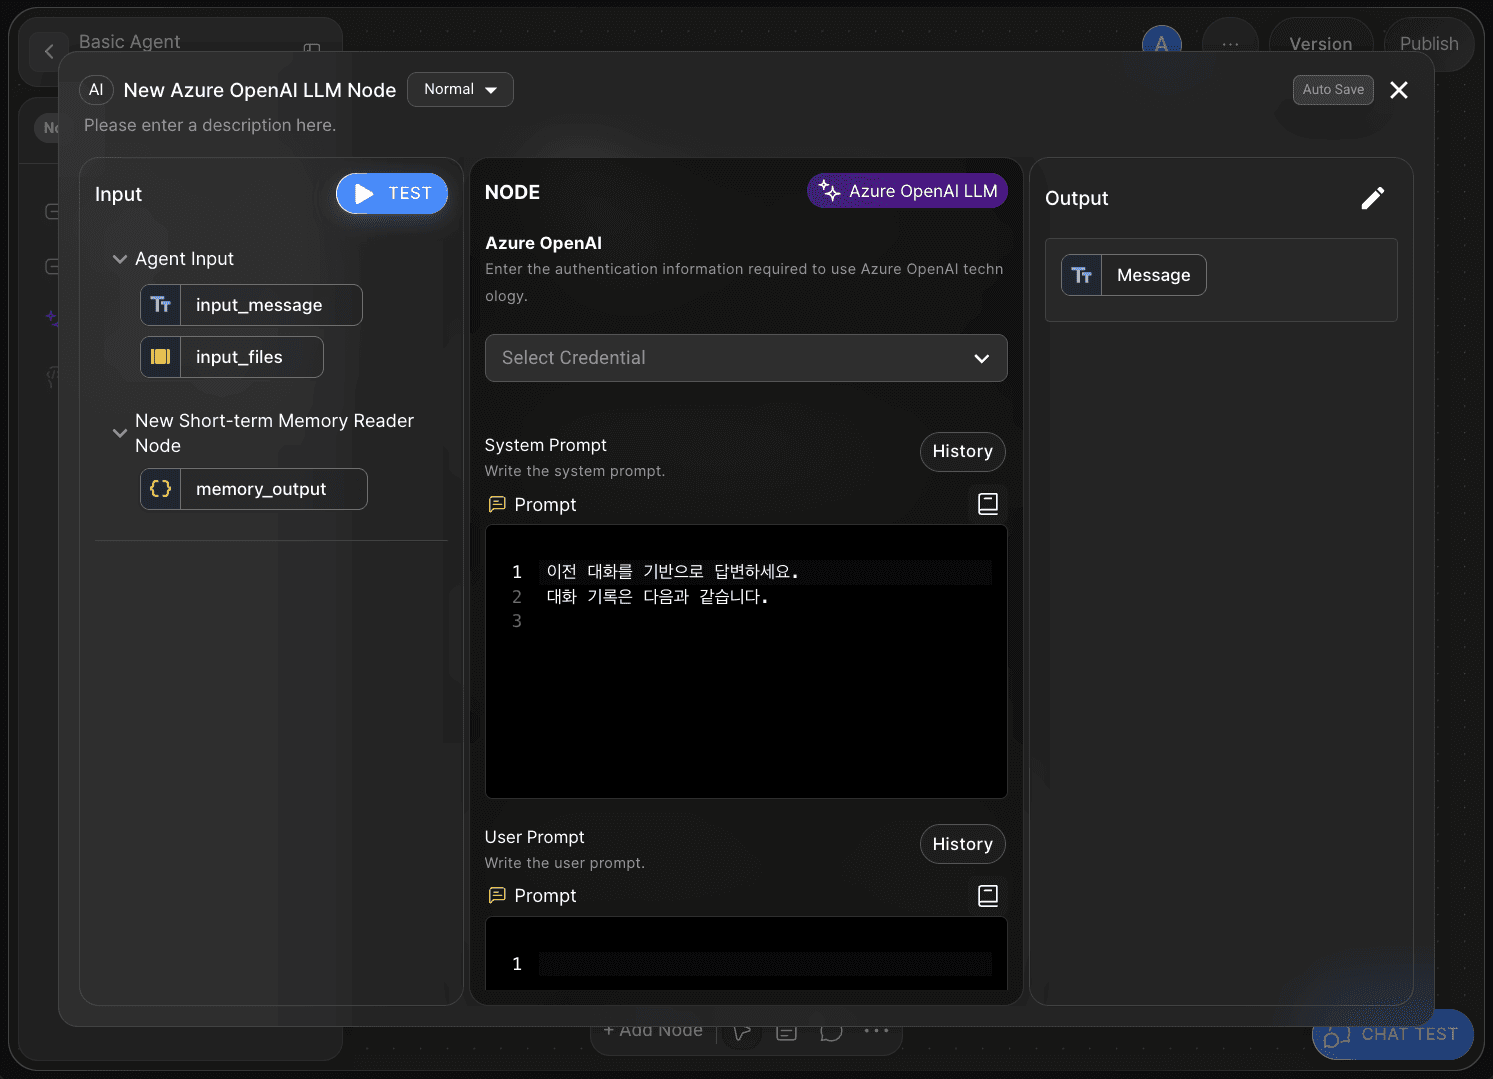
In the System Prompt field, write clear instructions that define the AI’s role and output format.
Since this tutorial focuses on building a simple conversational agent, use the following example:
Respond based on the previous conversation. The conversation history is as follows:
5-2) User Prompt
The User Prompt field is where you pass input data to the AI.
This step delivers the information received from the Short-term Memory Reader Node to the AI model.
For this simple tutorial, you’ll input variables into the User Prompt as shown in Step 6.
Step 6: Bind Variables via Drag and Drop

In Agentria, you can easily bind variables without writing any code by using drag-and-drop.
Bind the variables as follows:
System Prompt:
memory_output
User Prompt:
input_message
Step 7: Declare LLM Output Variable

To connect the LLM node to the End Node, you must declare an Output Variable in the LLM node.
Set the Data Type to String and name the variable Message.
This completes the LLM node configuration.
Step 8: Connect the End Node

Now, send the generated response output to the End Node.
Return to the canvas and connect the LLM Node to the End Node using an Edge.
Double-click the End Node to open the Node Editor — by default, it contains a String type adapter variable named output_message.
Link the Message variable from the LLM node to this adapter, either by selecting it or by drag-and-drop.
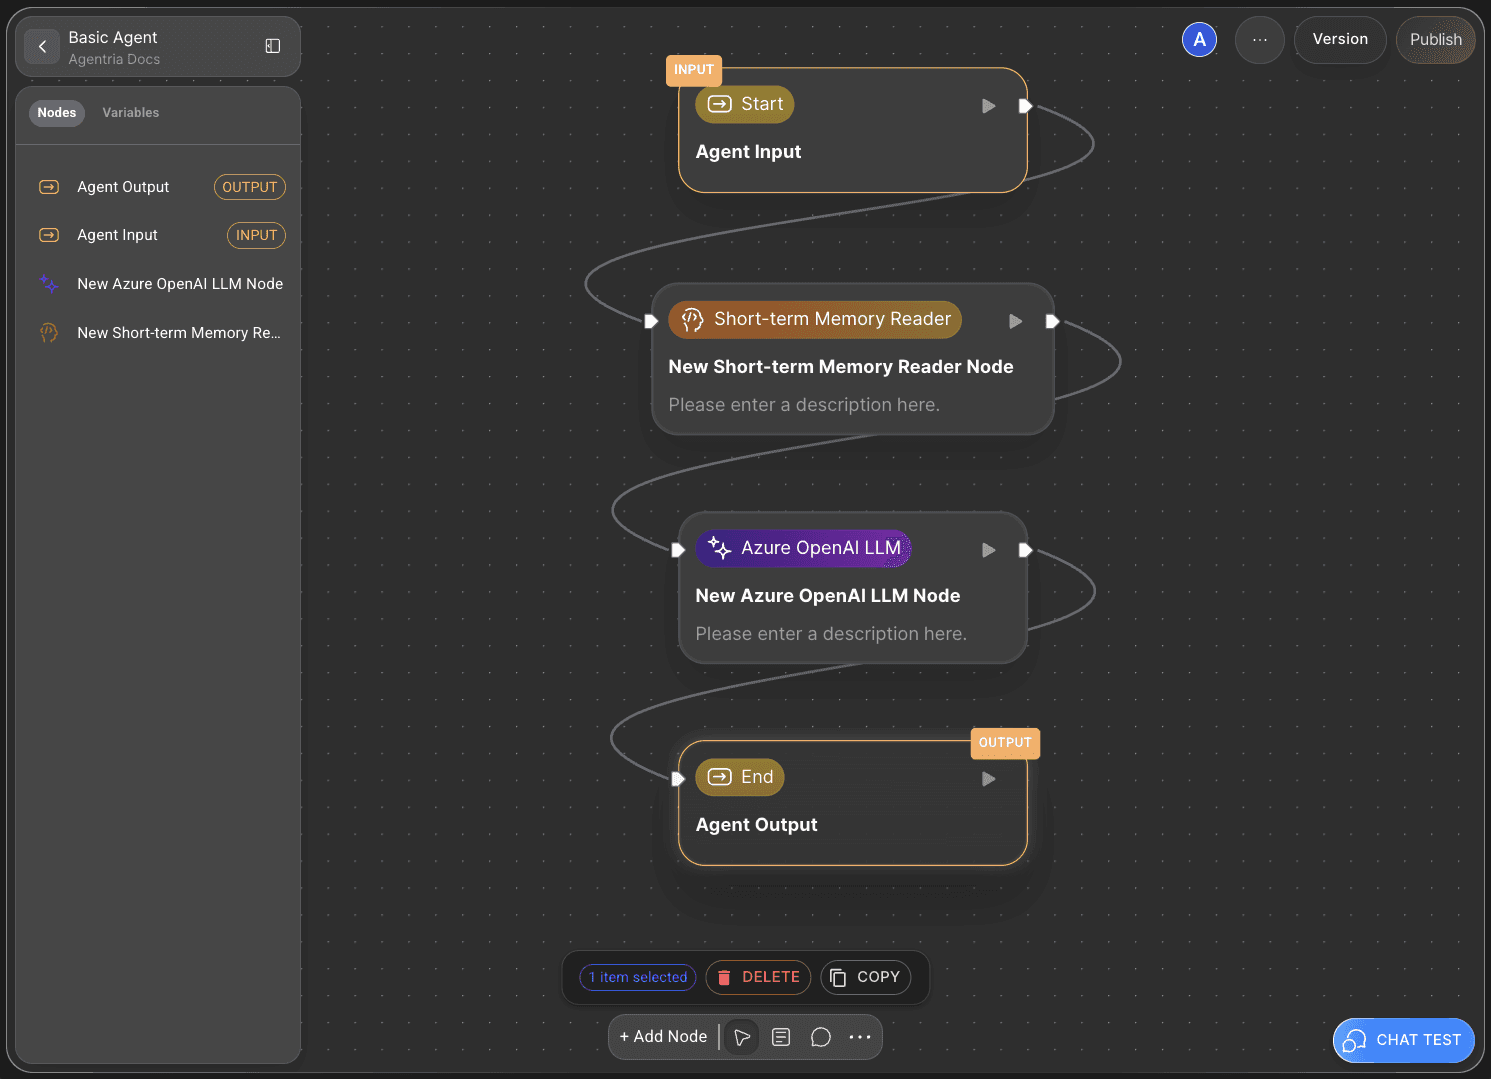
With that, your ‘Conversational Agent Workflow using the Short-term Memory Reader Node’ is complete.
Step 9: Test the Workflow with Chat Test
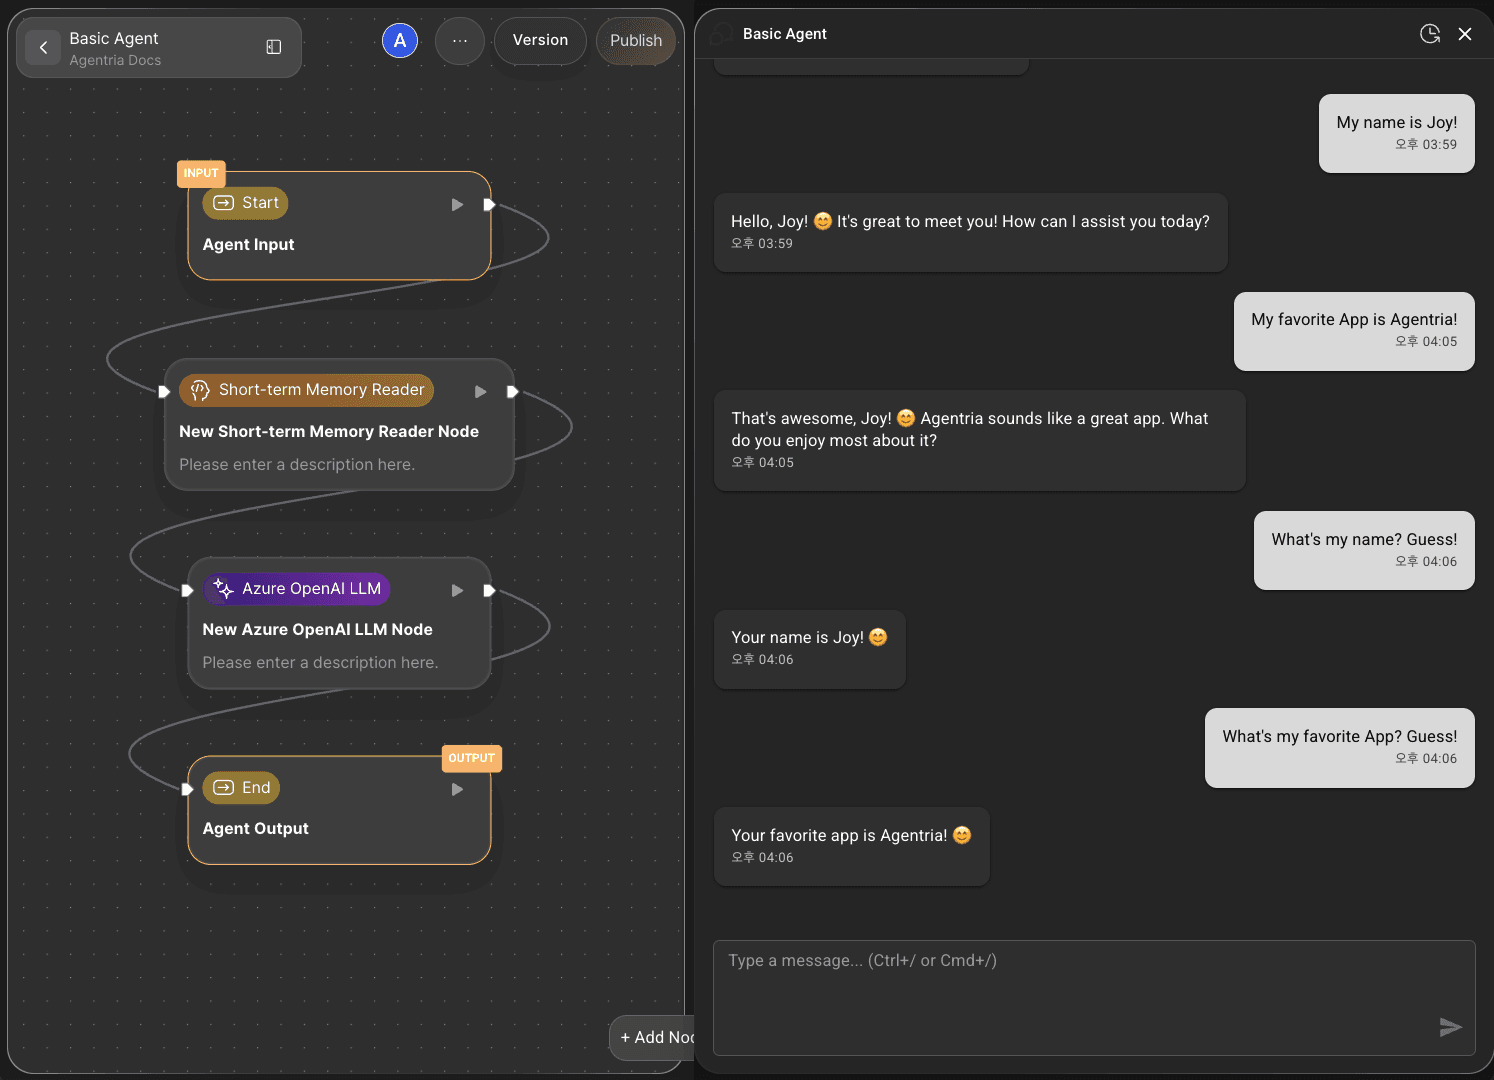
Click the CHAT TEST button at the bottom-right corner of the canvas to run the full workflow.
Agent testing takes place in a chat interface, allowing you to verify smooth interaction, make adjustments, and improve functionality.
Step 10: Review the Conversation Generation Process
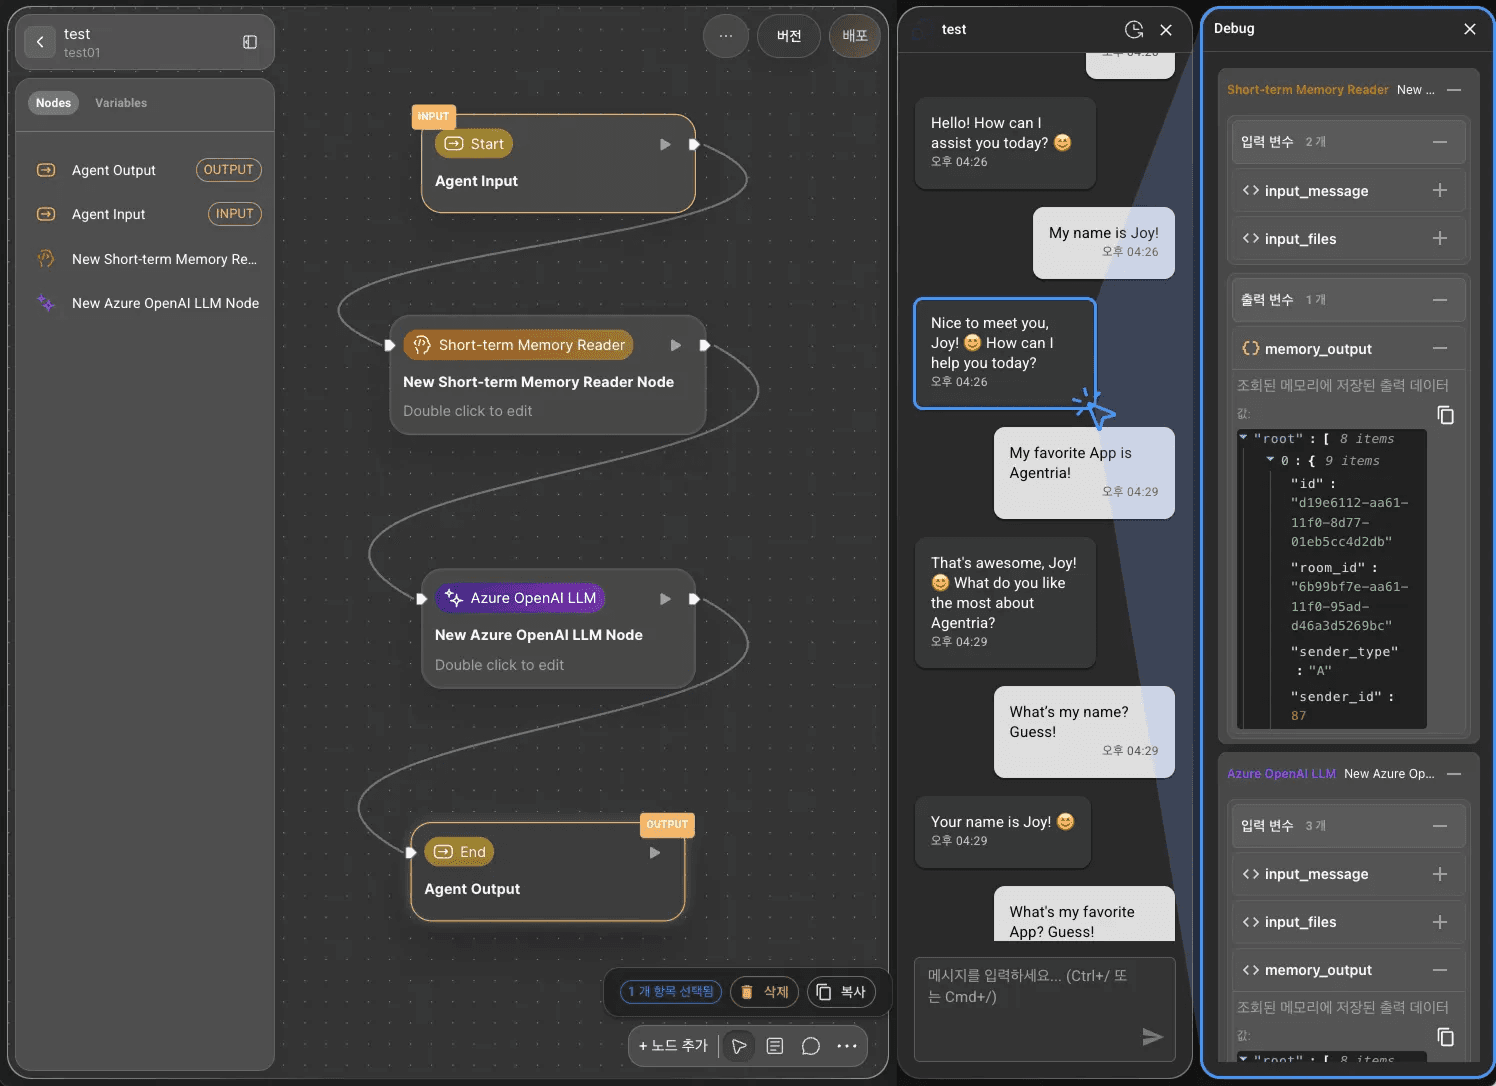
The Chat Test provides visibility into the agent’s conversation generation logic.
Click the agent’s response to open the sidebar on the right, where you can view the node-by-node process behind the generated reply.
This feature is useful for refining and improving the agent’s performance.
Next Step
🎉 Congratulations! you’ve successfully created ‘Conversational Agent’ workflow using Agentria.
Now, try entering various messages in the Chat Test to review the results, adjust nodes, and enhance workflow performance.
Agentria is a space where ideas turn into reality — your imagination can make workflows expand infinitely.
For more Ability examples, visit the 🔗Ability Guide.
For Agent-based examples, visit the 🔗Agent Guide.