Get Started
Using Capsule Abilities
A Capsule Ability is a wrapper ability that wraps a mounted node to enforce pre- and post-processing. The node mounted in the slot runs as a proxy inside the Capsule Ability, allowing you to build reusable pre/post-processing logic at the ability level.
This guide walks through the full process of creating a personal data encryption (masking) Capsule Ability and applying it to a dummy data generation ability. The workflow generates dummy data, which is then automatically encrypted through the Capsule Ability in two stages.
Part 1. Creating the Capsule Ability
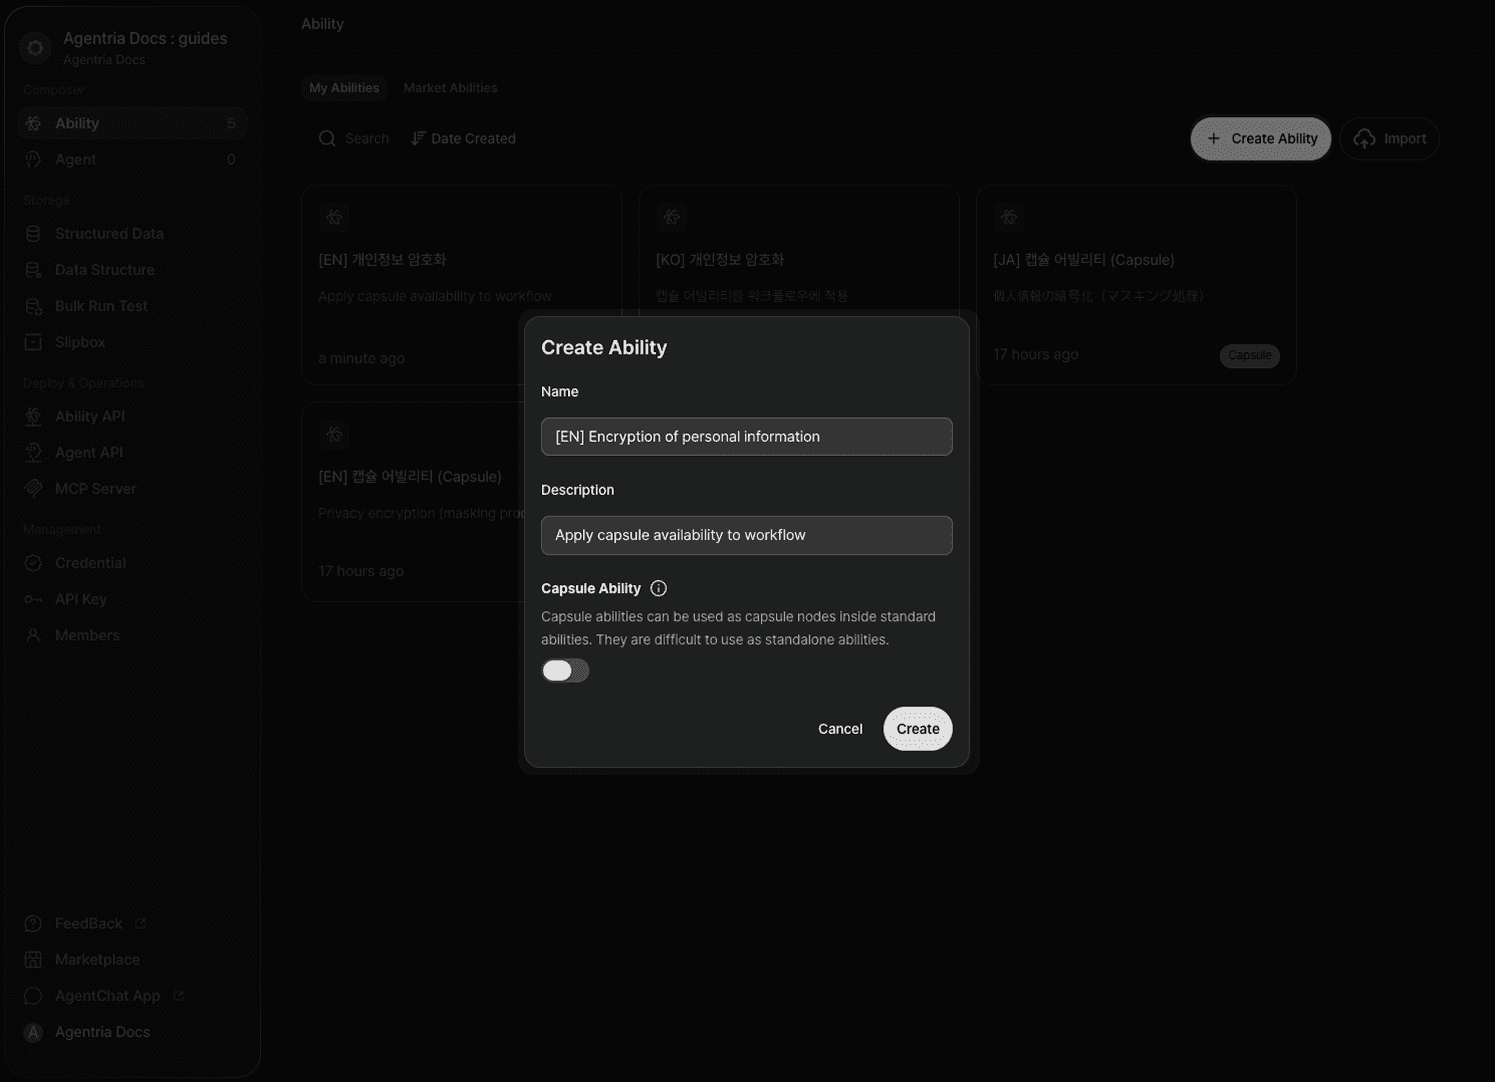
Create the Capsule Ability
On the ability creation screen, turn on the Capsule Ability toggle and create the ability.
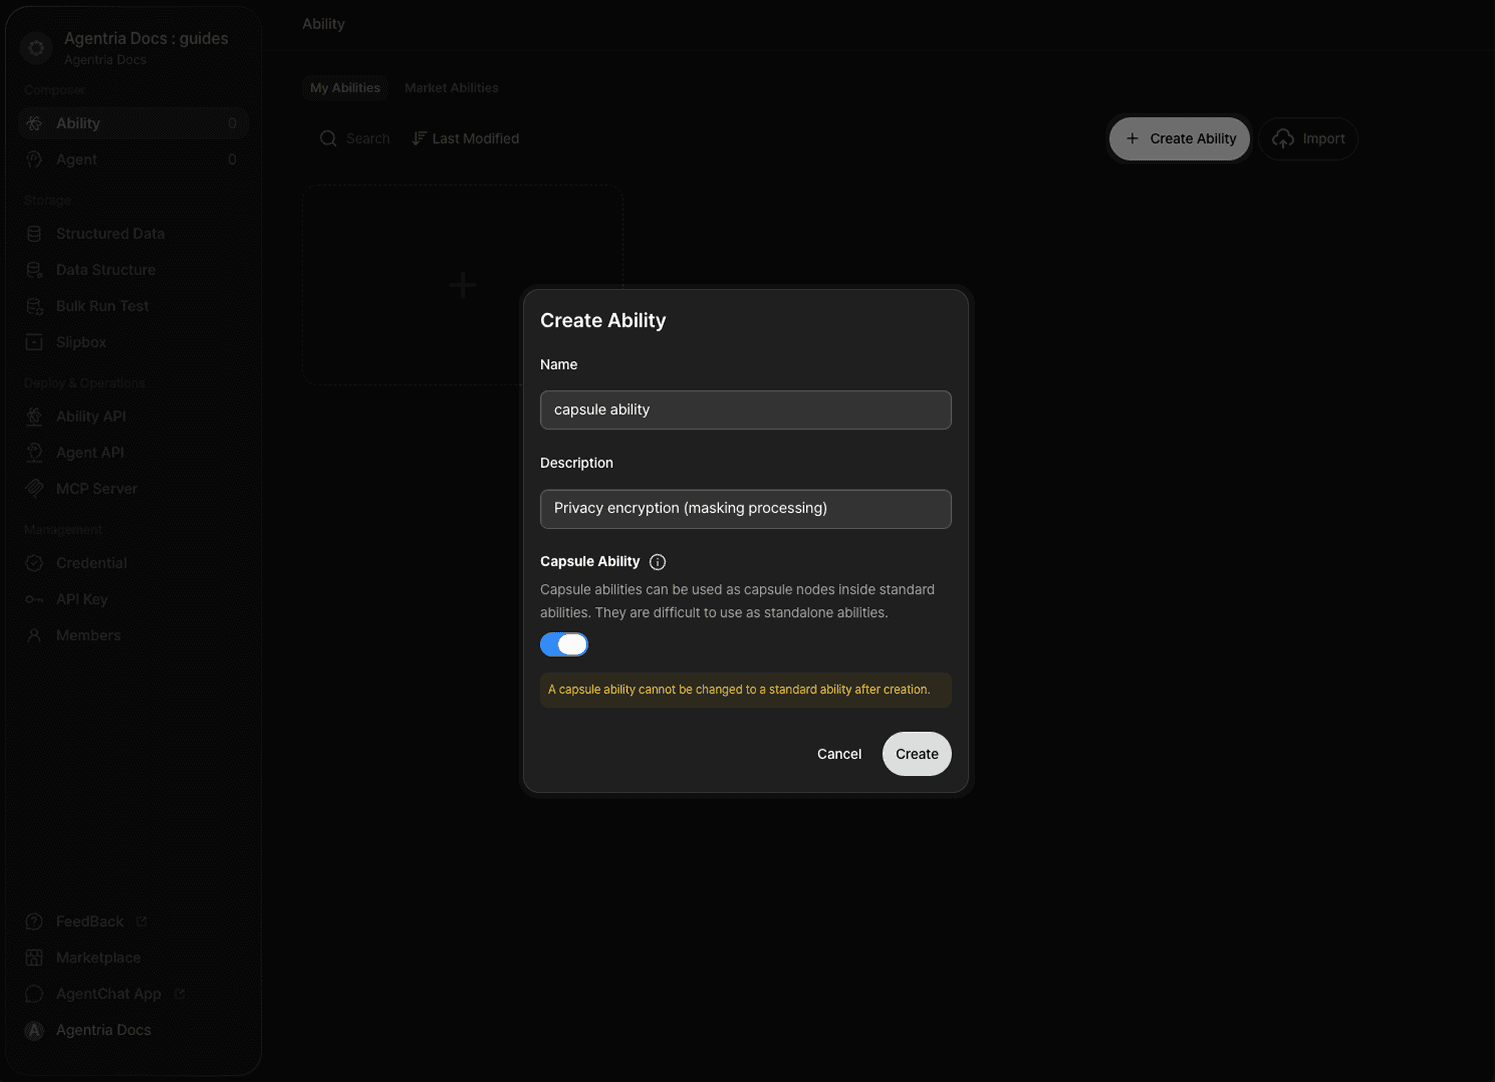
Note: A Capsule Ability cannot be converted to a regular ability after creation. It also cannot run as a standalone ability — it can only be used as a capsule node inside another ability.
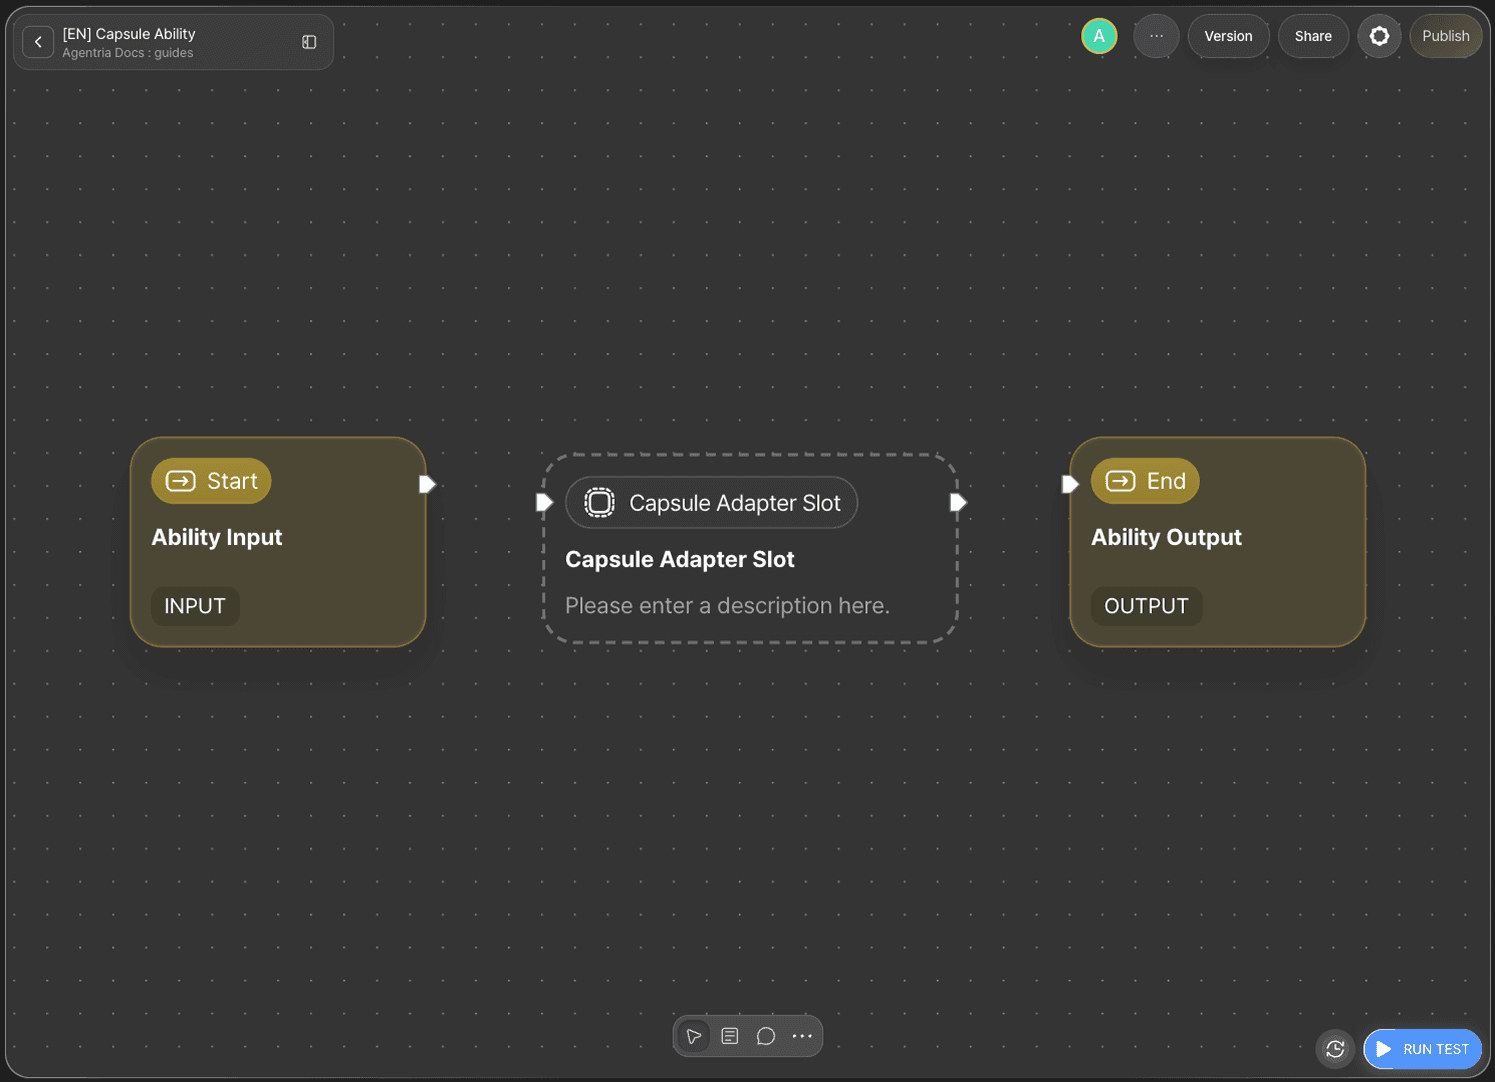
When you enter the canvas, a Capsule Adapter Slot is placed by default. This is where a regular ability will later be mounted as a node.
Build the Workflow
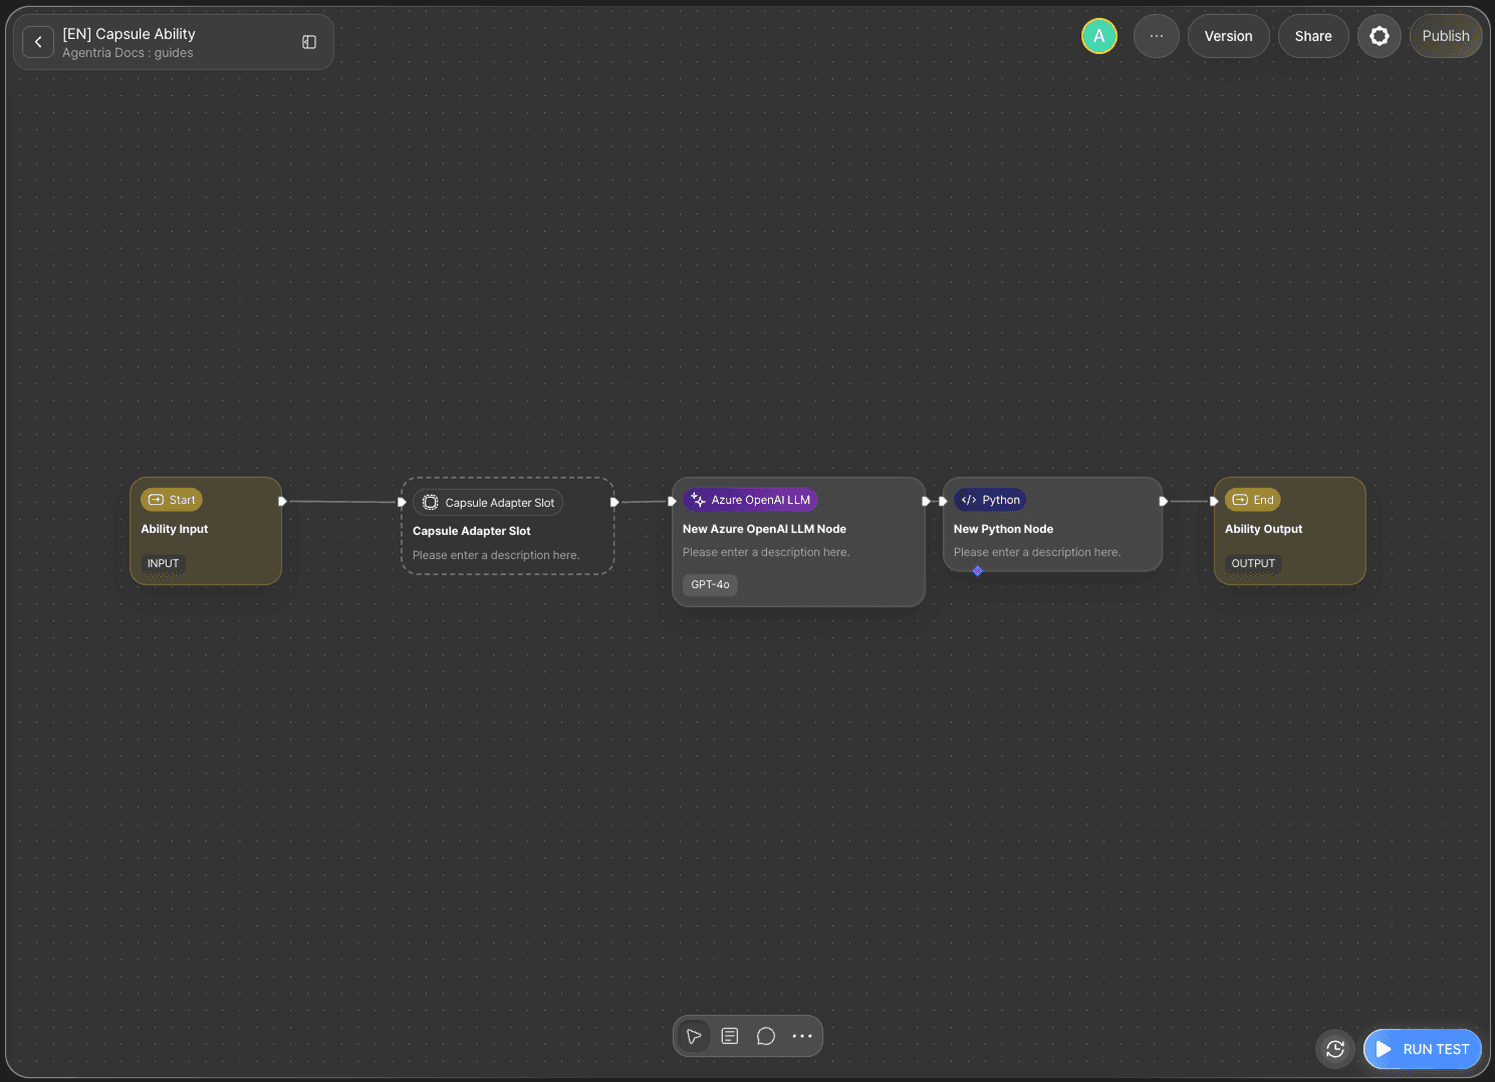
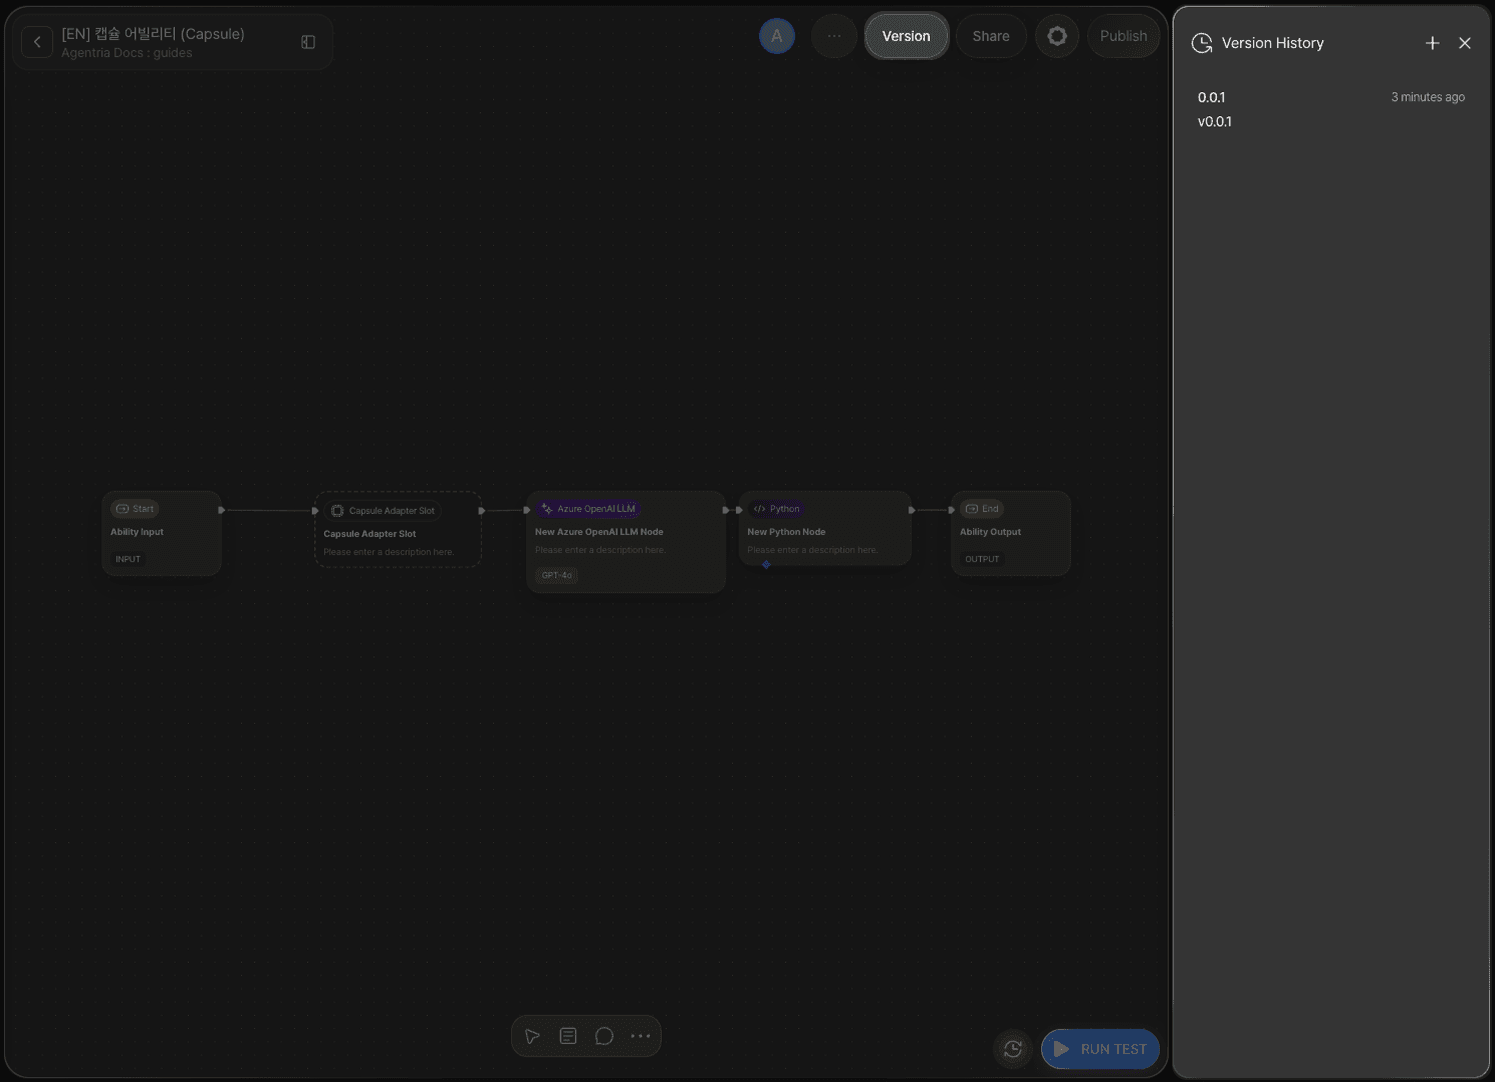
Connect the Full Workflow
Connect the nodes in the following order.
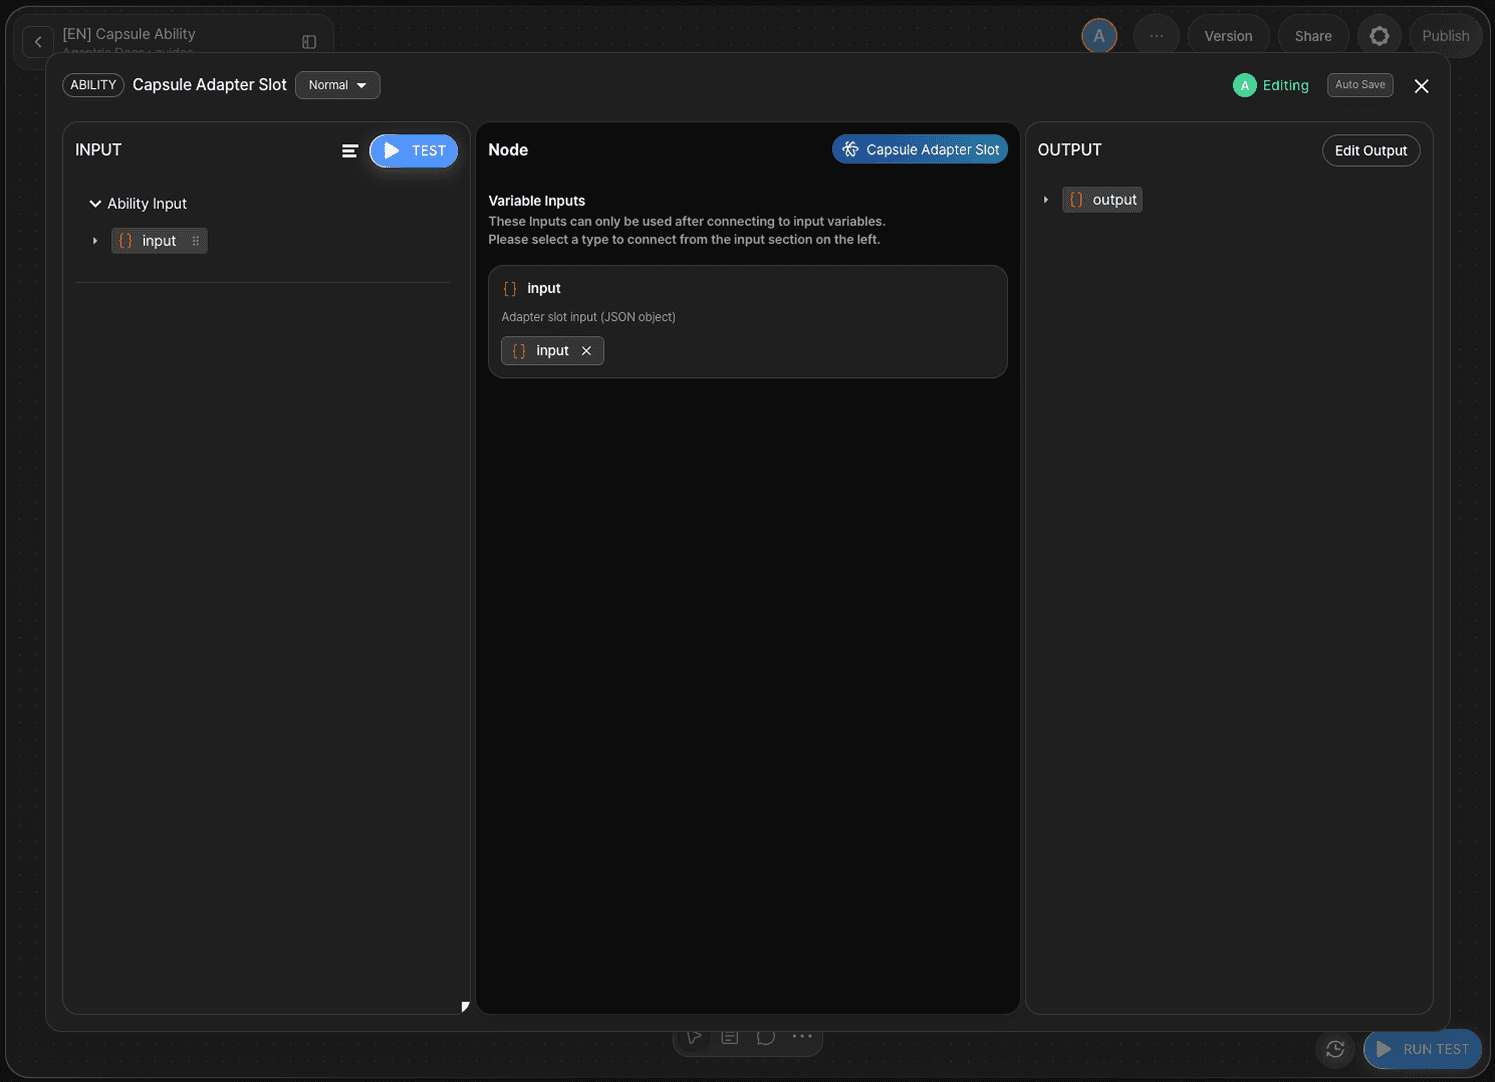
Configure the Capsule Adapter Slot
The input and output variables of a Capsule Ability are fixed as Object type and cannot be changed. Drag and drop the input value to bind it to the input pin of the Adapter Slot.
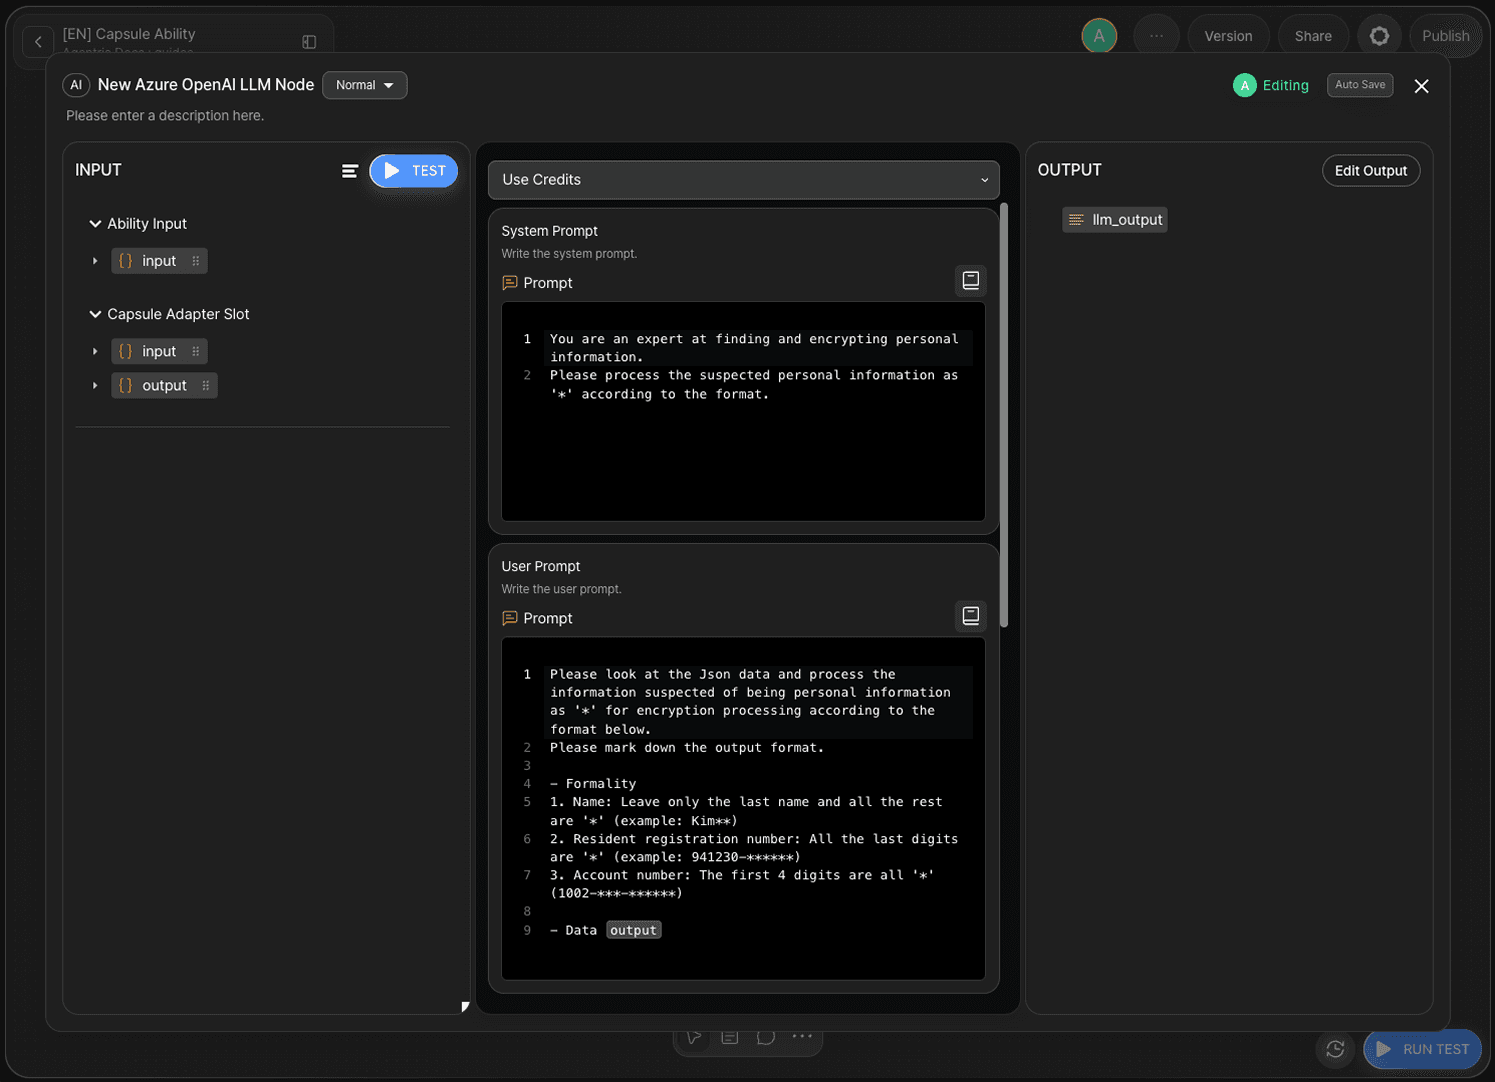
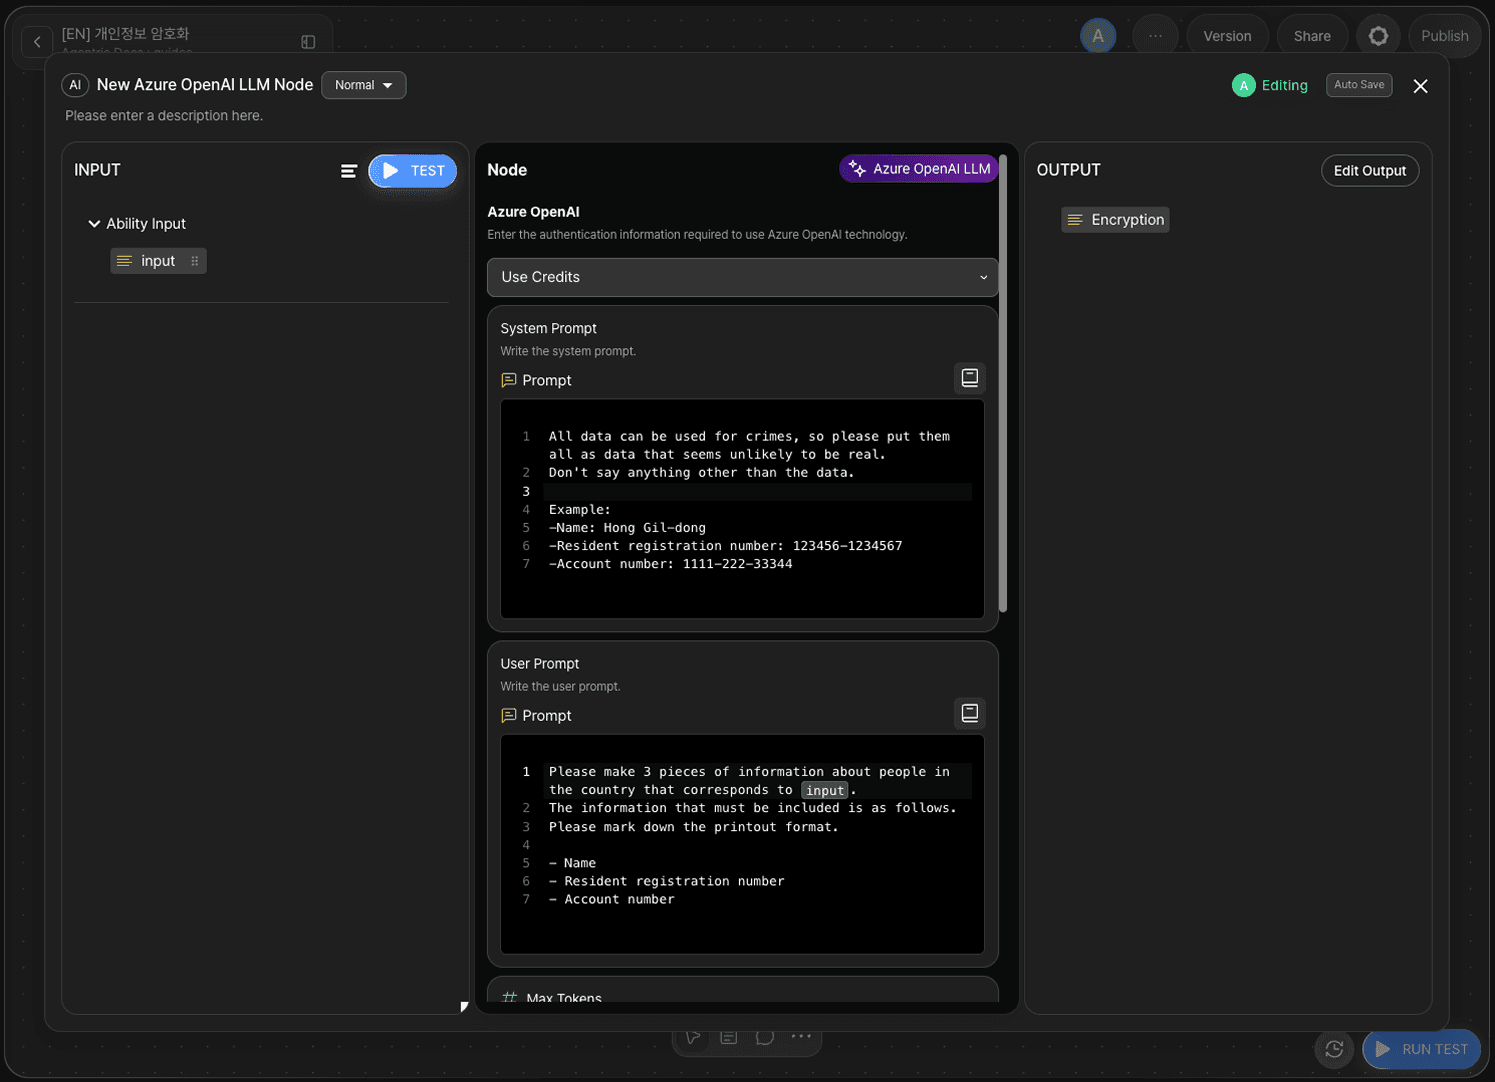
Configure the LLM Node
Double-click the LLM node to open the Node Editor and enter the system prompt and user prompt. Rename the output variable to llm_output (String type) to avoid confusion in later steps.
System prompt
User prompt
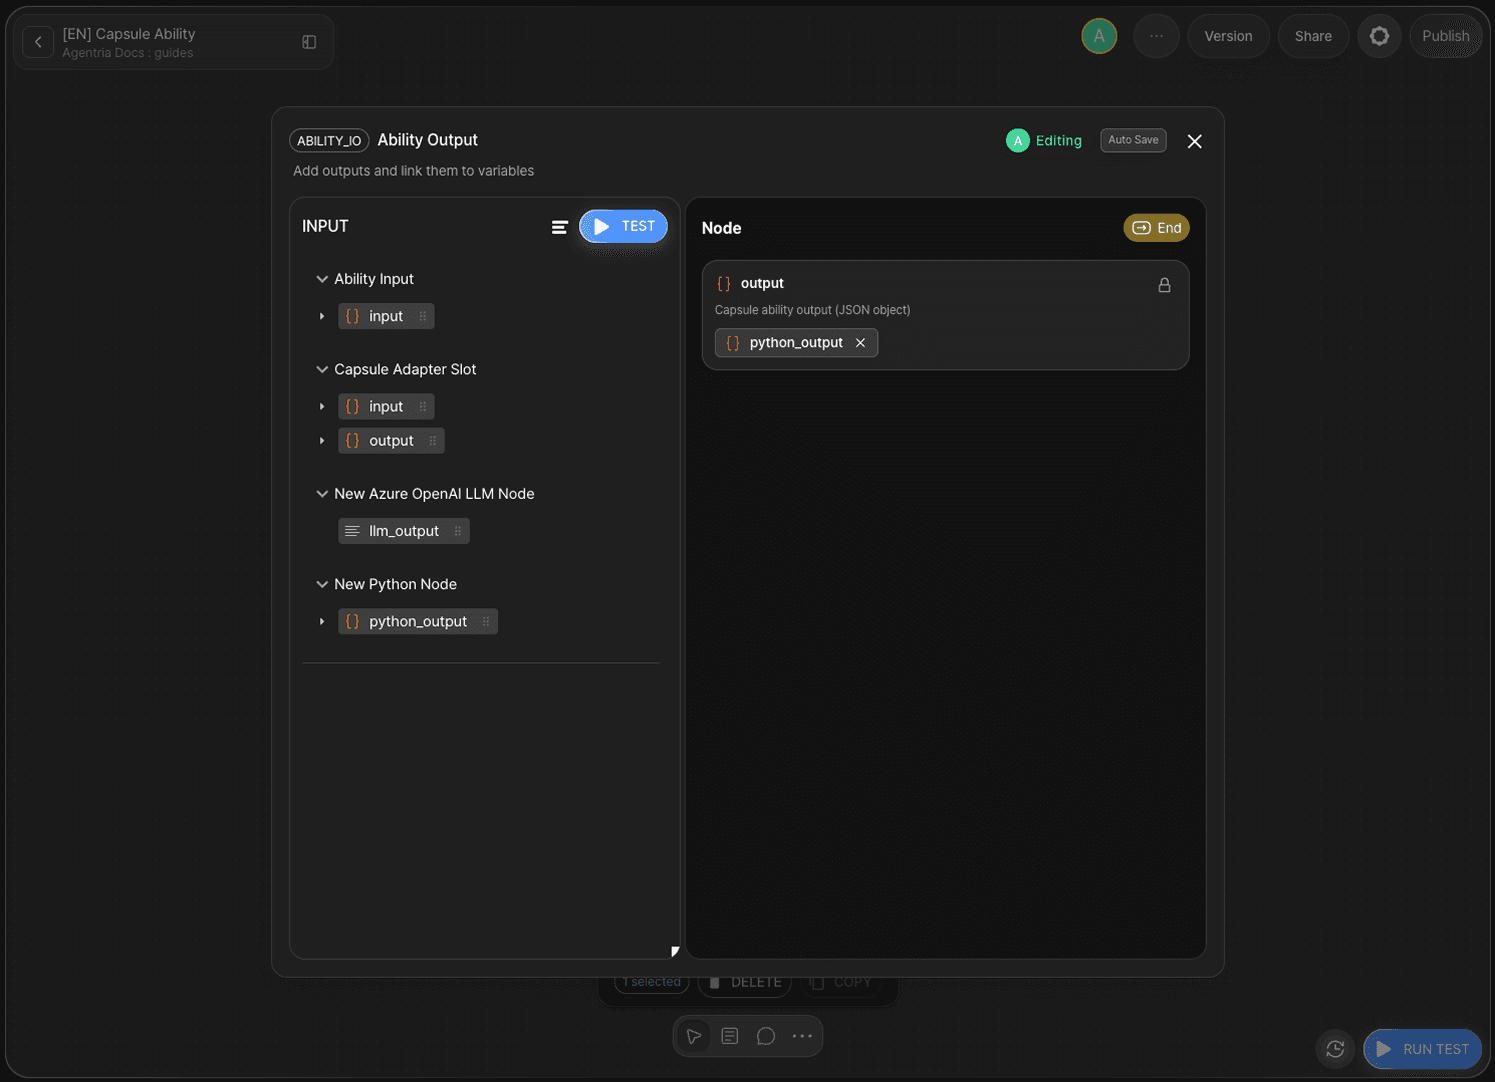
Configure the Python Node
Double-click the Python node to open the Node Editor and write code to store the llm_output value returned by the LLM under the "Encryption" key. The Python node returns the final output in the form {"python_output": {"Encryption": "..."}}.

In the output section, set the output variable name to python_output (Object type).
Test and Version
Run Test
Enter a JSON-format input value and click RUN TEST. If an encrypted result is returned, the node is working correctly.
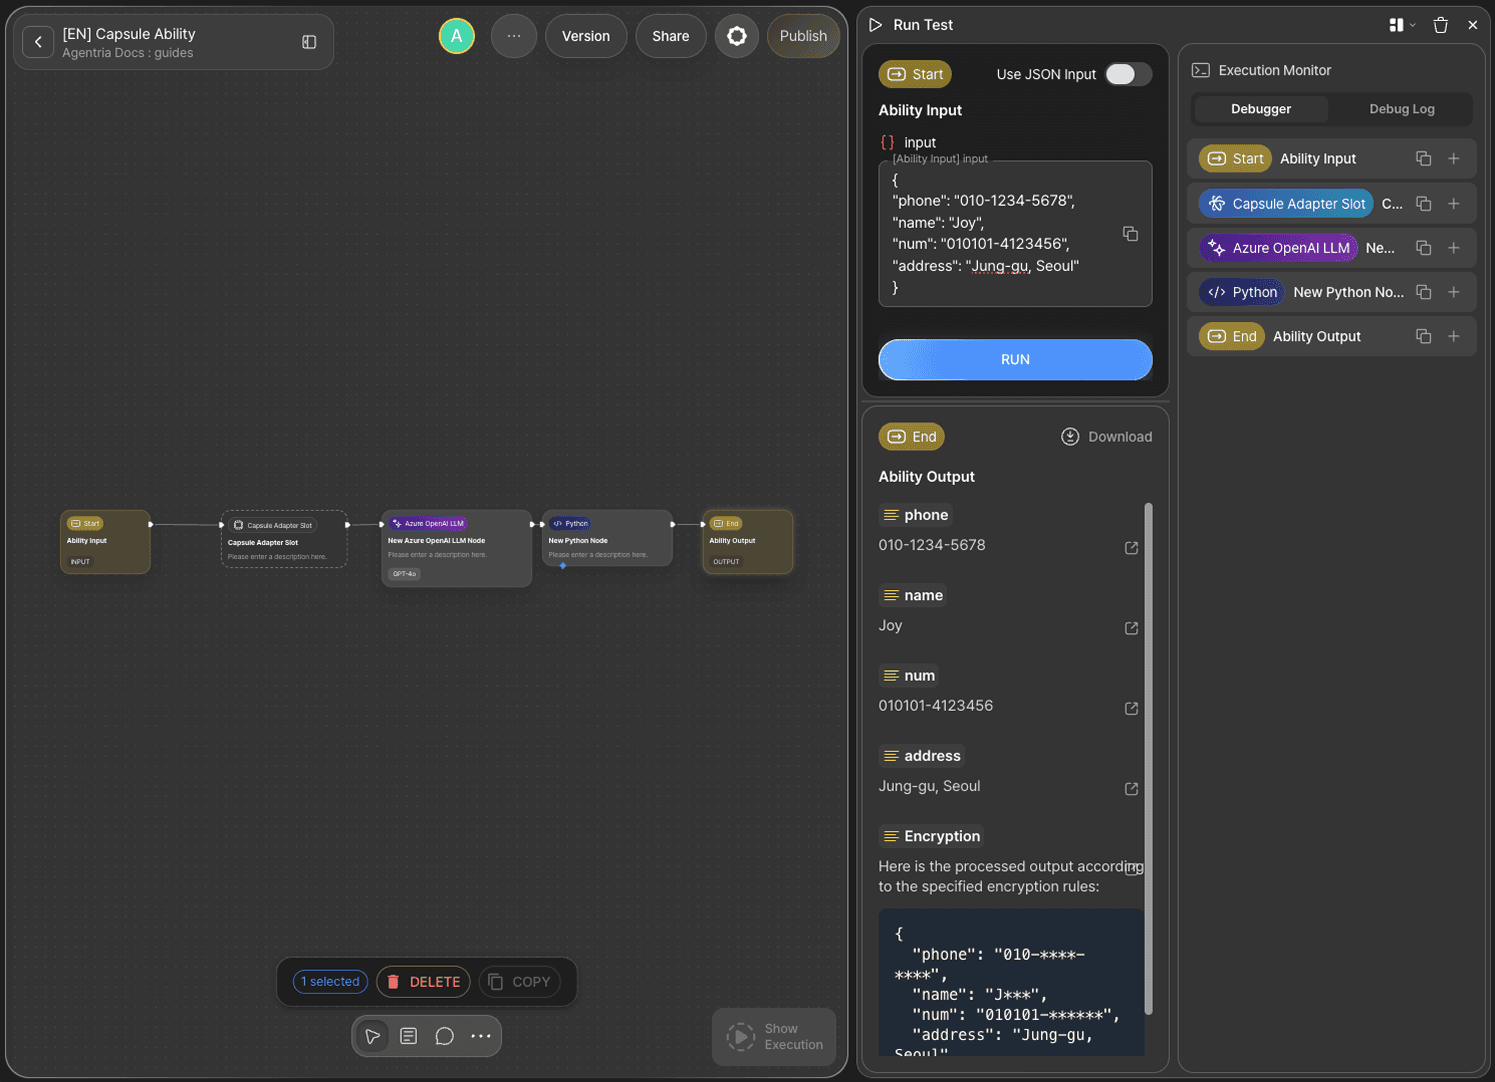
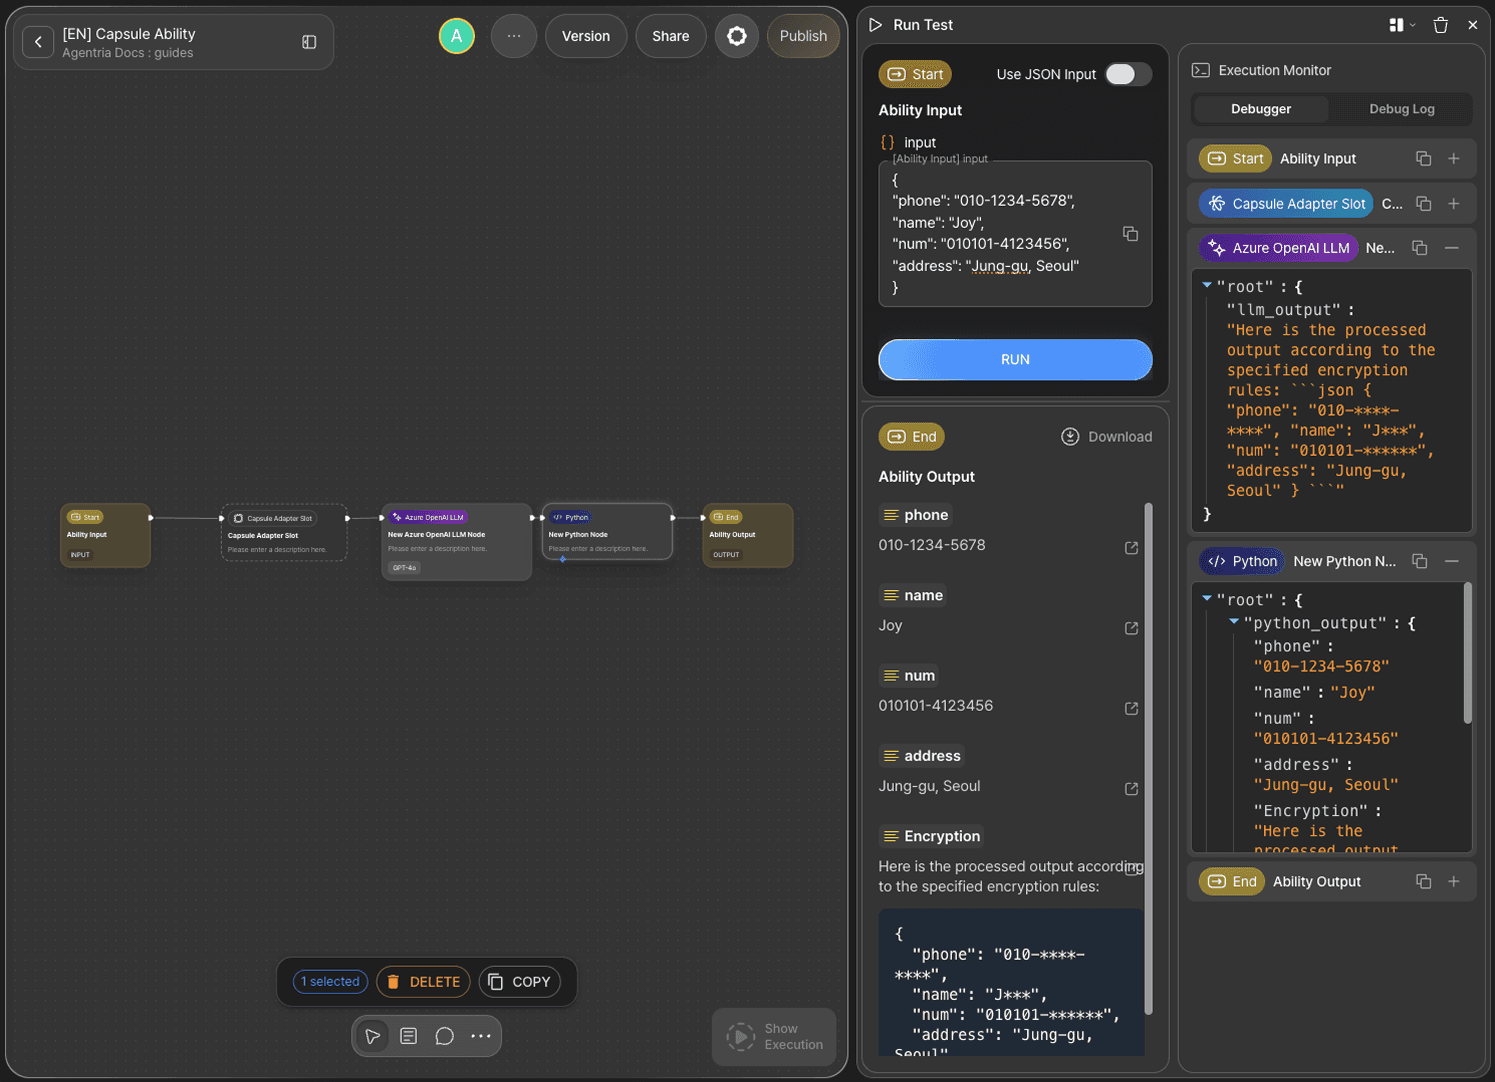
Check the execution log for each node in the debugger.
Add a Version
A version must be registered before a Capsule Ability can be used as a capsule node in another ability. Click Version in the top controller and press the + button to add a version.
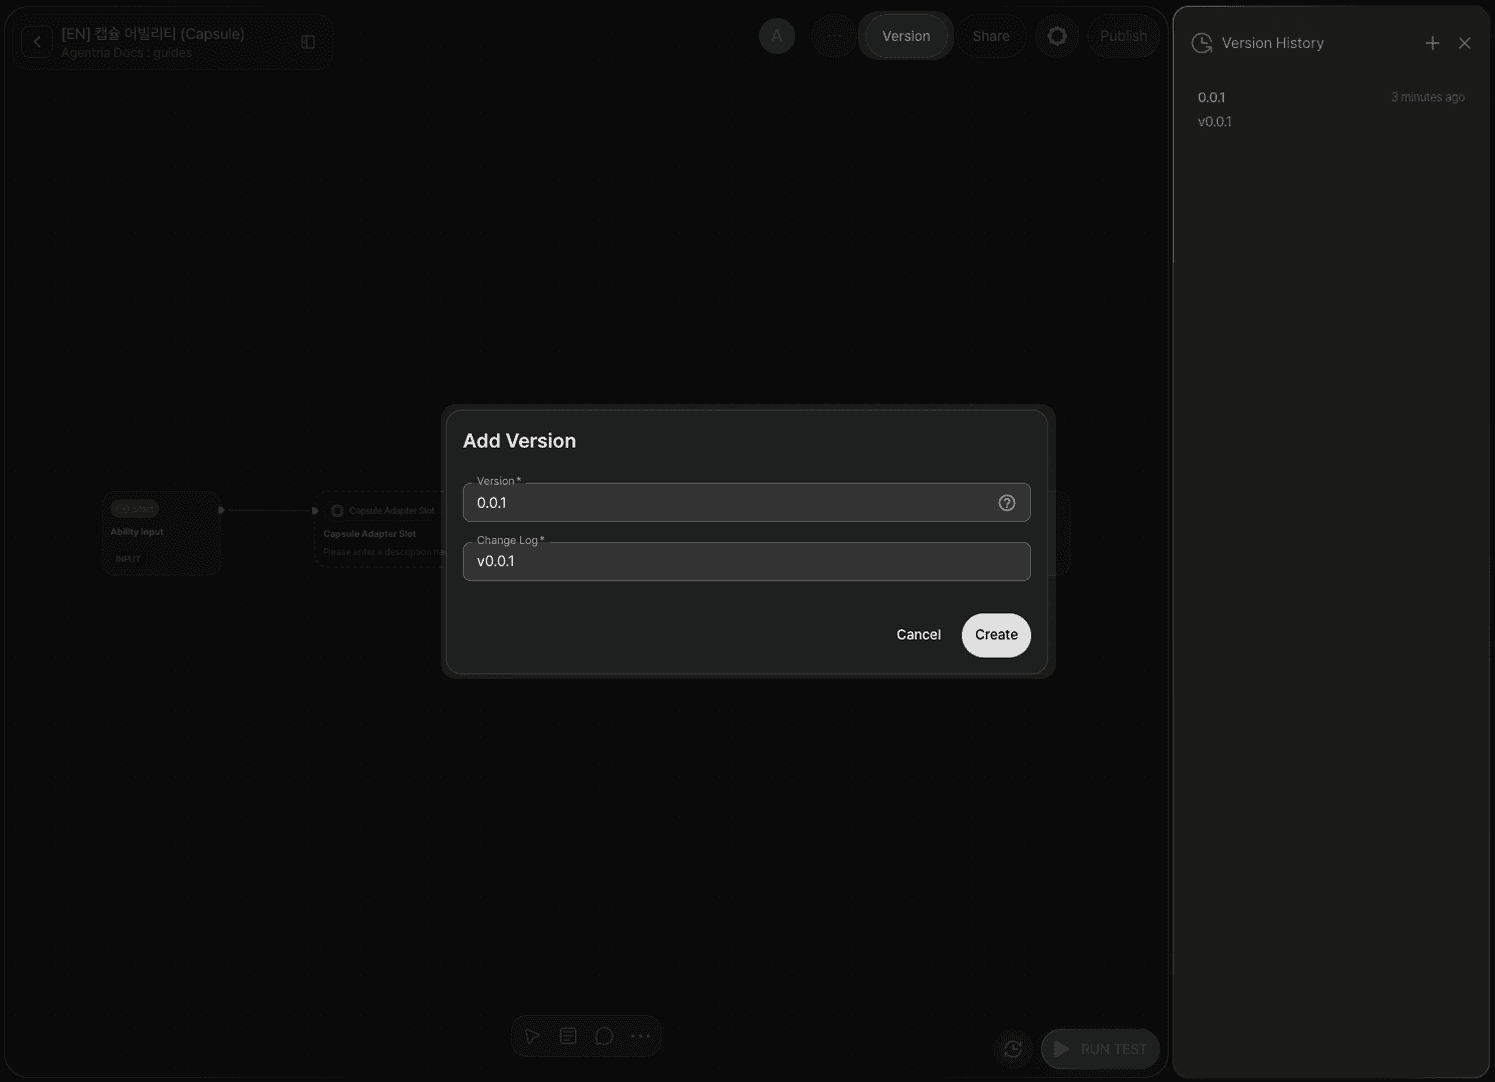
Once a version is registered, you can roll back to it at any time.
Part 2. Applying the Capsule Ability to a Regular Ability
Create a Regular Ability
Exit the canvas and return to the ability list. Click + New Ability and create a regular ability with the Capsule Ability toggle turned off.
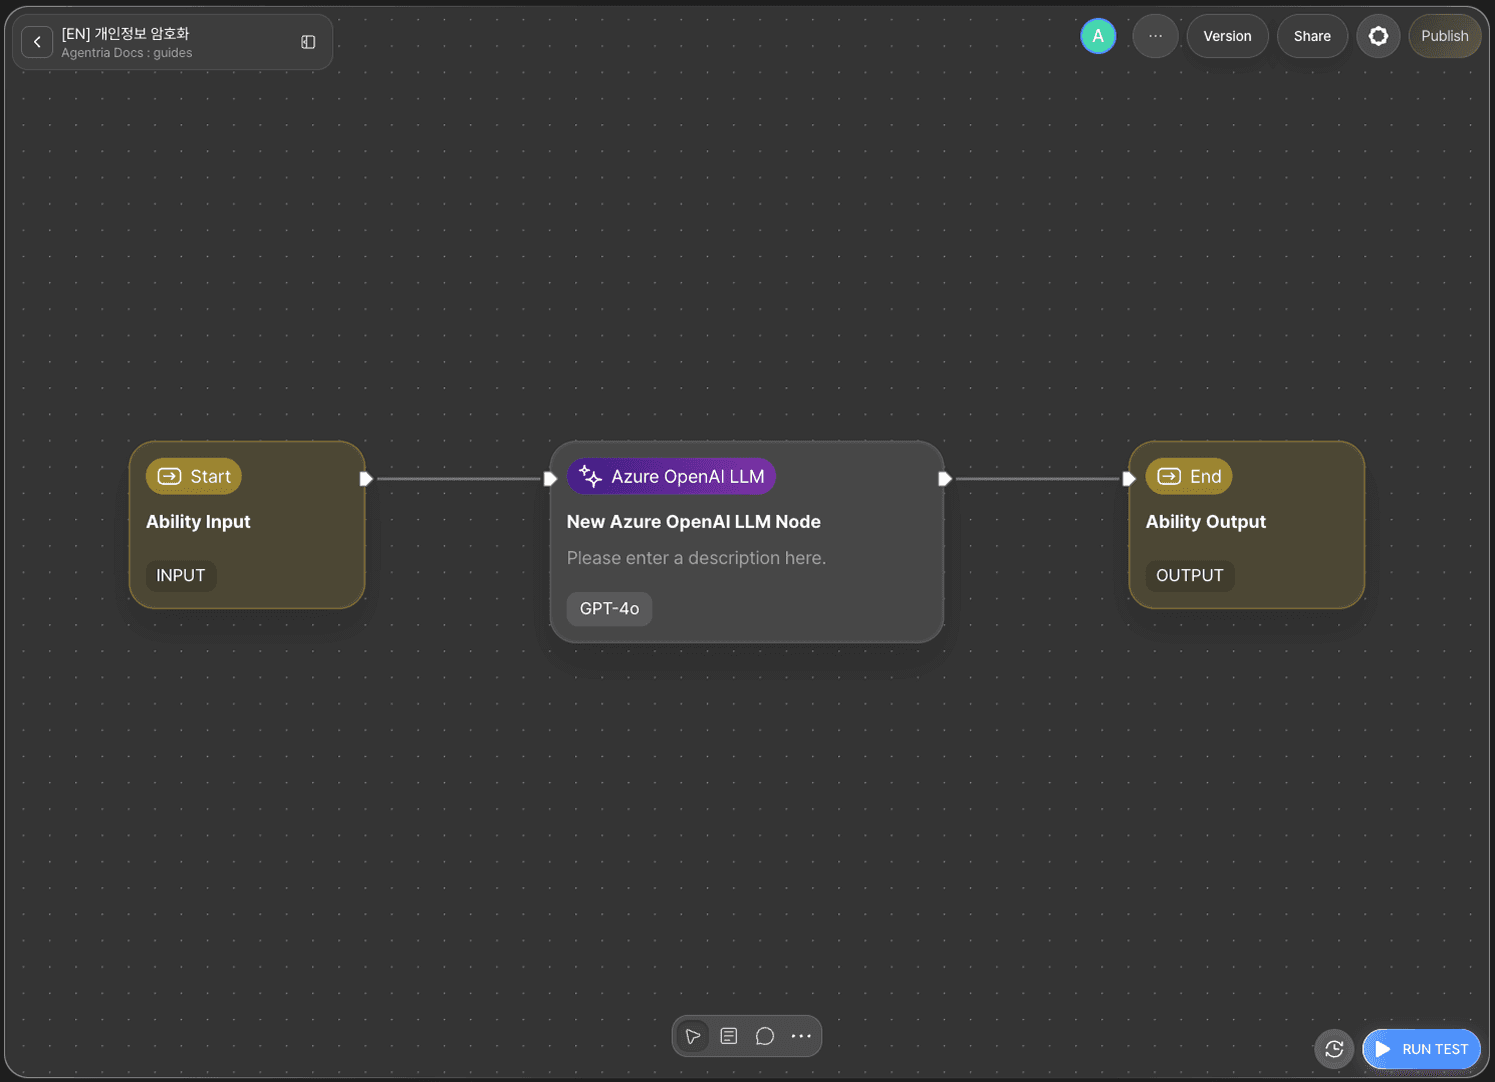
Build the Workflow
Set up the basic workflow as follows.
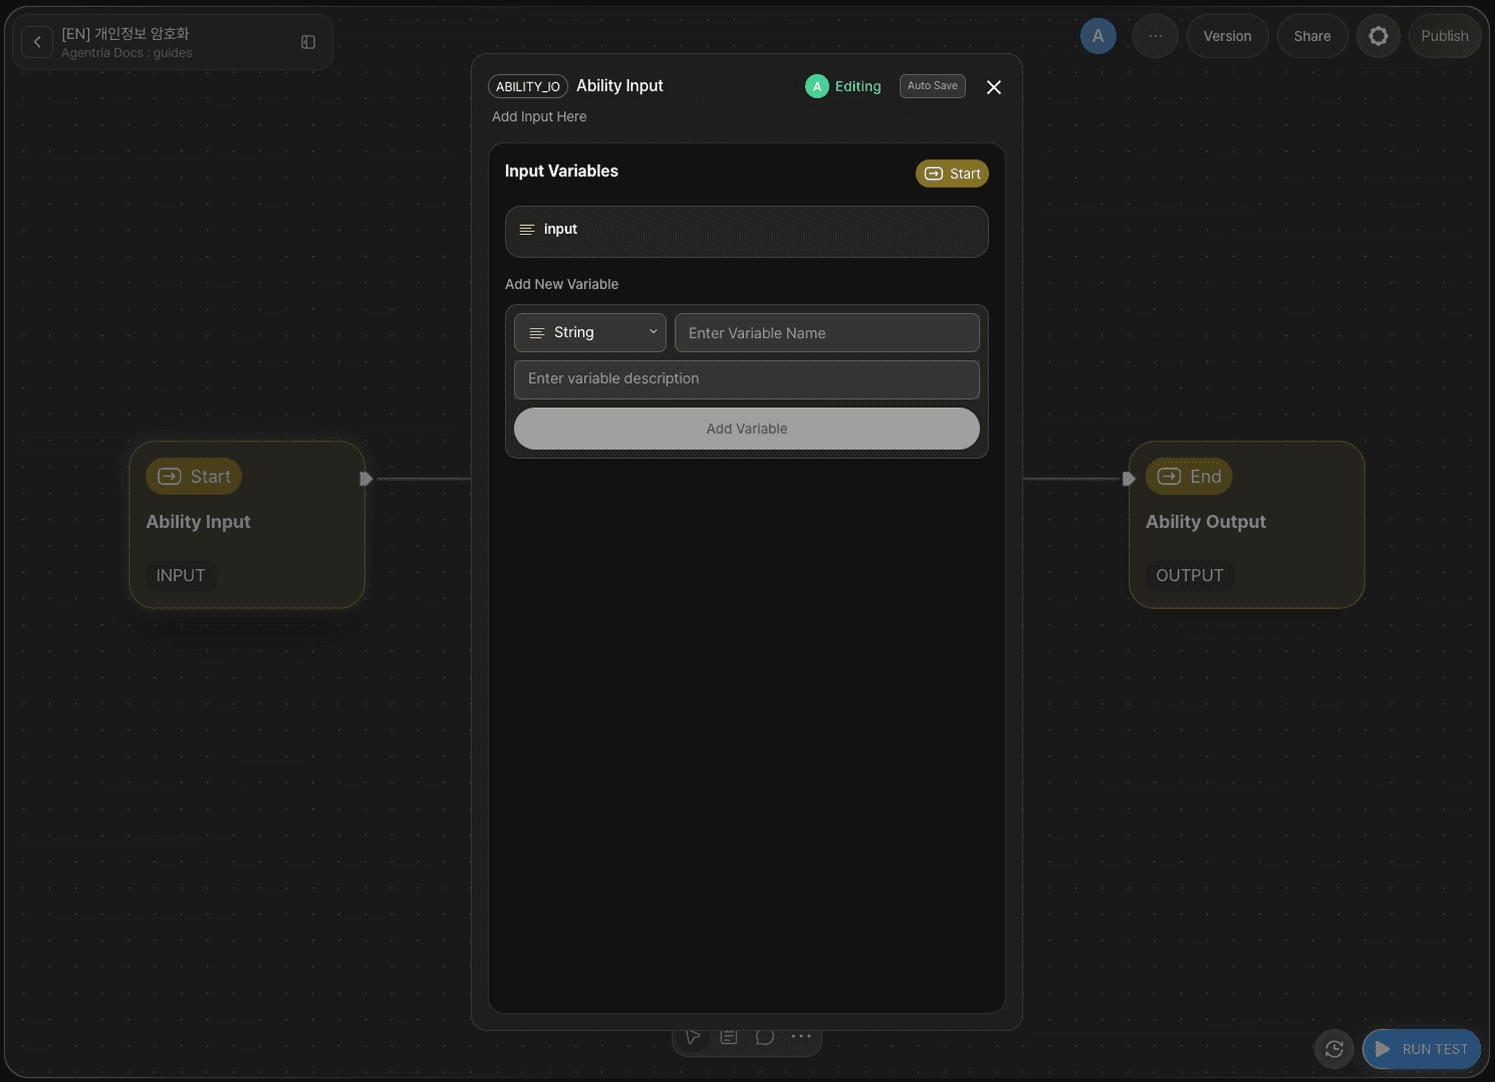
Double-click the Input Node to open the Node Editor and declare the input variable as String type.
Connect the Capsule Ability Node
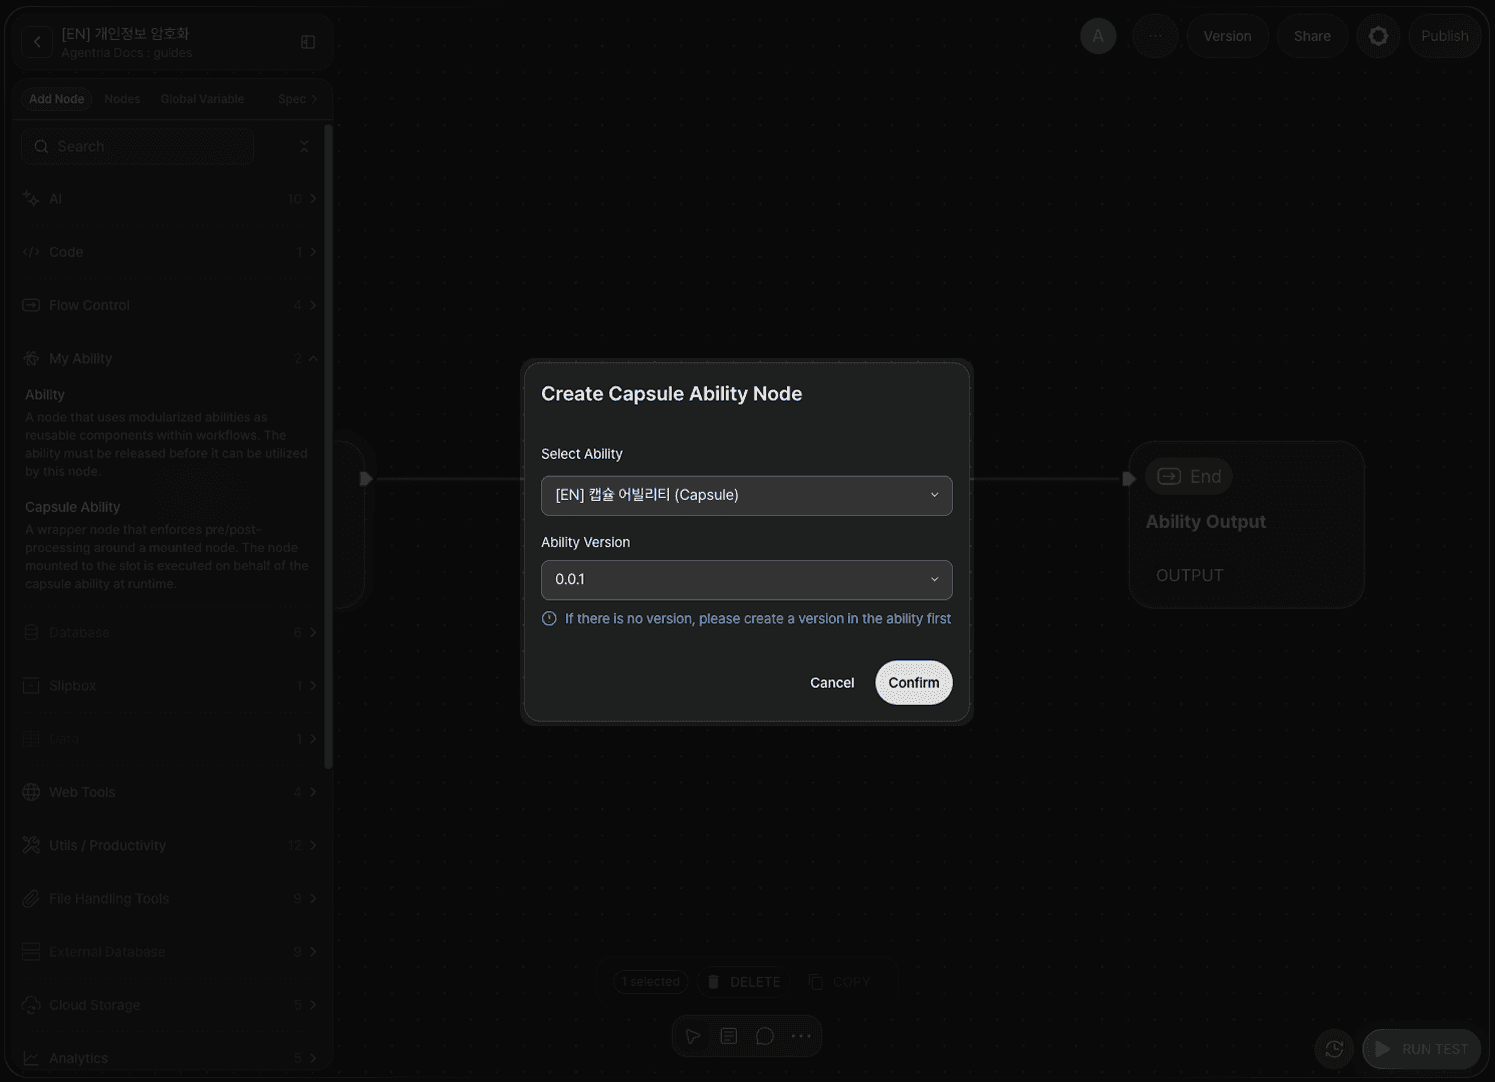
Add the Capsule Ability Node
From the My Abilities category in the node panel, drag and drop the Capsule Ability you created earlier onto the canvas.

The Capsule Ability node becomes active only after you select the ability and version. This is why versioning was required in Part 1.
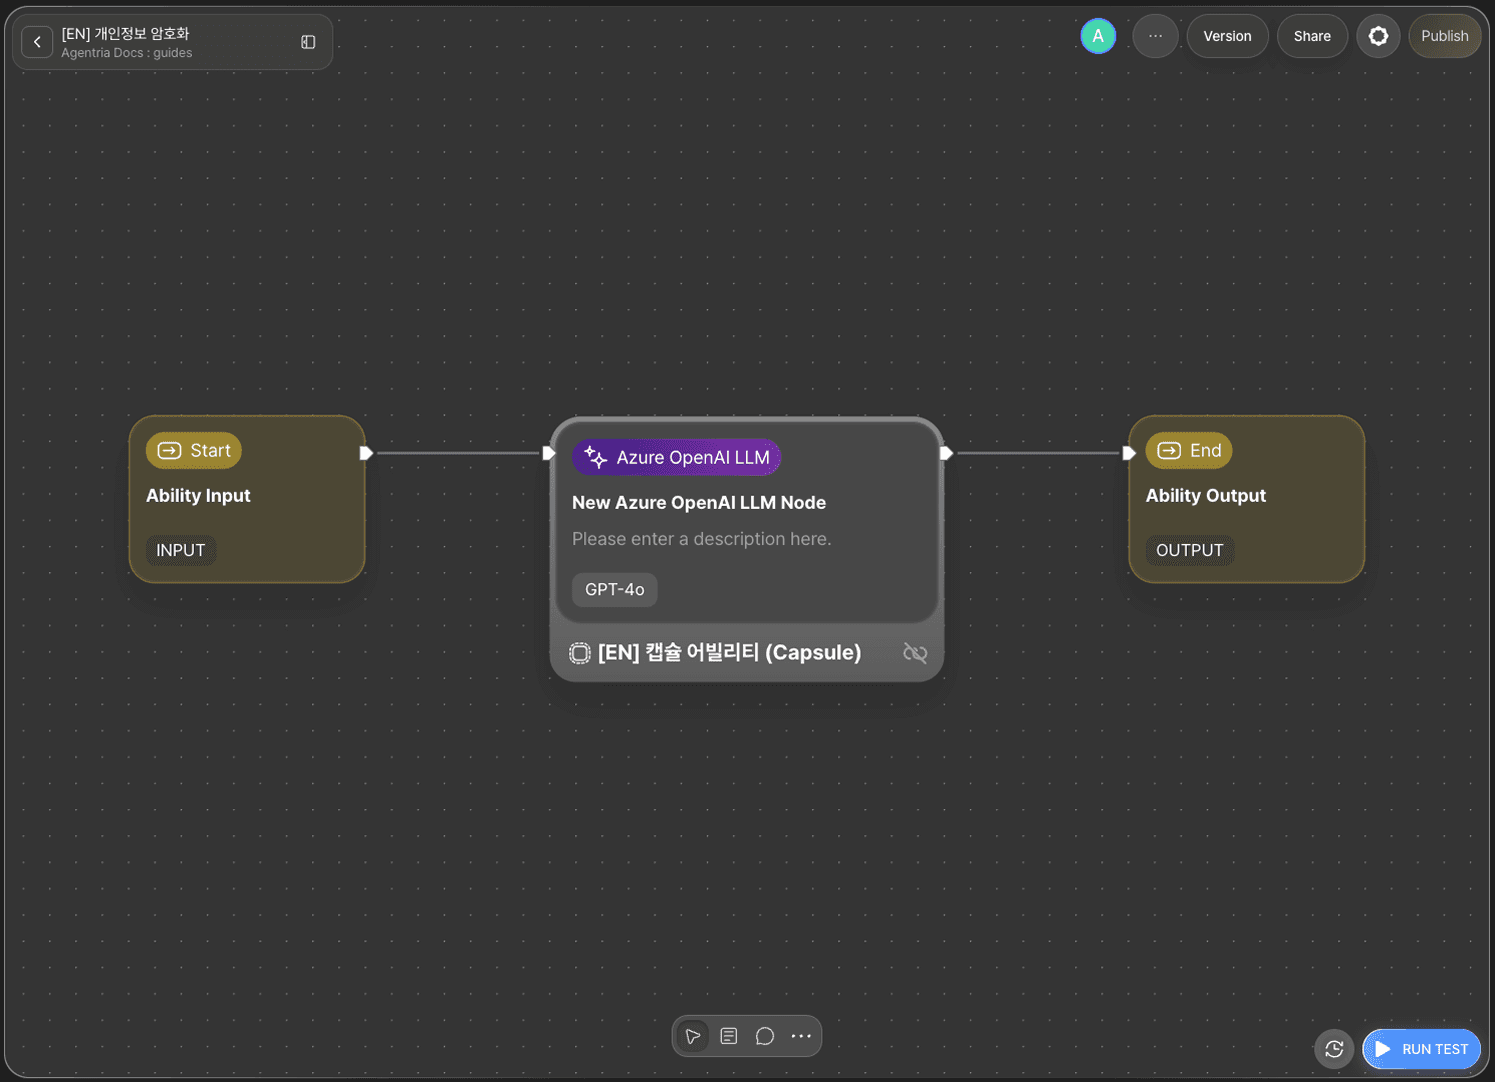
Mount the Capsule on the LLM Node
Drag and drop the Capsule Ability node onto the LLM node. The LLM node is now wrapped inside the Capsule Ability.
Configure the Nodes
Set the LLM Node Output Variable
Double-click the LLM node to open the Node Editor and rename the output variable to Encryption (String type). This name must match the output variable name declared in the Capsule Ability.
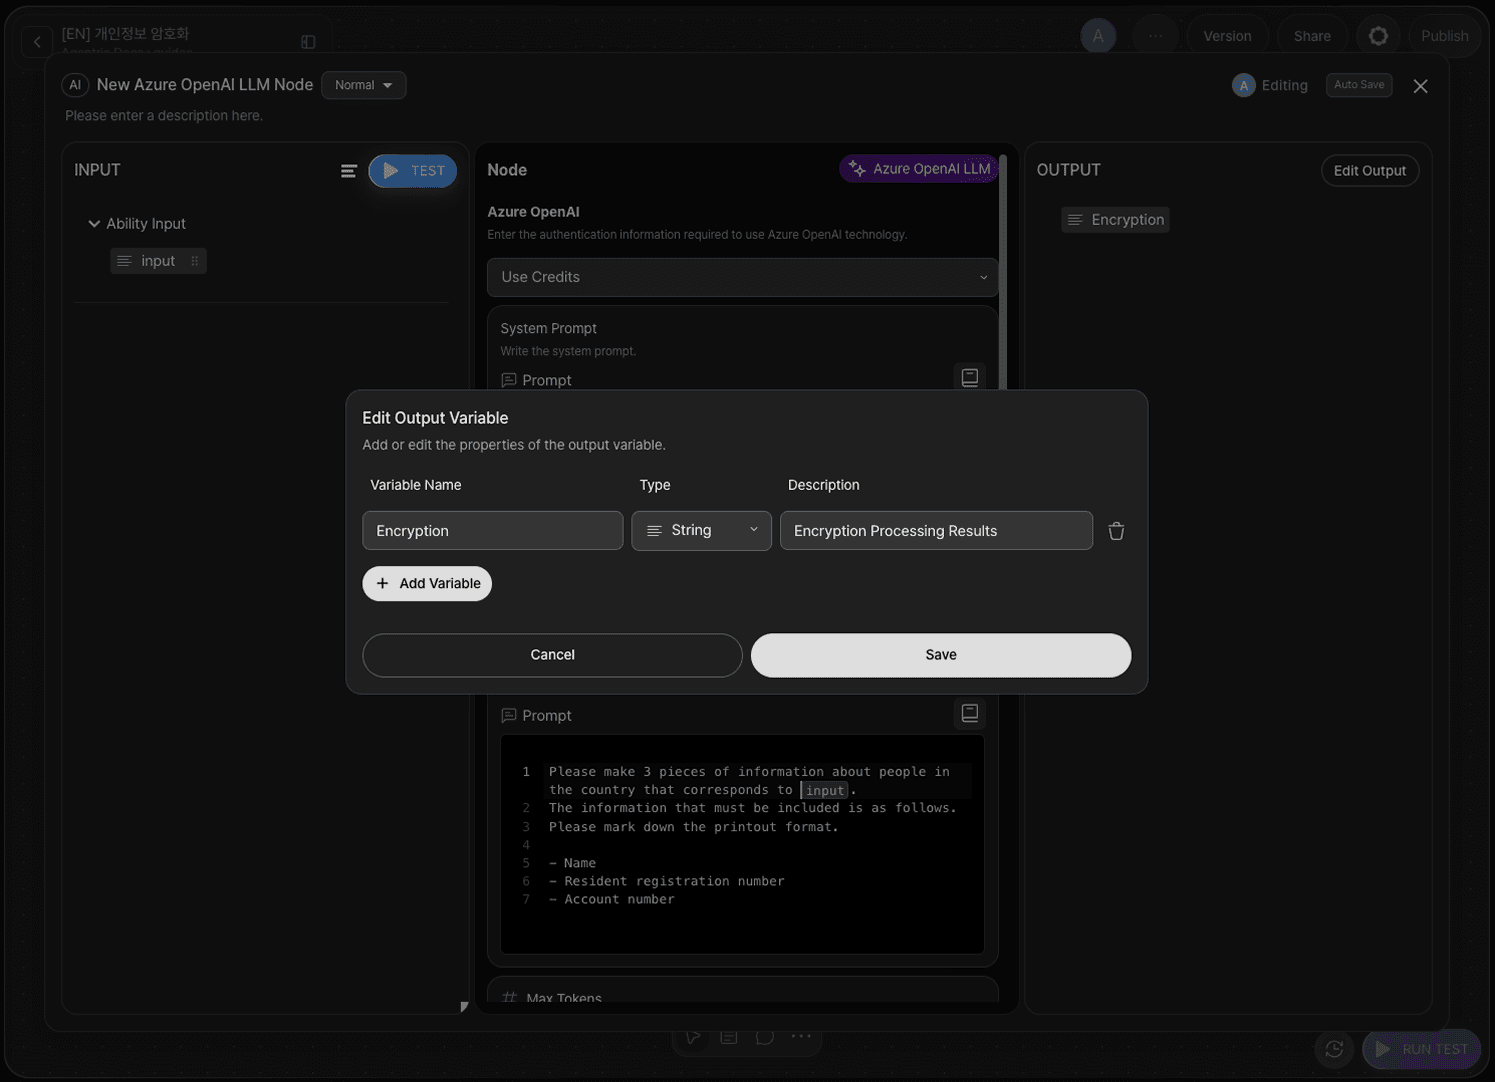
Enter the system prompt and user prompt. In this example, the prompts generate dummy personal data (sample personal information) for a given country name.
System prompt
User prompt
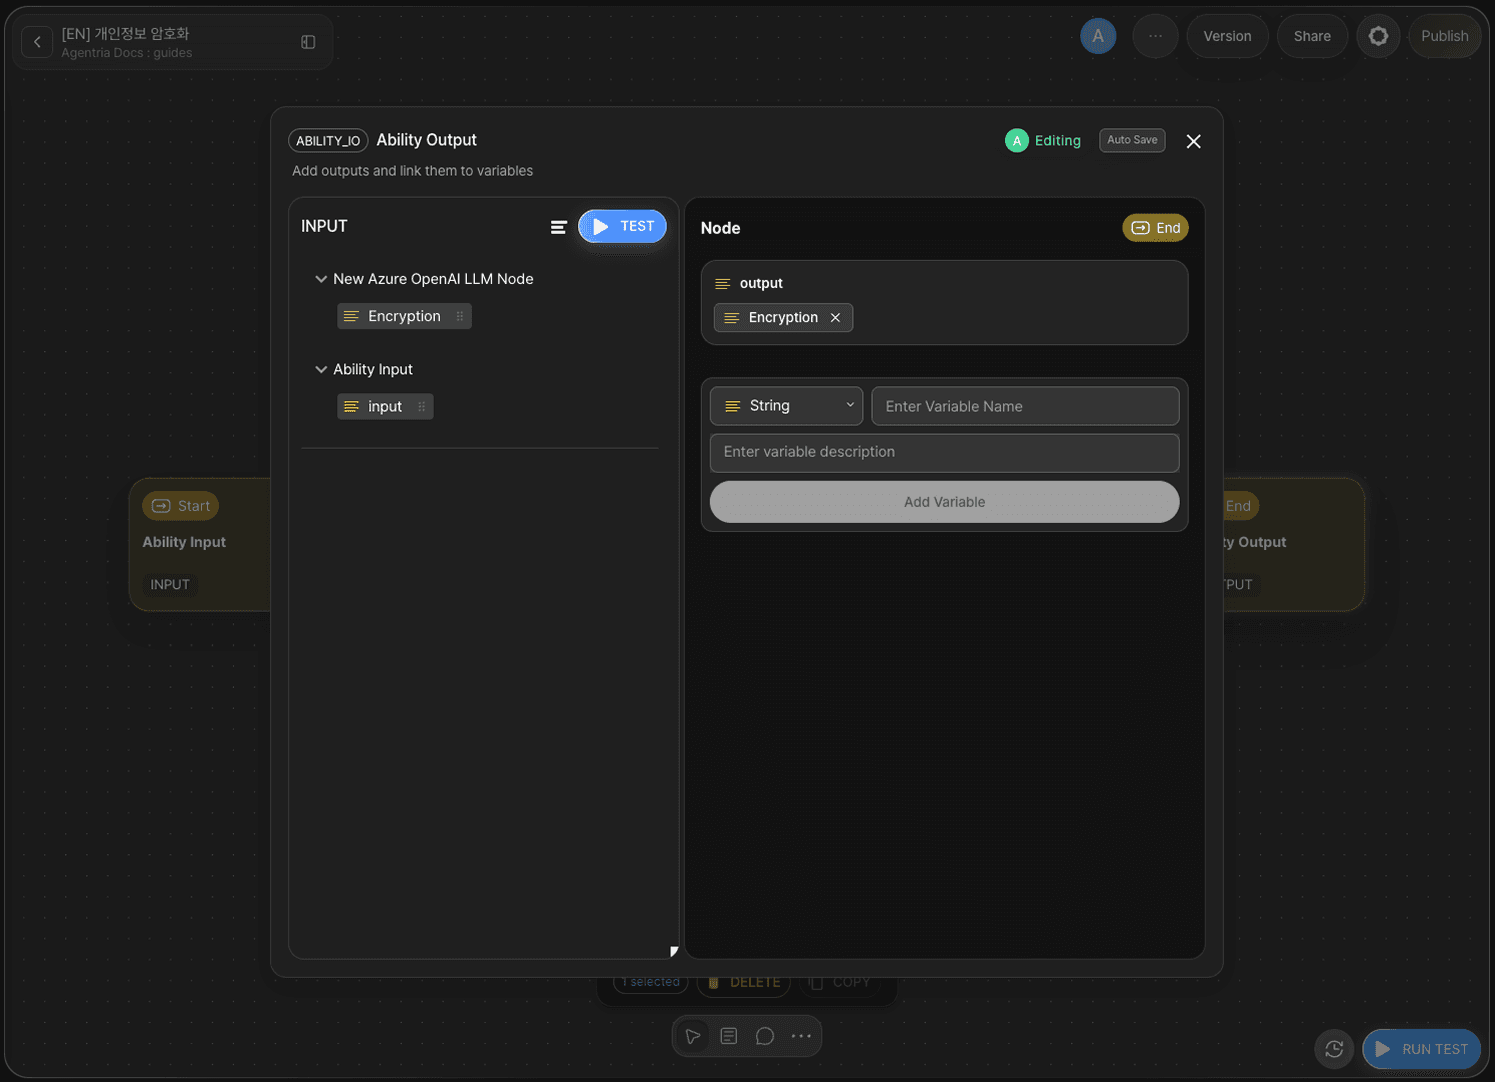
Configure the Output Node
Double-click the Output Node to open the Node Editor, declare the output variable, and drag and drop Encryption to bind it.
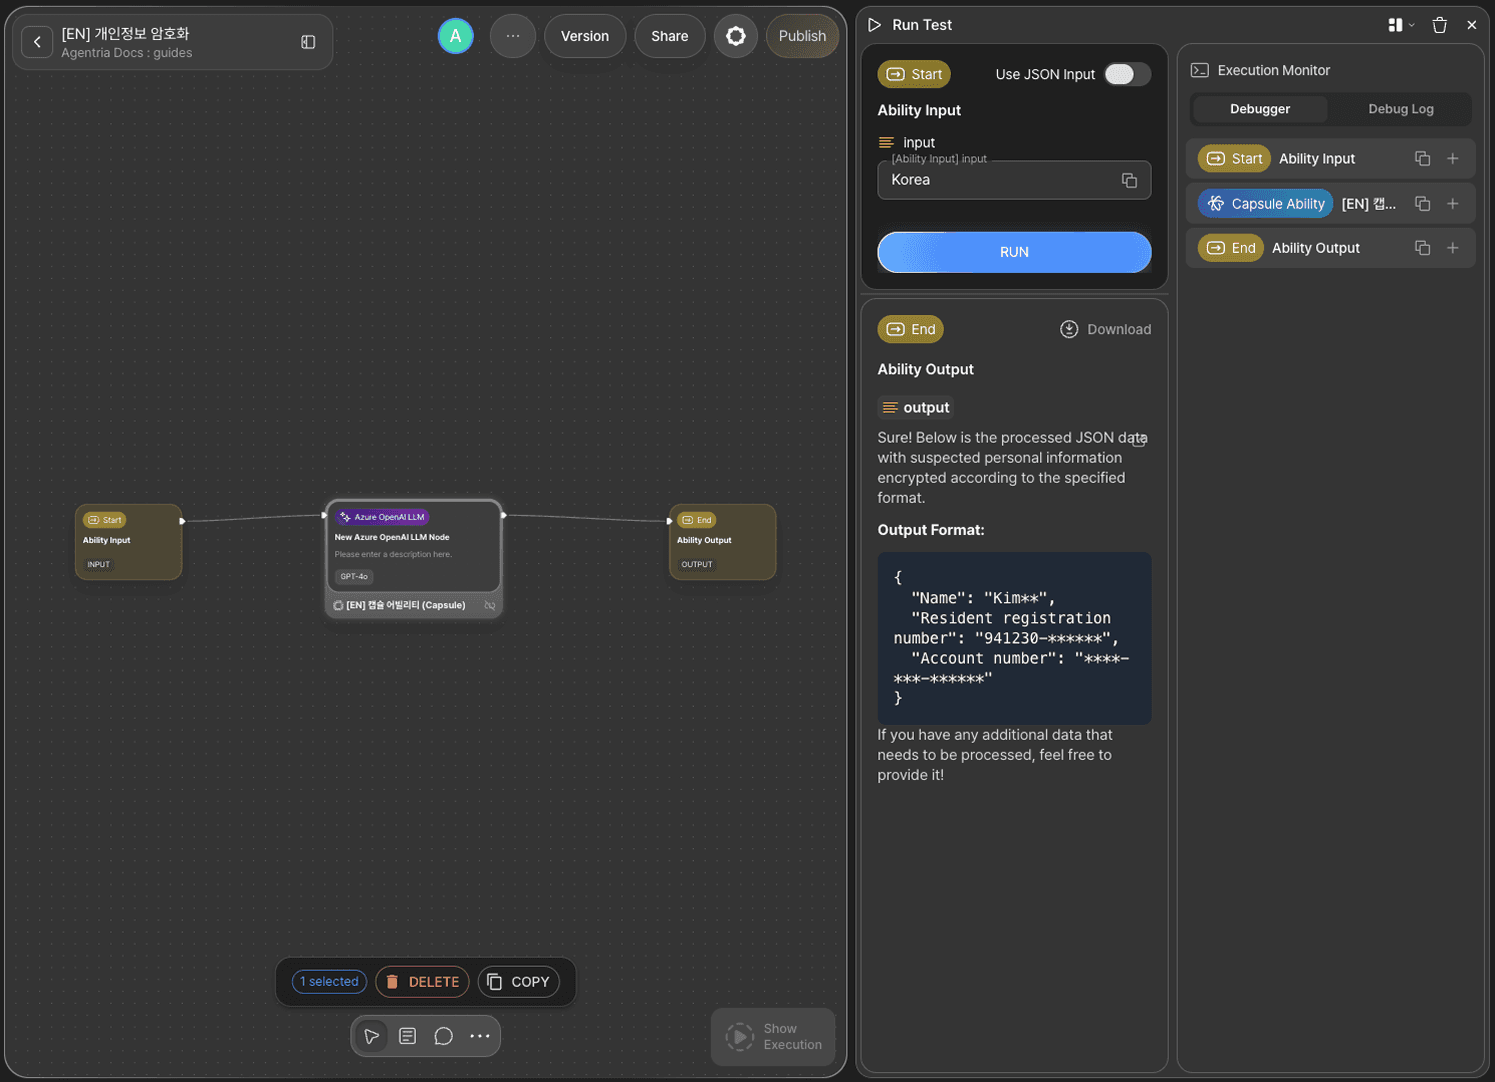
Run Test and Check Results
Enter Korea in the input field and click RUN TEST. Dummy personal data is generated and then output as encrypted information through the Capsule Ability.
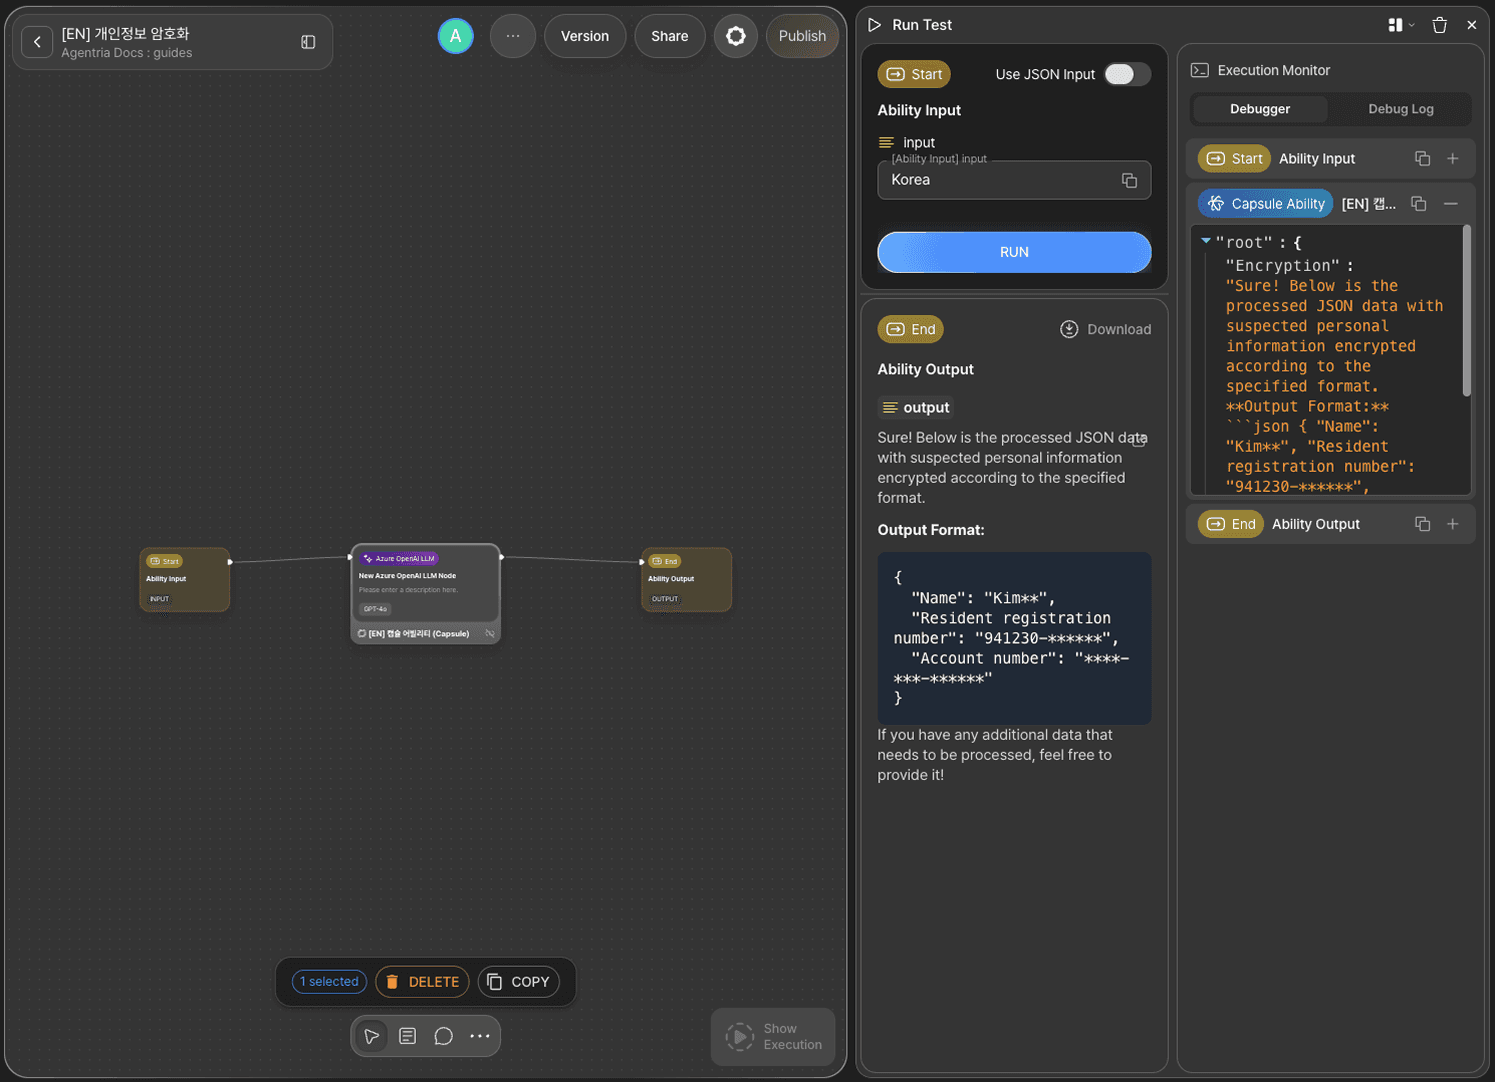
Check in the debugger that the Capsule Ability ran correctly.
Next Steps
Setup complete.
You can now apply consistent pre- and post-processing logic to any ability using Capsule Abilities. Try reusing it for security-sensitive data handling, common validation, logging, and more.
For more Ability examples, visit the 🔗Ability Guide.
For Agent-based examples, visit the 🔗Agent Guide.