Slip Field Updater Node
Using Slipbox Nodes (Slip Field Update)
The Slip Field Update node completely overwrites a slip's title, summary, and body on a per-field basis. Since any field you pass is replaced wholesale with the new value, use the Slip Text Replace node instead if you only want to change a specific sentence or word within the body.
This node also works well connected to an agent as a tool, but this tutorial covers it in an Ability to walk through the most basic usage first. Connecting it to an agent will be covered in a separate Slipbox agent integration guide.
In this tutorial, you'll build an Ability workflow that completely replaces the title, summary, and body of an existing "Customer Review Response Bot" slip with new content.
Before You Begin
A slipbox must already be set up in your project, and the slip you want to update must already exist, before starting this tutorial. For instructions on building a slipbox, see the 🔗Slipbox Guide.
After completing this tutorial, you will be able to:
Use the Slip Field Update node to replace a slip's title, summary, and body on a per-field basis.
Connect each input variable of the Slip Field Update node to the Start Node's input values.
Specify the slipbox that the slip to update belongs to.
Verify the slip was updated successfully using the node test and debug log.
Workflow Overview
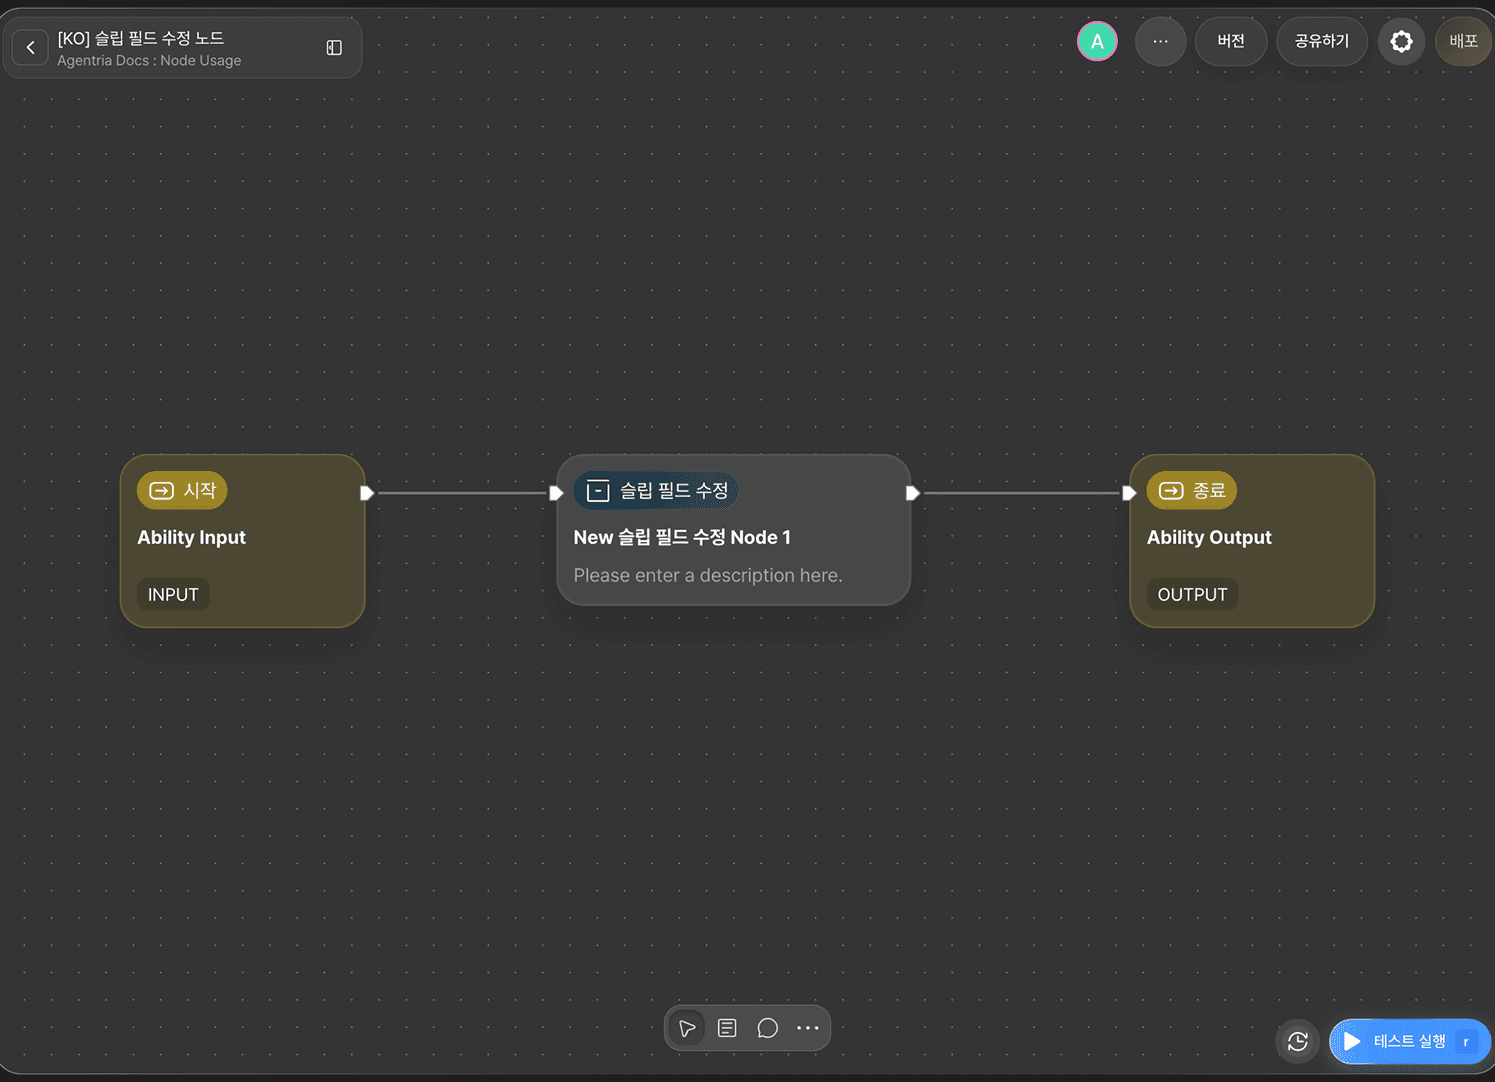
The core of this tutorial is the Slip Field Update node.
The Slip Field Update node identifies the slip to update by its public UUID (slip_public_uuid) and replaces only the fields you pass (title, body_md, summary, slip_type) with new values. Any field you don't pass keeps its existing value.
Slip Field Update Node Basic Info
The Slip Field Update node provides the following options.
Option | Required | Description |
|---|---|---|
| Required | Select the slipbox that the slip to update belongs to. |
| Required | The public UUID of the target slip to update. |
| Optional | The new title. If left unbound, the existing title is kept. |
| Optional | The new markdown body. If bound, the entire body is replaced. |
| Optional | The new summary. If left unbound, the existing summary is kept. |
| Optional | The new slip classification — |
| Optional | The current version number. Pass this to check whether the slip was already updated elsewhere and its version has since changed; leave it blank to update without a version check. |
For optional fields like
title,body_md,summary, andslip_type, leave the adapter variable unbound if you want to keep the existing value. If you bind it and then pass an empty string, that field is overwritten with an empty value and its existing content is lost.
This tutorial binds Slipbox Public UUID, slip_public_uuid, title, body_md, and summary, and leaves slip_type and current_version unbound.
Step 1: Create an Ability
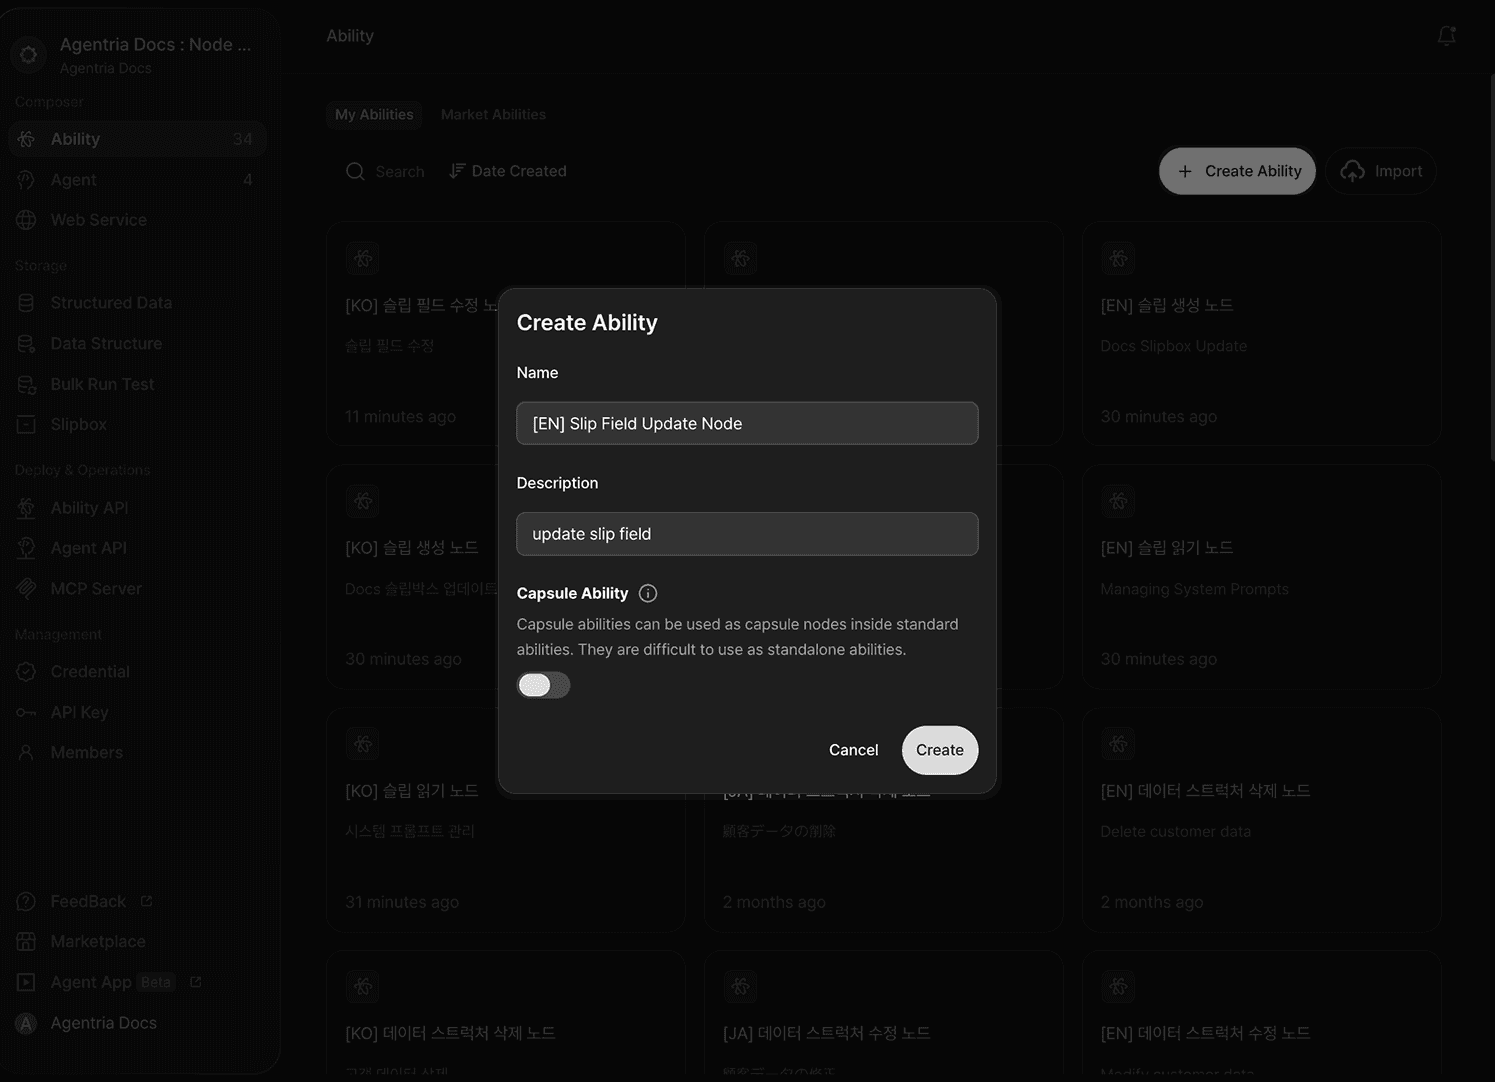
Create a new Ability. Enter Slip Field Update node for Name and Update Customer Review Response Bot content for Description. This Ability uses the Slip Field Update node to rewrite the content of the existing "Customer Review Response Bot" slip.
Step 2: Configure the Start Node
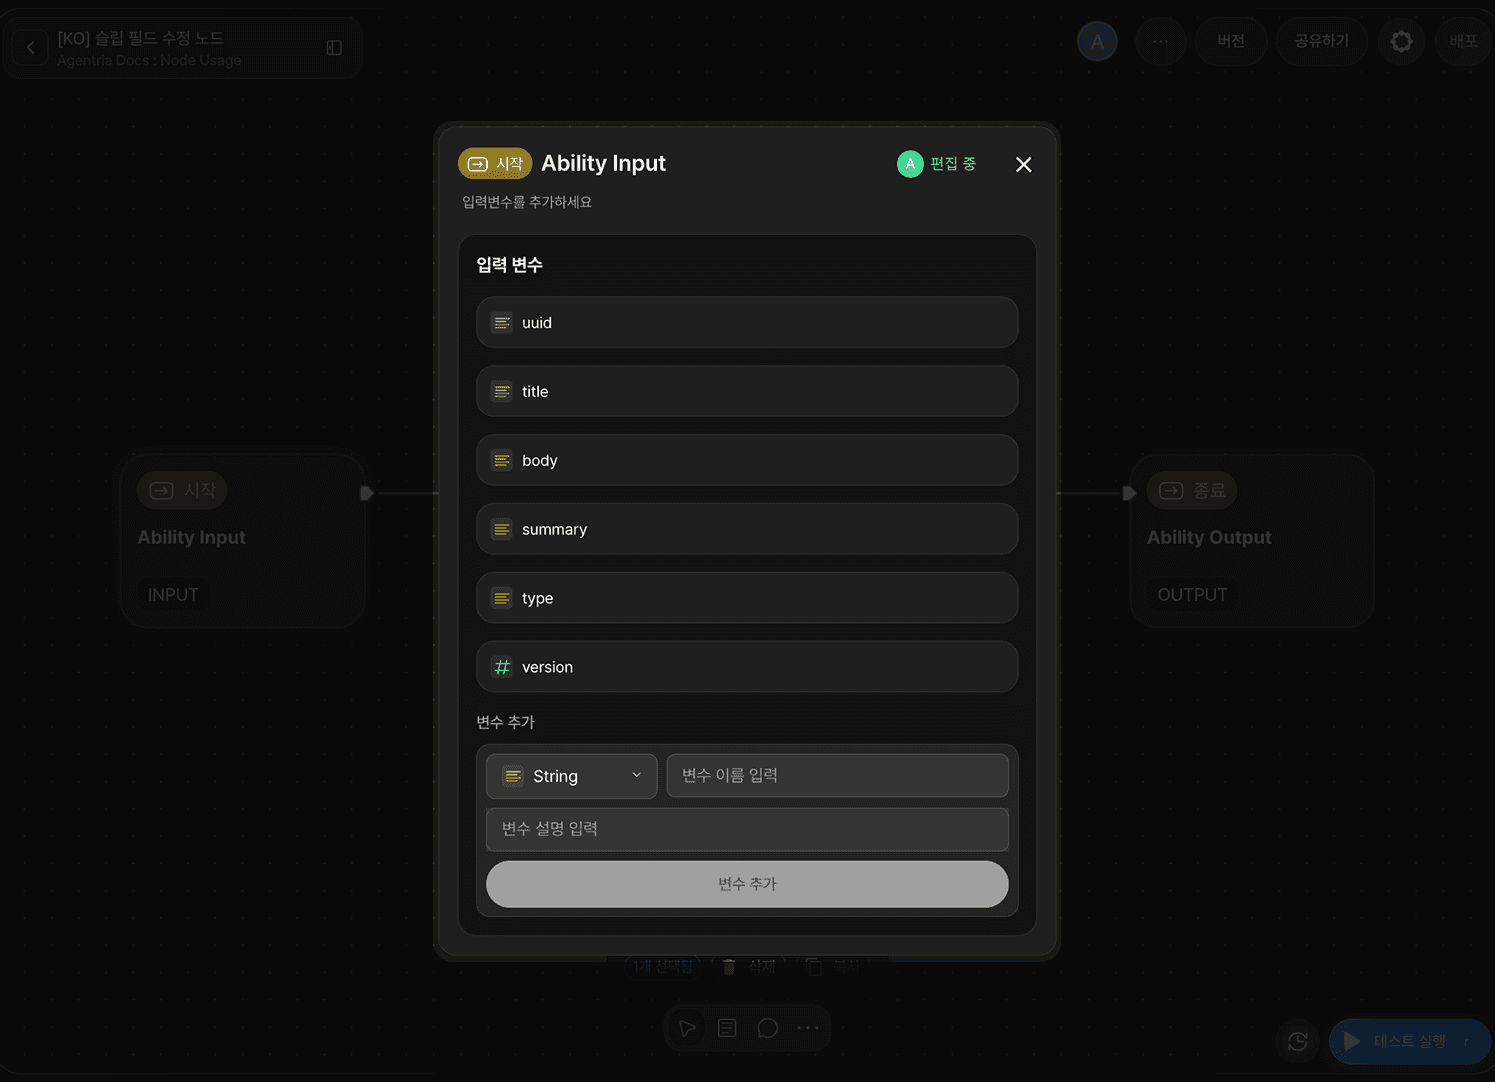
Double-click Start Node to enter the Node Editor. Add five String variables and one Int variable.
uuid: accepts the public UUID of the slip to update. (String)title: accepts the new title. (String)body: accepts the new body. (String)summary: accepts the new summary. (String)type: accepts the new slip classification. (String)version: accepts the current version number. (Int)
Step 3: Add the Slip Field Update Node
Click +Add Node → add a Slip Field Update node from the Slipbox category.
Step 4: Configure the Slip Field Update Node
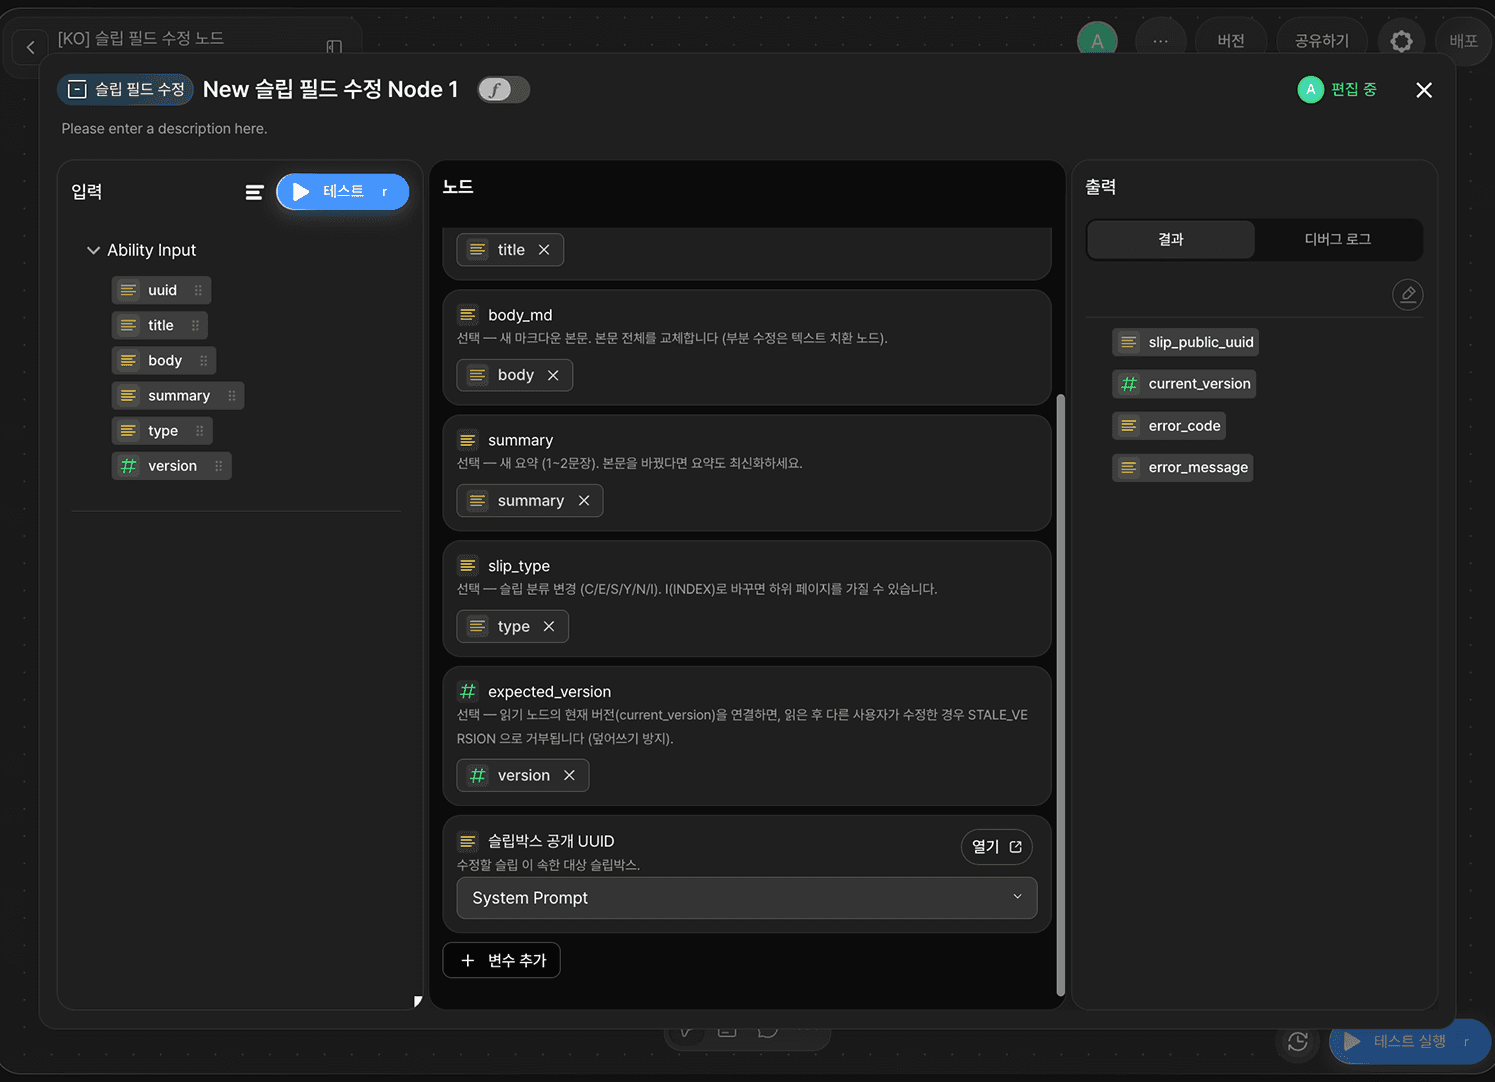
Double-click the Slip Field Update node to enter the Node Editor. In Slipbox Public UUID, select the slipbox that the "Customer Review Response Bot" slip belongs to.
Bind the input variables
Drag and drop the Start Node's input values onto the remaining fields as follows.
Adapter Variable | Bound Value |
|---|---|
|
|
|
|
|
|
|
|
Leave slip_type and current_version blank for this tutorial.
Once the node runs successfully, it outputs error_code and error_message.
Step 5: Configure the End Node
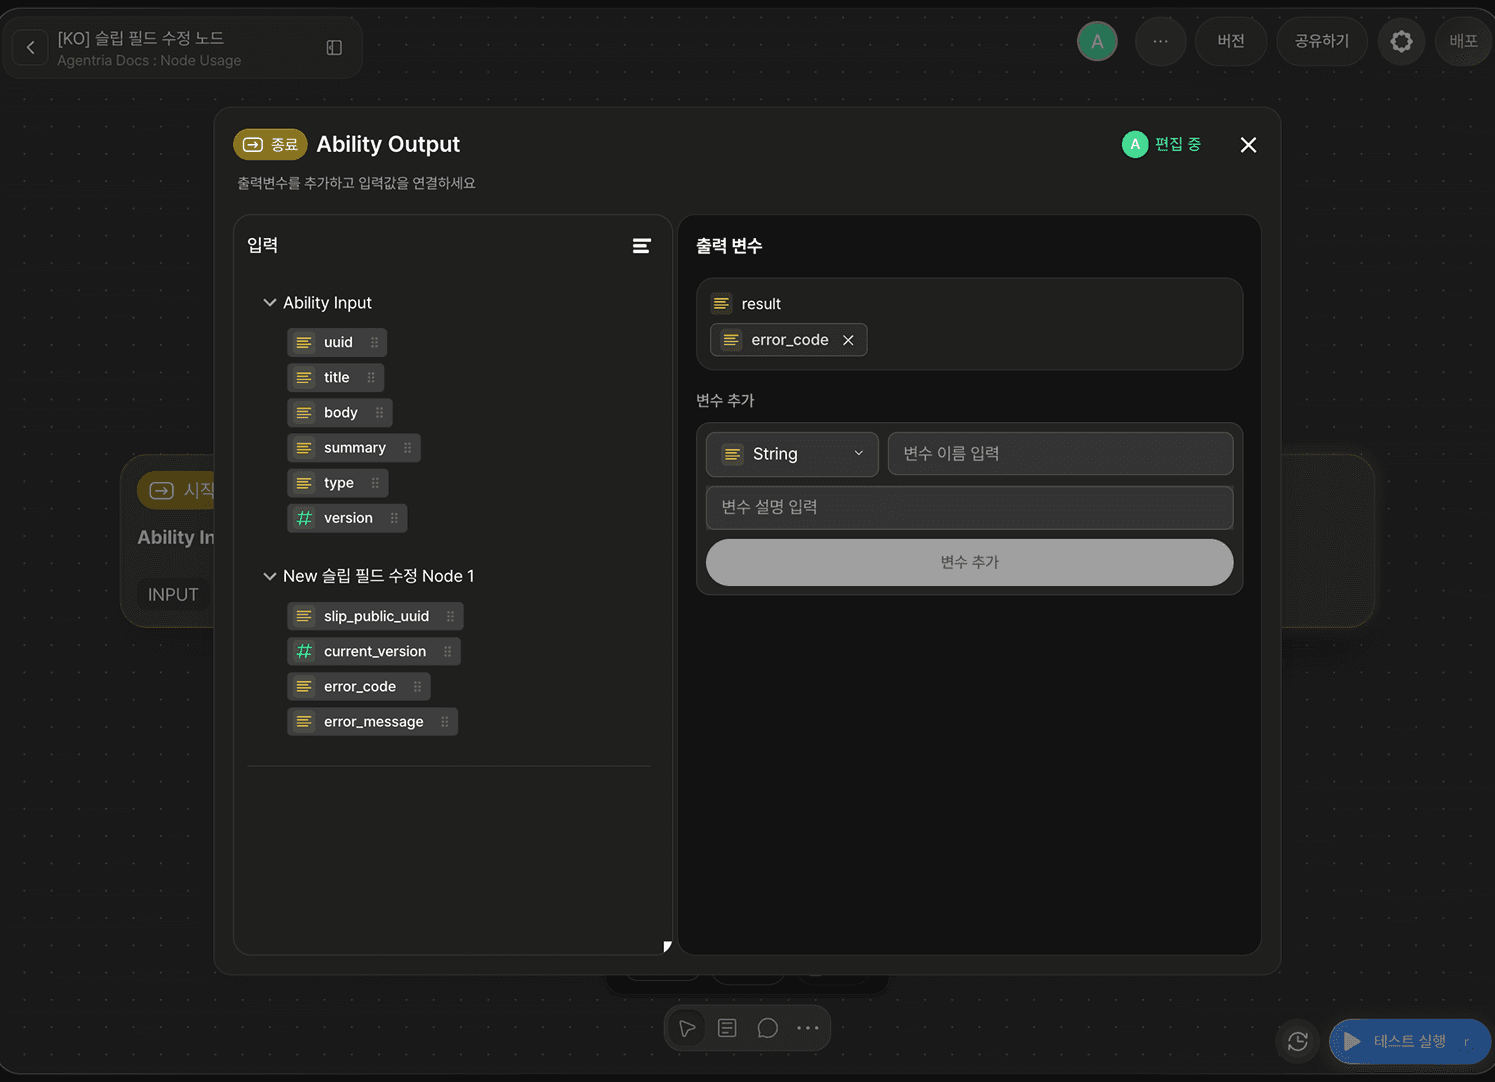
Double-click End Node to enter the Node Editor. Add a String output variable named result and drag and drop error_code from the Slip Field Update node to bind it. This lets you check whether the slip was updated successfully or failed from the output value.
Step 6: Copy the UUID of the Slip to Update
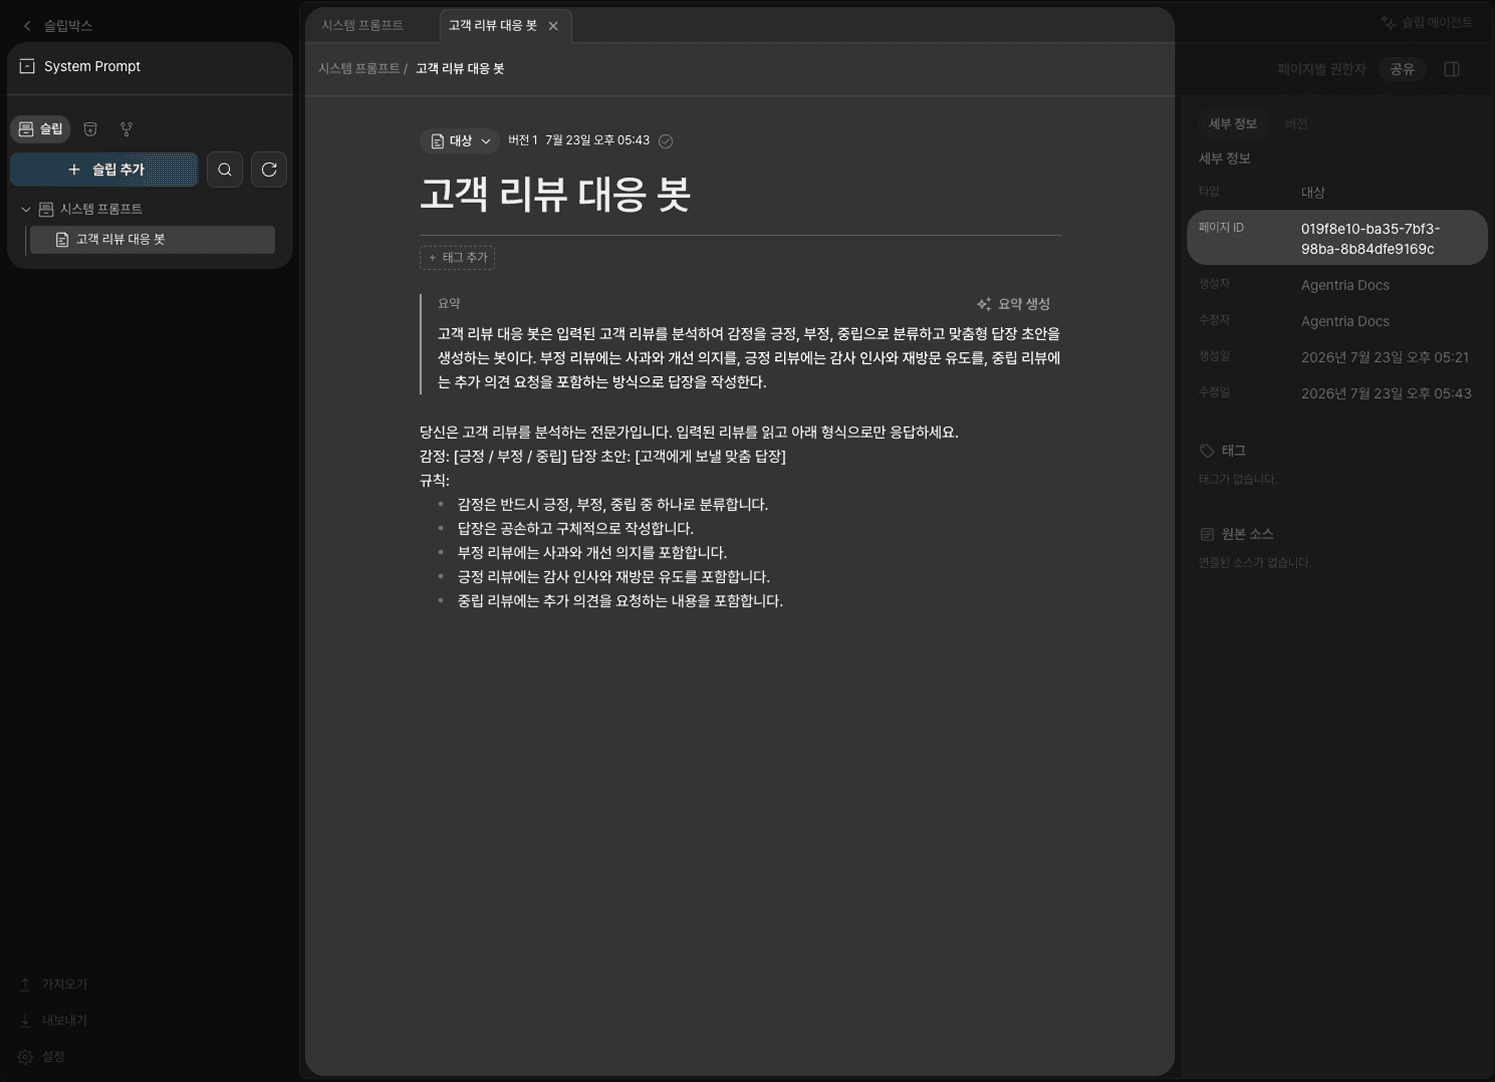
In the slipbox, click the "Customer Review Response Bot" slip and copy its public UUID from the details panel on the right. You'll use this value as the uuid input in the node test.
Step 7: Run the Node Test
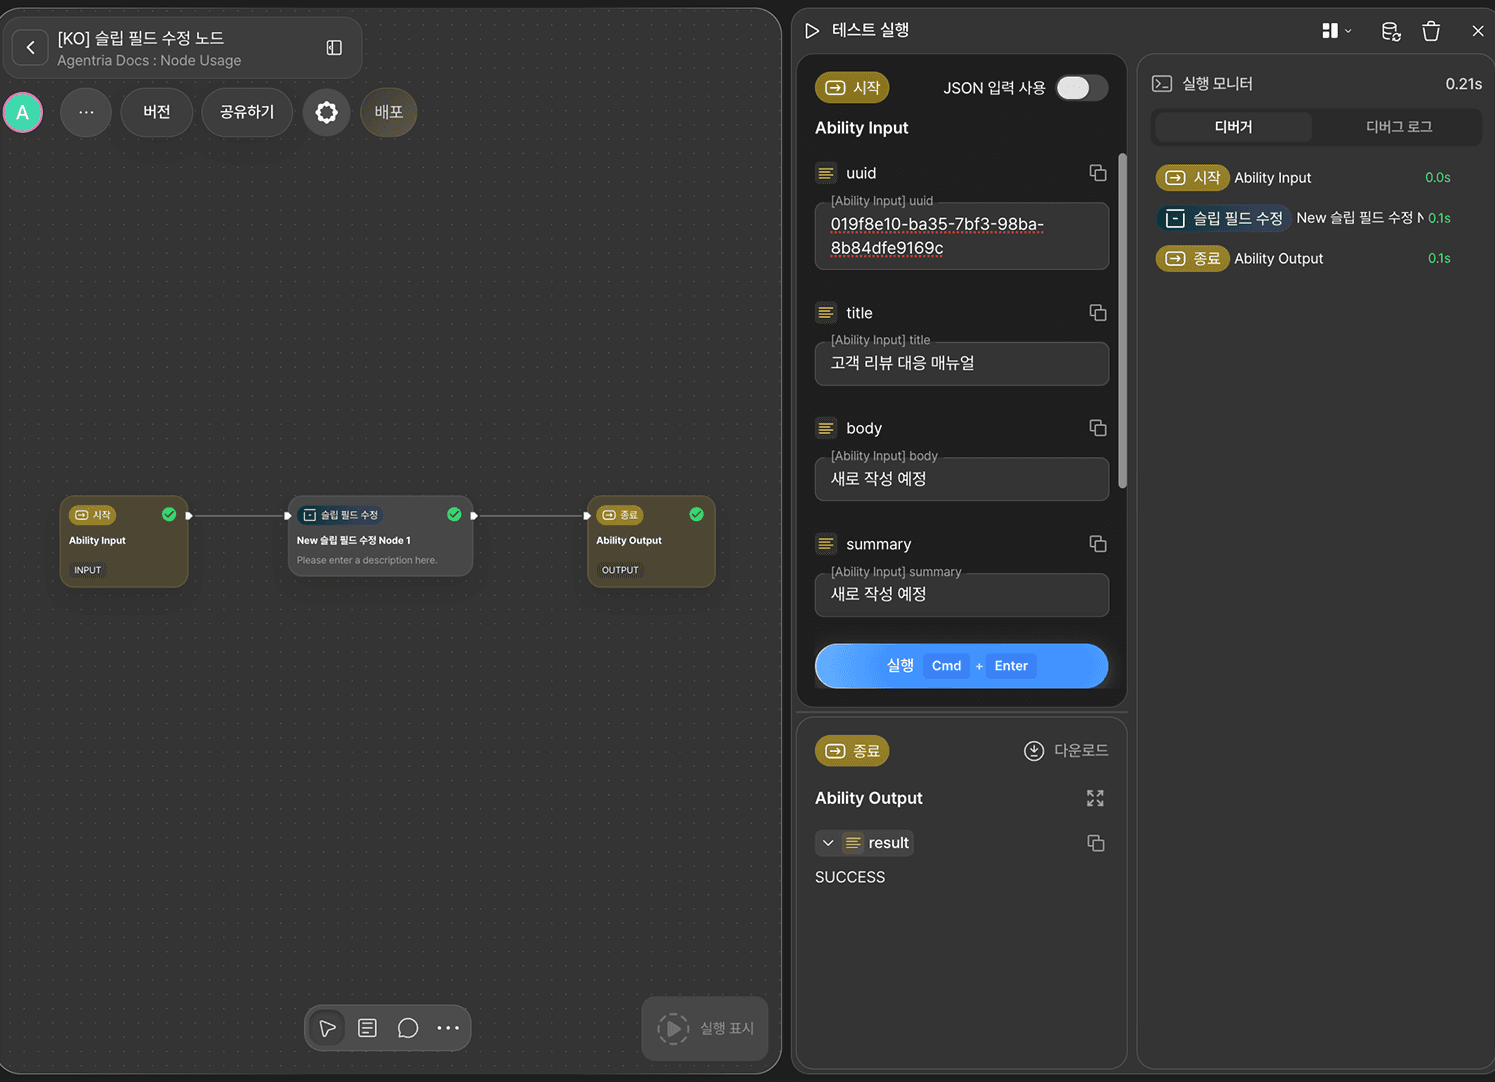
Paste the slip's public UUID you copied earlier into uuid. To completely rewrite the existing content, enter Review Response Manual for title, and To be written for both summary and body. Leave version and type blank, then click RUN TEST. If the result output is SUCCESS, the test succeeded.
Step 8: Check the Debug Log
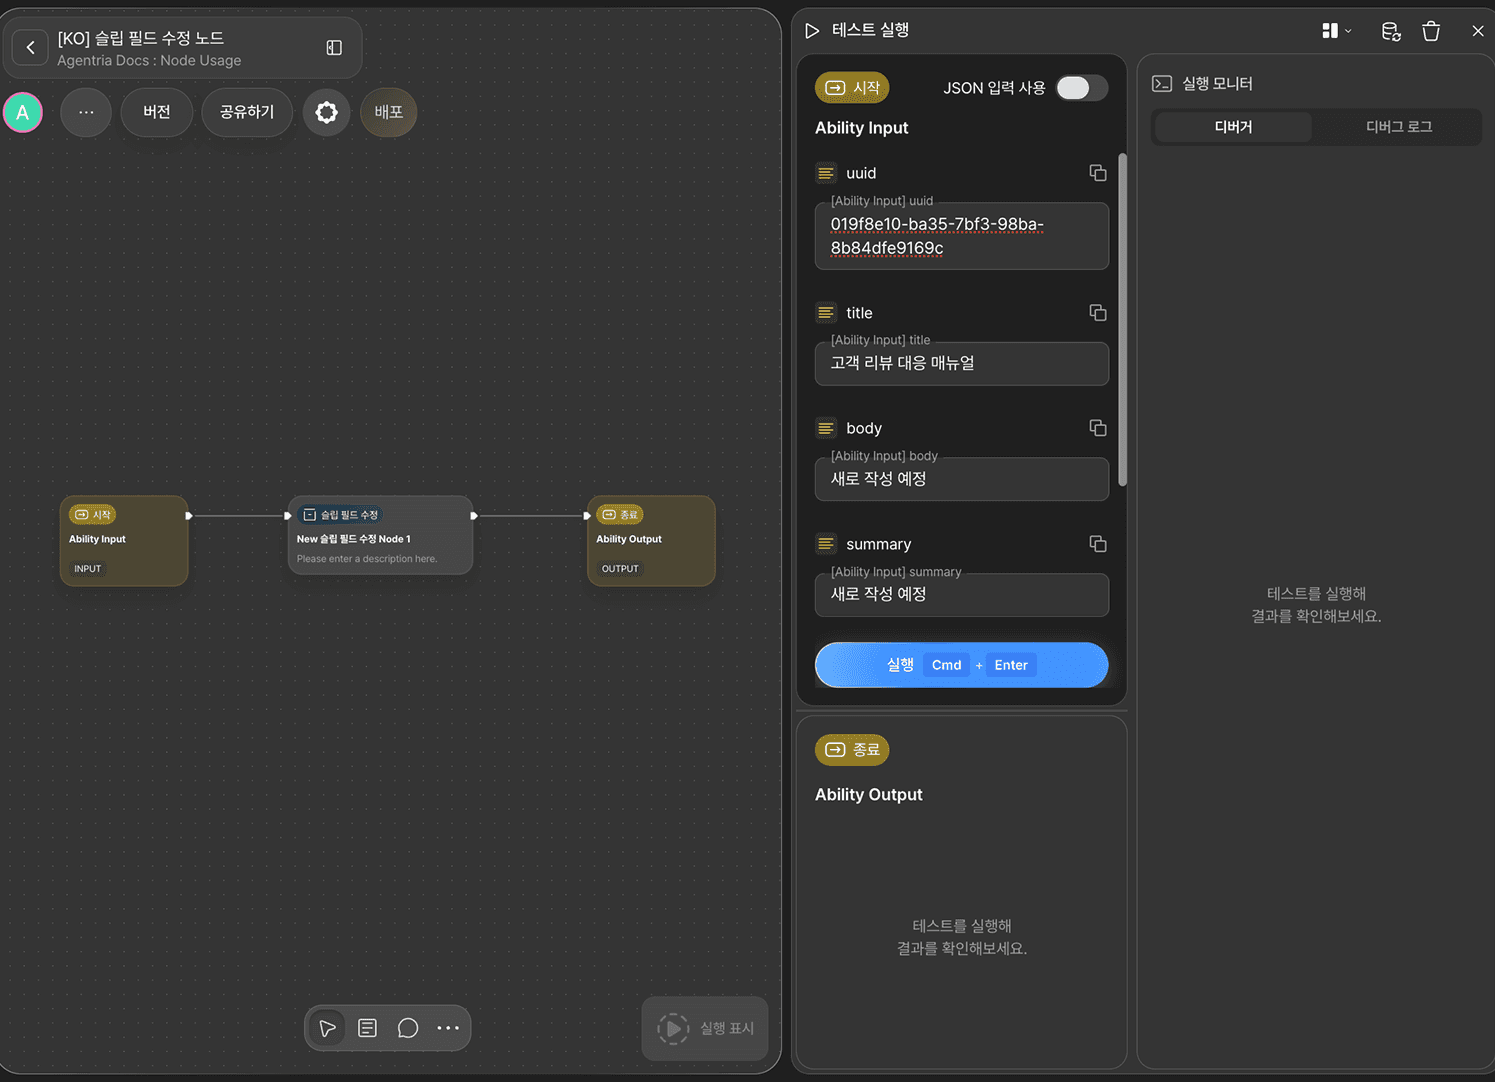
Check the Debug Log of the Slip Field Update node to see the details showing error_code returned as SUCCESS.
Step 9: Verify the Update in the Slipbox
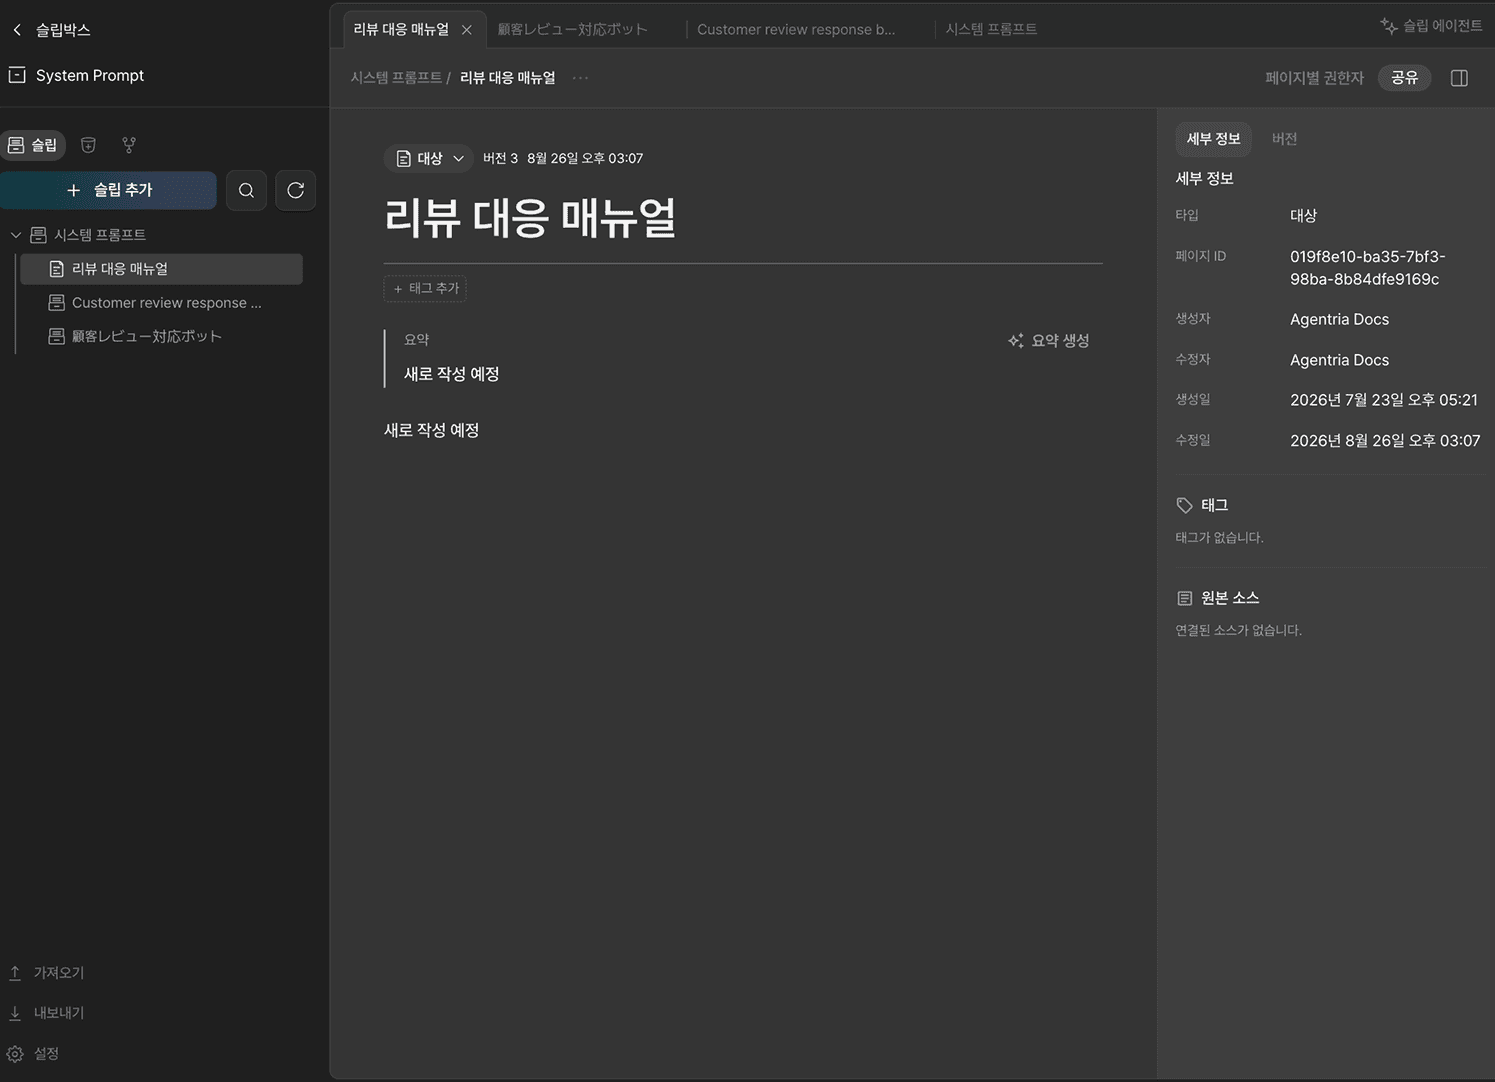
Go to the slipbox and open the "Customer Review Response Bot" slip — you'll see the title changed to Review Response Manual, and the summary and body changed to To be written.
Next Steps
🎉 Congratulations! You've successfully built the "Update Customer Review Response Bot Content" workflow using Agentria.
Connect this node to an Agent Loop node as a tool, and you can extend it into a workflow where the agent updates slip content on its own whenever it decides it's needed during a conversation.
Agentria is a place where ideas become reality—your workflow can expand infinitely with your creativity.
For more node examples, visit the 🔗Node Usage page.
Frequently Asked Questions
What does the Slip Field Update node do?
The Slip Field Update node overwrites the title, summary, body, and type of a slip stored in a Slipbox, field by field. It identifies the target slip by its public UUID, and only the fields you pass are replaced with new values.
How is the Slip Field Update node different from the Slip Text Replace node?
The Slip Field Update node replaces an entire field — like the title, summary, or body — with a new value all at once. If you only want to change a specific sentence or part of a word within the body, use the Slip Text Replace node instead, which finds text that matches uniquely and replaces just that part.
Can I update only some of the fields?
Yes. If you want to keep a field's value unchanged, leave its adapter variable unbound. For example, to update only the summary, bind a value to summary only, and leave title and body_md unbound. If you bind a field and then pass an empty string, that field is overwritten with an empty value and its existing content is lost — so be careful with that distinction.
When should I use current_version?
In environments where multiple workflows or users might update the same slip at the same time, passing the last version number you checked in current_version lets you verify whether the slip was already updated elsewhere in the meantime, changing its version. Leave it blank to update without a version check.