Get Started
Learning Node Usage - Python Node
This tutorial guides you through using the Python node in Agentria. The Python node lets you process data with custom code and call other nodes as functions through the Function-Pin. This lets you invoke AI nodes at the exact moment you want from within your Python code and process the results back in Python—giving you a flexible workflow.
In this tutorial, you'll complete a workflow that accepts customer review text, runs preprocessing in the Python node, then calls an LLM node as a function to classify sentiment and generate a customized reply draft.
Before You Begin
For instructions on accessing the Agentria canvas, see the 🔗3-Step Core Guide.
After completing this tutorial, you will be able to:
Understand the Python node's Function-Pin and connect it to an LLM node.
Call an LLM node as a function using
await function()syntax in Python code.Set the system prompt and input variables for an LLM function node.
Use the debug log to identify errors in Python code.
Workflow Overview
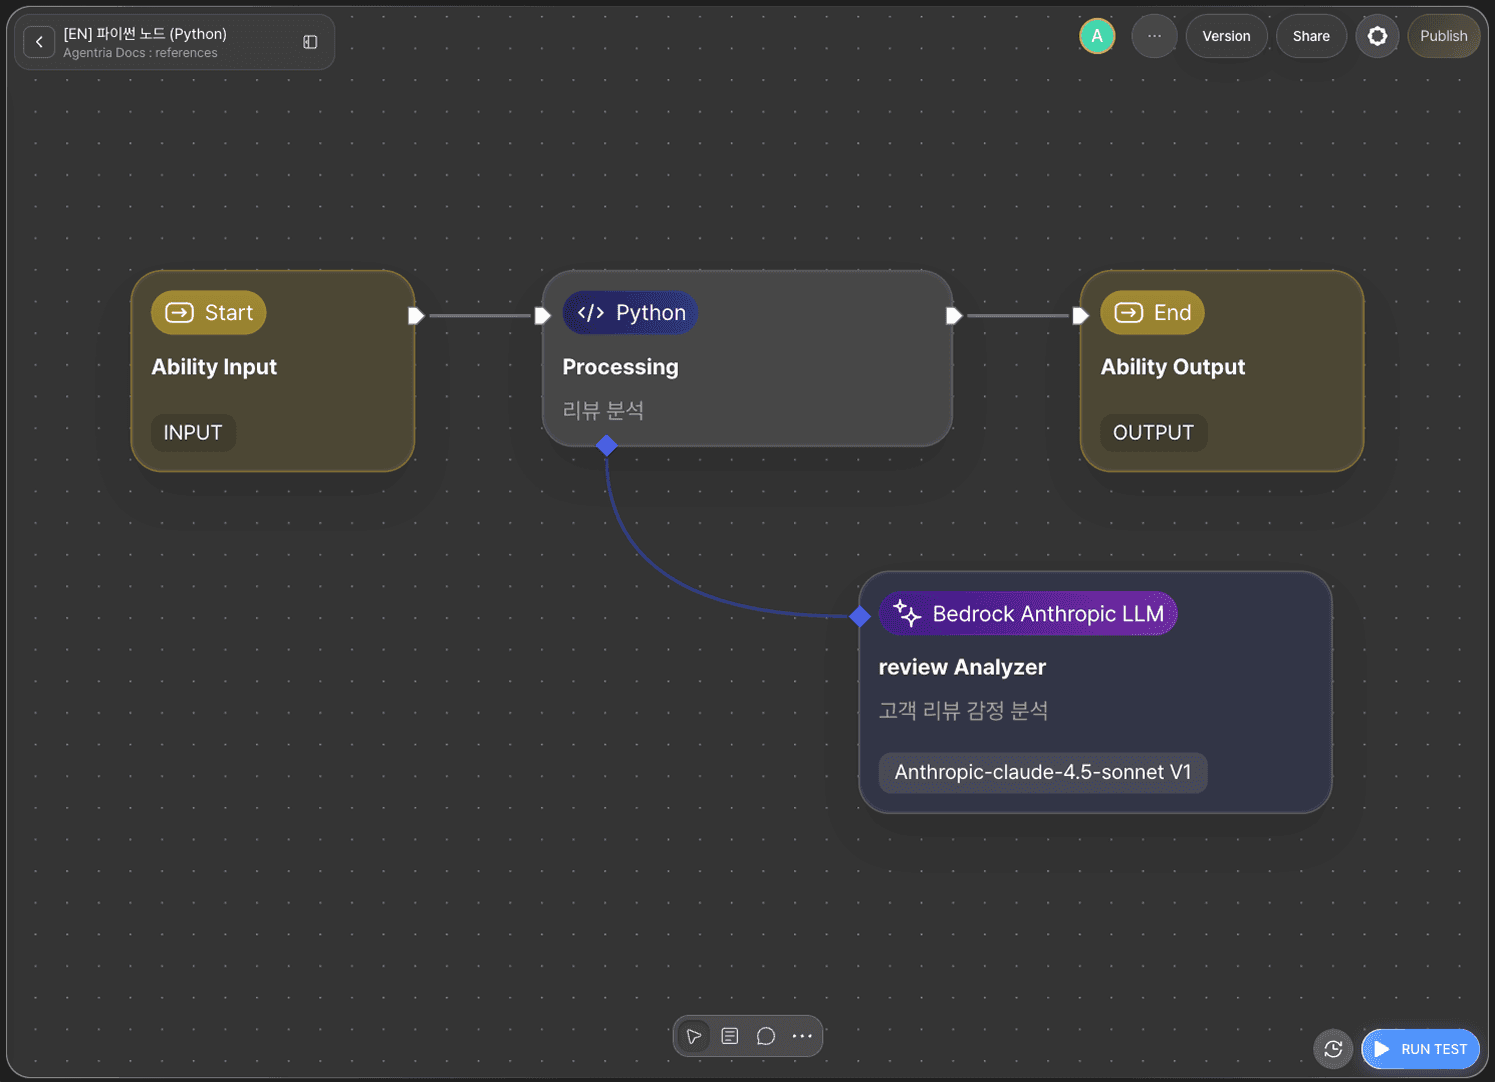
Full flow: Start Node → Python node → End Node
The key concept in this tutorial is the Python node's Function-Pin.
Drag the blue Function-Pin at the bottom of the Python node and connect it to the In-Pin of the LLM node. This converts the LLM node into a function node. A function node is not part of the main workflow flow—it only runs when called by await {%functionName%}() in your Python code. This gives you direct control over when to invoke the AI and what arguments to pass.
Step 1: Create an Ability
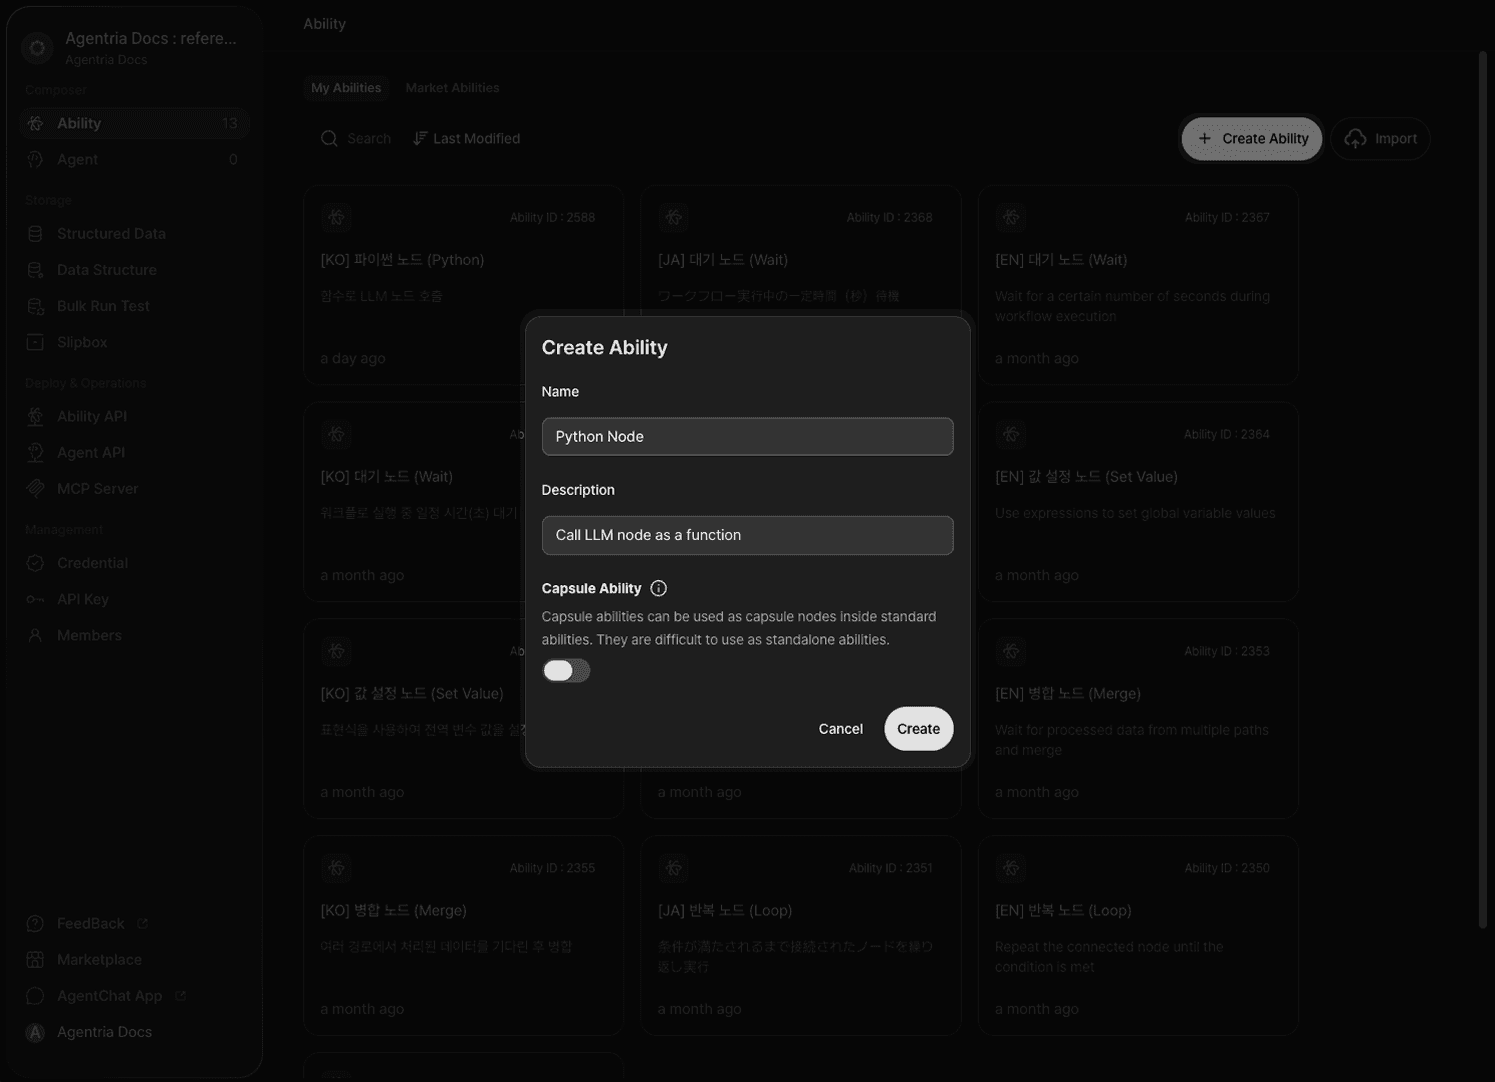
Create a new Ability on the Agentria canvas.
Click +Add Node to add a Python node and an LLM node to the canvas. Rename the Python node to Processing and the LLM node to Review Analyzer.
Drag the blue Function-Pin at the bottom of the Processing node and connect it to the In-Pin of the Review Analyzer node. When the "Convert to function node?" modal appears, click Confirm.
The Function-Pin is the blue pin at the bottom of the Python node. Do not confuse it with the white Out-Pin used for regular connections.
Step 2: Declare Input Variables
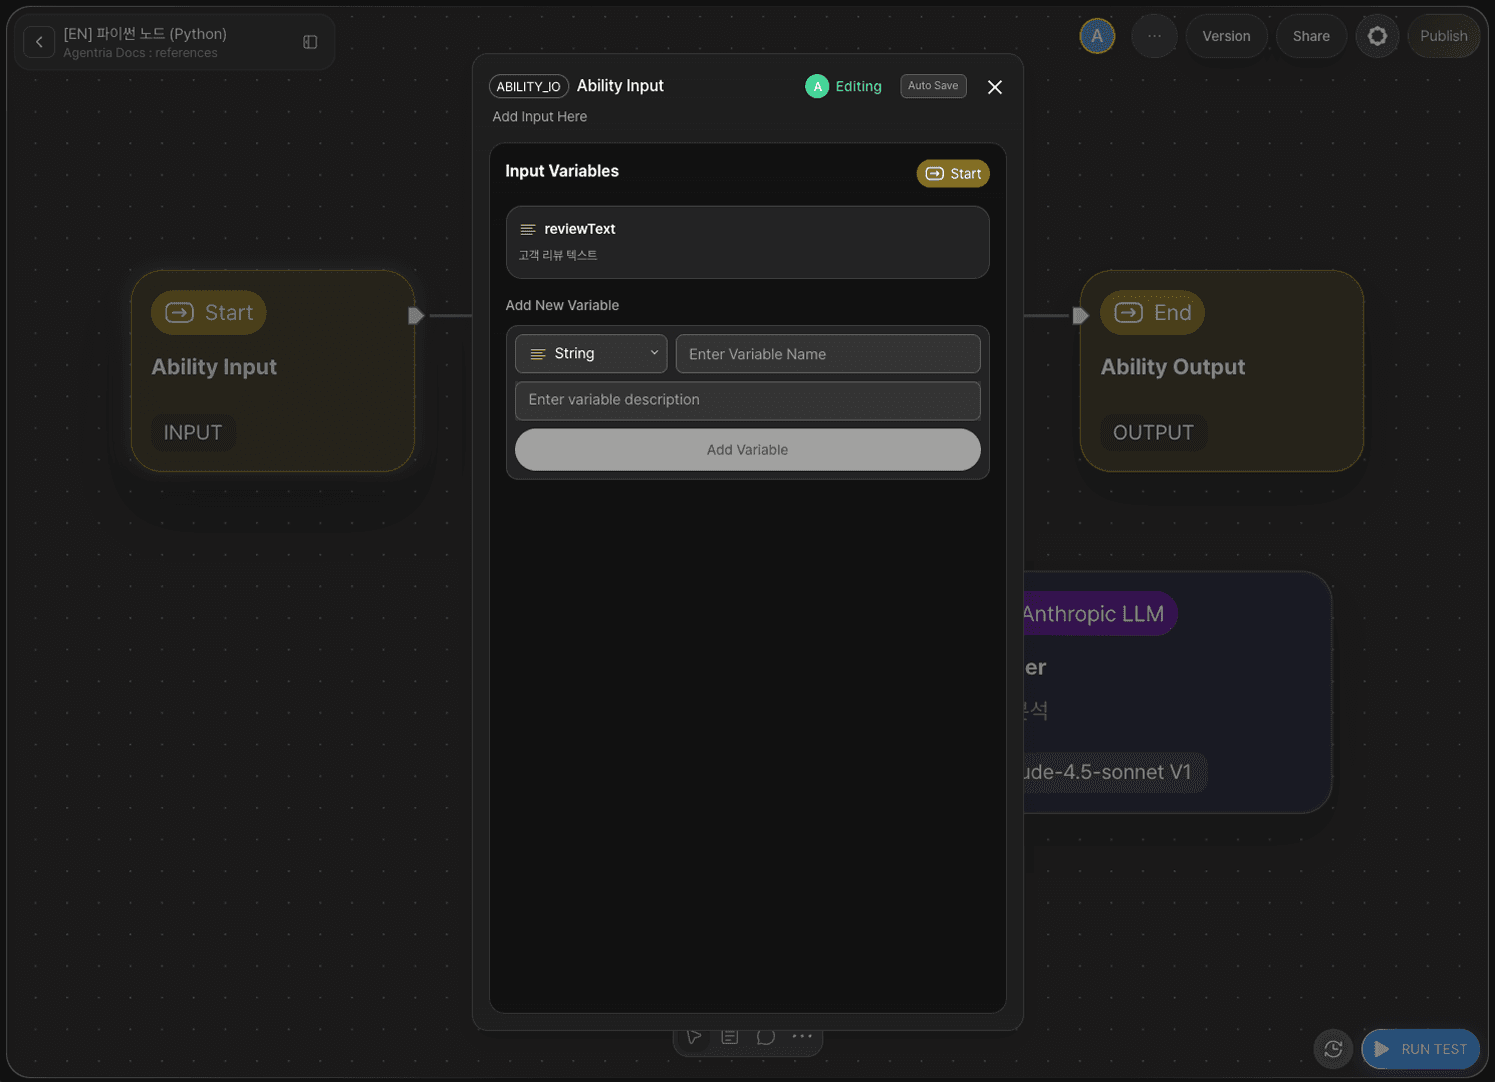
Double-click the Start Node to open the Node Editor.
Declare the following input variable.
Field | Value |
|---|---|
Type | String |
Name |
|
Description | Customer review text |
Once done, return to the canvas.
Step 3: Configure the Python Node
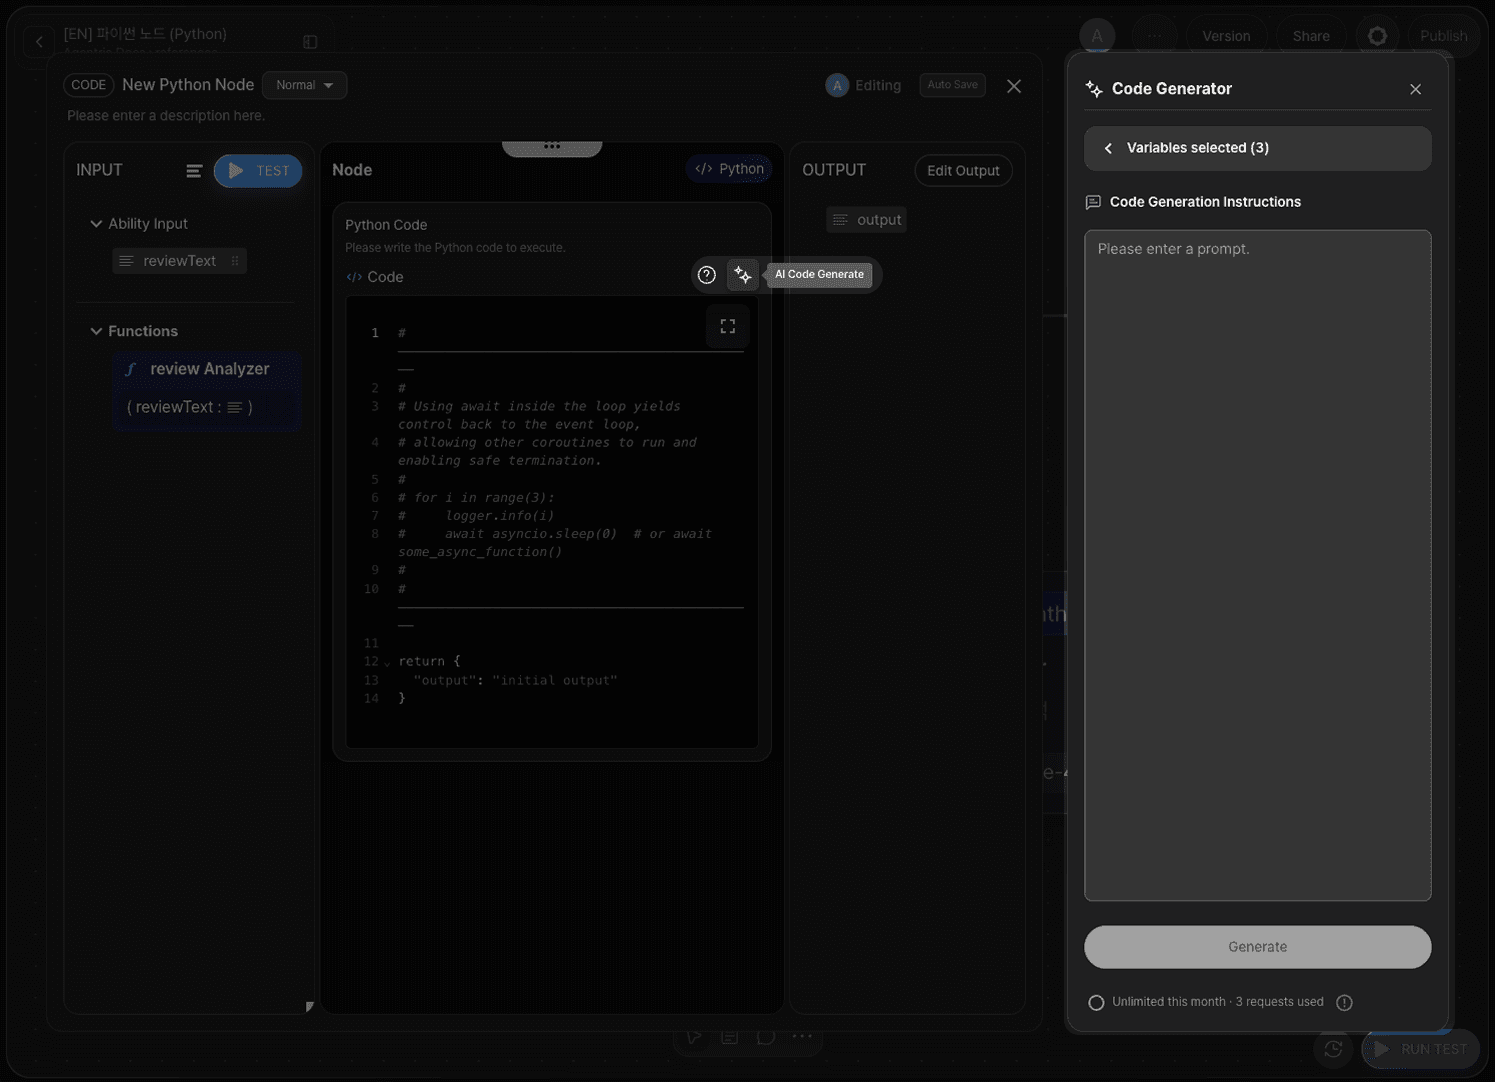
Double-click the Processing node to open the Node Editor.
The Python node includes a built-in AI Code Generator. Click the code generator icon, enter a prompt describing the behavior you want, and the code is generated automatically. Click Accept to apply the generated code.
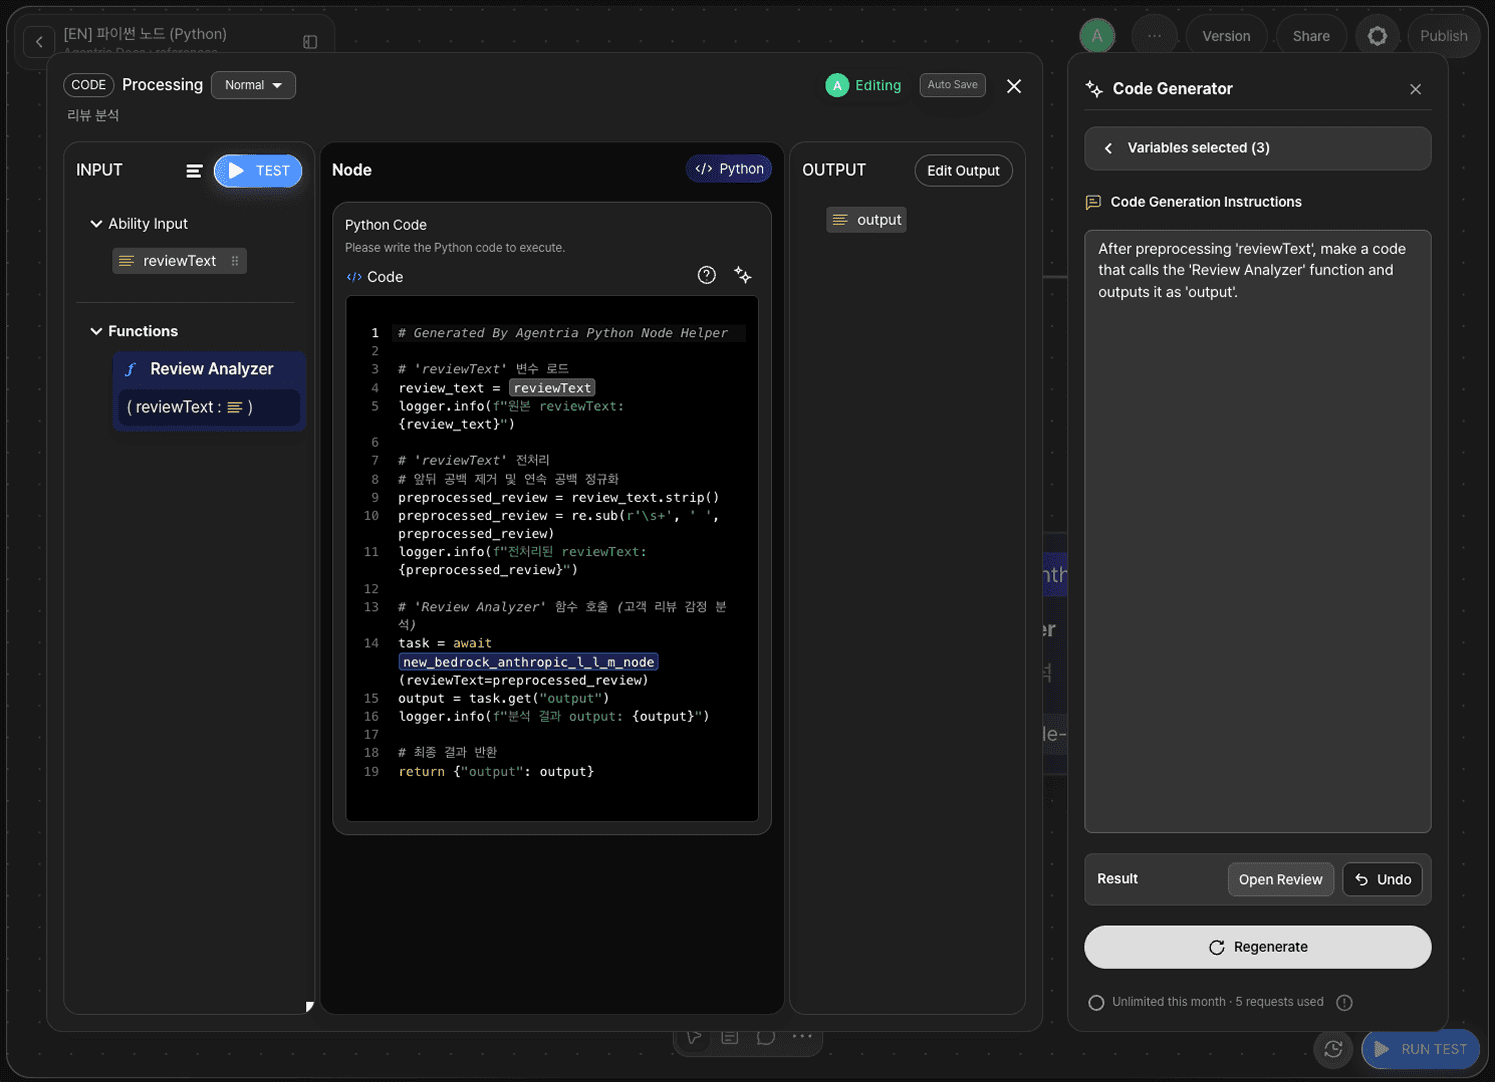
Enter the following script in the code input area. Drag and drop the reviewText variable and the function pin reference from the left panel to insert them into the code.
Step 4: Configure the LLM Function Node — Input Variables
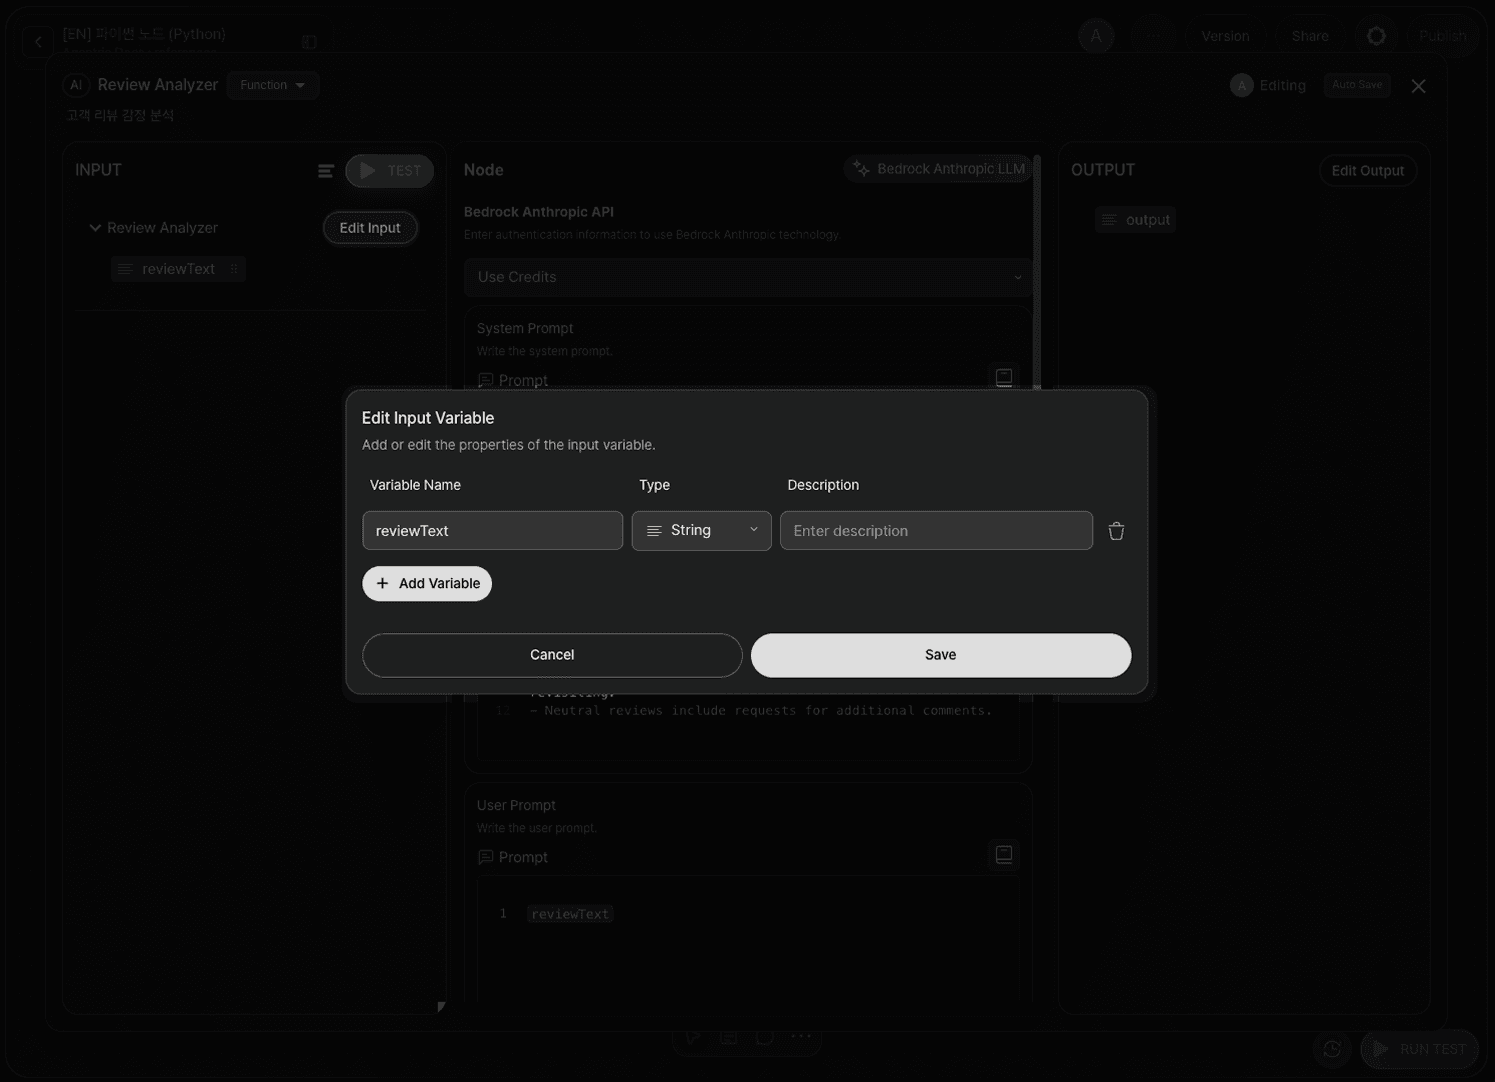
Double-click the Review Analyzer node to open the Node Editor.
Click the Edit Input button in the left input panel. The variables you add here are linked to the arguments you pass when calling the function from Python code. Set the same variable name as declared in the Start Node.
Variable Name | Type |
|---|---|
| String |
When calling from Python as
await function(reviewText=review_text), the argument namereviewText=must match the variable name declared here.
Step 5: Configure the LLM Function Node — Prompts
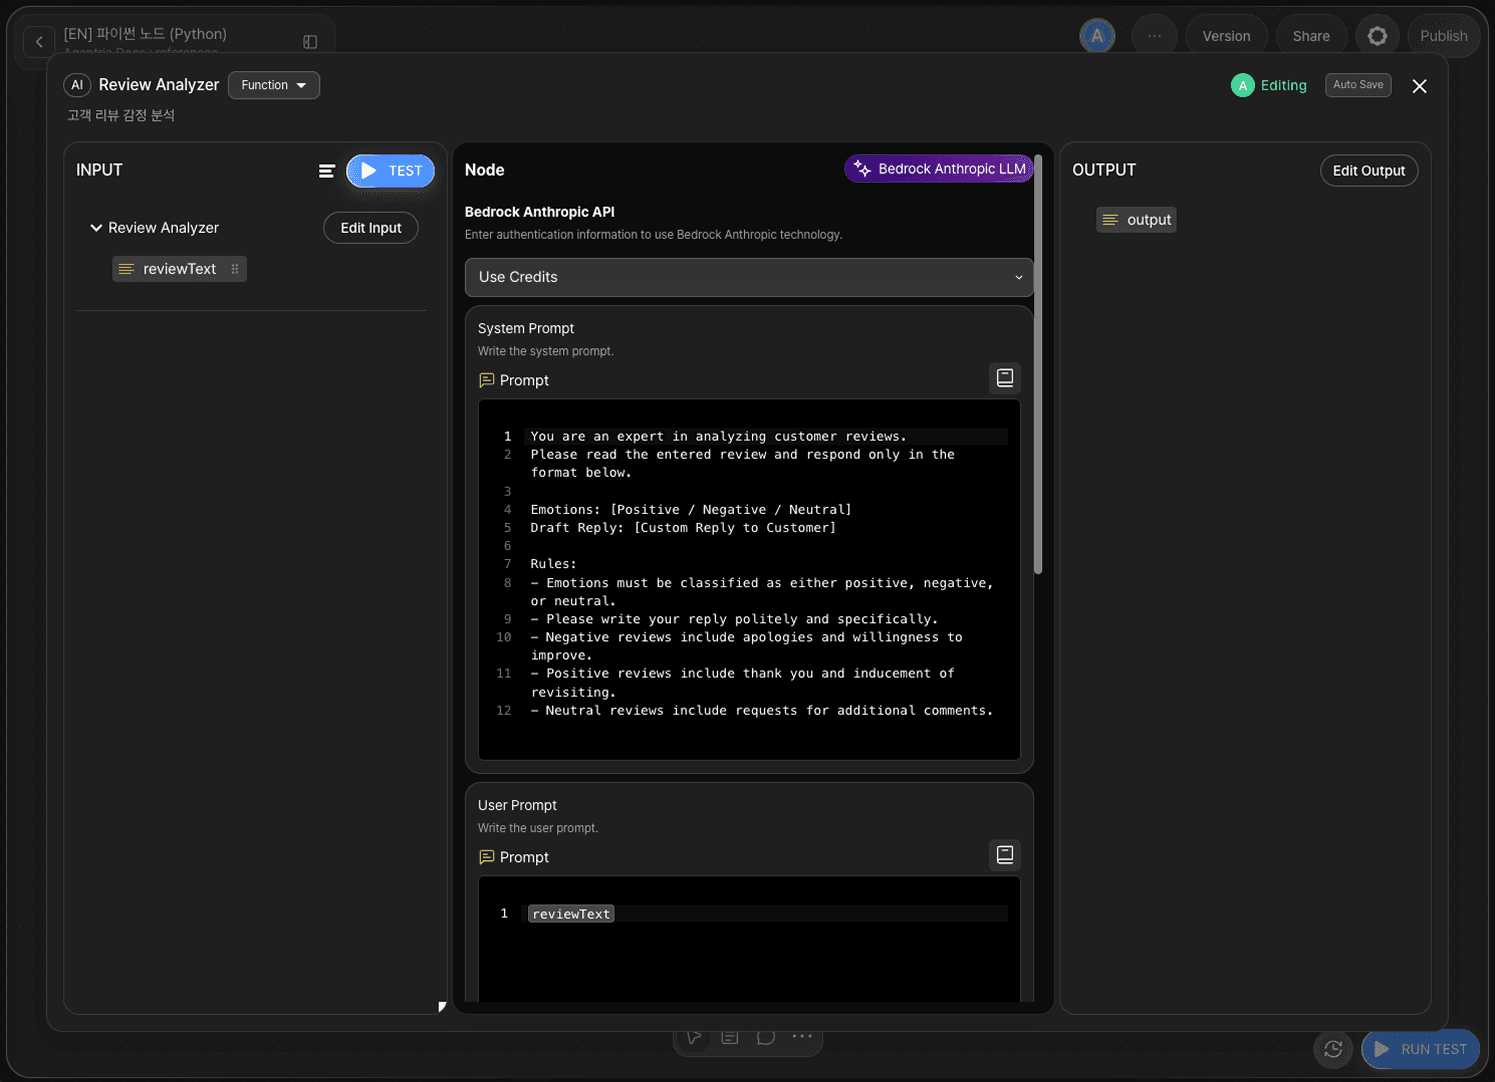
System Prompt
Enter the following in the System Prompt field.
User Prompt
In the User Prompt field, drag and drop the reviewText adapter variable from the left input panel.
Step 6: Configure the End Node
Return to the canvas and connect the main flow edges.
Out-Pin of
Start Node→ In-Pin ofProcessingnodeOut-Pin of
Processingnode → In-Pin ofEnd Node
The
Review Analyzernode is a function node — do not connect it to the main flow edges.
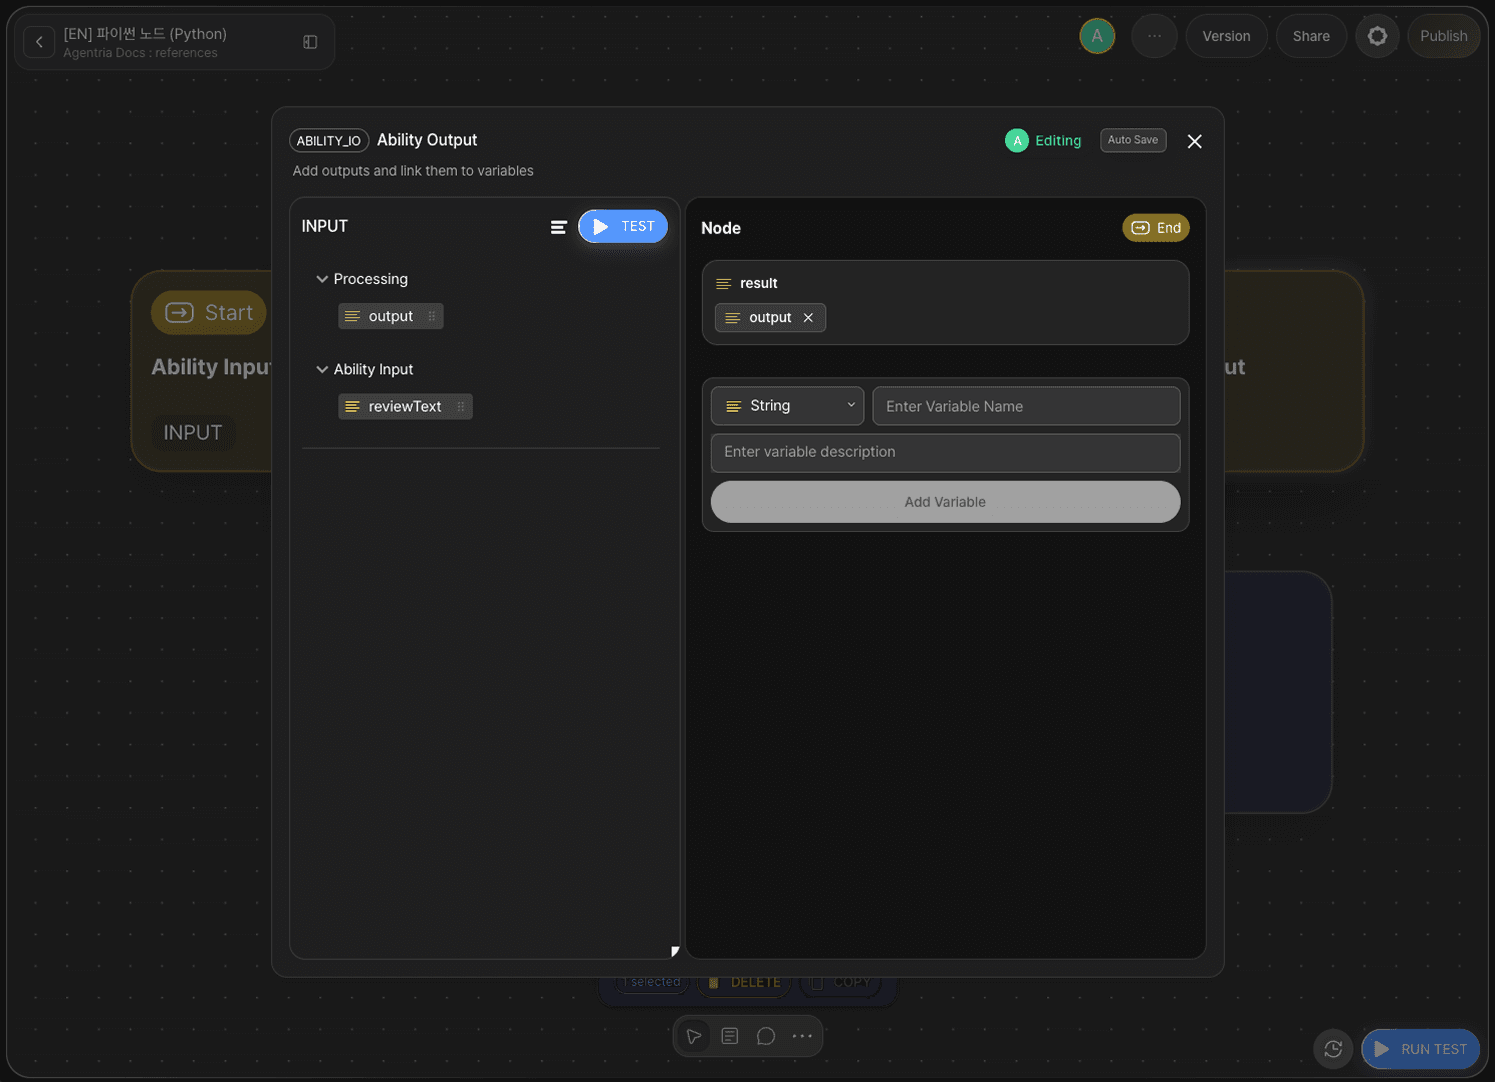
Double-click the End Node to open the Node Editor. Add the following variable to the Output Section.
Variable Name | Type |
|---|---|
| String |
Drag and drop the output variable from the Processing node and bind it to result in the End Node.
Step 7: Run Test
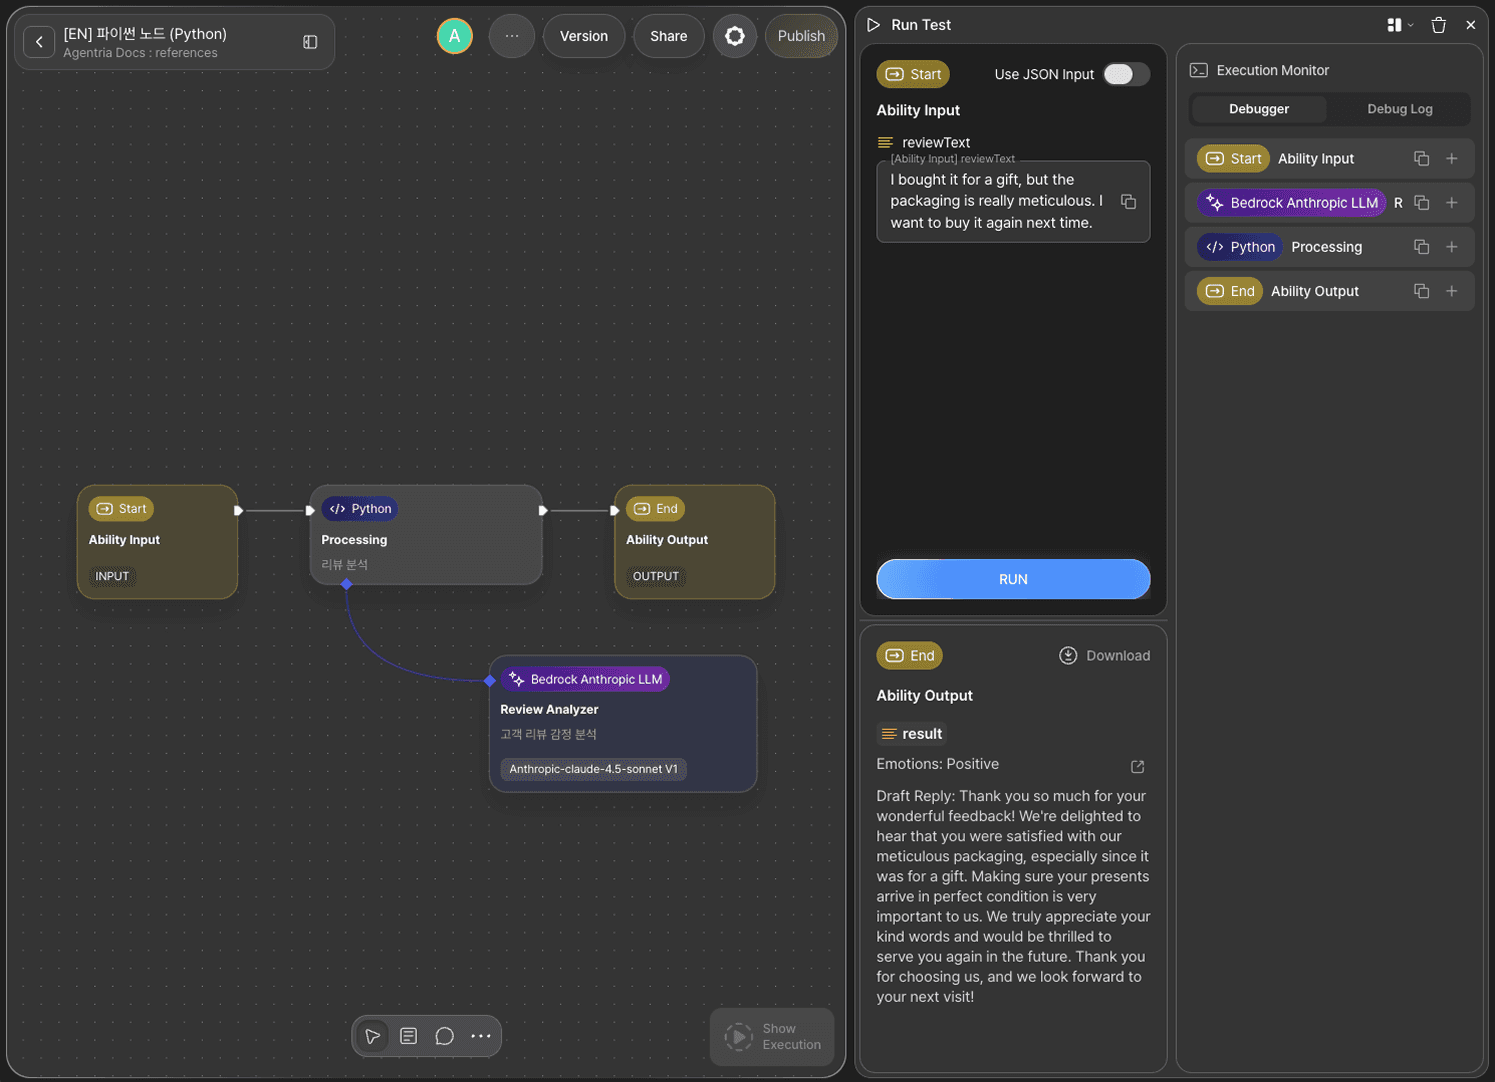
Click the RUN TEST button in the bottom right of the canvas.
Enter the review text to test in the reviewText field and run.
Sample Input
Sample Output
Step 8: Check the Debug Log
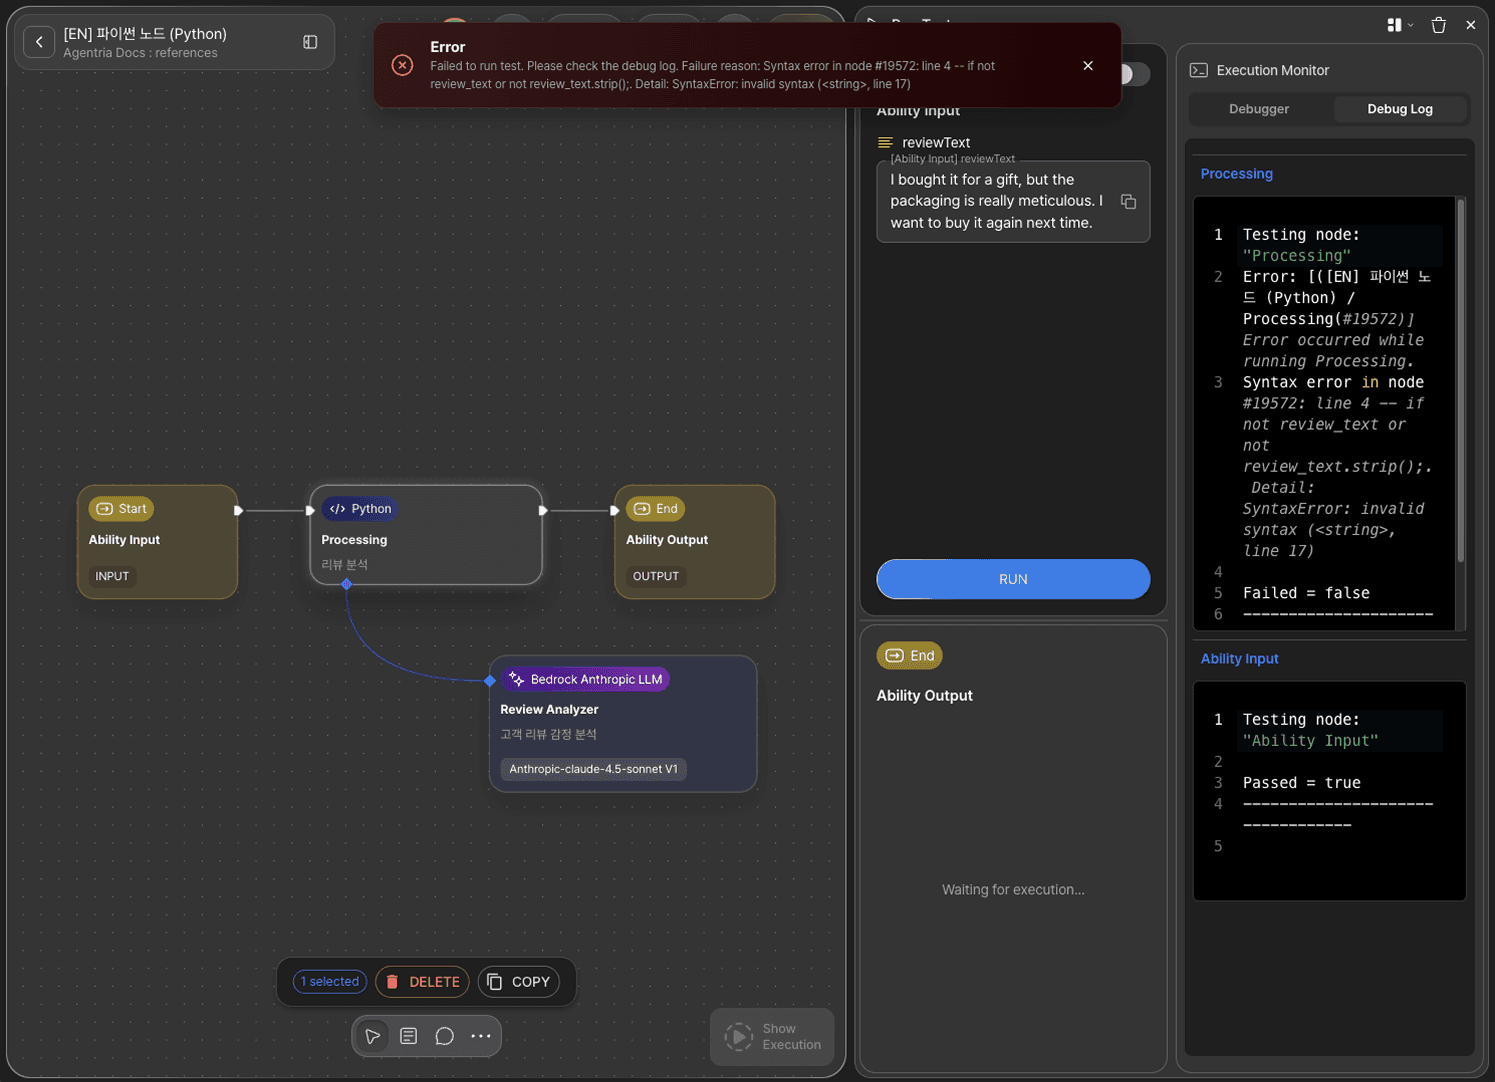
If an error occurs in the Python node, you can check the Debug Log to see exactly where in the code the error occurred and what it is. Use the error message to fix the code and run the test again.
Next Steps
🎉 Congratulations! You've successfully built the "Customer Review Sentiment Classification and Reply Draft Generation" workflow using Agentria.
You can modify the system prompt to apply different reply styles for various industries and situations, or extend the workflow by adding more preprocessing logic to the Python code.
Agentria is a place where ideas become reality—your workflow can expand infinitely with your creativity.
For more Ability examples, visit the 🔗Ability Guide.
For Agent-based examples, visit the 🔗Agent Guide.
Restricted Functions
Restricted Item | Reason |
|---|---|
| Prevents loading arbitrary modules |
| Prevents dynamic code execution |
| Prevents dynamic expression evaluation |
| Prevents process termination |
| Prevents exposing internal context |
| Prevents file system access |
| Prevents access to internal variables |
| Prevents external command execution |
| Prevents shell command execution |
| Prevents access to the subprocess module |
Available Libraries
Available Module | Purpose |
|---|---|
| Regular expressions |
| JSON processing |
| Math operations |
| Date/time |
| Data structures, iteration, functional utilities |
| Encoding/decoding |
| Code parsing |
| Typing and validation |
| Data analysis |
| Token counting |
| Async processing (excluding subprocess-related APIs) |
| Morphological analysis |
| Built-in helper functions |
Helpers (File Handling Utilities)
In the Code Node, you can use helpers utility functions for file processing and data transformation.
For detailed usage, please refer to the guide on the 🔗Helpers page.