Key Features
To use the Slack Node, you must first issue a Slack credential and then register it in Agentria.
You’ll need to log in with the Slack account connected to your workspace to complete this process.
Credential Registration Goal
To register a credential in Agentria, you’ll need a Bot User OAuth Token.
By following this guide, you’ll learn how to issue the required information and register your Slack credential in Agentria.
This guide is based on registering credentials for the Slack Node (Send Message), but note that the same Slack token can be reused for multiple node types (e.g., update, delete, etc.).
Step 1: Access the Slack API Site
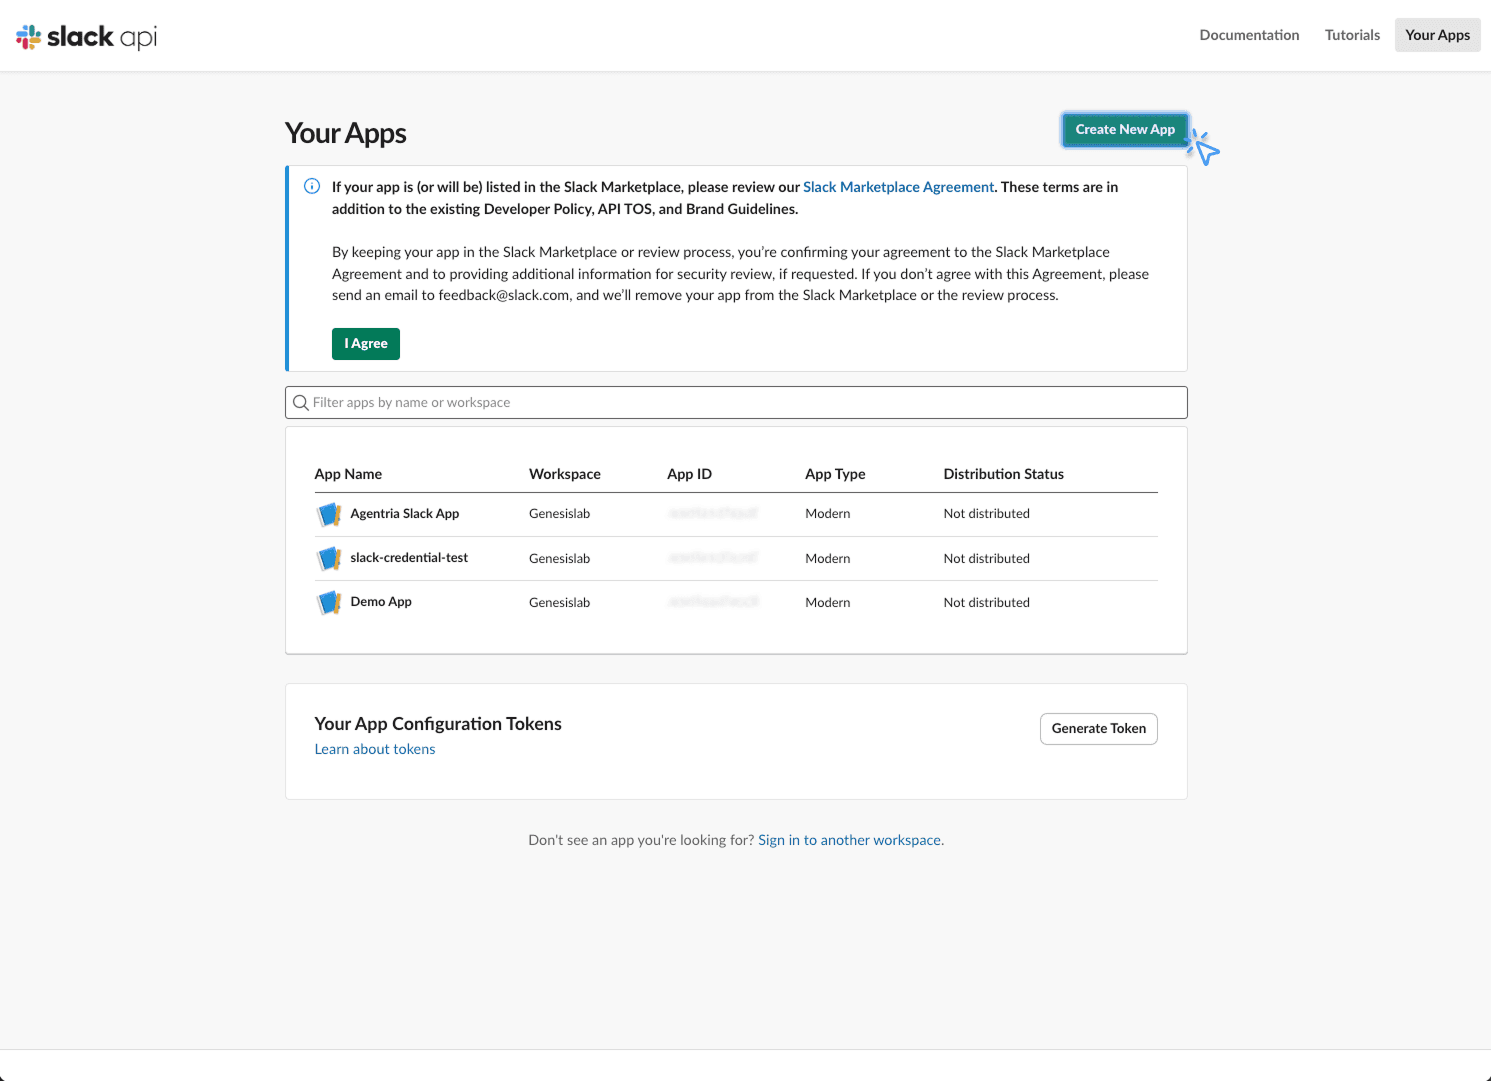
To issue a credential, open your browser and go to the Slack API site.
Click the Create New App button to start creating a new app.
If this is your first time visiting the API site, the button will appear in the center of the page.
Step 2: Create an App
2-1 ) App Configuration
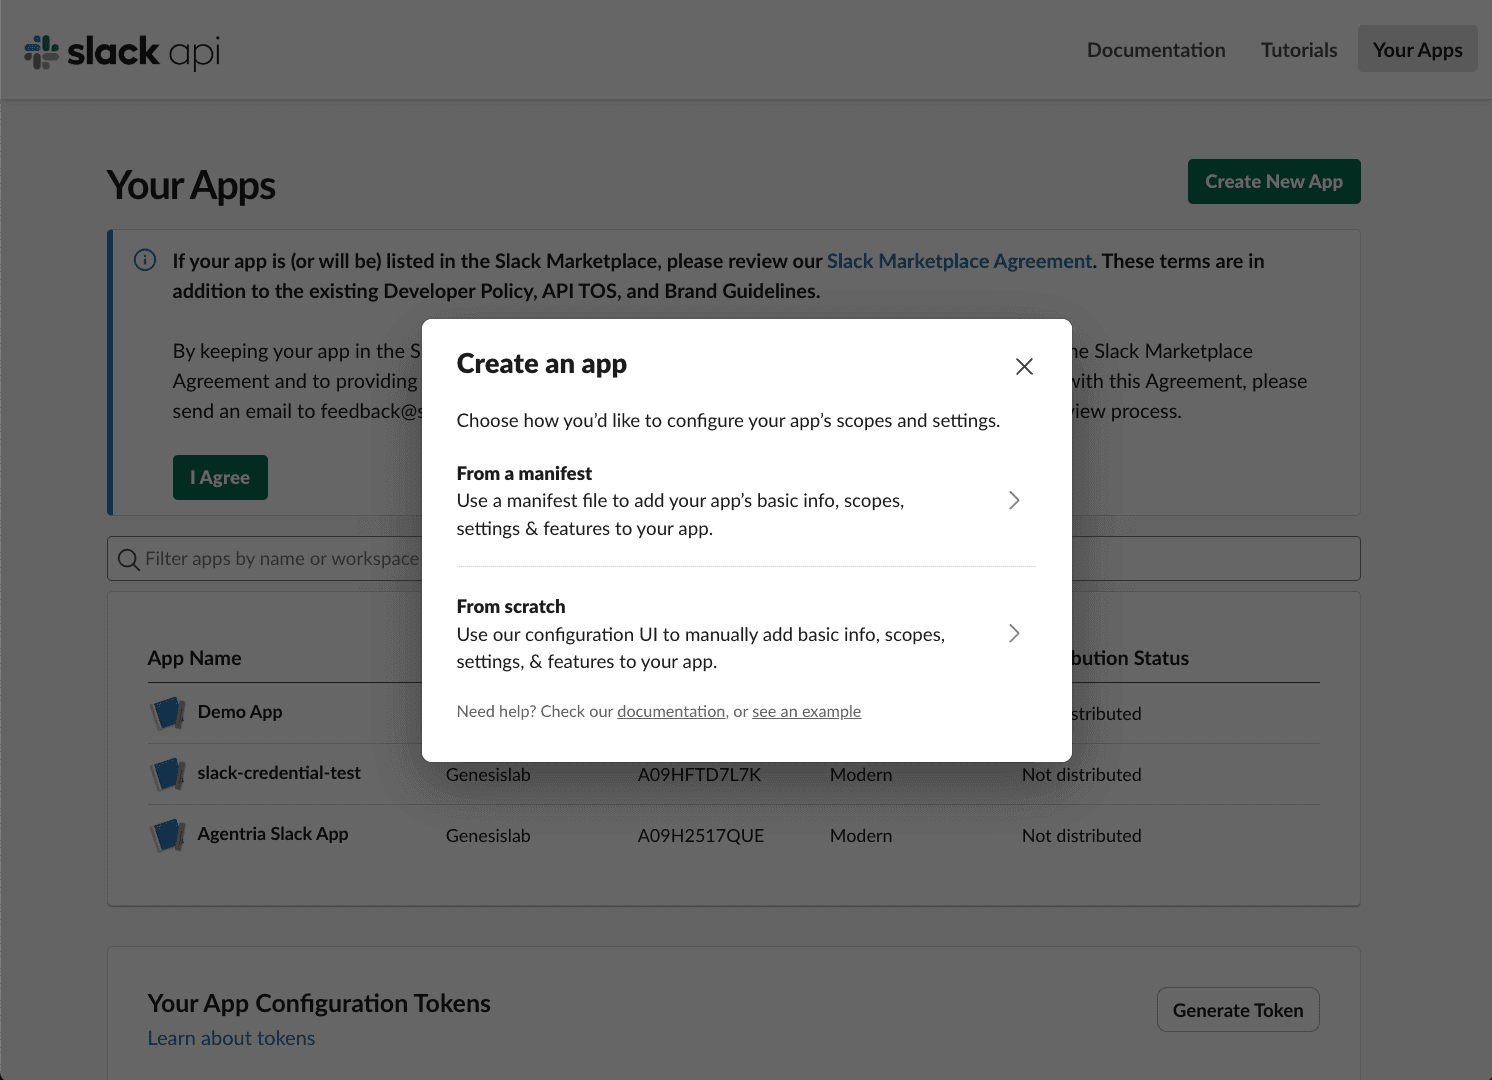
To create an app, you must choose how to define its scope and settings.
From a manifest : Automatically adds basic information, scopes, and configuration for your app.
From scratch : Allows you to manually add your app’s basic information, scopes, and configuration.
This guide uses the manifest option, as it provides an easier and faster setup experience.
If you prefer to manually configure the app in detail, select the scratch option instead.
2-2 ) Select a Workspace
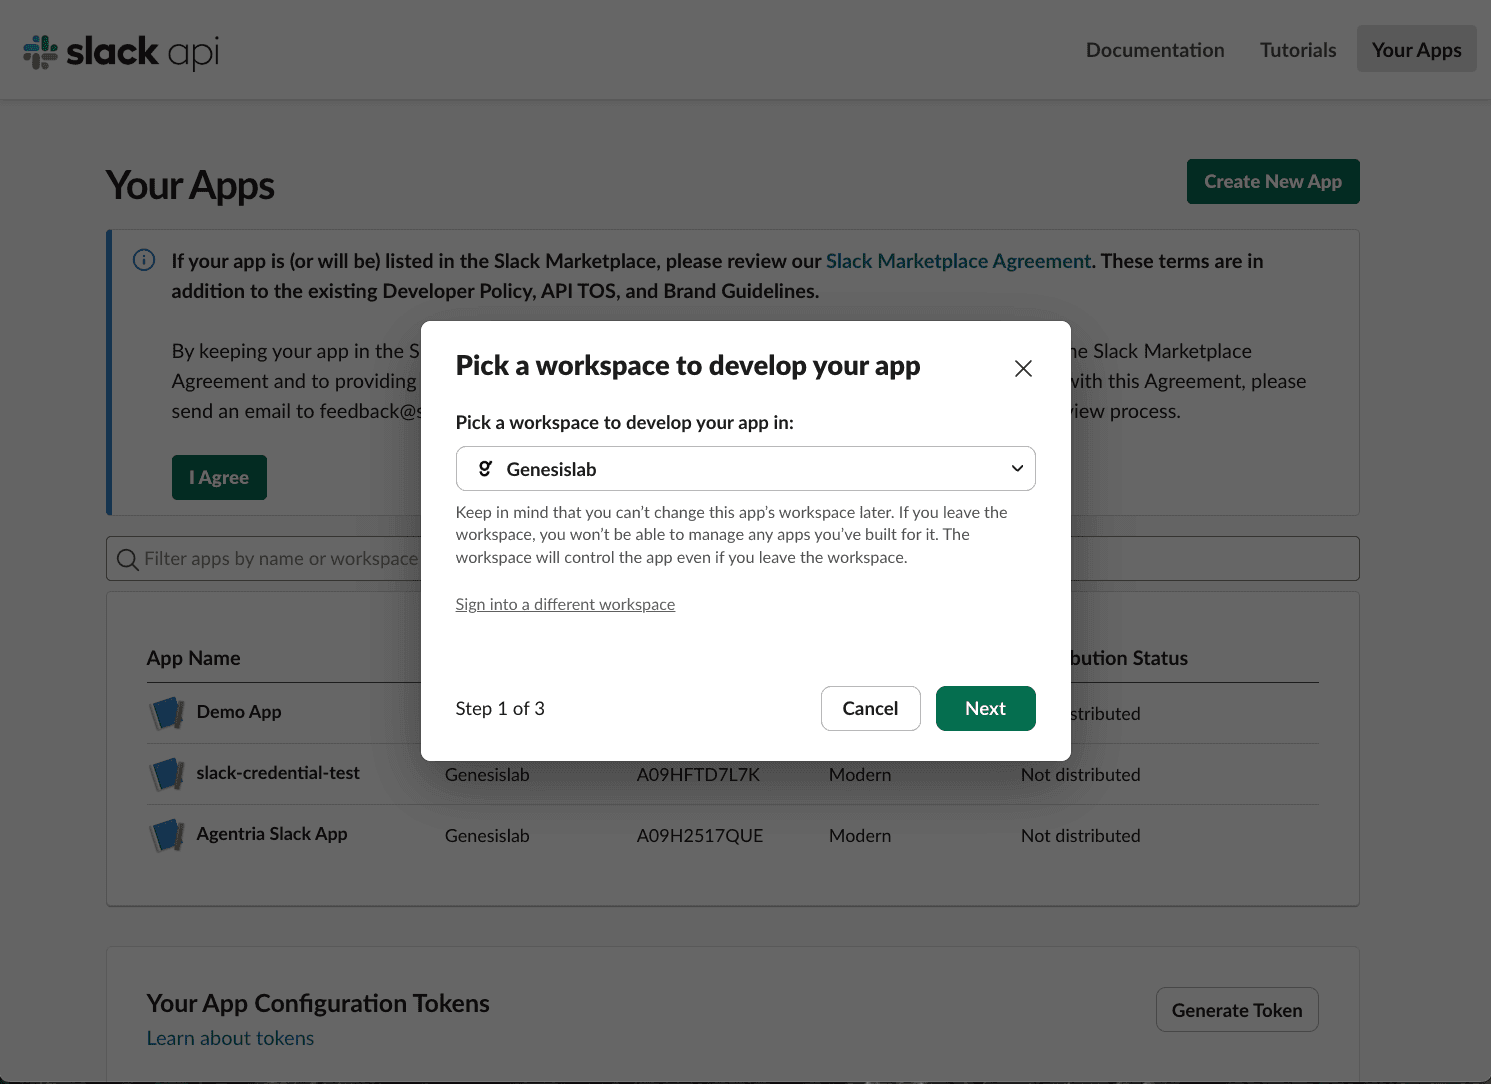
Choose the Slack workspace where you want to create the app.
Click Next to proceed.
2-3 ) Generate a JSON File
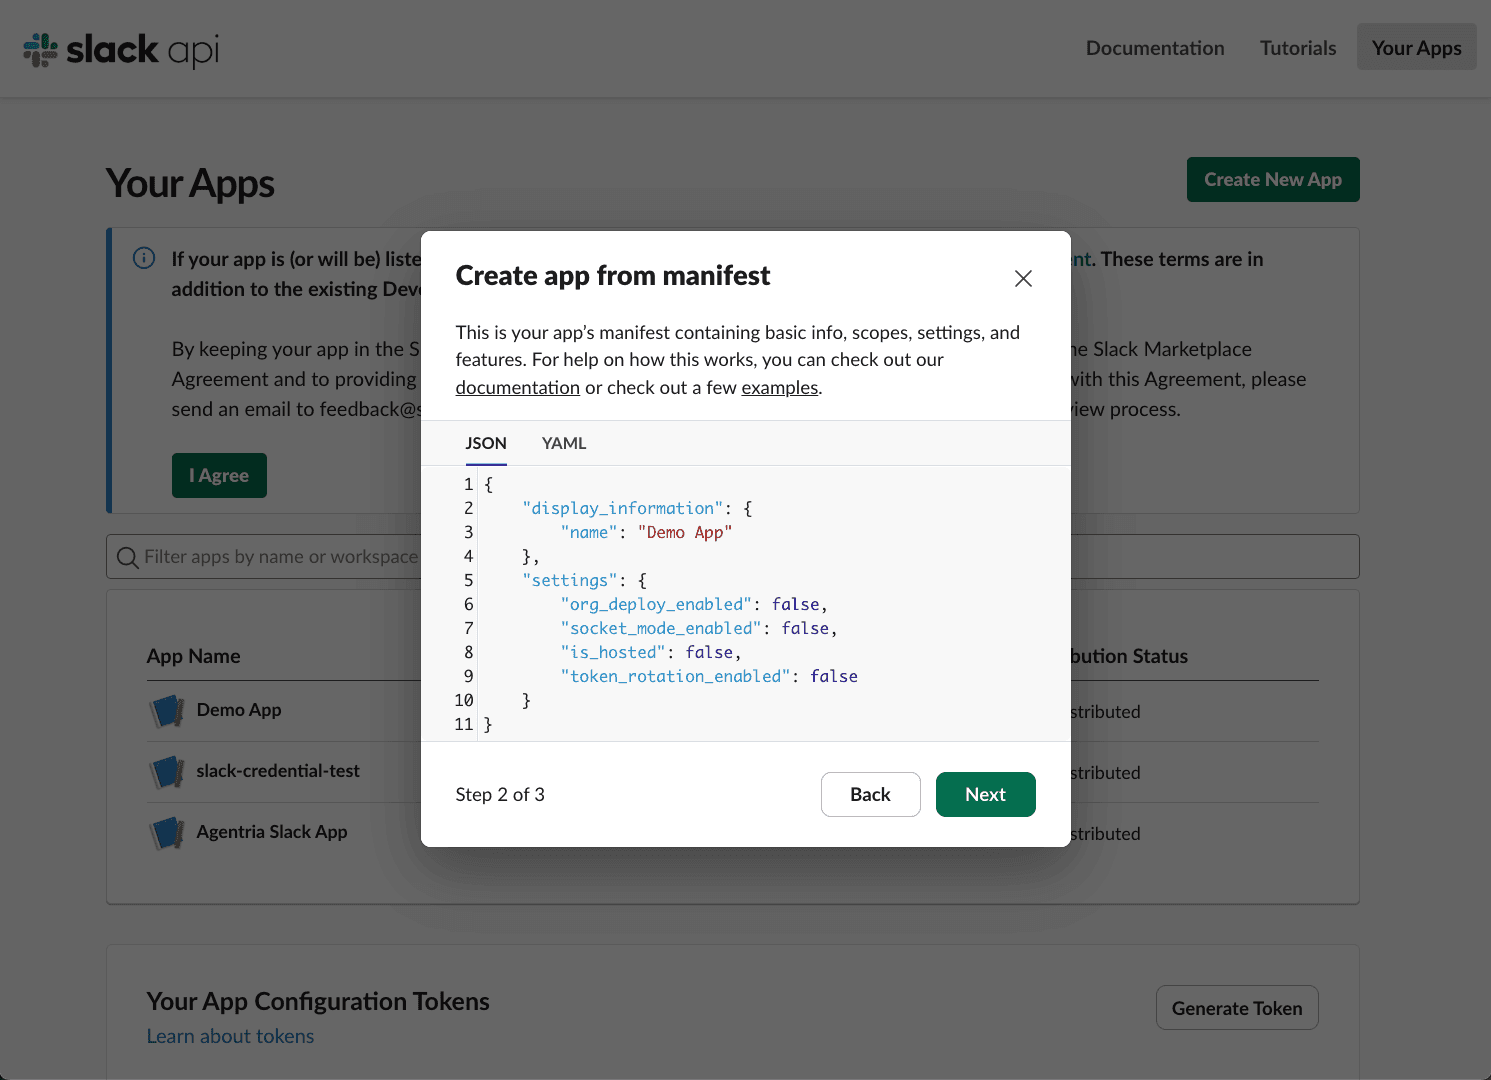
Since the manifest option was selected, a JSON file will be generated automatically.
Click Next to proceed.
2-4 ) Create the Demo App
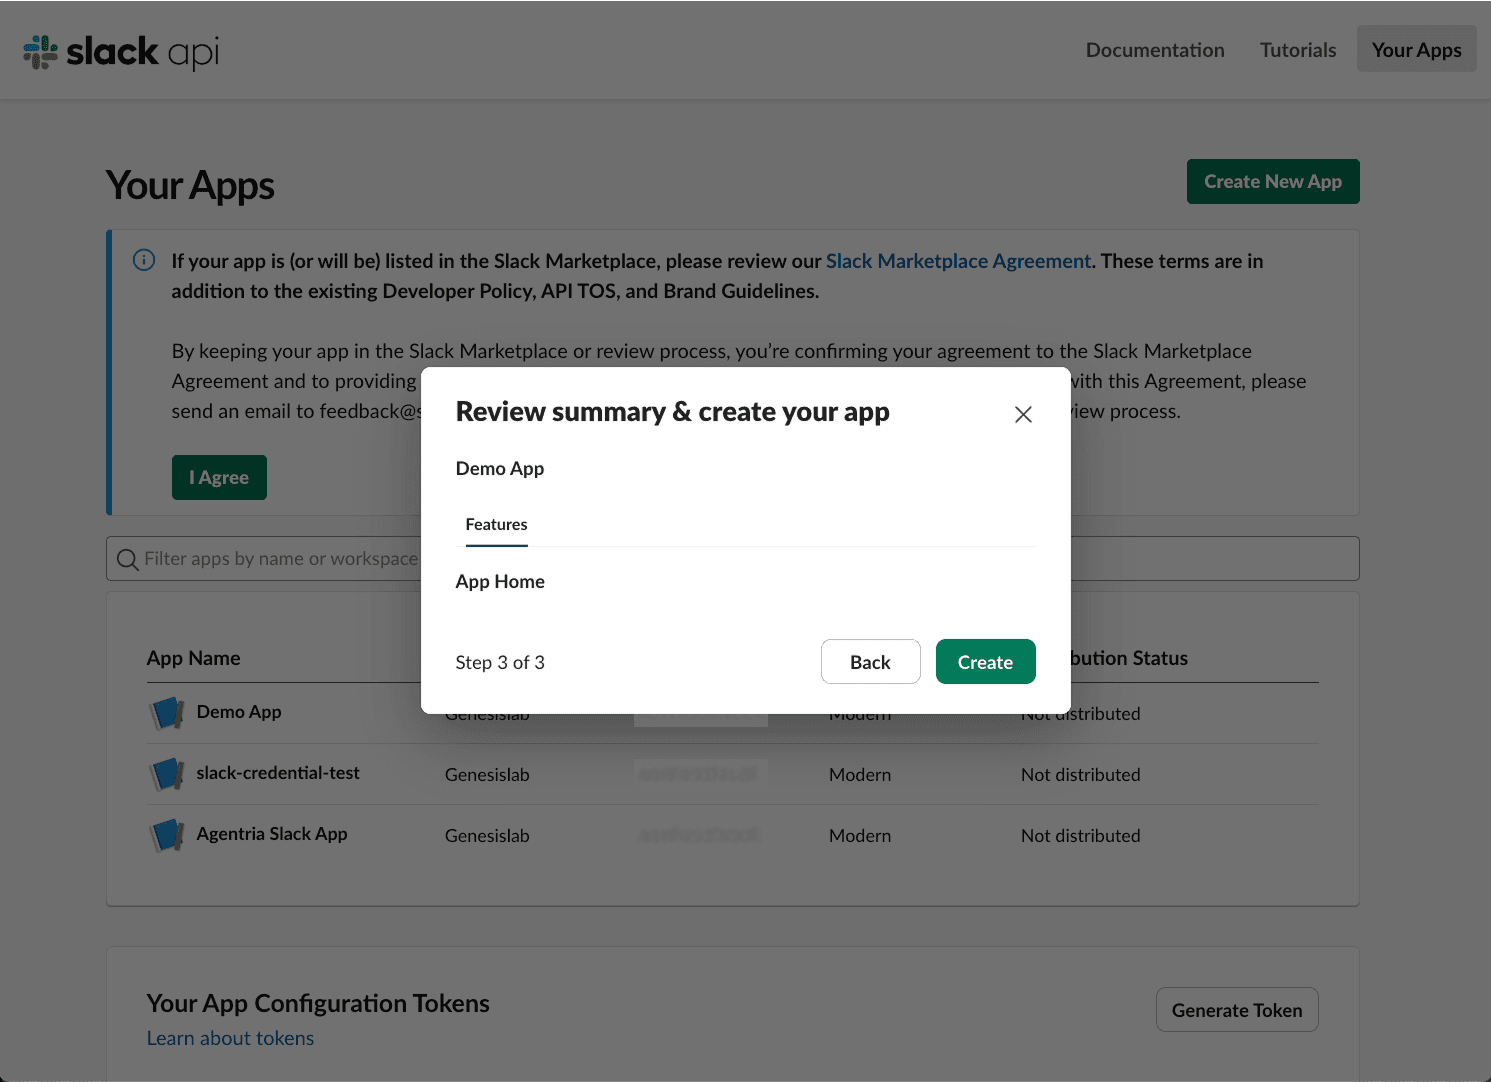
Click Create to generate your app.
If this is your first app, the button may appear as Create App.
Step 3: Store Your Credential Information (Important)
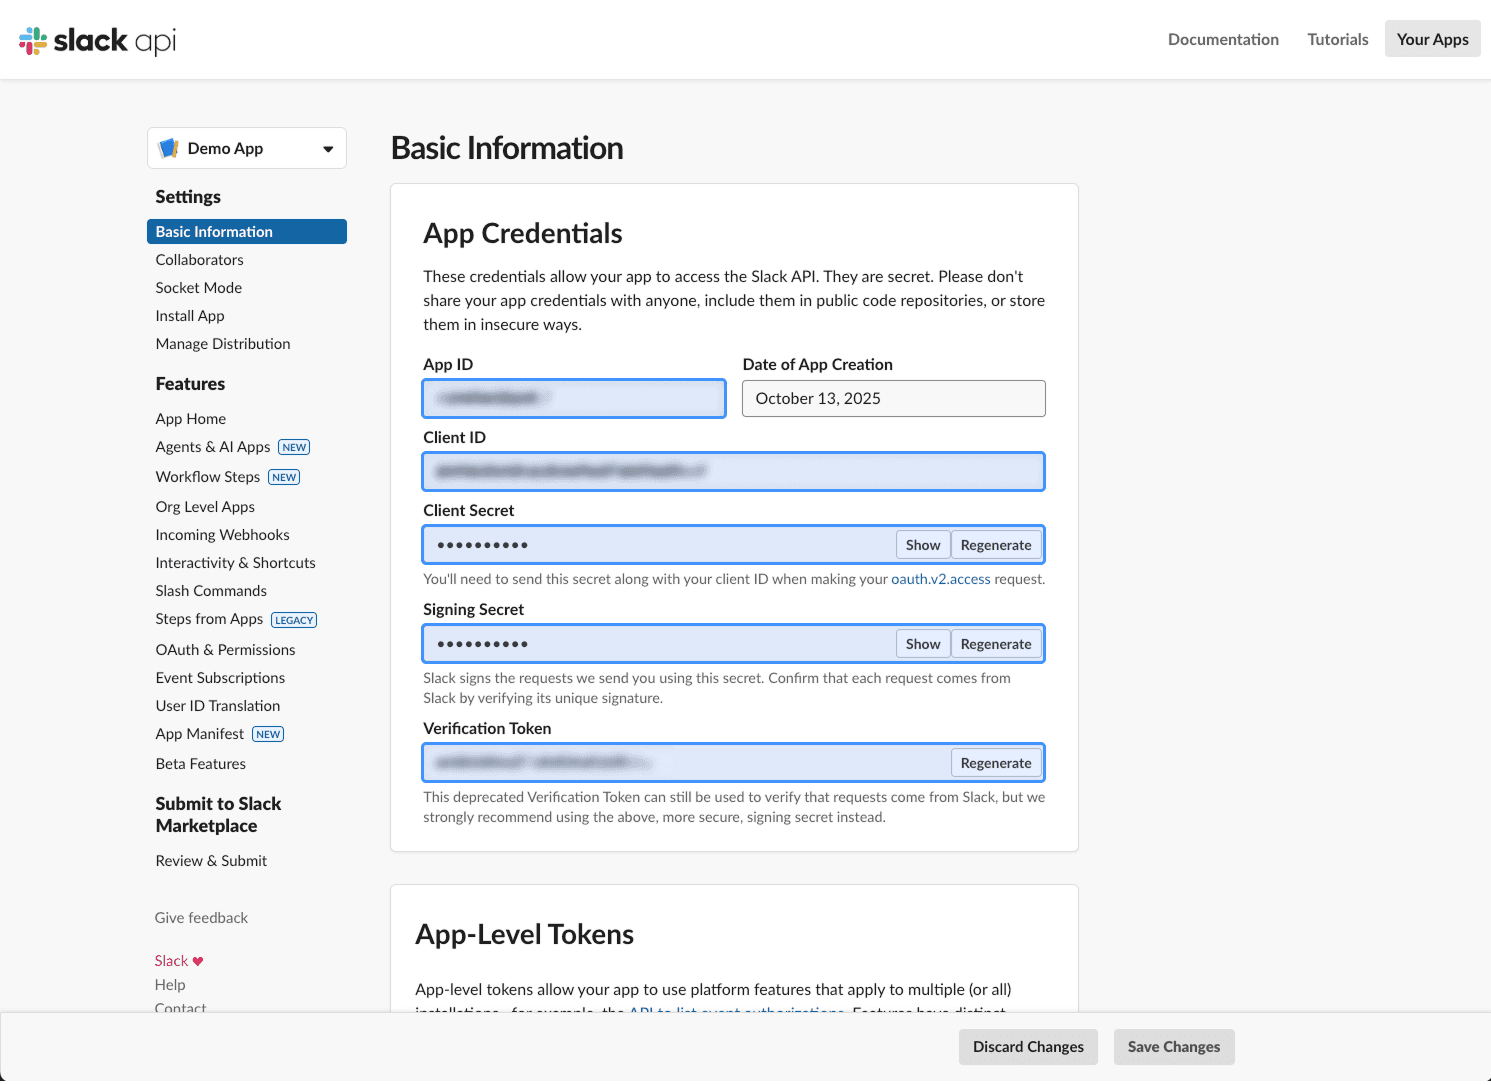
Once the app is created, you’ll be able to view your credential details.
Make sure to store this information securely, as it will be required later.
You can review these details anytime by navigating to the Basic Information tab in the sidebar.
Step 4: OAuth & Permissions
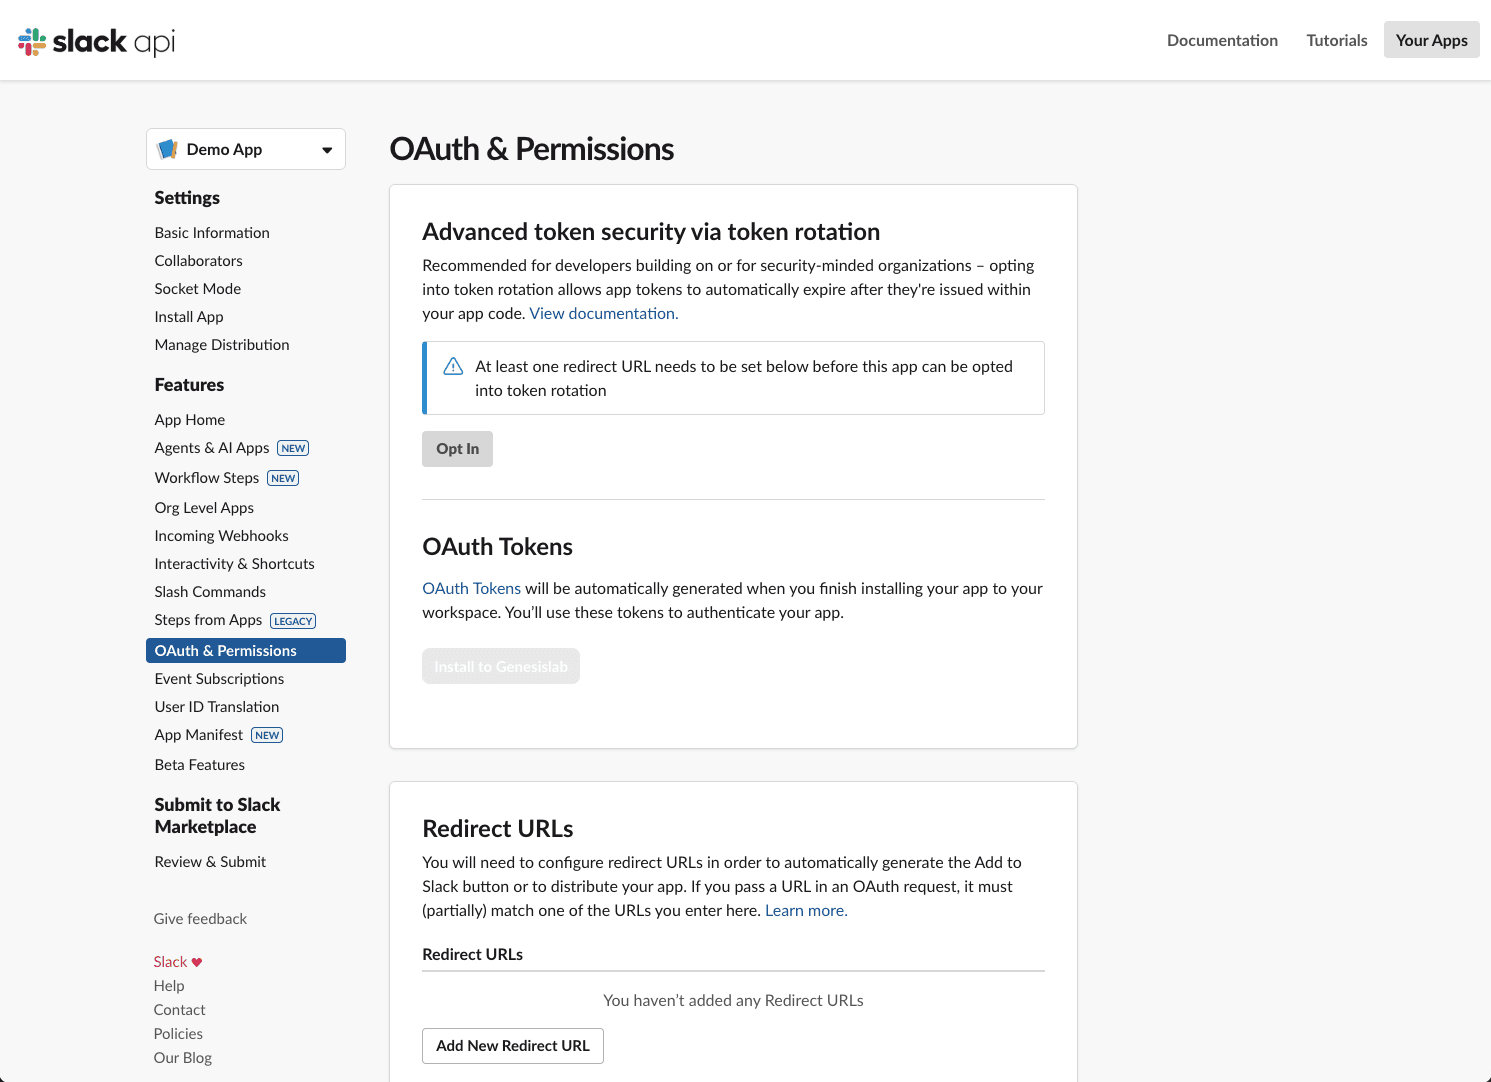
In the sidebar, click the OAuth & Permissions tab.
Follow the steps below to enable the Install to Workspace button for your OAuth token.
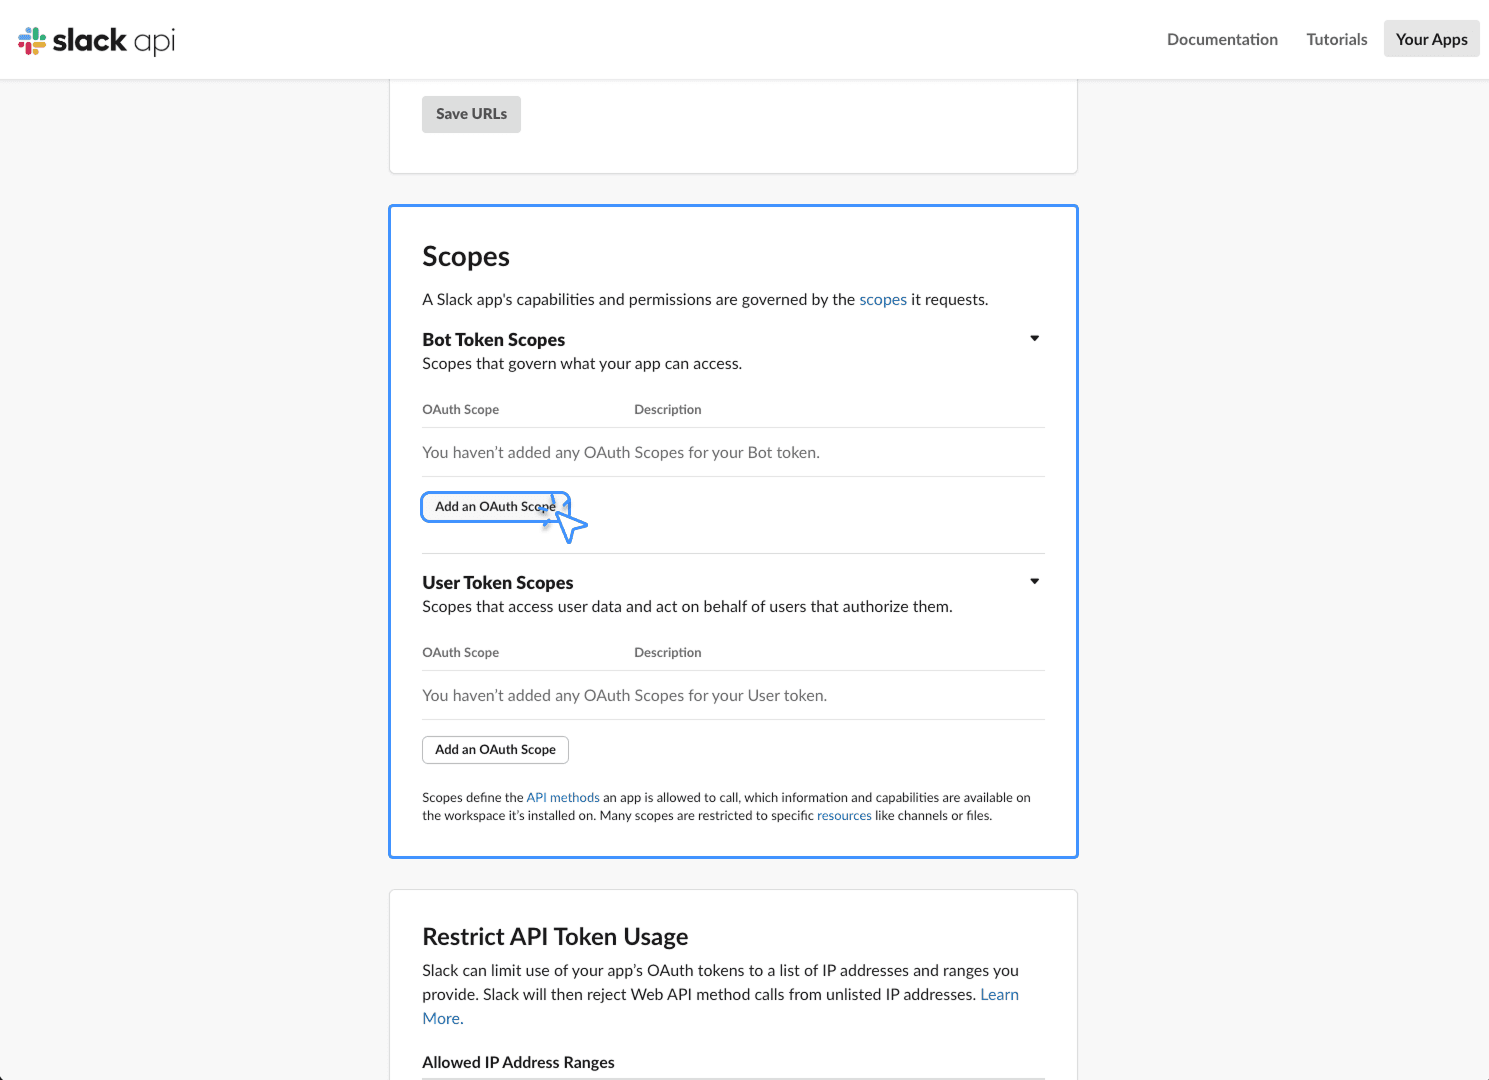
Scroll down to the Scopes section.
Under Bot Token Scopes, click Add an OAuth Scope.
Step 5: API Configuration
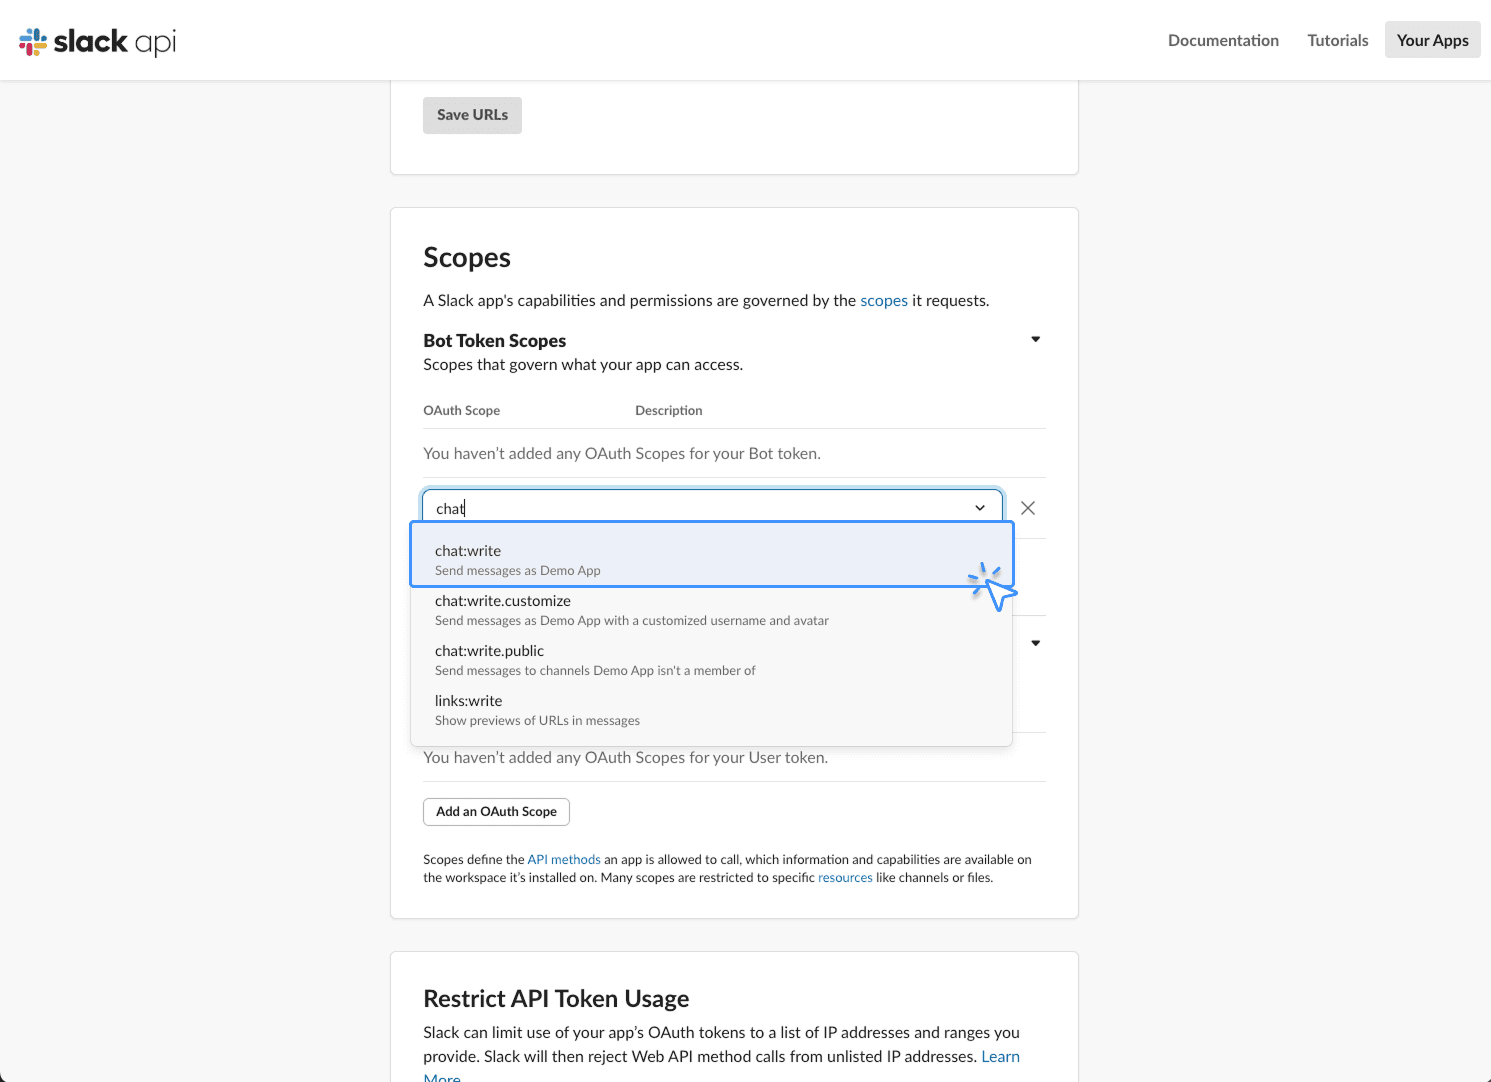
In the input field, type chat and select chat:write.
This guide uses the Send Message Slack bot as an example.
Choose the appropriate scopes according to your Slack Node’s purpose.
You can type keywords like Send, Update, or List to view available options.
Step 6: Install to Workspace
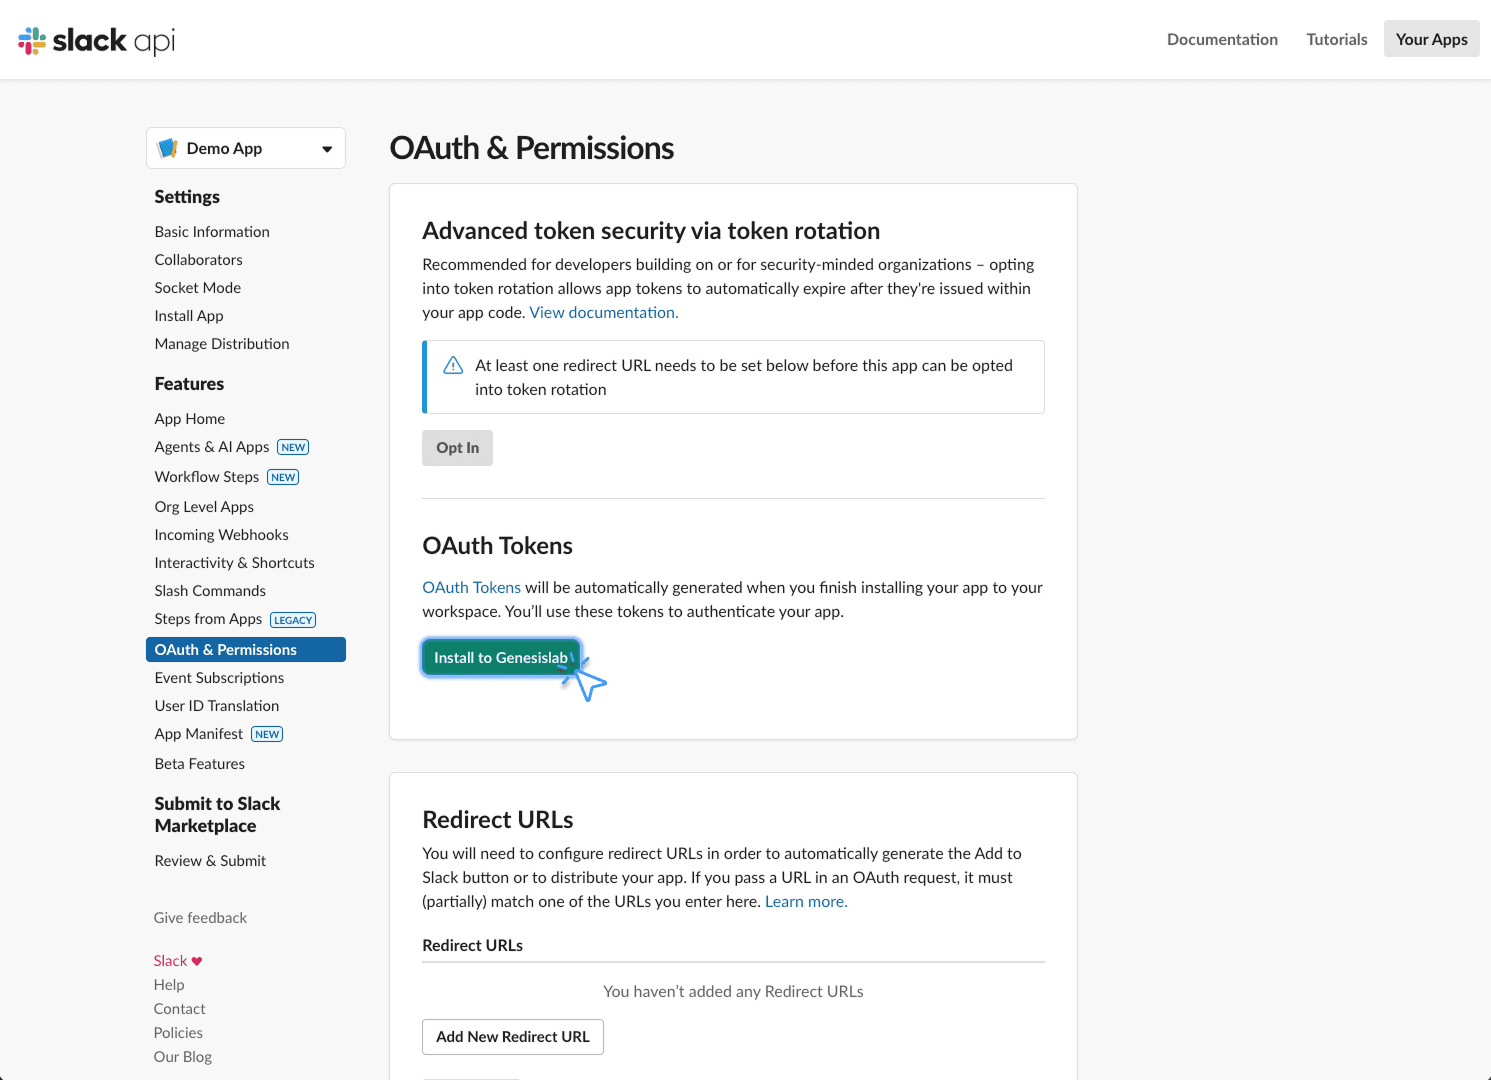
Scroll back to the top of the page — the OAuth Token button should now be active.
Click the Install to Workspace button.
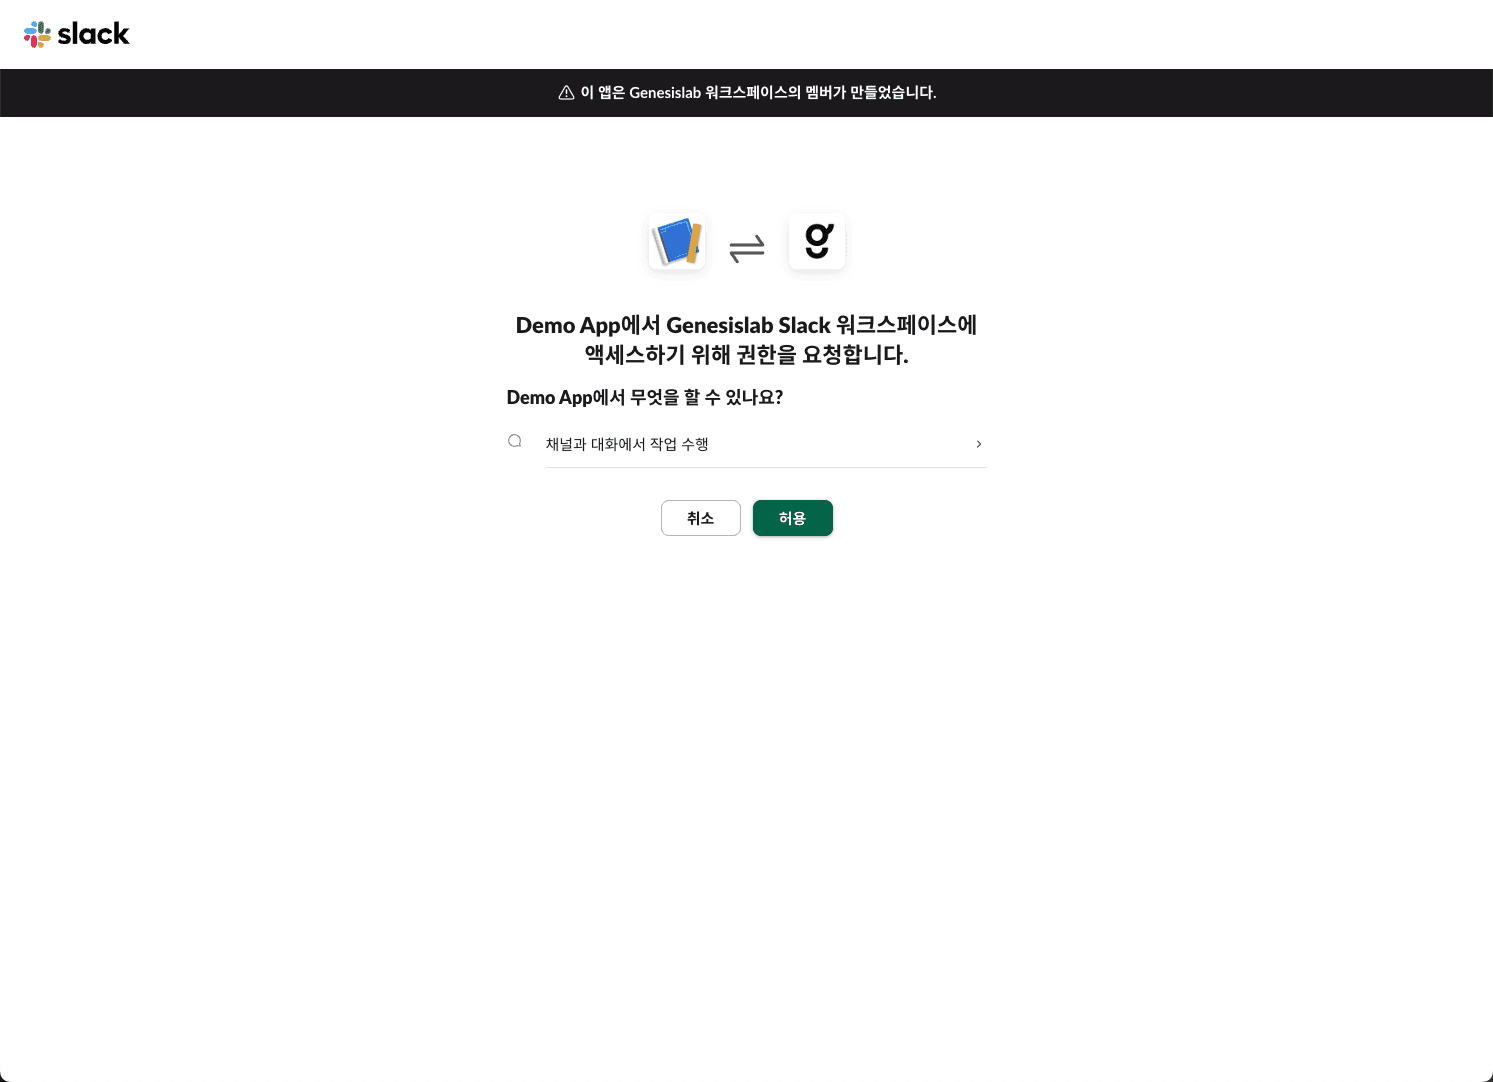
Allow access to your Slack workspace.
Step 7: OAuth Token Issued
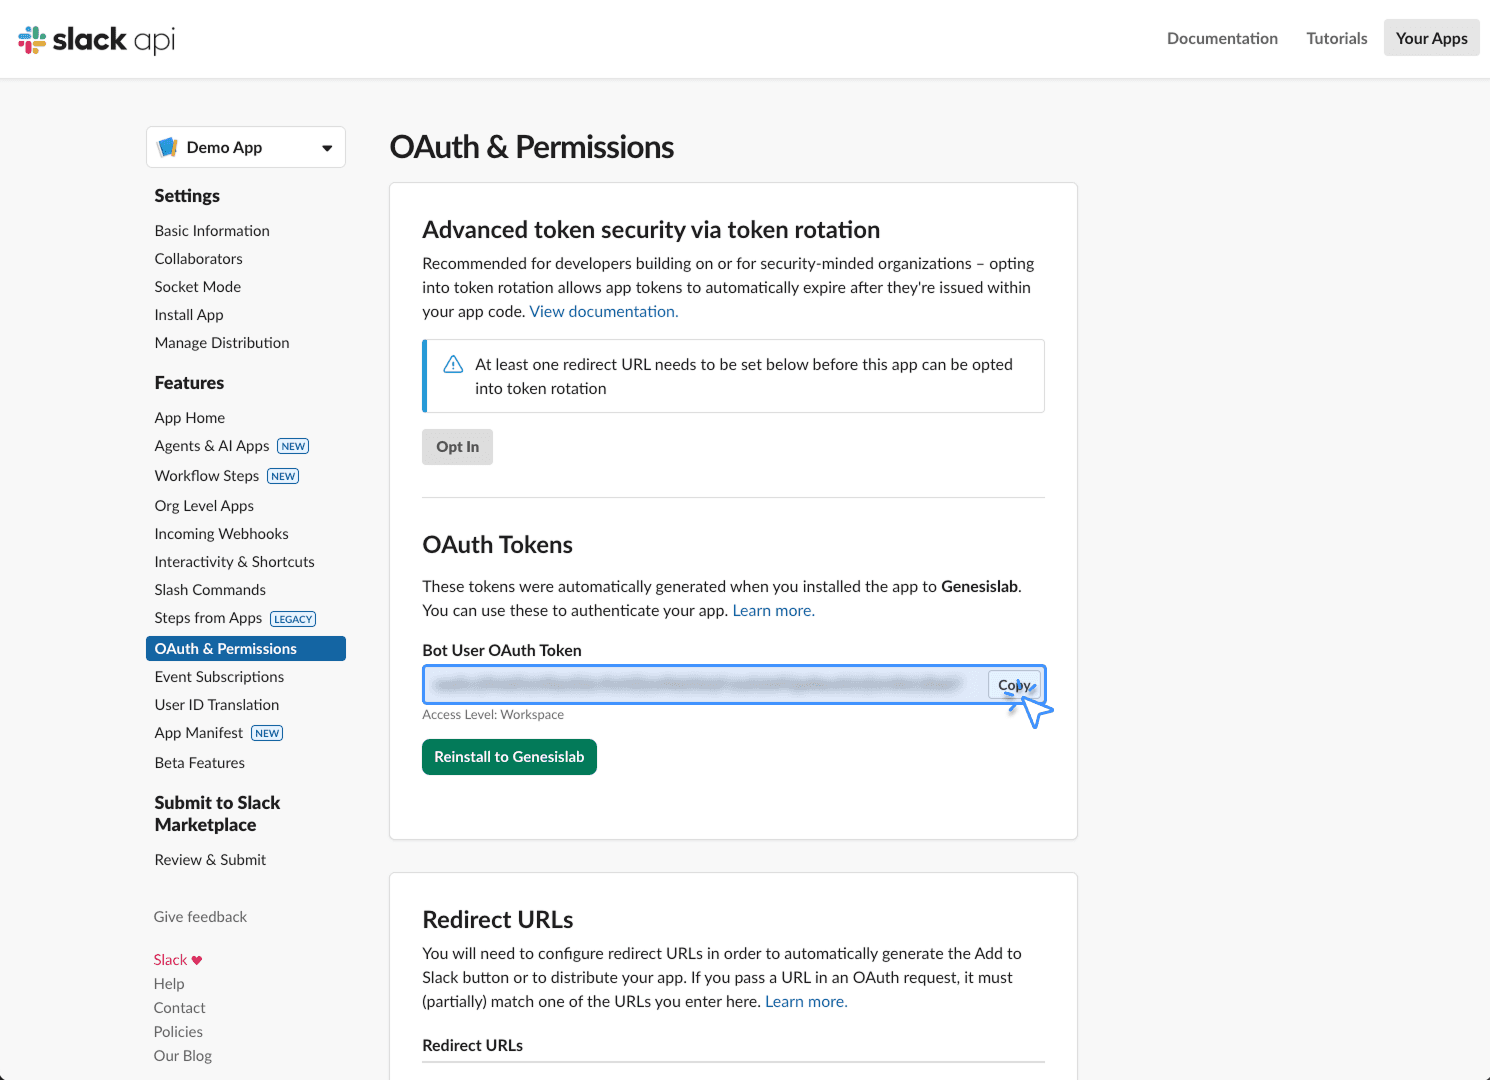
Be sure to store the issued OAuth token information in a safe place. Copy the token information and use it to register your Agentria credentials in Step 9. Edit the app name in Step 8. You can skip this step and proceed to Step 9.
Step 8: Edit the App
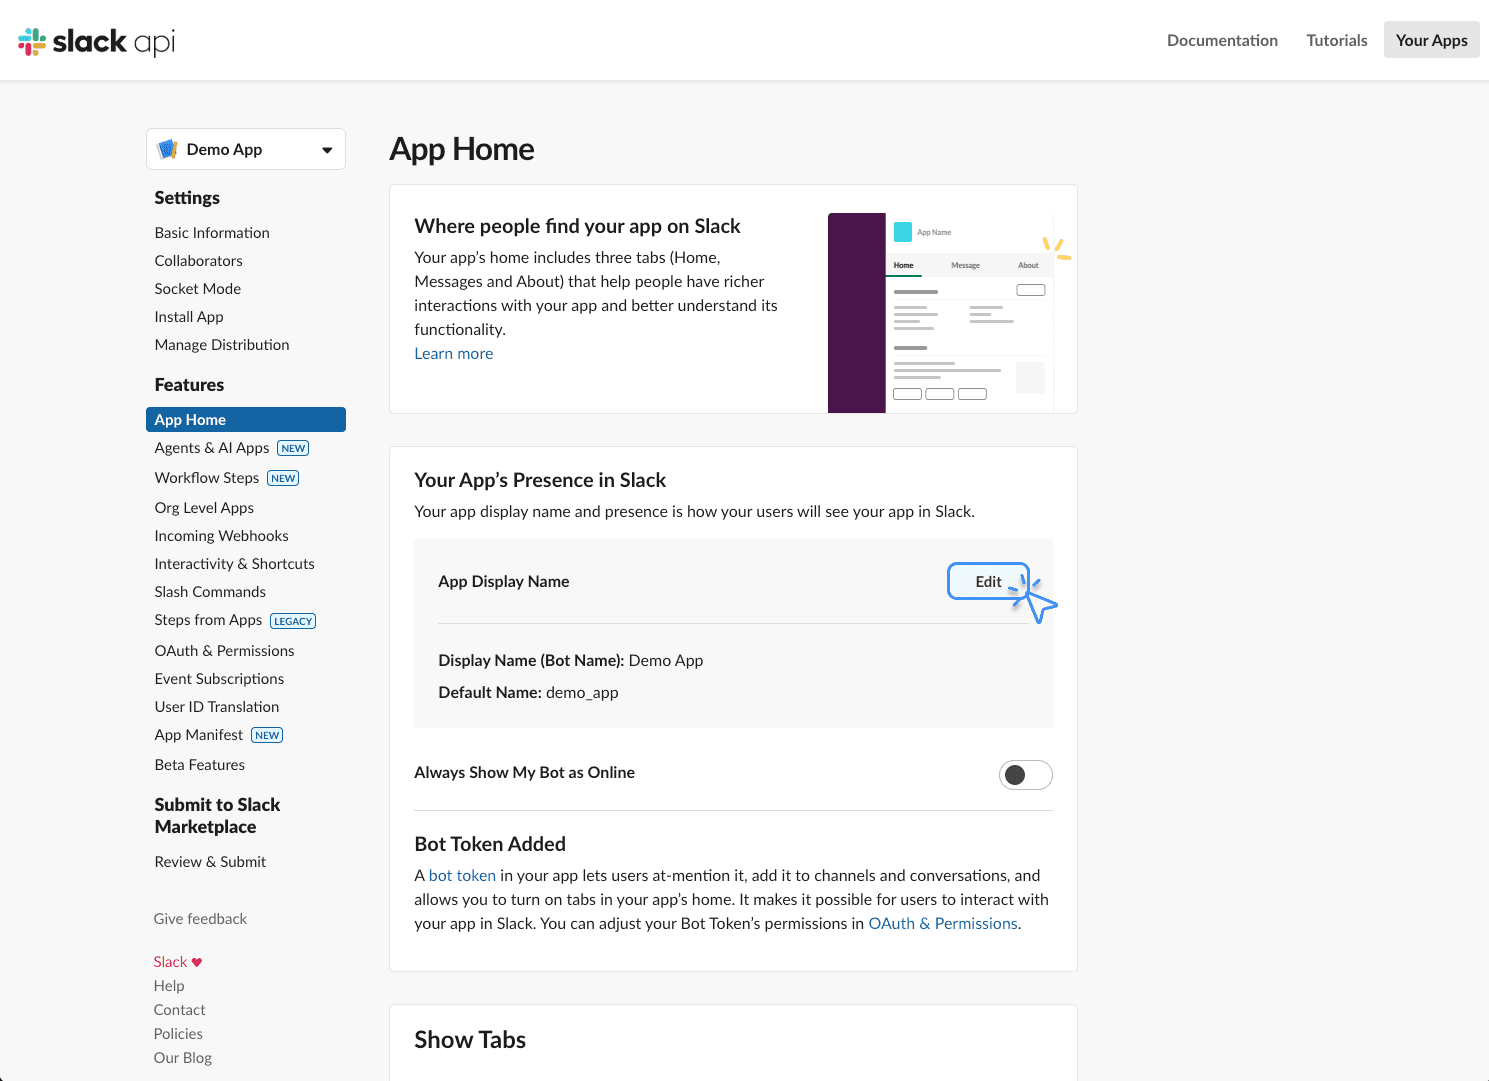
매니페스트 기본 설정으로 생성한 앱의 이름은 Demo App 입니다.
사이드바에서 앱 홈(App Home)에 진입해 편집(Edit) 버튼을 누르면 앱의 기능과 용도에 맞게 이름을 변경할 수 있습니다.
If your app was created using the default manifest settings, its name will appear as Demo App.
To rename it:
Go to App Home in the sidebar.
Click
Editand update the app name to match its purpose or functionality.
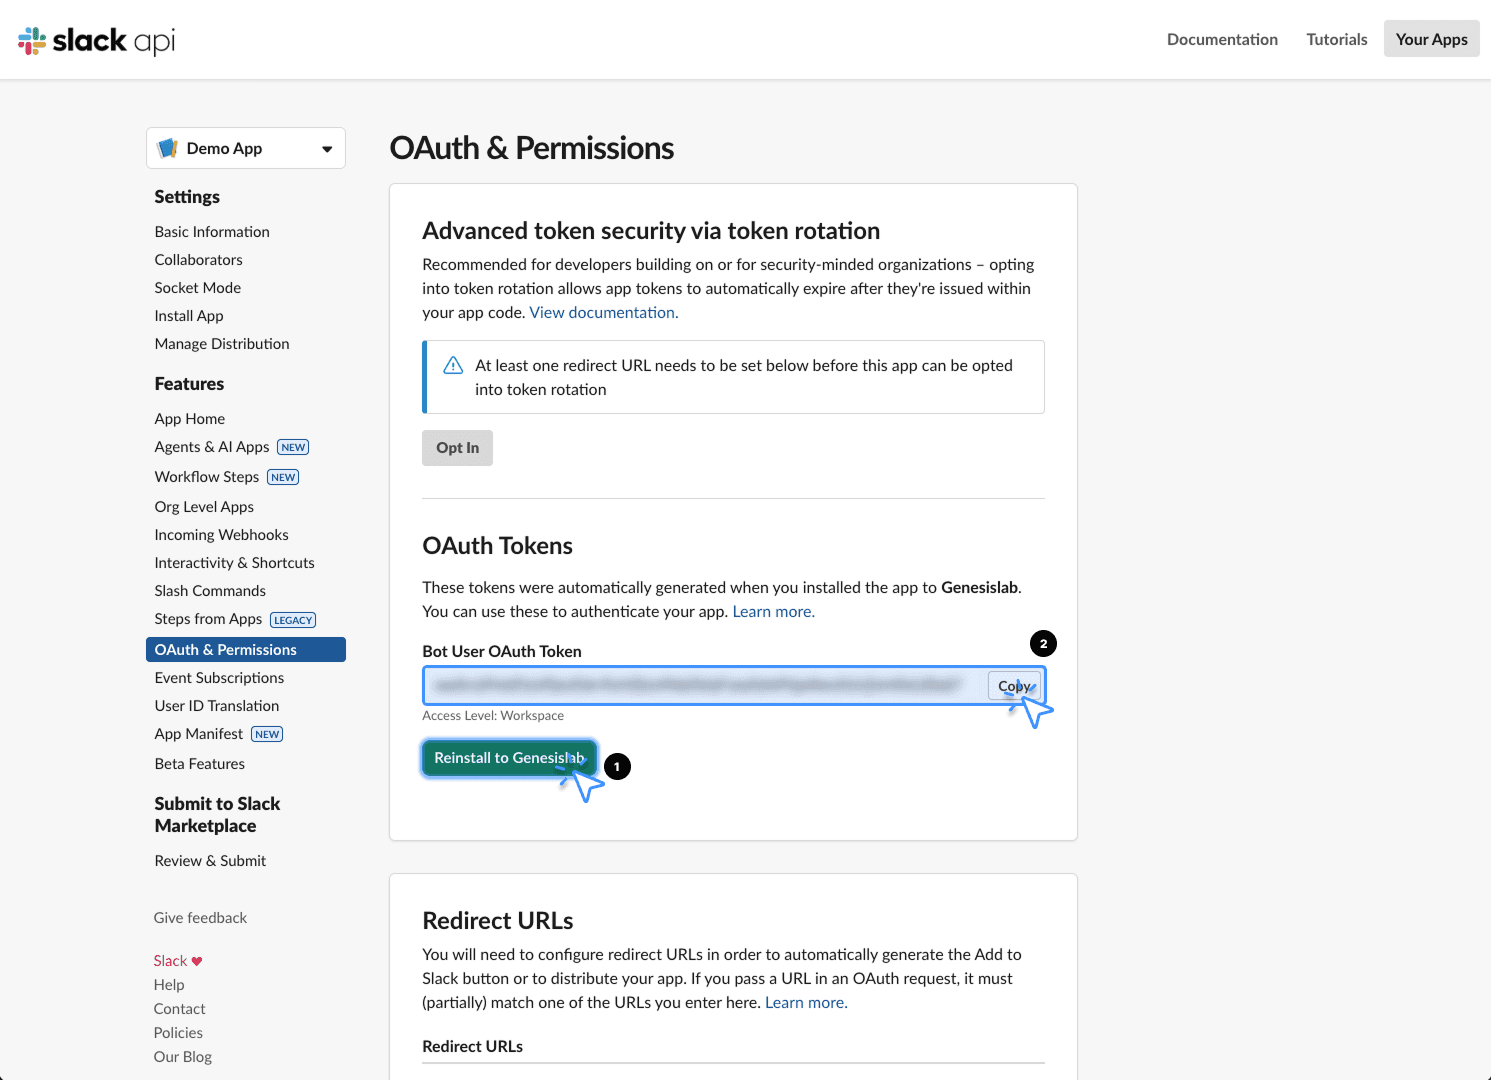
If you modify the app, you must reinstall the OAuth token afterward. Navigate back to OAuth & Permissions and reinstall to workspace.
Click the Reinstall to WorkSpace.
After completing the reinstallation and permission steps, a new token will be generated.
Copy this updated token and proceed to Step 9.
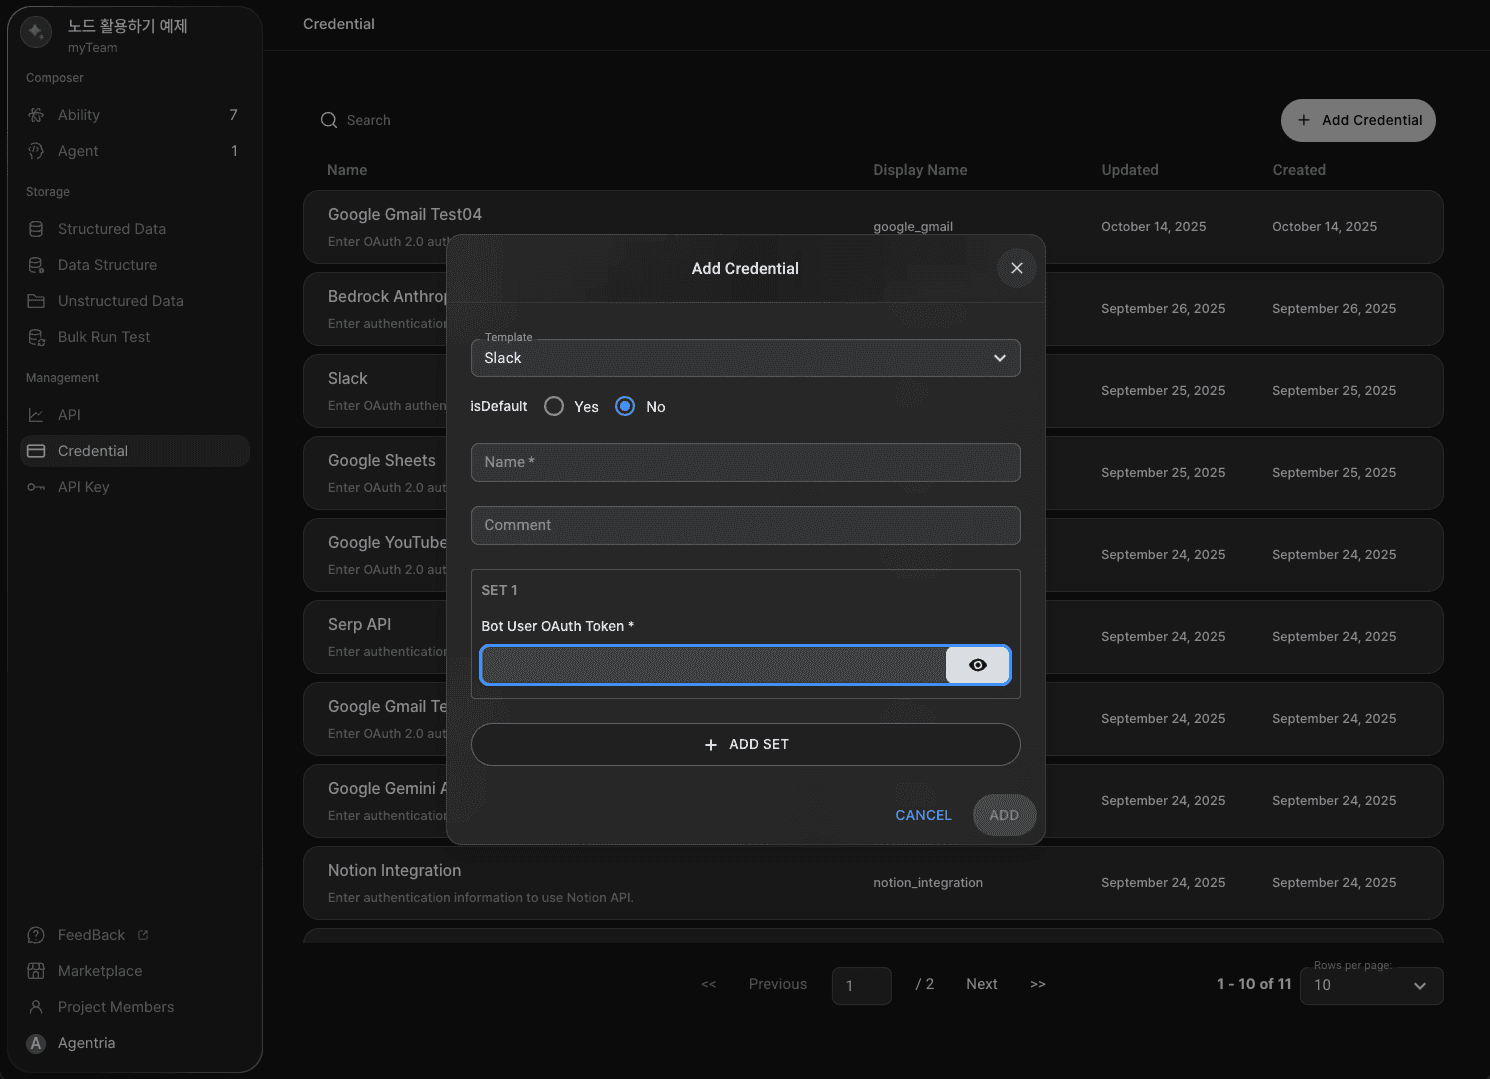
Step 9: Register the Credential in Agentria
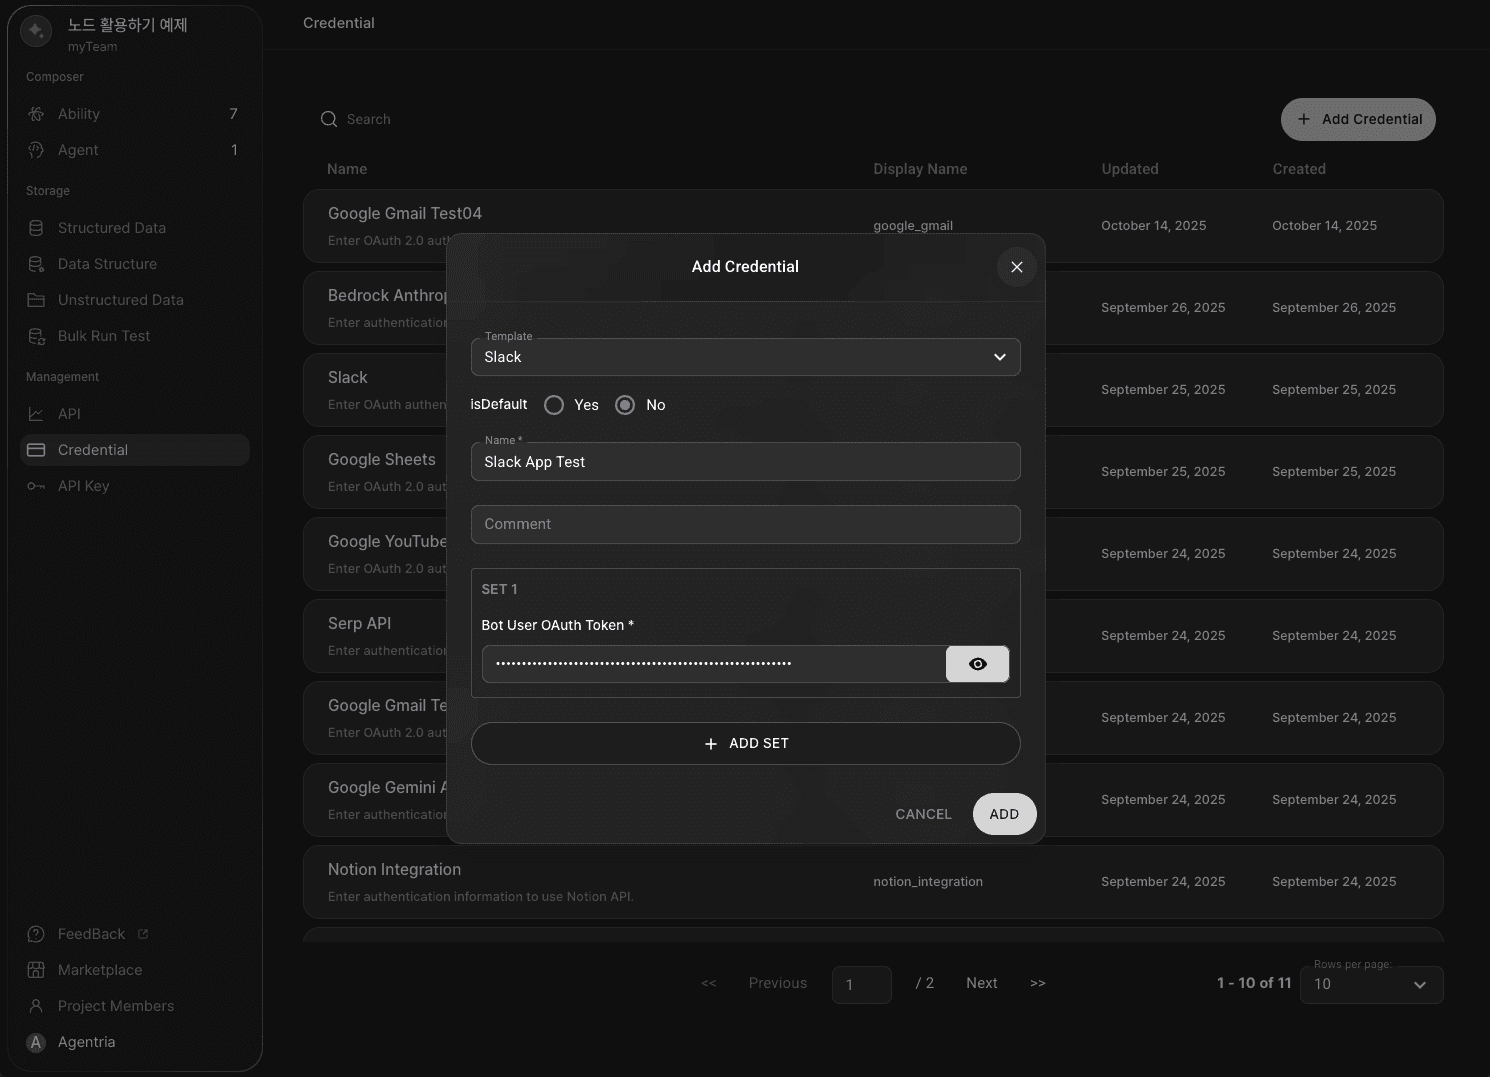
In Agentria, select Slack as the credential template and assign a name to your credential.
Paste the copied token into the Bot User OAuth Token field.
Click ADD to register the credential.
If this is your first time registering a credential, click SAVE in the same location.
Step 10: Apply the Credential in a Node
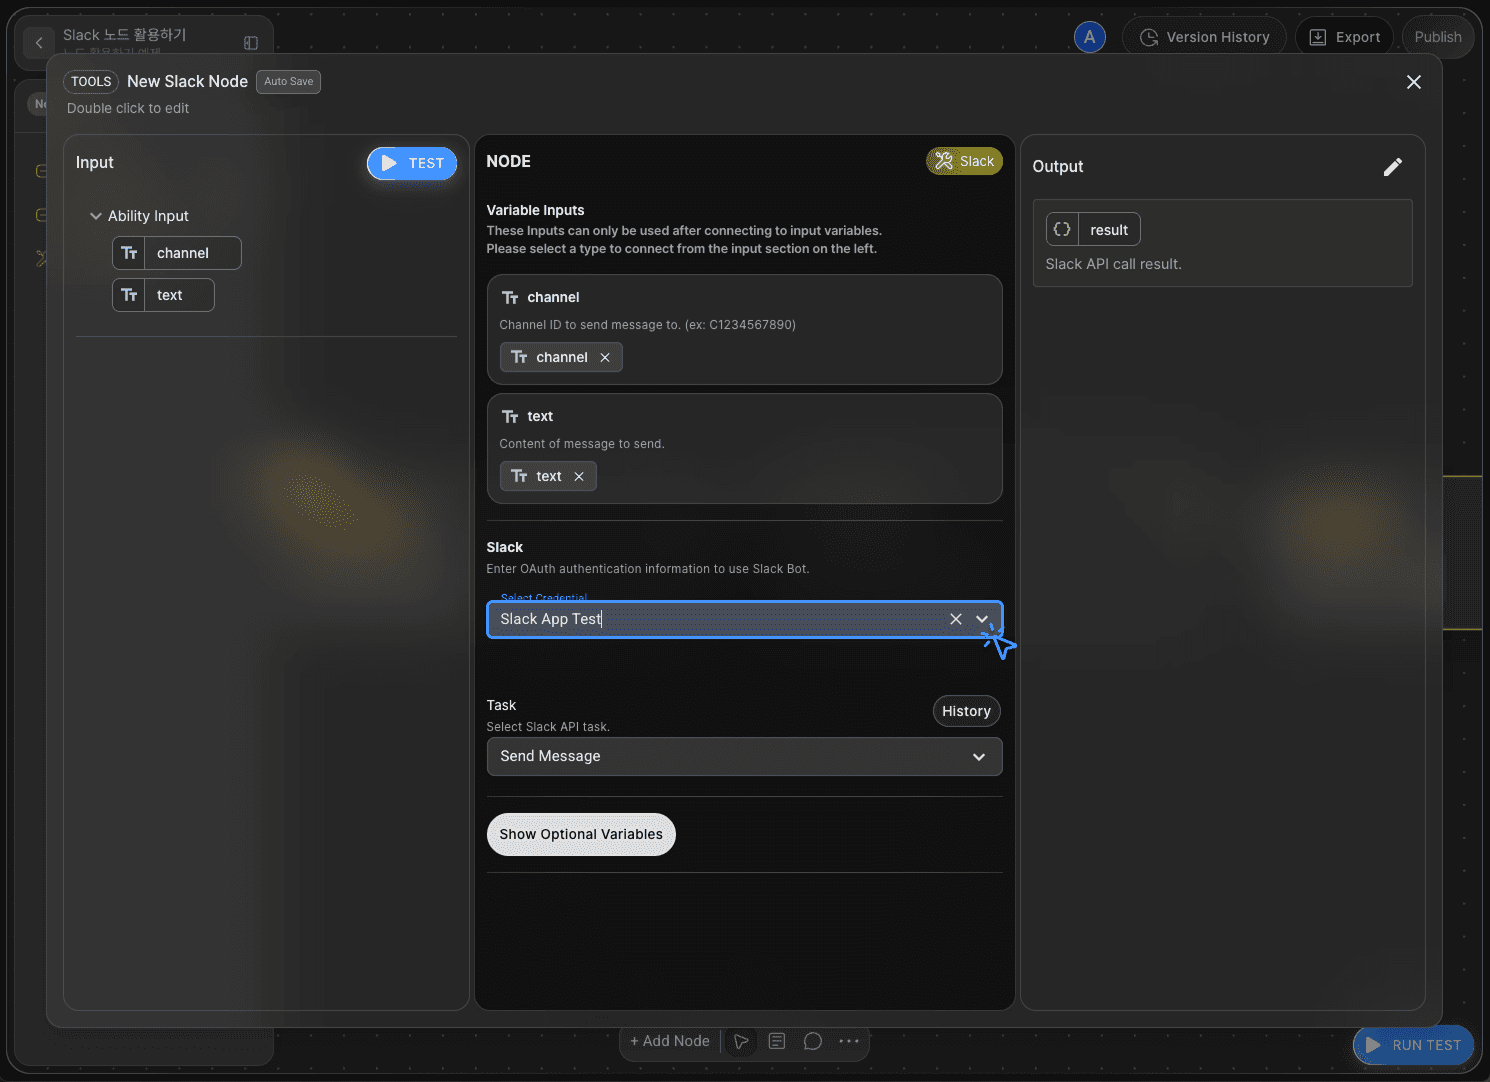
On the canvas, add a Slack Node, open its editor, and select the registered credential.
You can now use the Slack Node in your workflow.
Next Step
The same token can be reused across multiple Slack credential configurations.
If you ever regenerate your token, simply update the existing credential information in Agentria to continue using it without interruption.