Key Features
To use Google-related nodes—such as Gmail, Google Sheets, or Google Calendar—you must first issue a Google Credential and register it in Agentria.
A Google account is required to complete this process.
Credential Registration Goal
To register a credential in Agentria, you will need the following three items: Client ID , Client Secret , Refresh Token
By following this guide, you will be able to issue the required information and register your Google Credential.
This guide is written based on registering a credential for the Gmail node, but a single Google Client ID and Client Secret can be reused across multiple Google-based nodes.
Step 1: Access Google Cloud Console
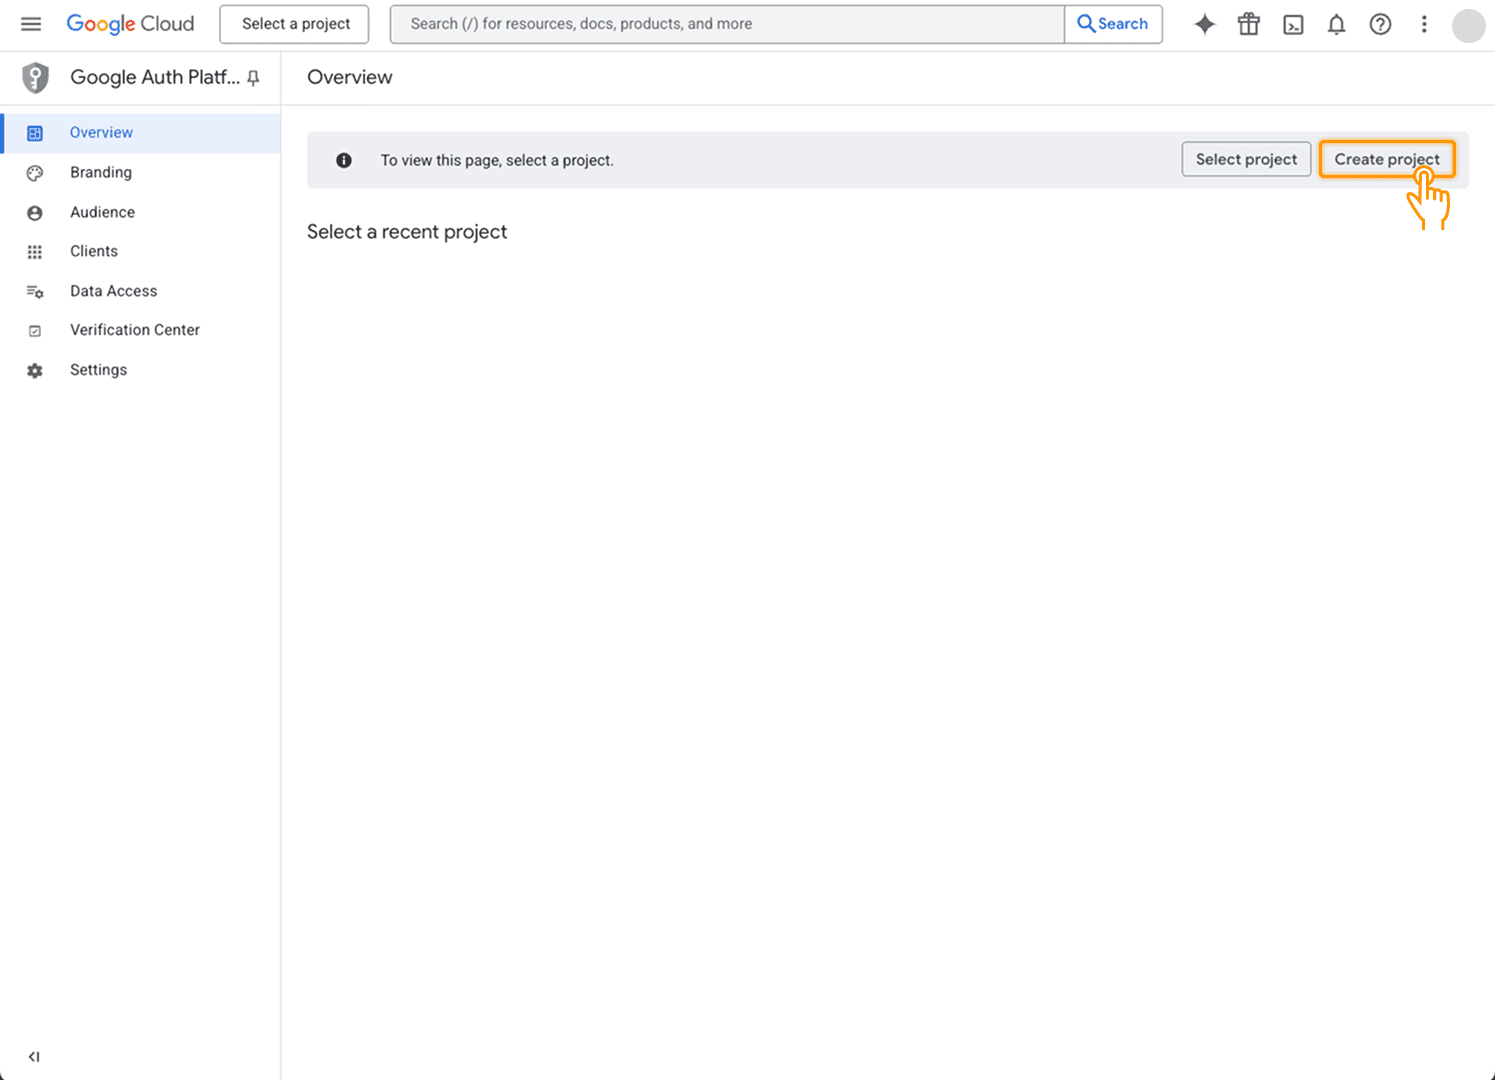
To issue credentials, open your browser and go to the 🔗Google Cloud Console Auth Platform.
If this is your first time using the Cloud Console, click Create Project to create a new project.
Step 2: OAuth Setup
OAuth is an open standard protocol used for user authentication and authorization on the internet.
You must complete the OAuth flow to issue a Google Credential.
2-1) Create a Project
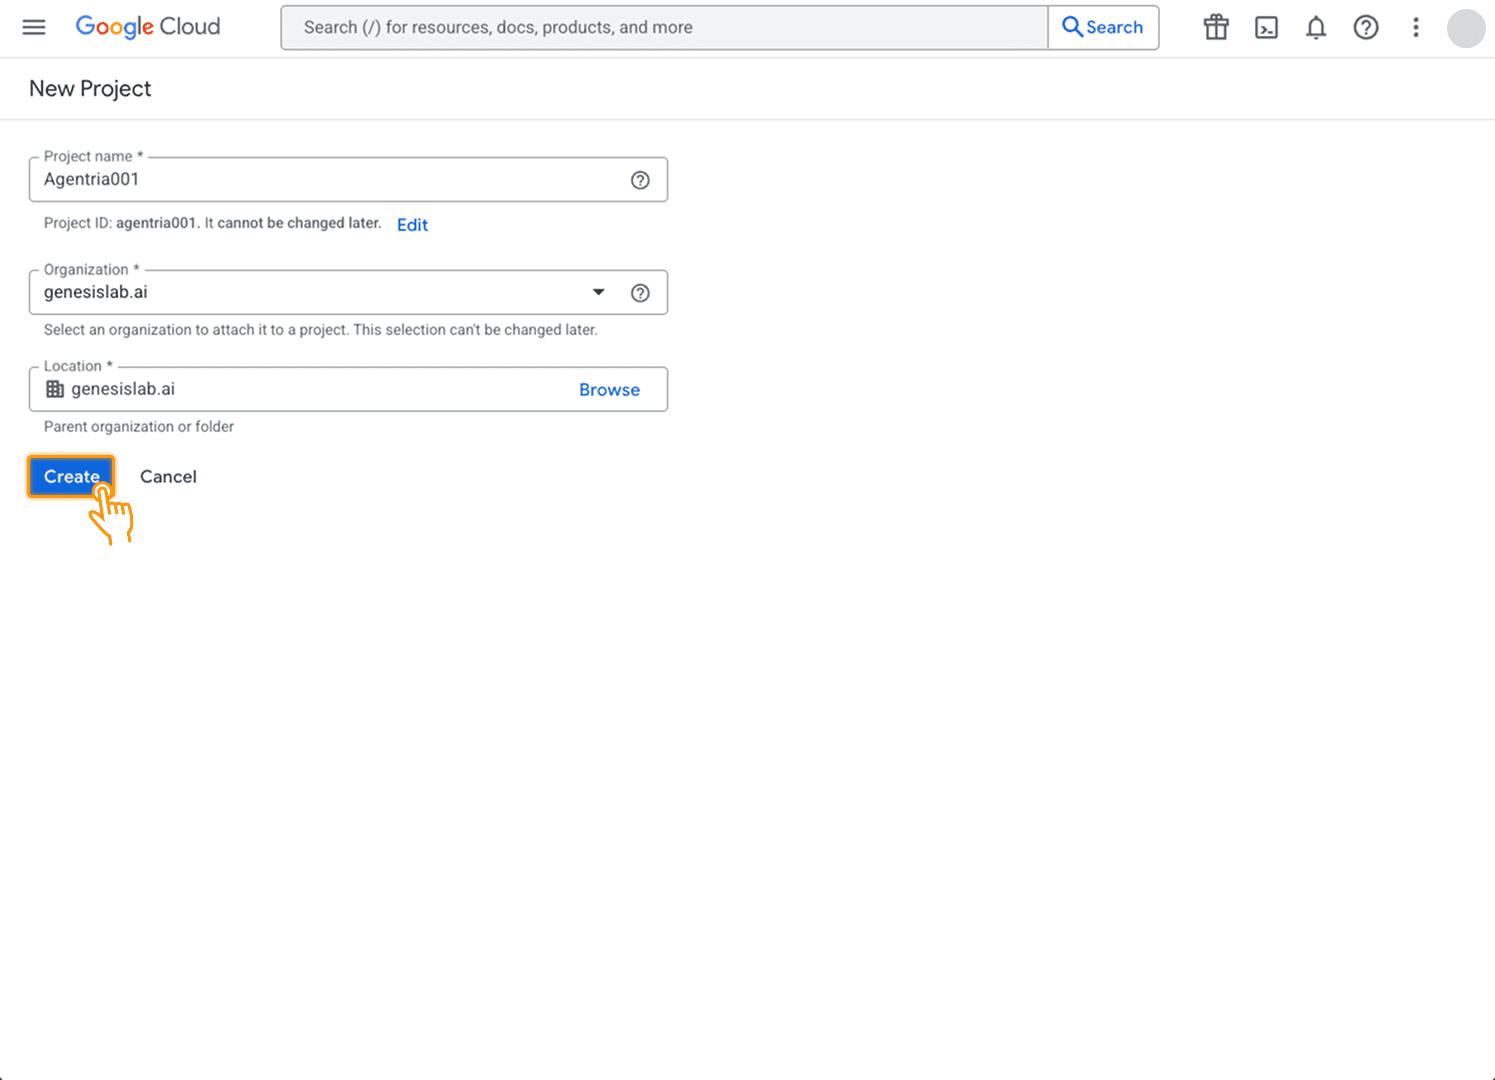
Set a project name and choose an organization.
For personal users, select “No organization”, then click Create.
2-2) Configure the Project
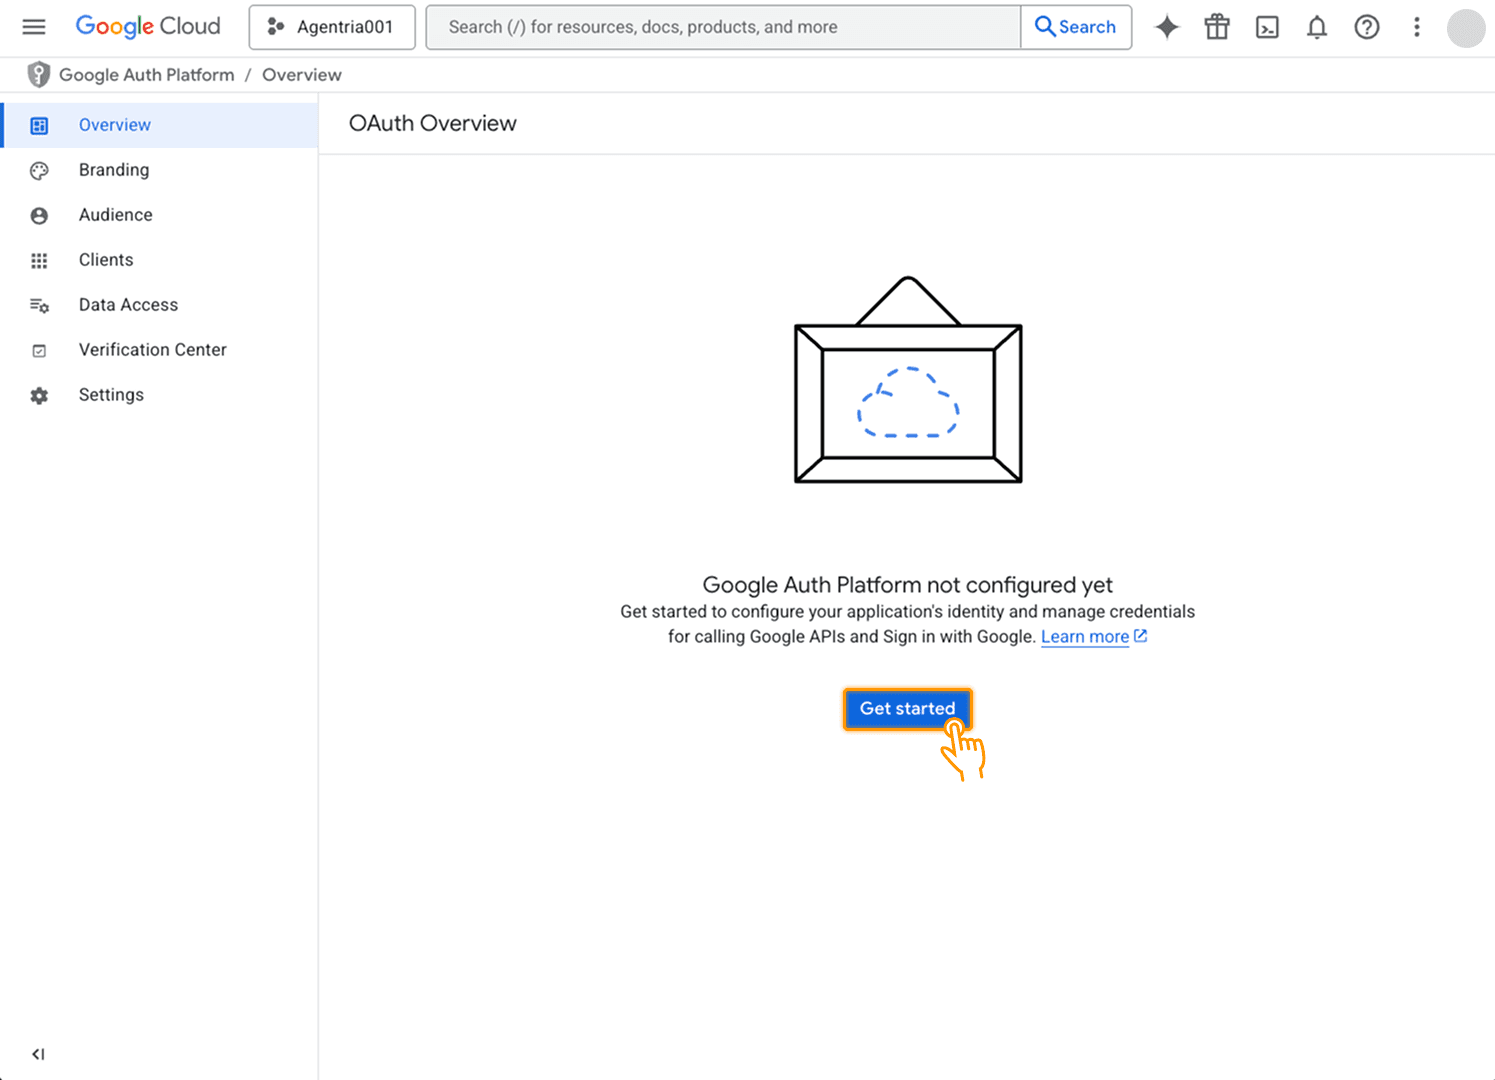
Click Get Started to configure your project.
Step 1: App Information
Set the App name
Enter the User support email
Step 2: Audience
Internal: Restricted to Google Workspace users in your organization (for internal apps)
External: Accessible to any Google Account, but only users added as test users can access it (ideal for public-facing apps)
Step 3: Contact Information
Enter an email address to receive notifications about project changes (may be the same as the user support email)
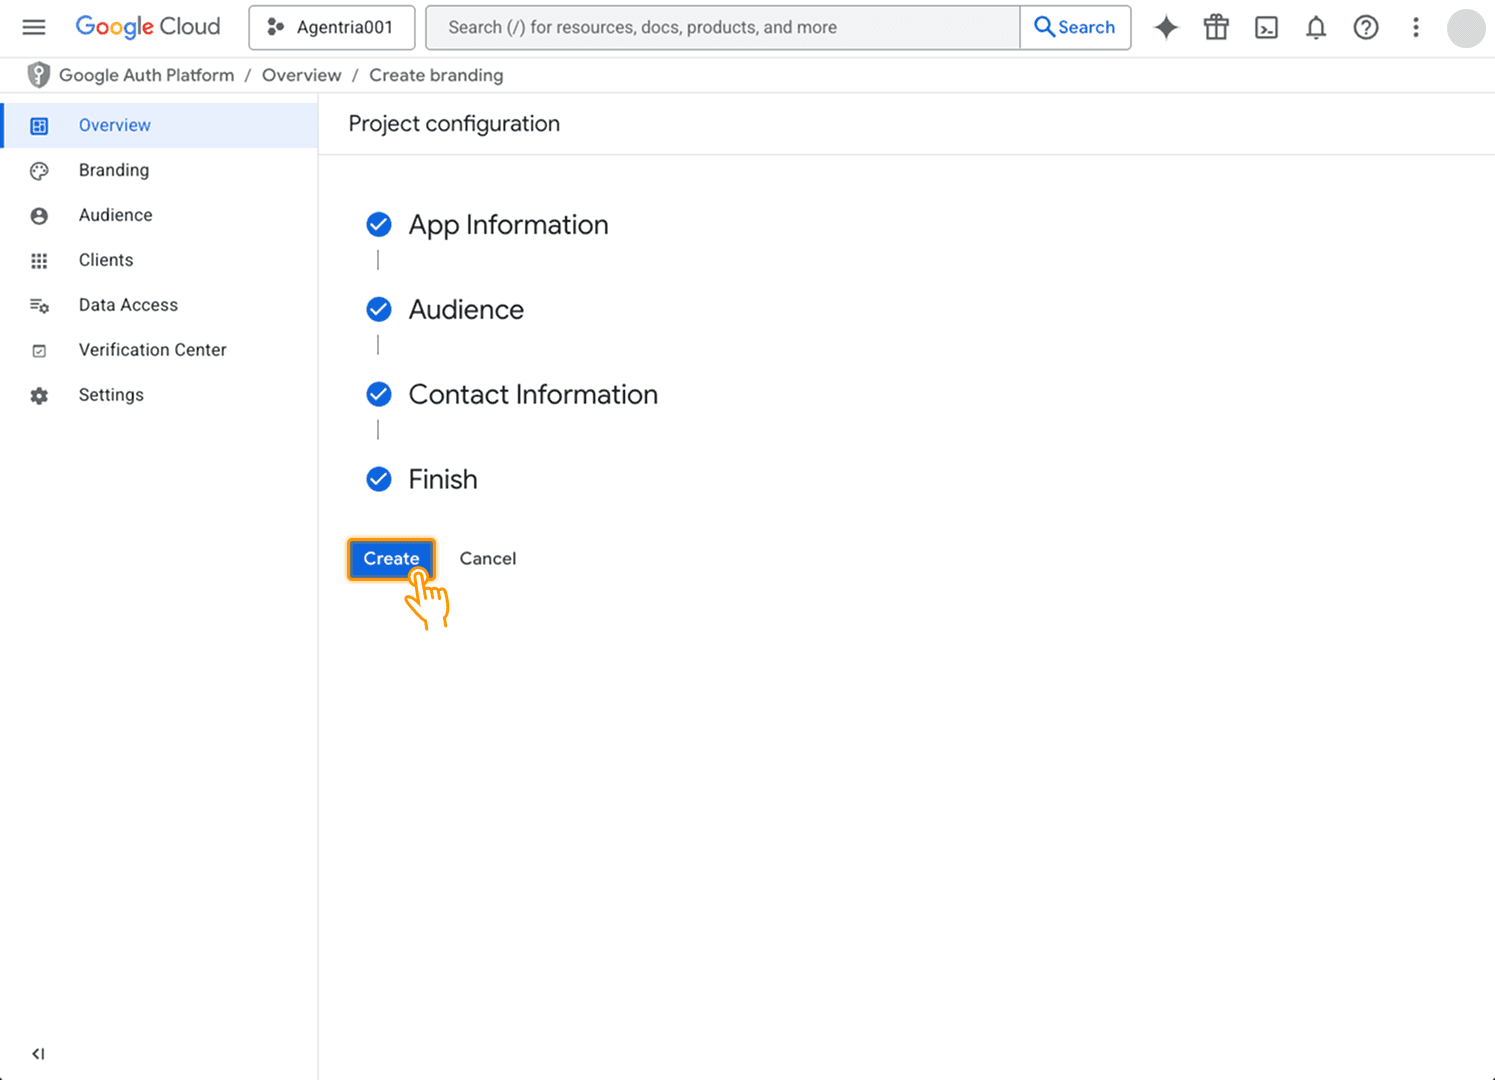
Step 4: Finish
Agree to Google’s policies and complete the configuration.
Click Create when finished.
Step 3: Create an OAuth Client ID
To generate user authentication credentials, you must create a Client ID.
During this process, your Client ID and Client Secret will appear—be sure to save them in a secure location.
3-1) Create OAuth Client

Click Create OAuth client.
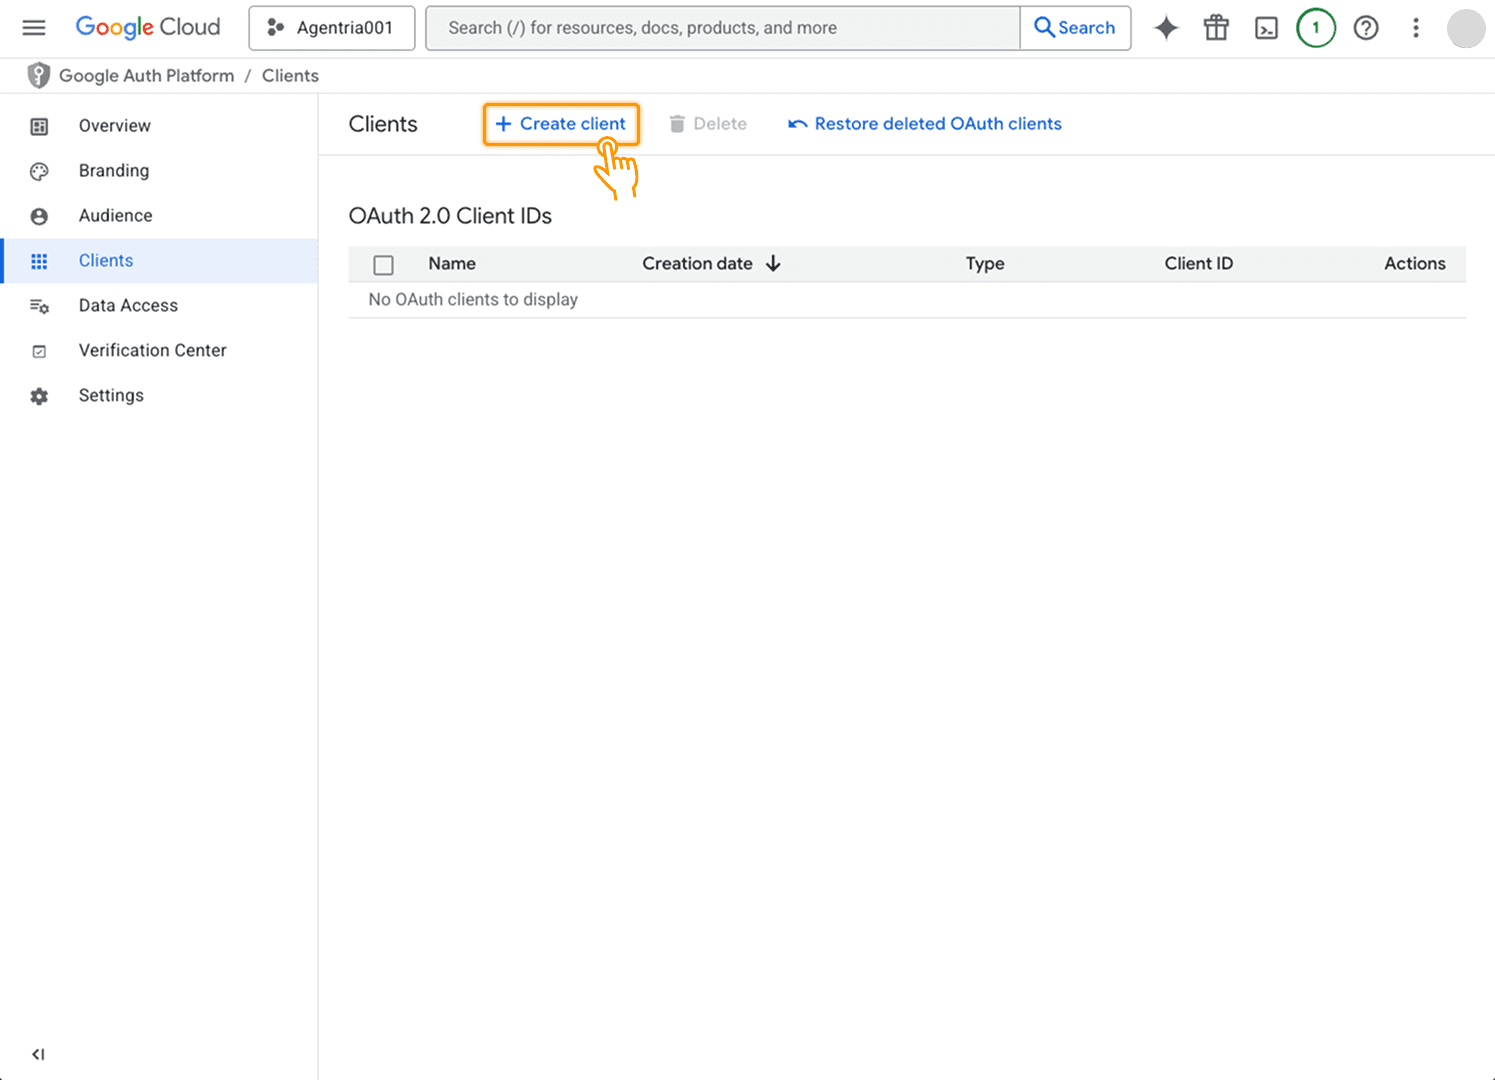
If you cannot find the button, open the Clients tab from the sidebar and click +Create client, which leads to the same creation process.
3-2) Configure the Client ID
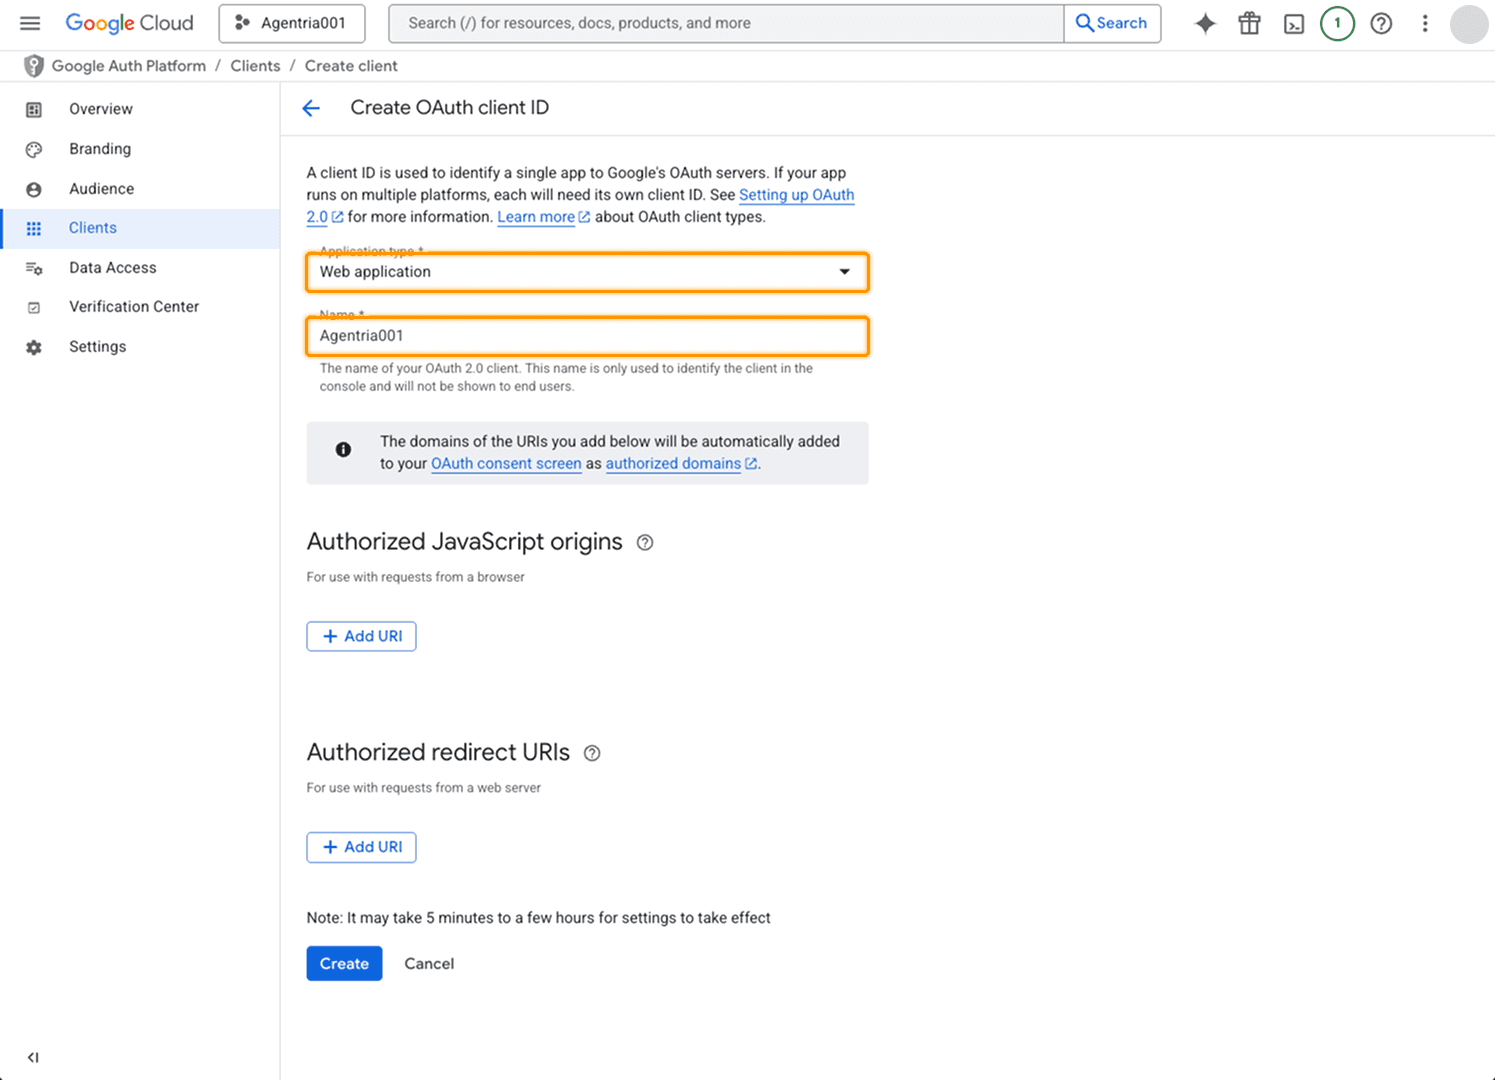
For use in Agentria, select
Web applicationas the application type.Enter a name for the Client ID.
The JavaScript origins field may remain empty.
Next, you must enter the Redirect URL.
A redirect (callback) URL is required so that Google can return success or failure results after authentication.
Leave the Google Console open and switch to the Agentria page to retrieve the approved redirect URL.
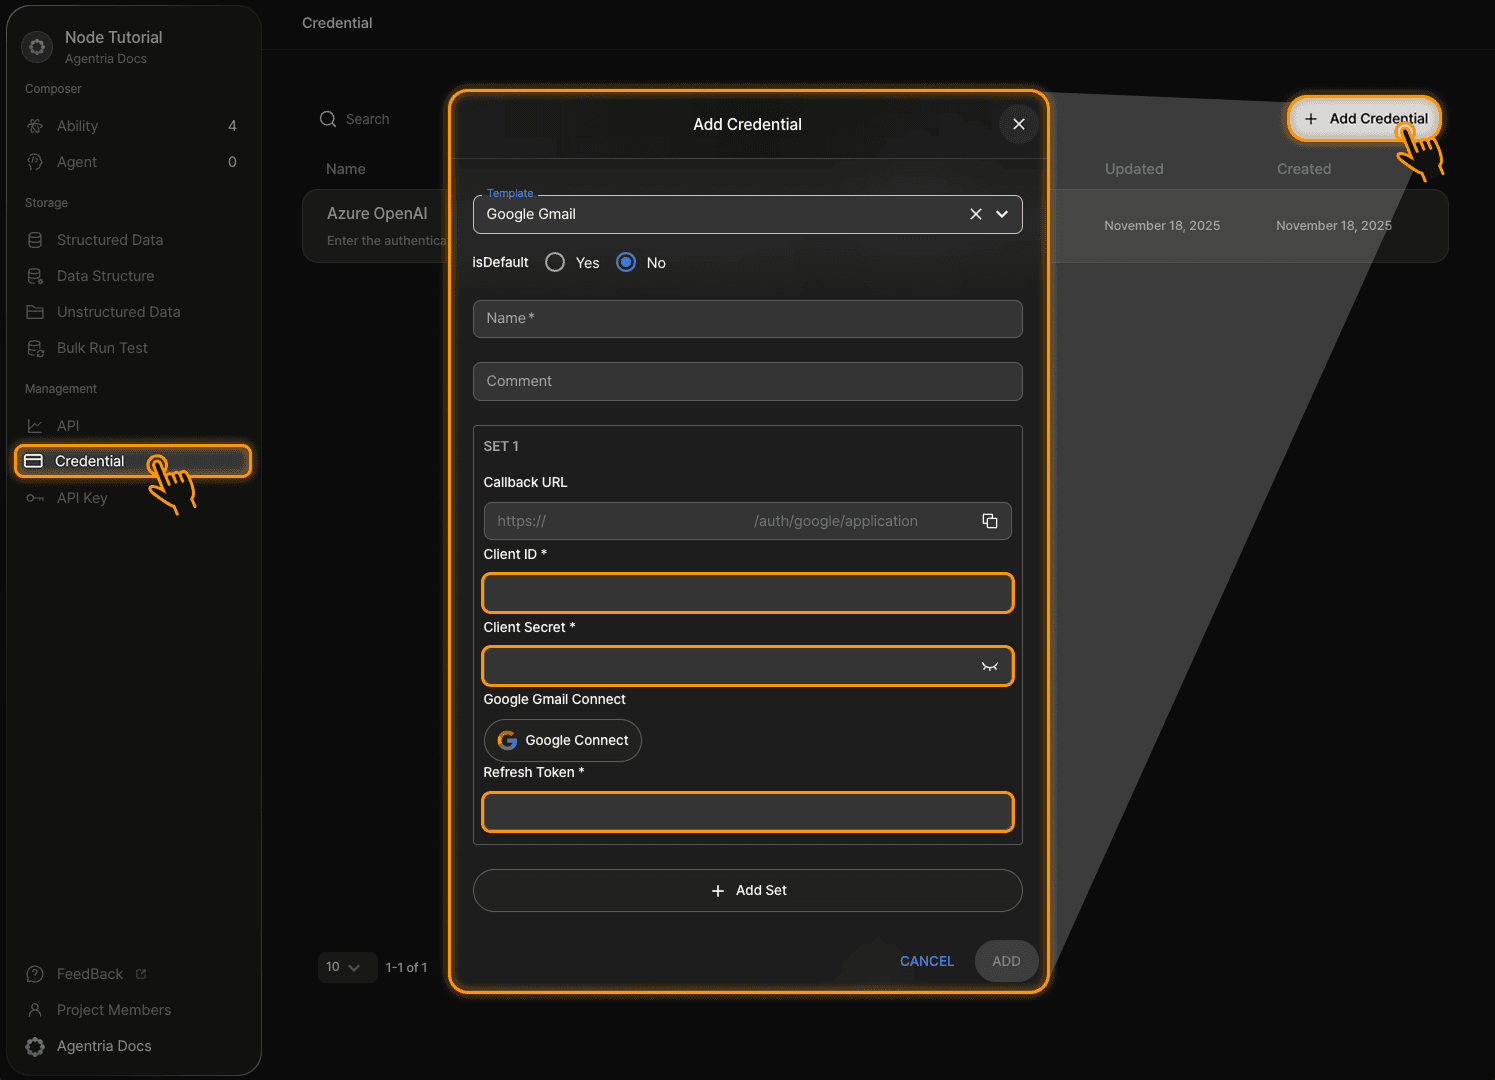
Step 4: Add Credential in Agentria
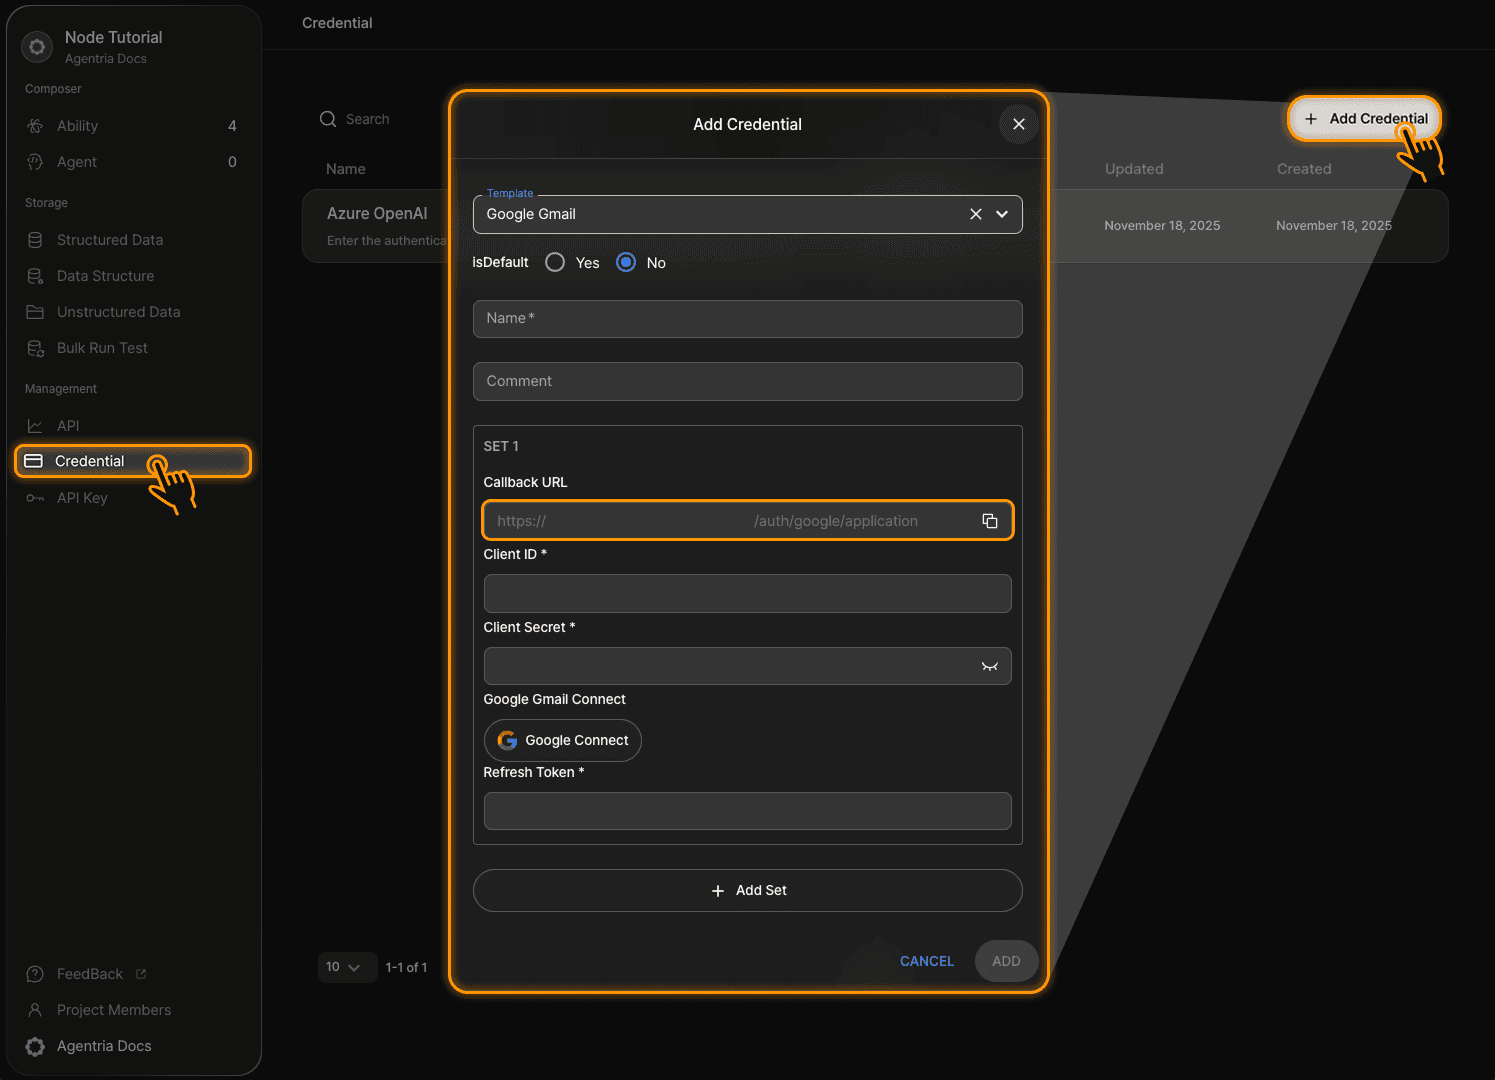
In your Agentria project, open the Credential tab in the sidebar.
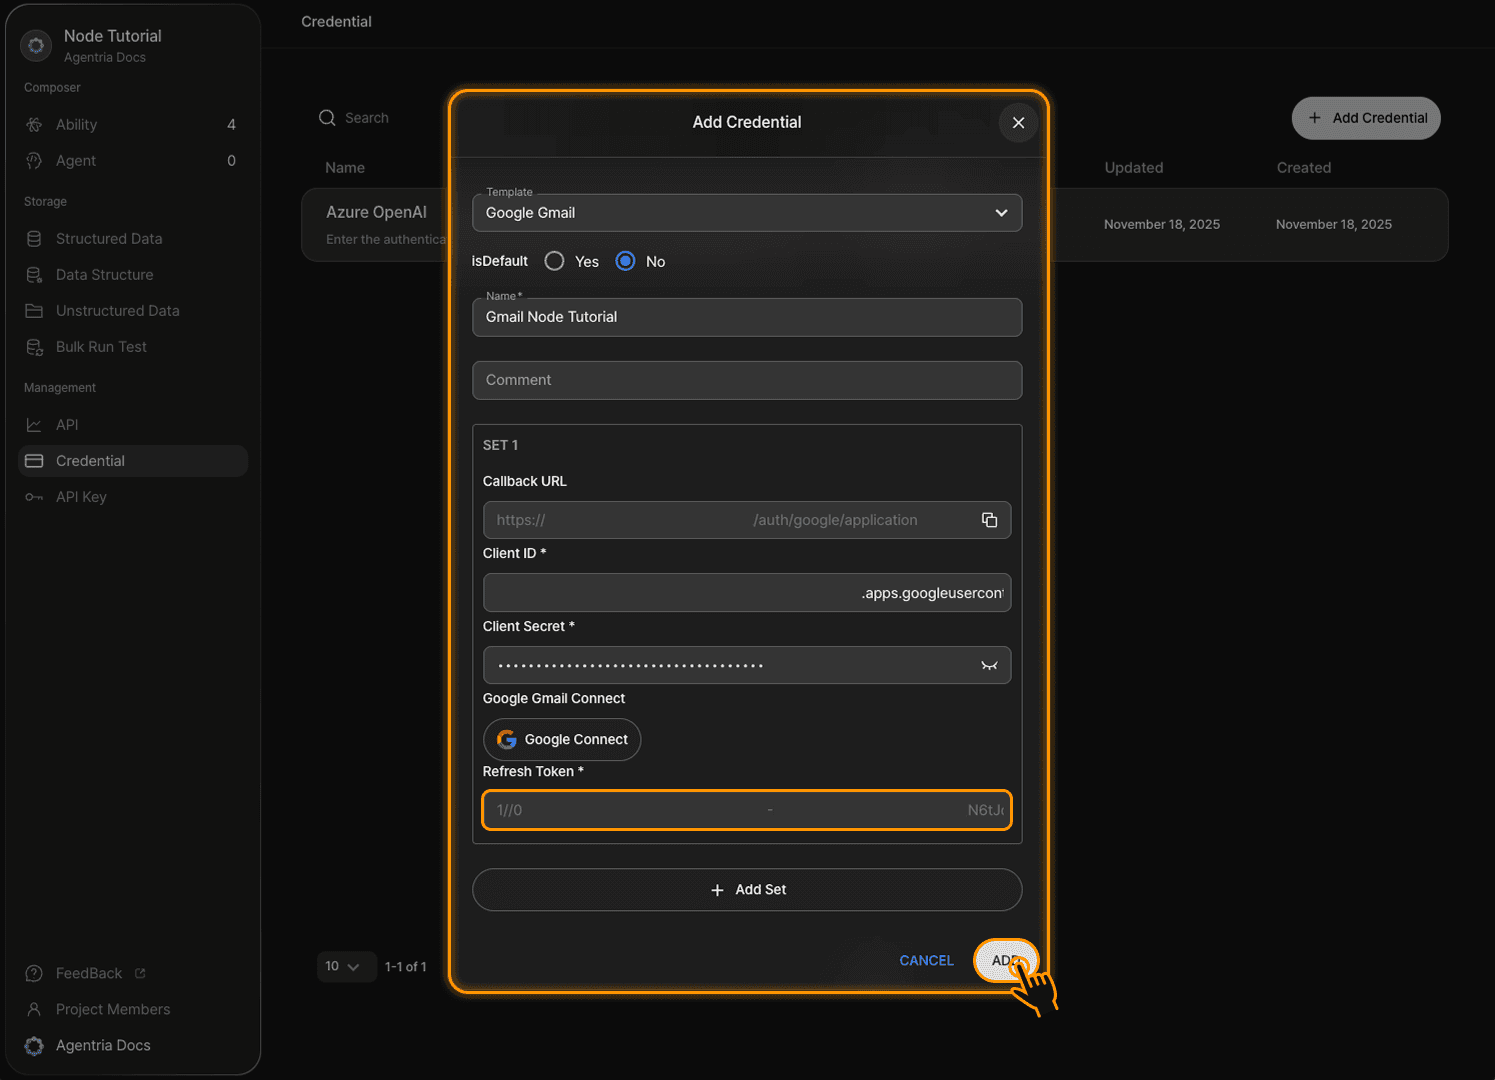
Click +Add Credential to create a new credential.
Select the appropriate Google template.
Credentials must be created separately for each template.
This guide uses the Google Gmail template.
Copy the Callback URL from the SET 1 section—this will be used in Step 5.
Do not close this pop-up yet; leave the Agentria page open and return to the Google Console.
Step 5: Register the Callback URL
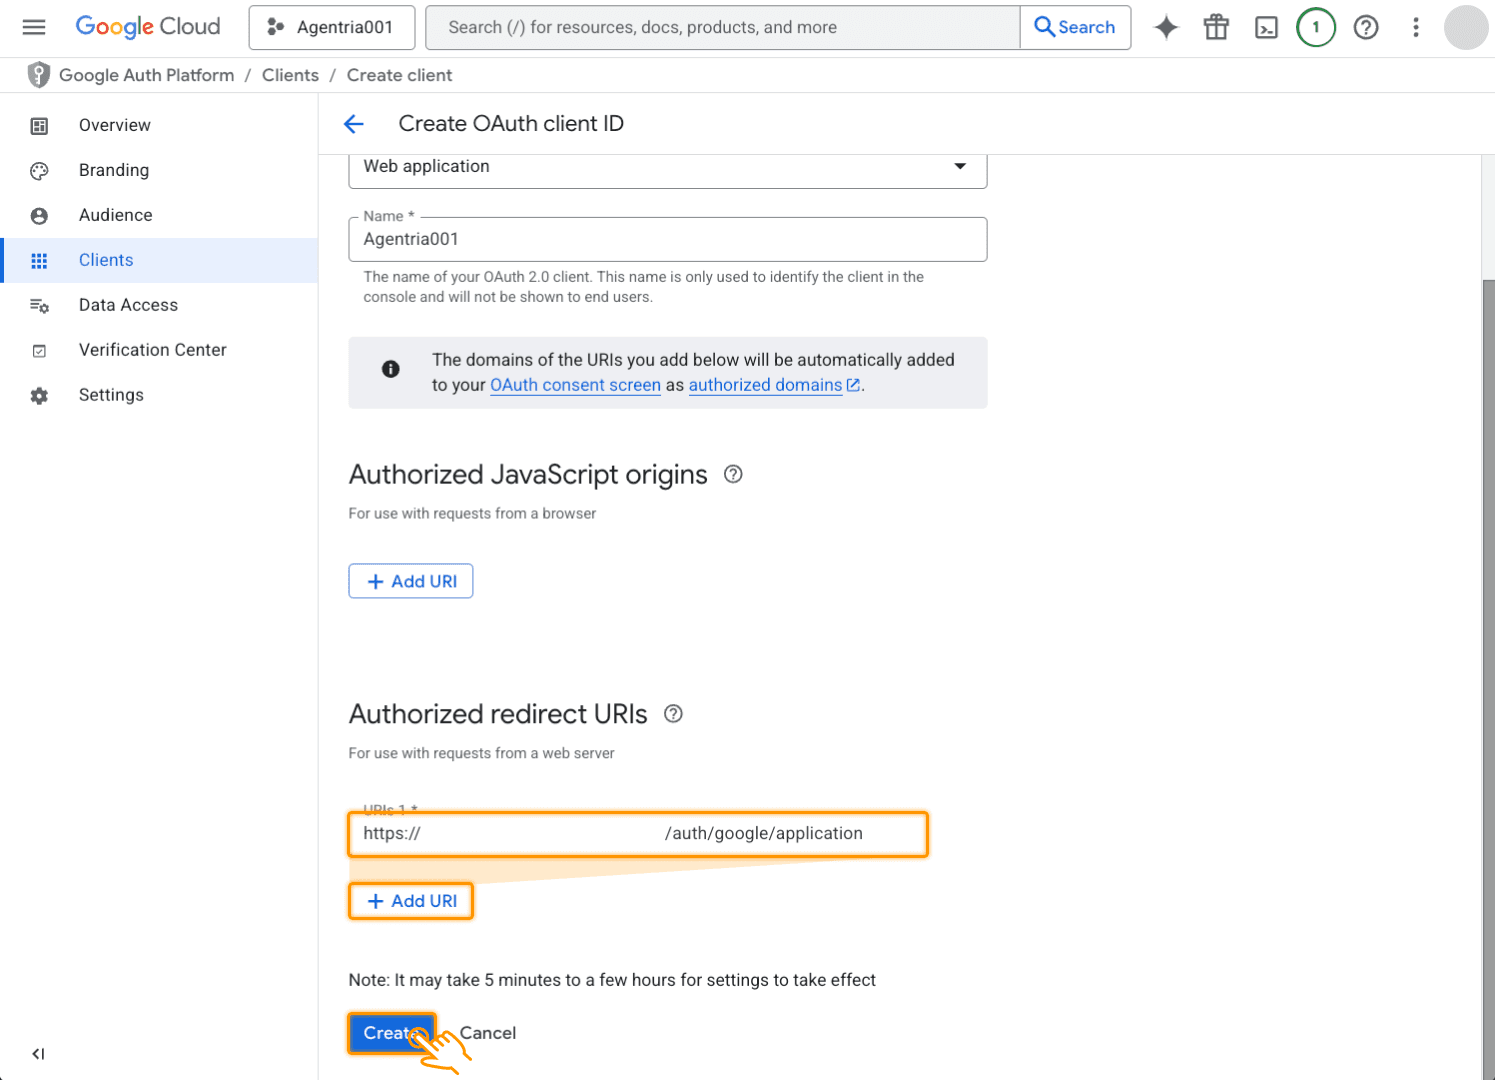
In the Google Cloud Console, click +Add URI under the Authorized redirect URIs section.
Paste the Callback URL you copied in Step 4.
Click Create to save.
Once completed, you may close the popup.
Step 6: Store Your Secret (Important)
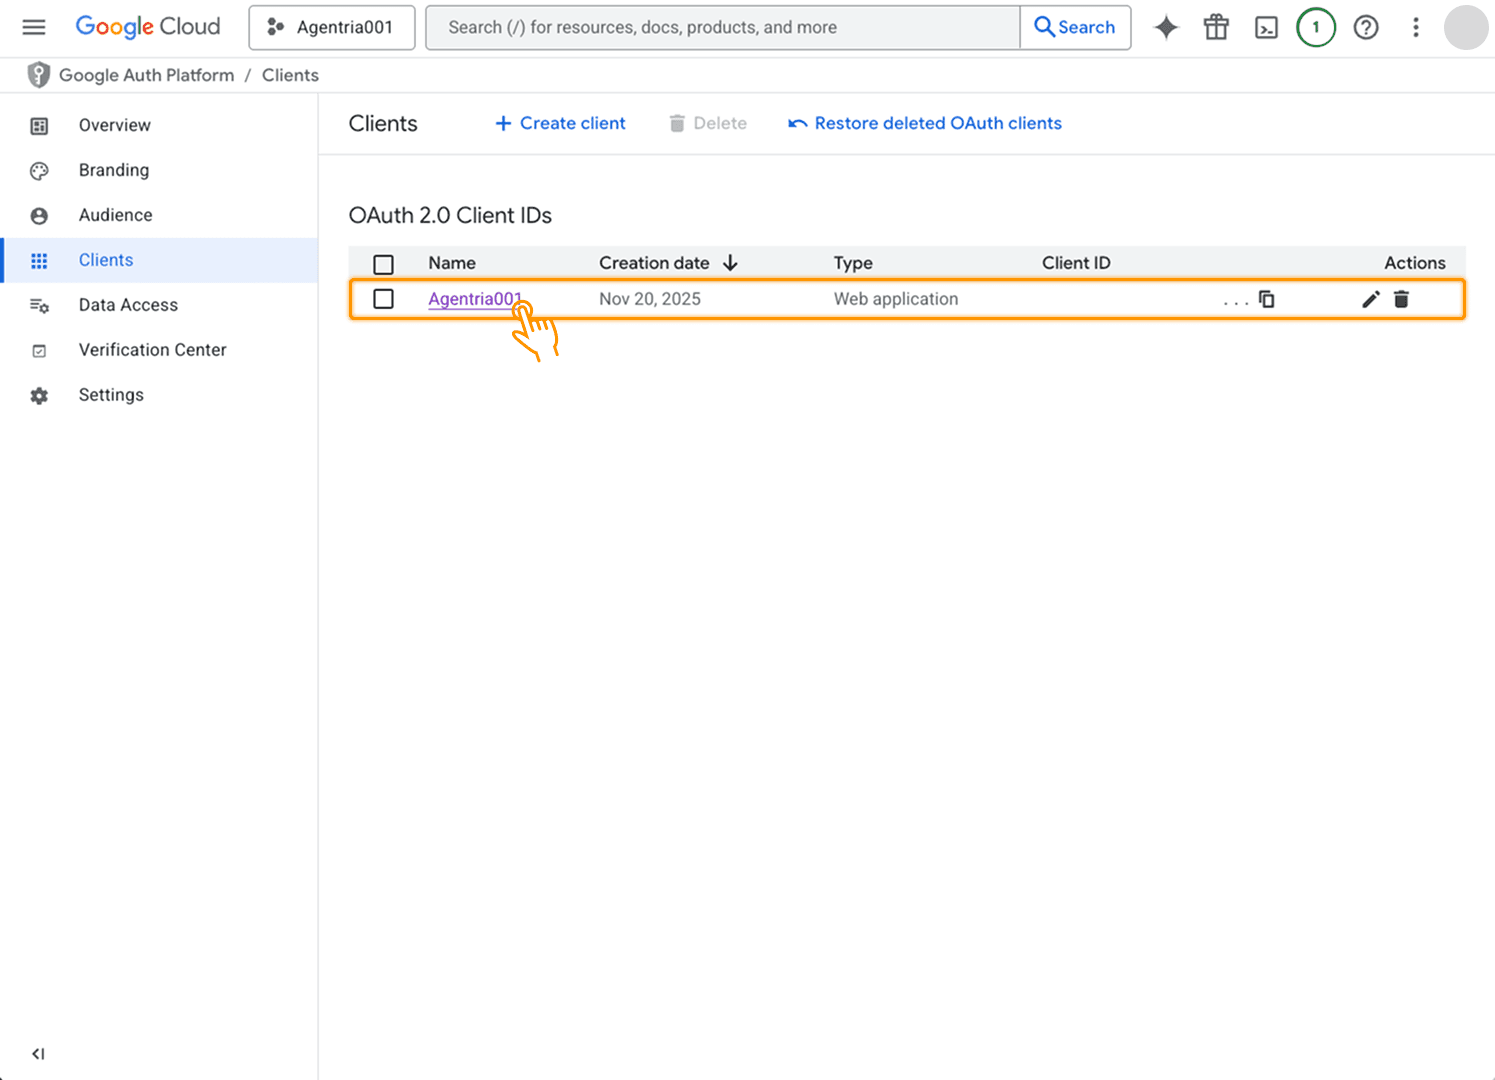
In the Clients tab, click your Client ID to reopen the popup containing your credentials.
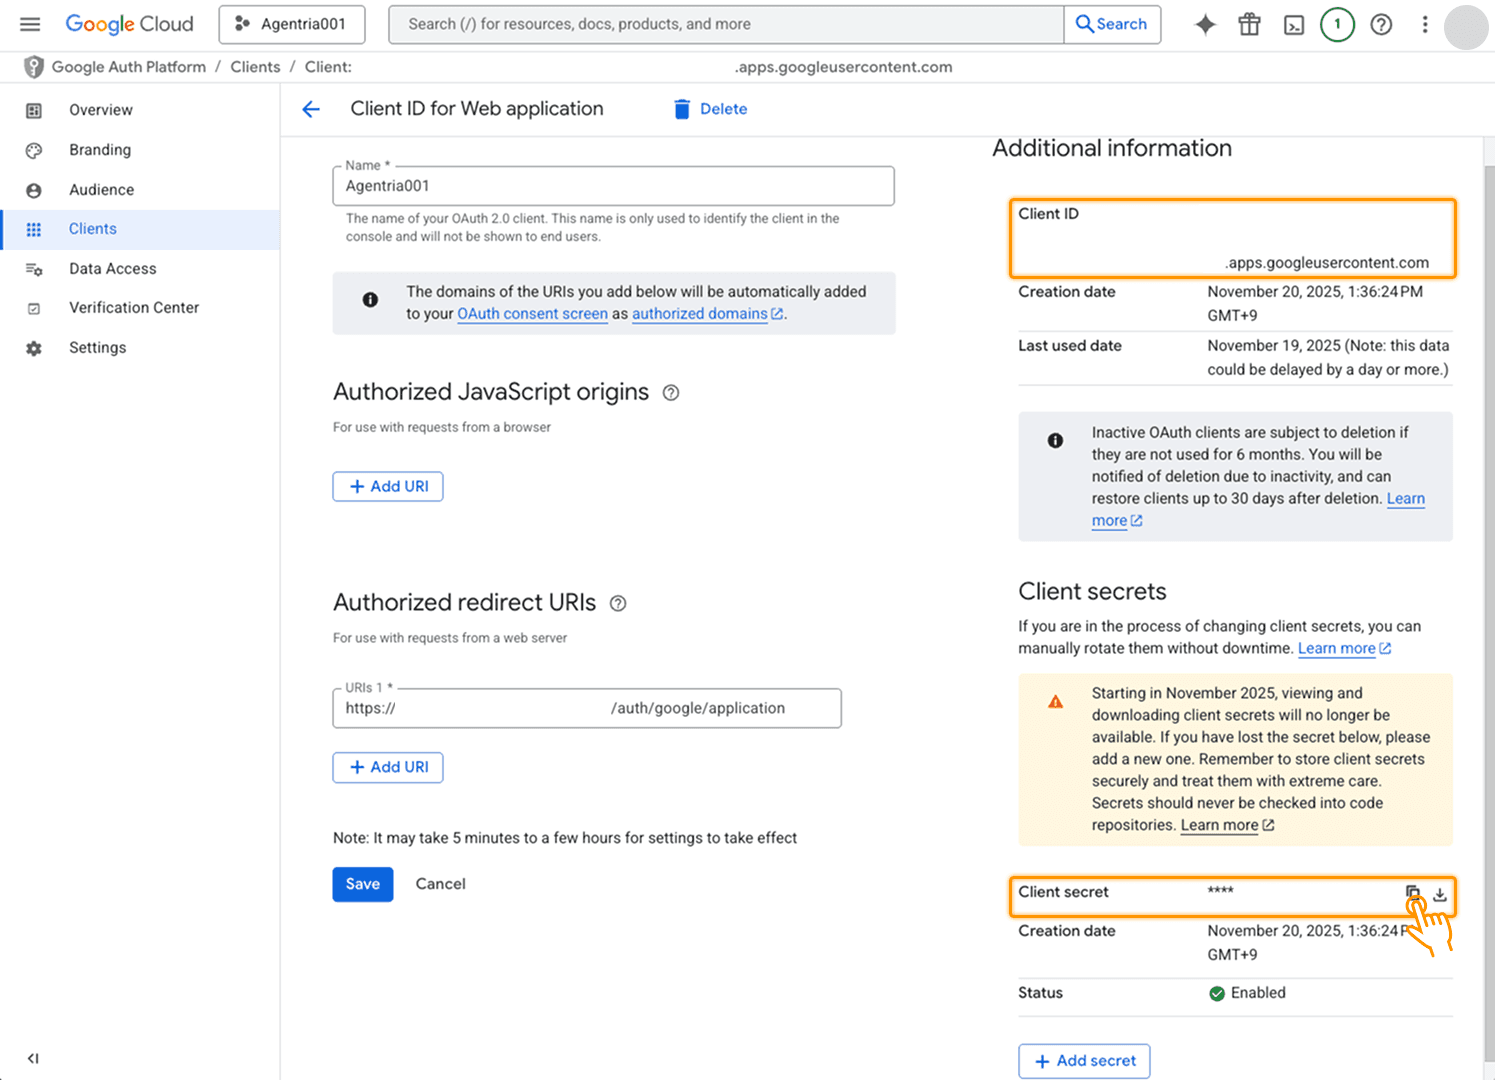
Be sure to securely store your: Client ID , Client Secret
You may also download the information as a JSON file.
These values will be used in Step 8.
Step 7: Add Data Access Scopes
7-1) Data Access
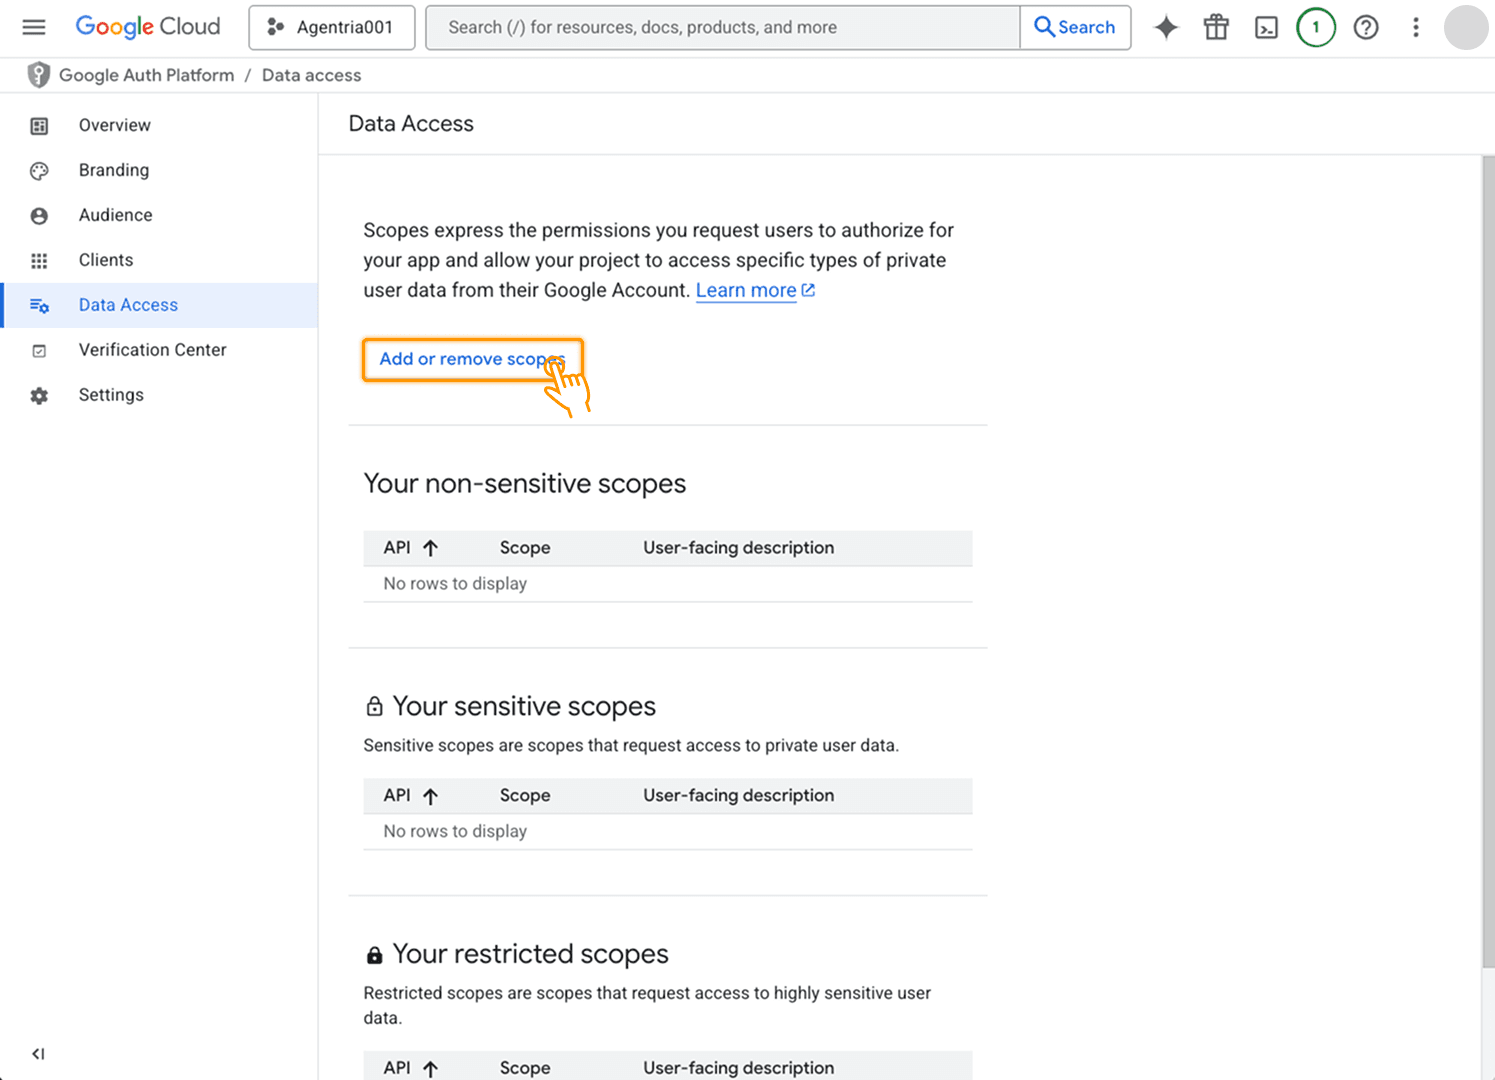
Open the Data Access tab in the sidebar.
Click Add or remove scopes to open the side panel.
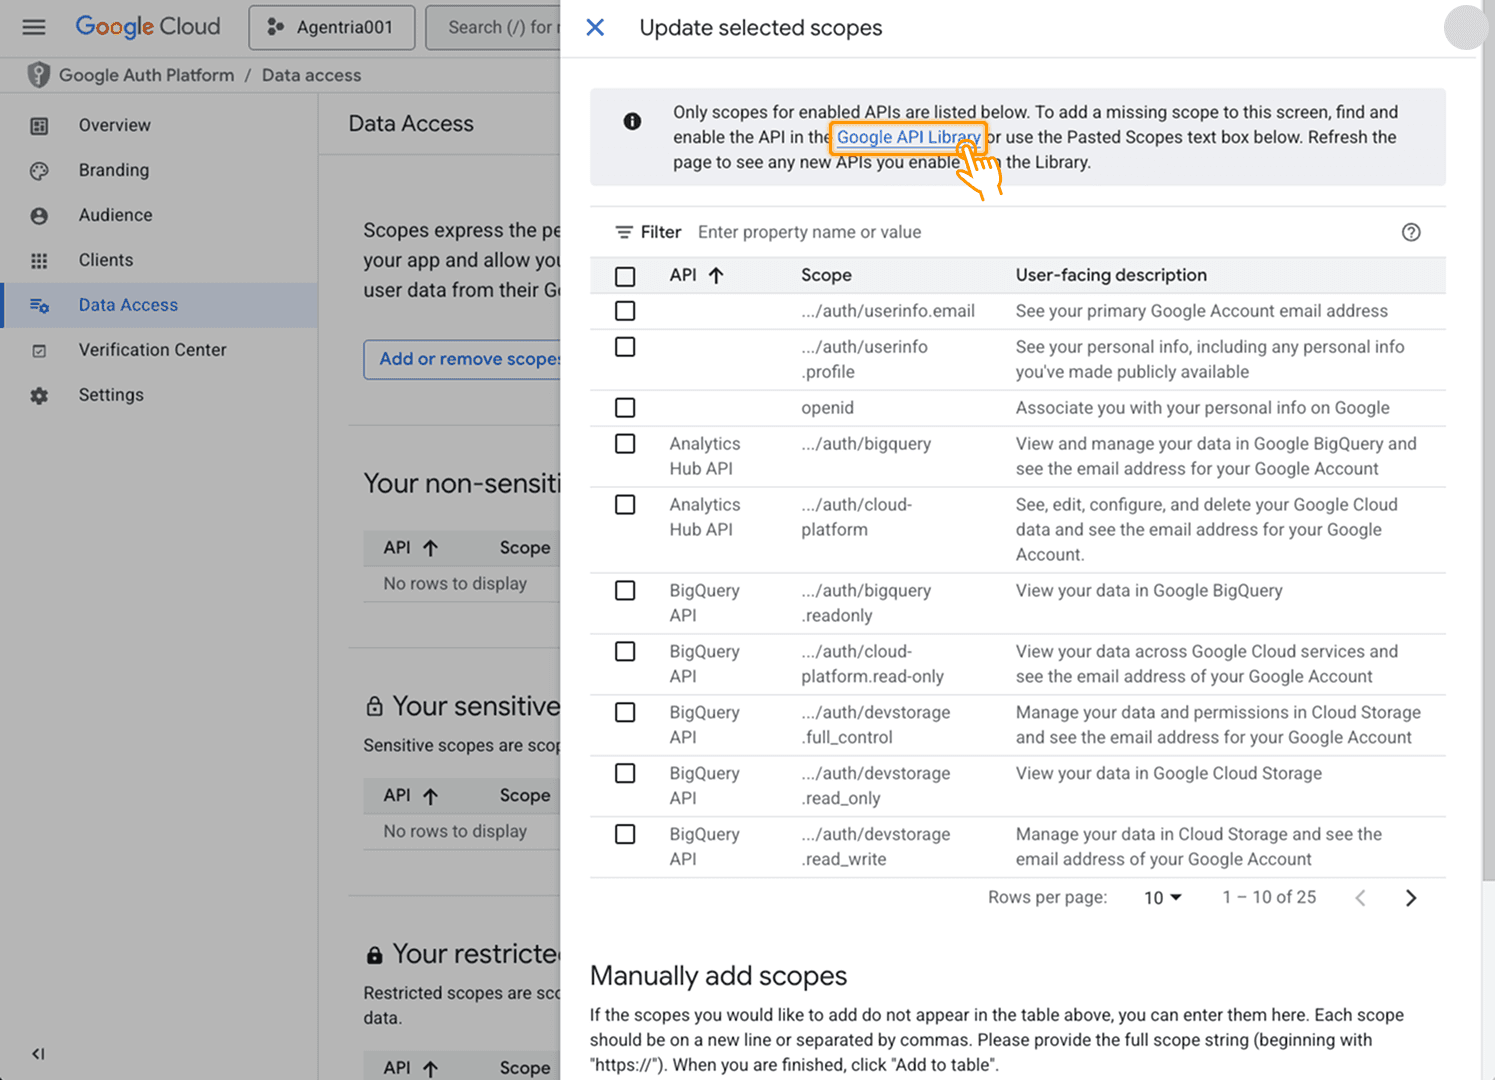
At the top, follow the Link to the Google API Library.
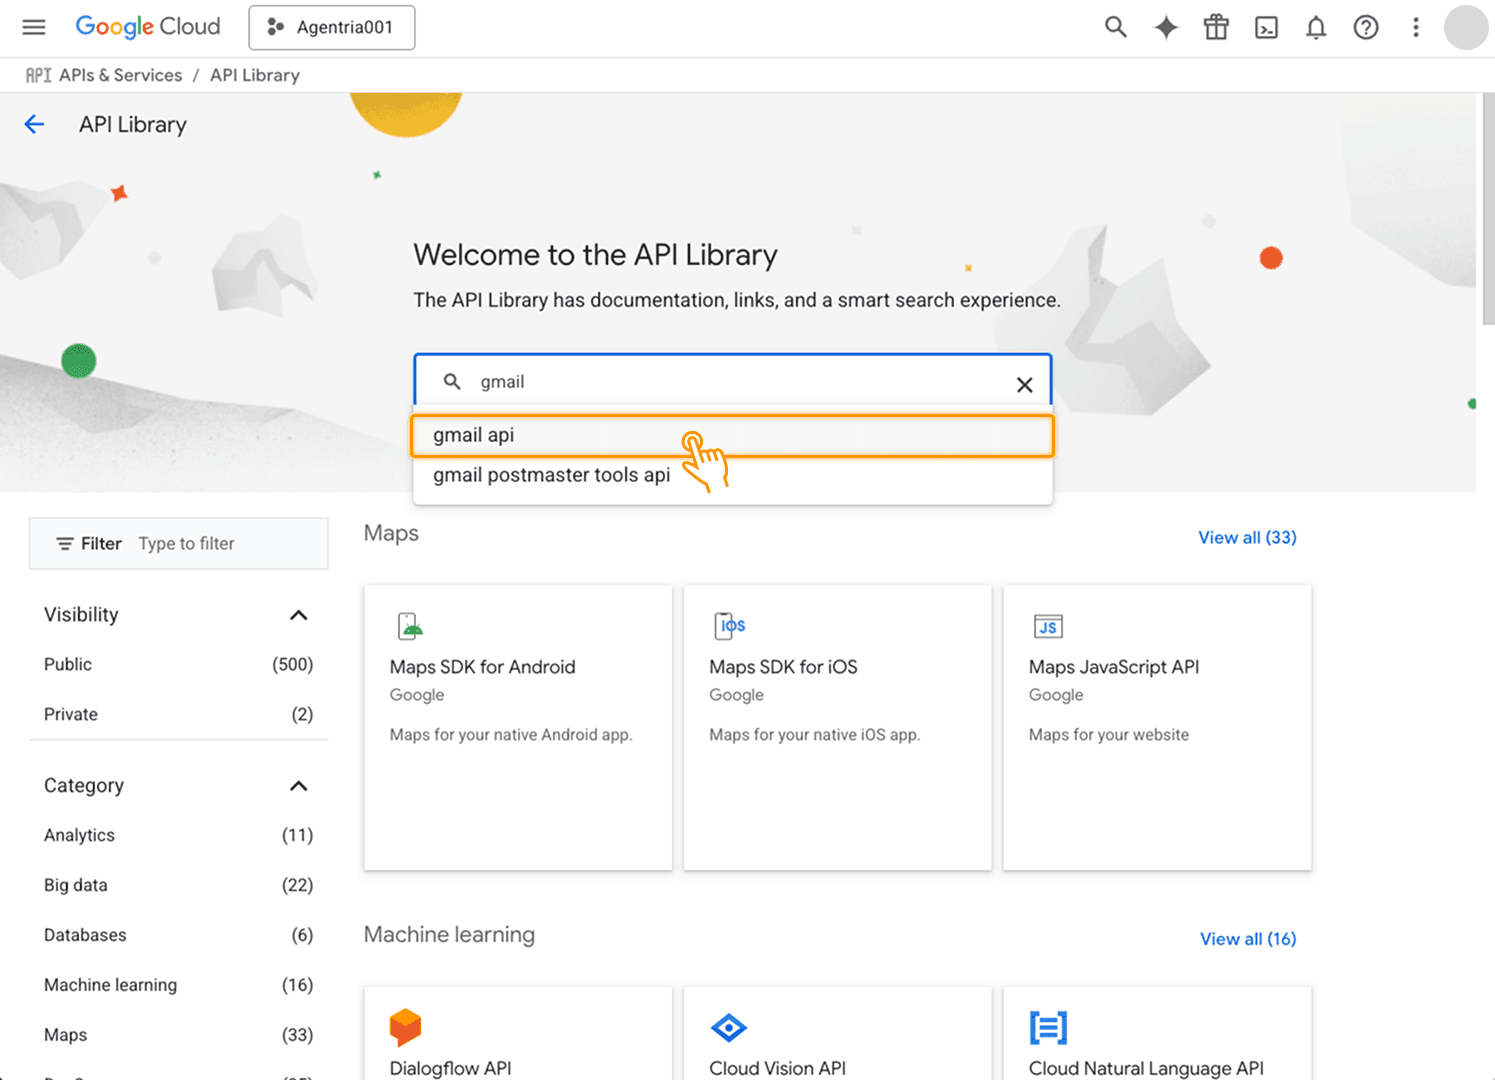
Search for the necessary API.
(e.g., Gmail API, Google Sheets API).
This guide uses Gmail as the example.
7-2) Enable the API
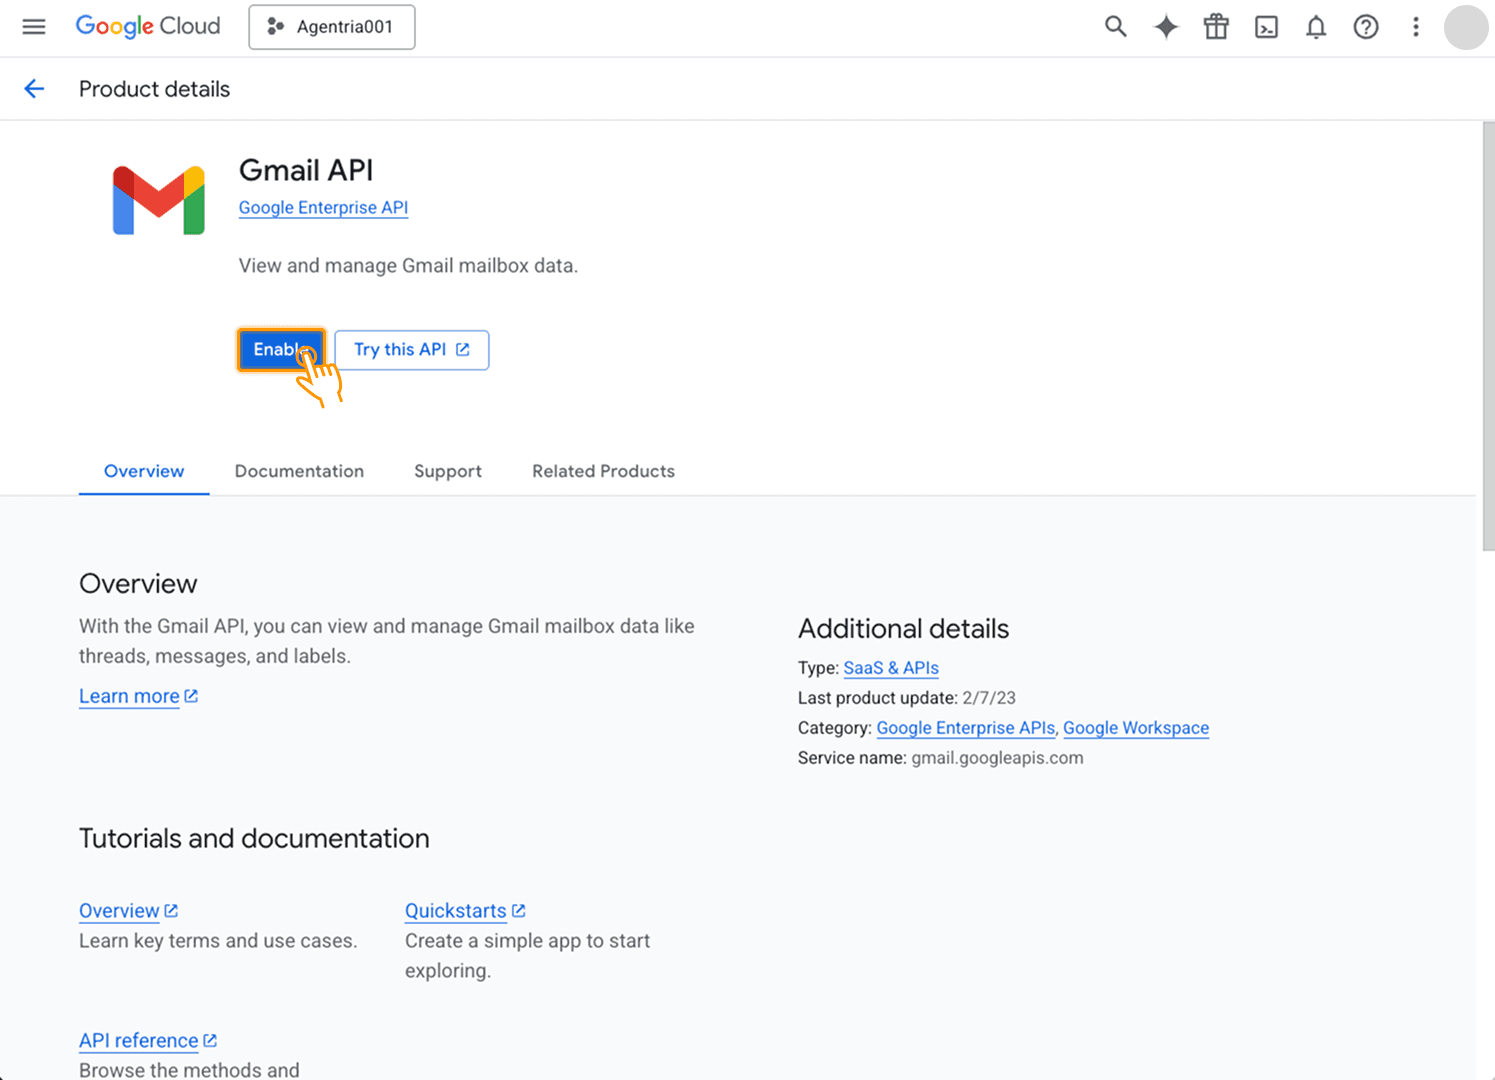
Select the API from the results and click Enable.
Your Google Cloud Console configuration is now complete.
Return to Agentria.
Step 8: Complete Credential Setup
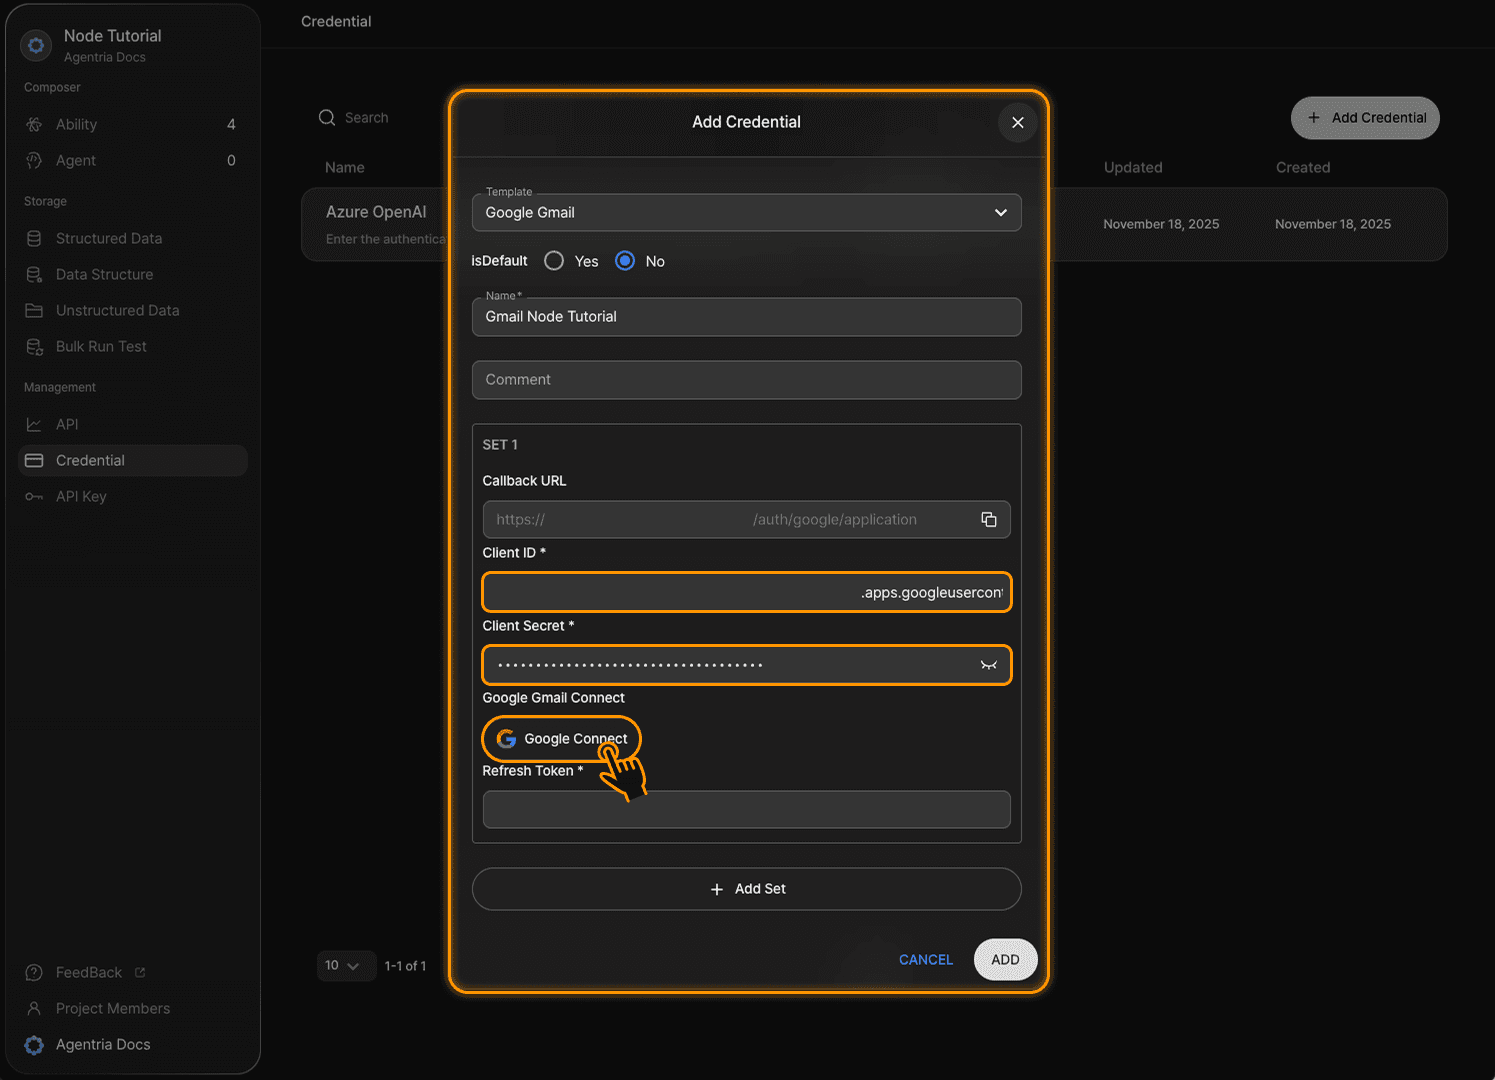
In the credential popup you left open earlier, enter the Client ID and Client Secret you saved in Step 6.
If you did not copy them, you can revisit the Clients tab in the Google Console to retrieve them.
Click Google Connect to link your Google account.
Upon allowing access, the Refresh Token will automatically be populated.
If you need to register additional Clients, click +ADD SET.
Click ADD in the bottom right to complete the credential setup.
Step 9: Add a Google Template Node
Add the corresponding Google template node to your canvas.
The node must match the template of the credential you created.
For example, a Gmail credential must be used with a Gmail node.
Step 10: Register the Credential in the Node
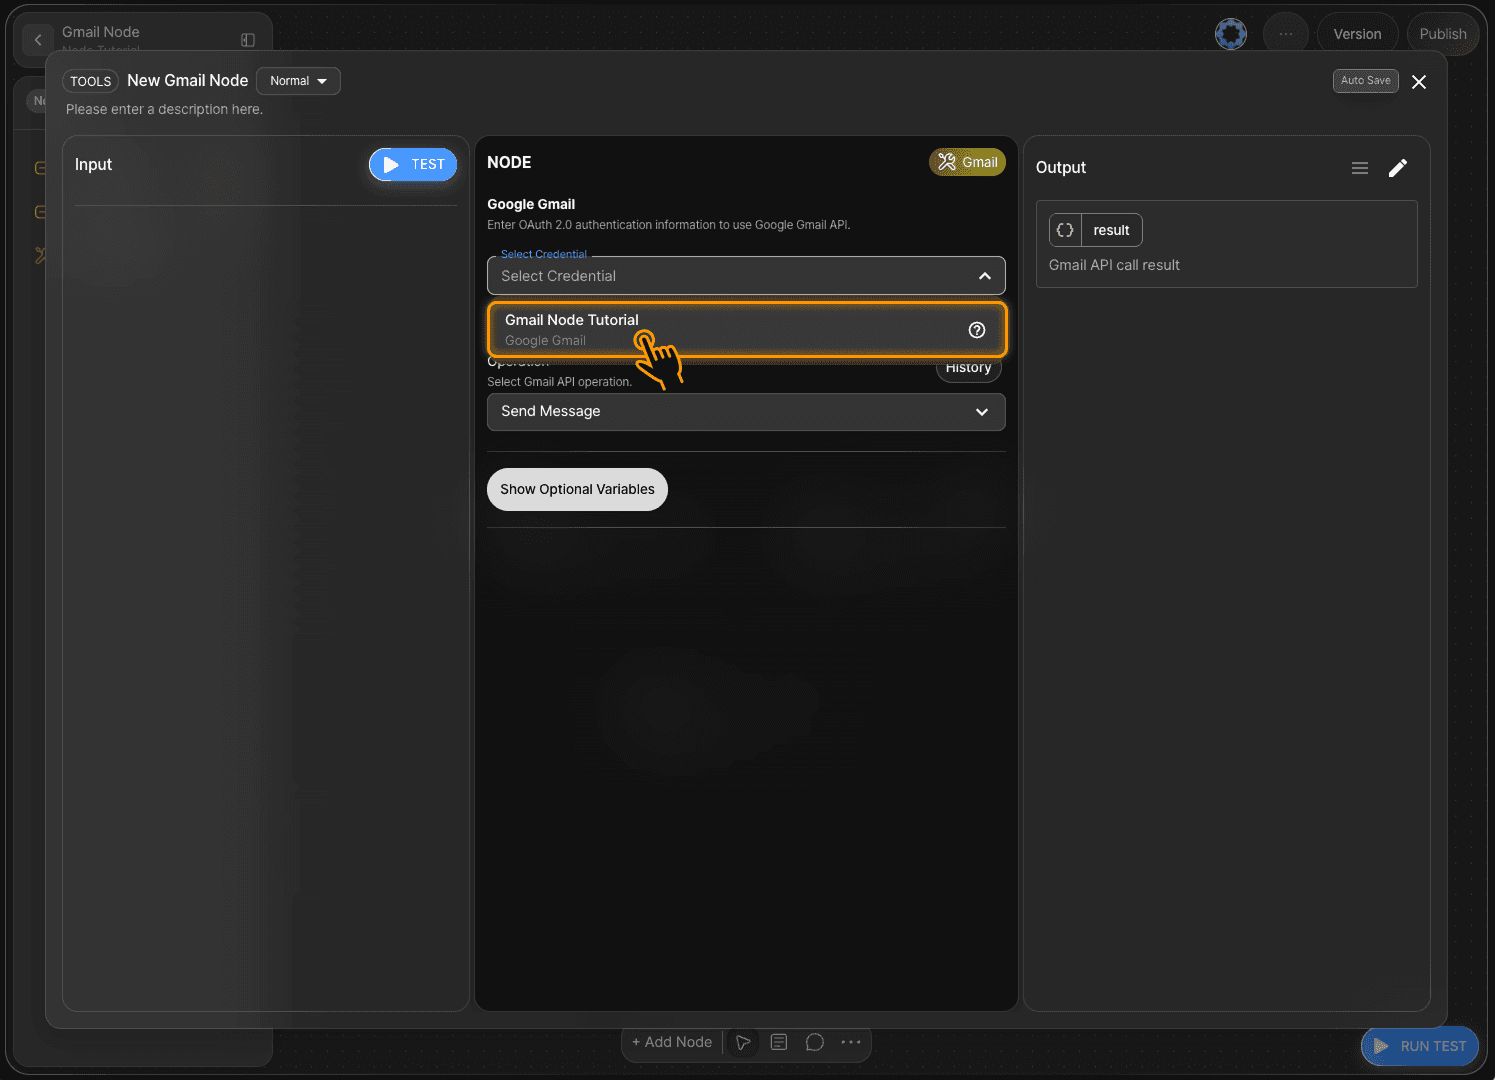
Double-click the node to open the Node Editor and select your credential.
You can now use Google-based nodes.
+) Troubleshooting: “Access blocked”
If you see Access blocked: agentria.ai has not completed Google’s verification process. during credential setup, follow the steps below as a temporary workaround.
1) Check the authorized redirect URI
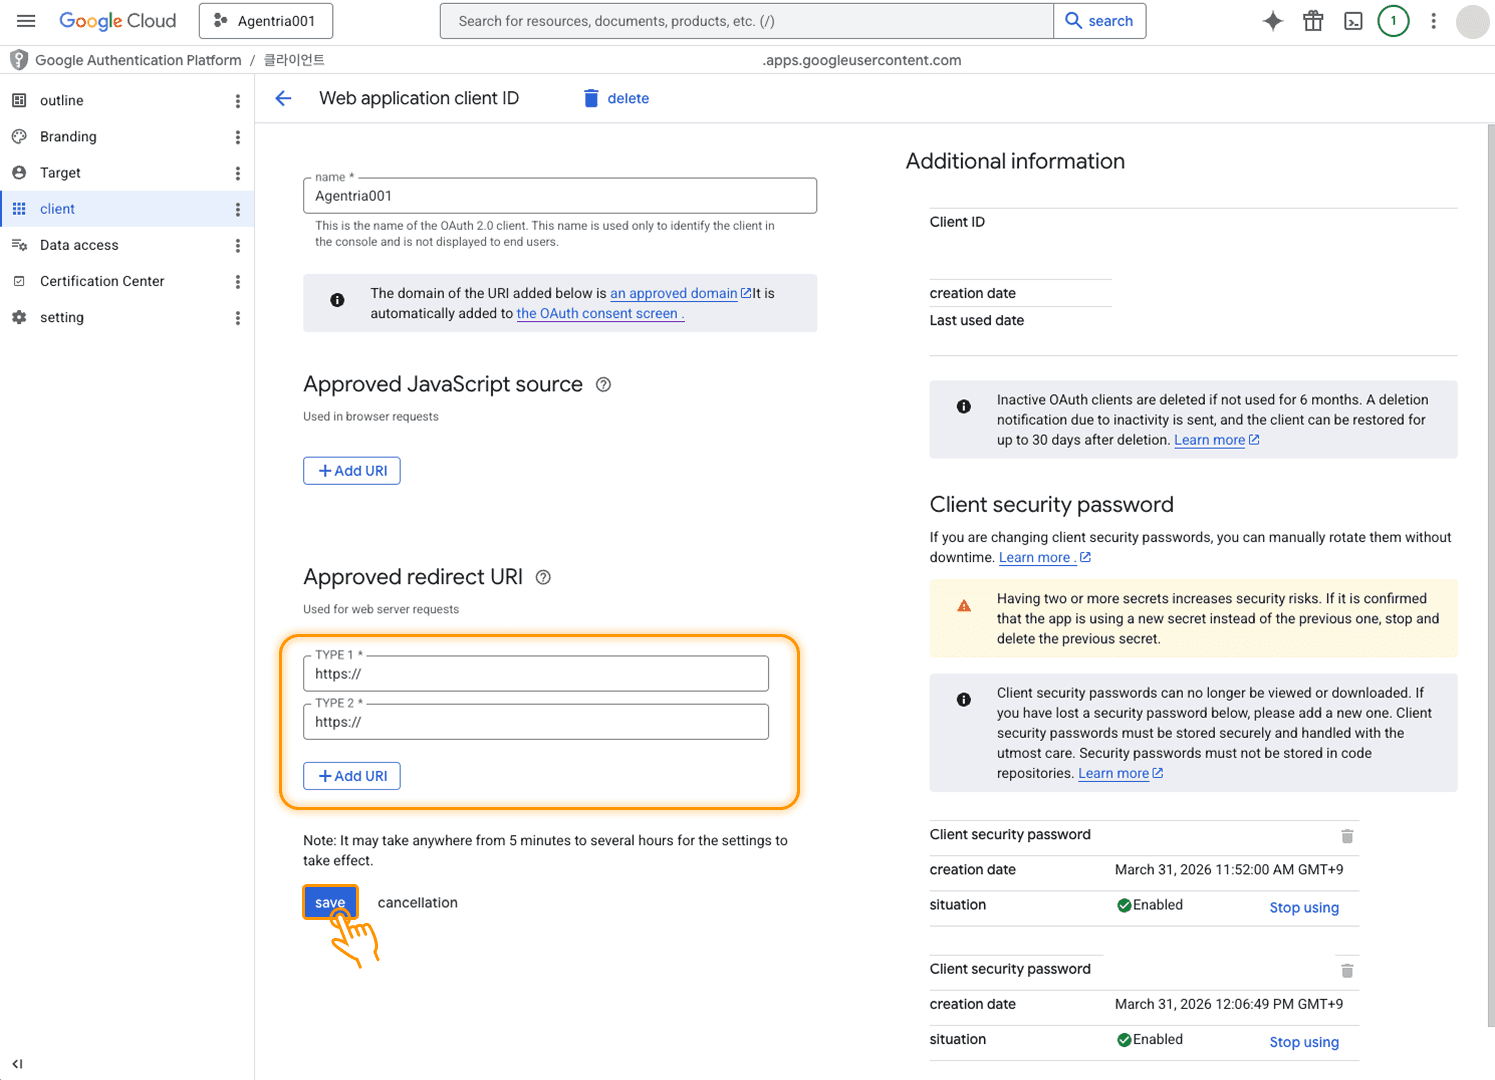
In the Clients tab, open your Web application client ID and confirm the Authorized redirect URIs are set correctly.
Be sure to click Save.
In many cases, this resolves the access blocked issue.
2) Add yourself as a test user
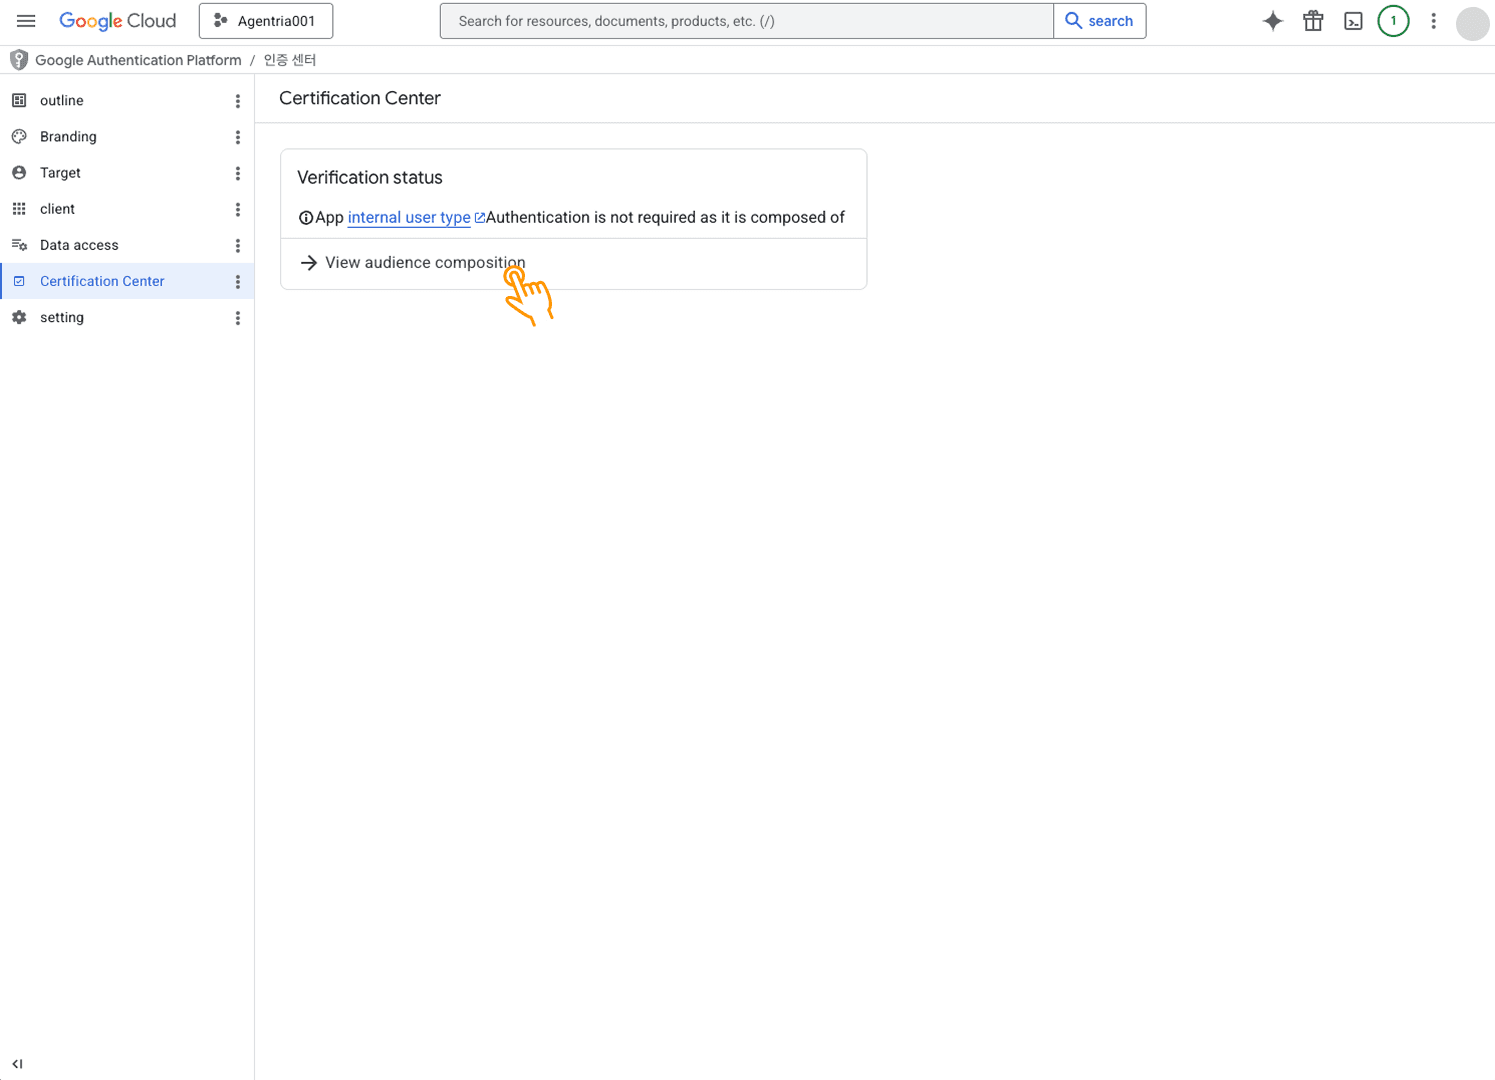
If the issue persists after checking the redirect URI, go to the OAuth consent screen (Auth center) and click View audience configuration.
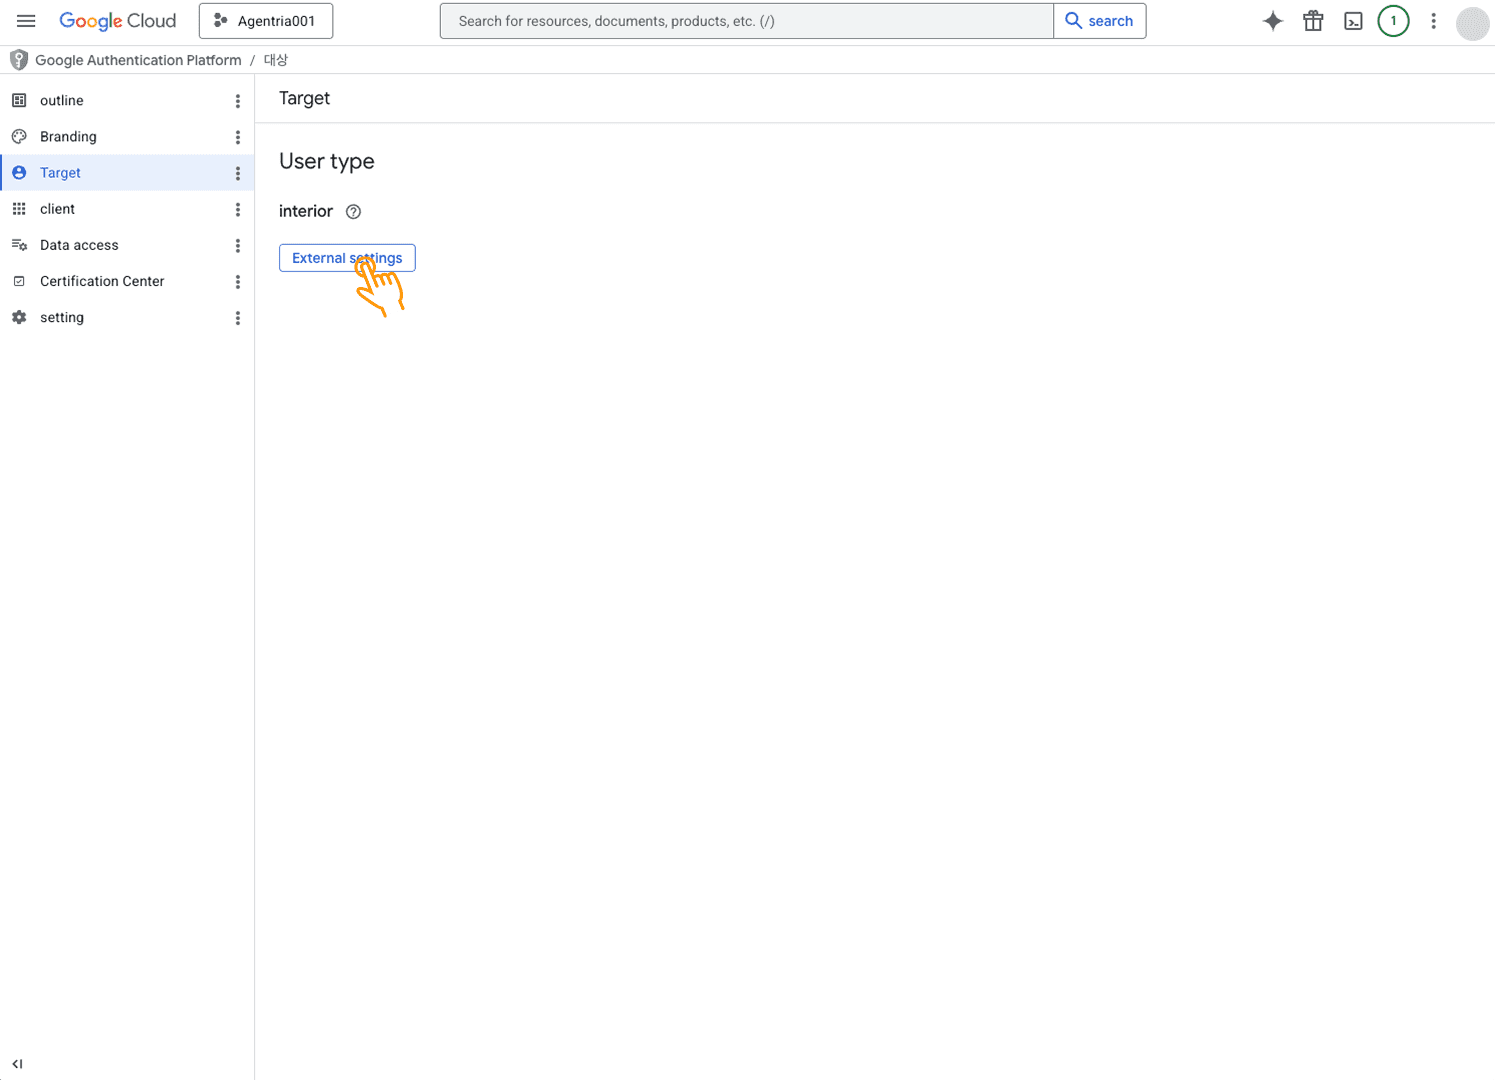
If the User type is set to Internal, switch it to External.
Access issues can occur depending on this setting.
If it is already External, continue to the next step.
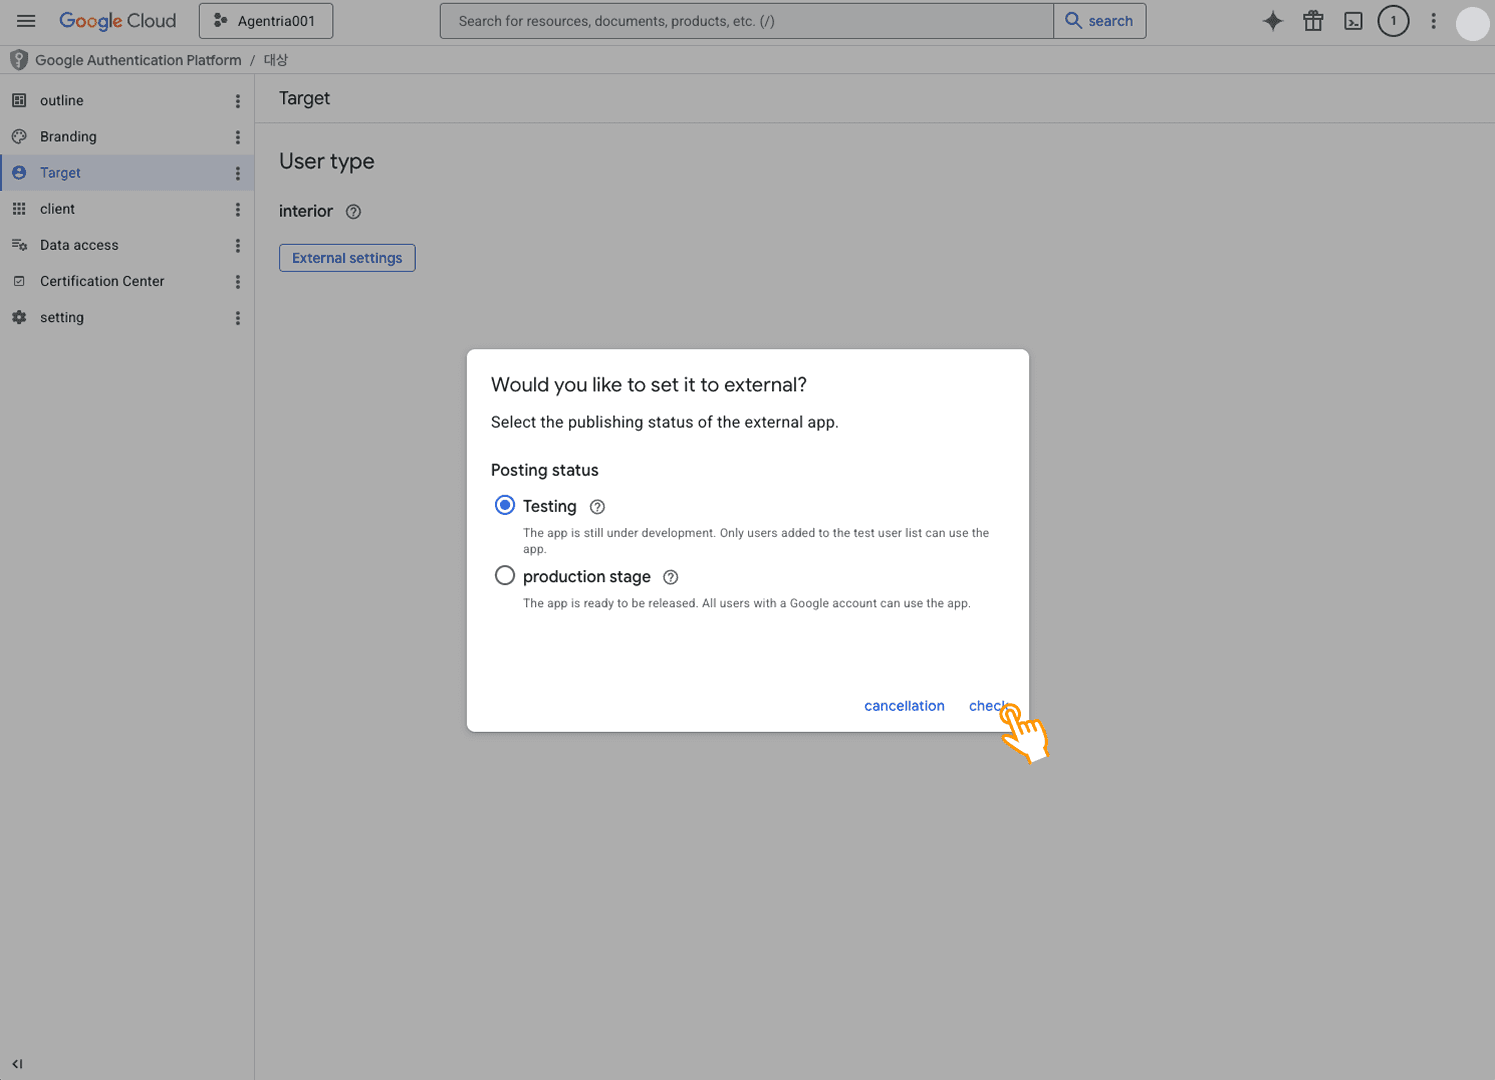
Keep the status as Testing, then click Confirm to apply the External setting.
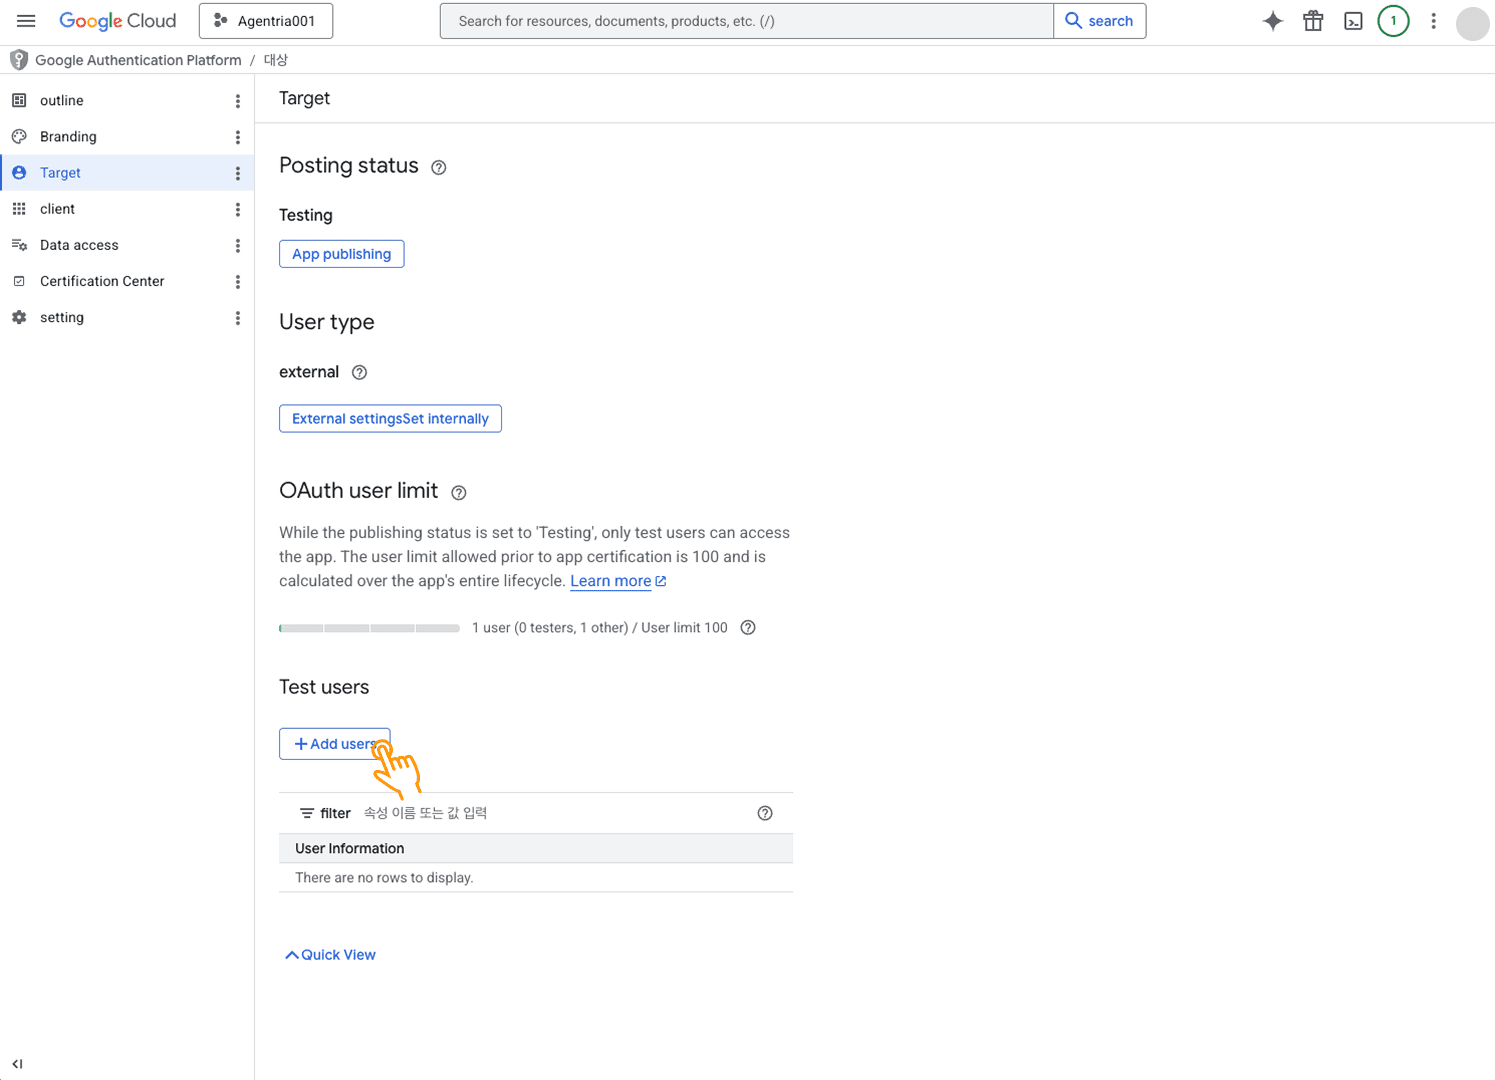
In the Test users section, click + Add users.
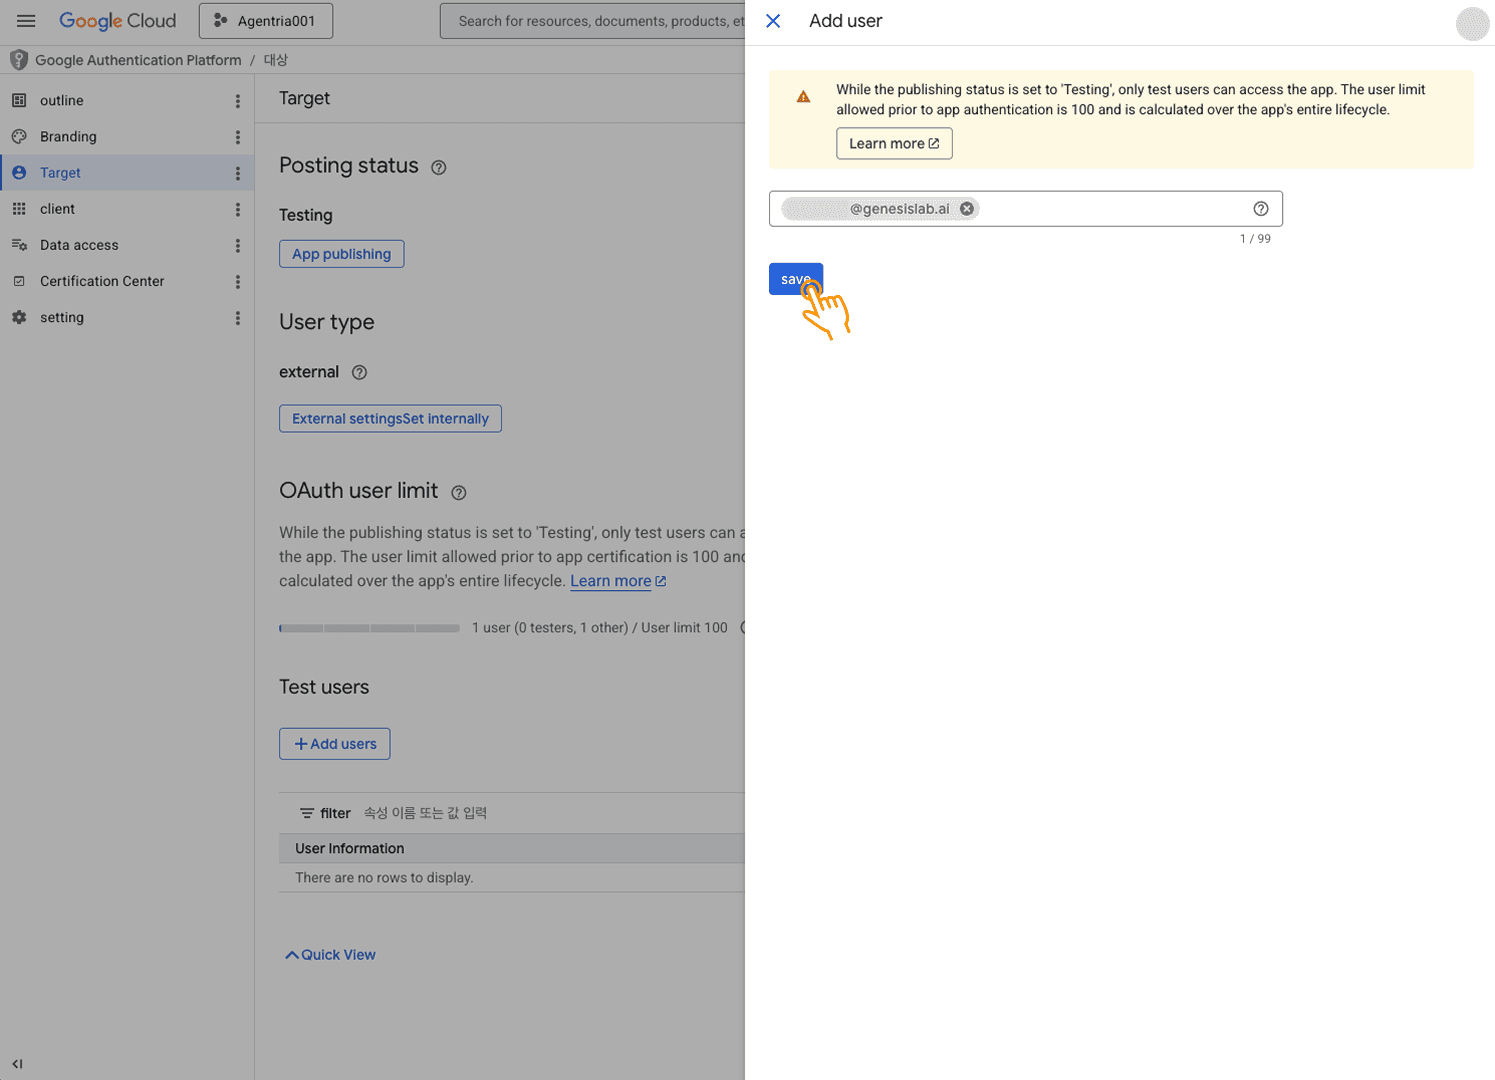
Enter the Google account email you will use with Agentria and save.
Return to Agentria and try connecting again.
Next Steps
Client information can be reused when configuring future Google credentials.
If access expires after six months of inactivity, simply re-authorize and proceed with authentication again.