Get Started
Learning to Use Nodes — Set Value Node
This tutorial walks you through the Set Value node in Agentria. The Set Value node sets a global variable value. Select the global variable to update in the Global Variable field, then enter a value or expression in the Set Value field — the result is stored in the selected global variable.
In this tutorial, you will build a "+1 Counter" workflow that starts the global variable num at 0, increments it by 1 using the Set Value node, and returns the final value once num reaches 10. The Loop node is used alongside to verify that the Set Value node correctly updates the global variable on each iteration.
Before You Begin
For instructions on how to enter the Agentria Canvas, refer to the 🔗3-Step Core Guide.
After completing this tutorial, you will be able to:
Configure the
Global VariableandSet Valuefields of the Set Value node.Build a workflow that updates a global variable value using an expression.
Set multiple global variables at once using
+Add Item.
Workflow Overview
The core of this tutorial is the Set Value node.
The Set Value node evaluates the num + 1 expression on every iteration and stores the result in the global variable num. Without the Set Value node updating the global variable, the Loop node would always evaluate the condition against the initial value and the loop would never end. By updating num each iteration, the Loop node can check the latest value.
For detailed usage of the Loop node used in this tutorial, refer to the 🔗Loop Node Guide.
Step 1: Create an Ability
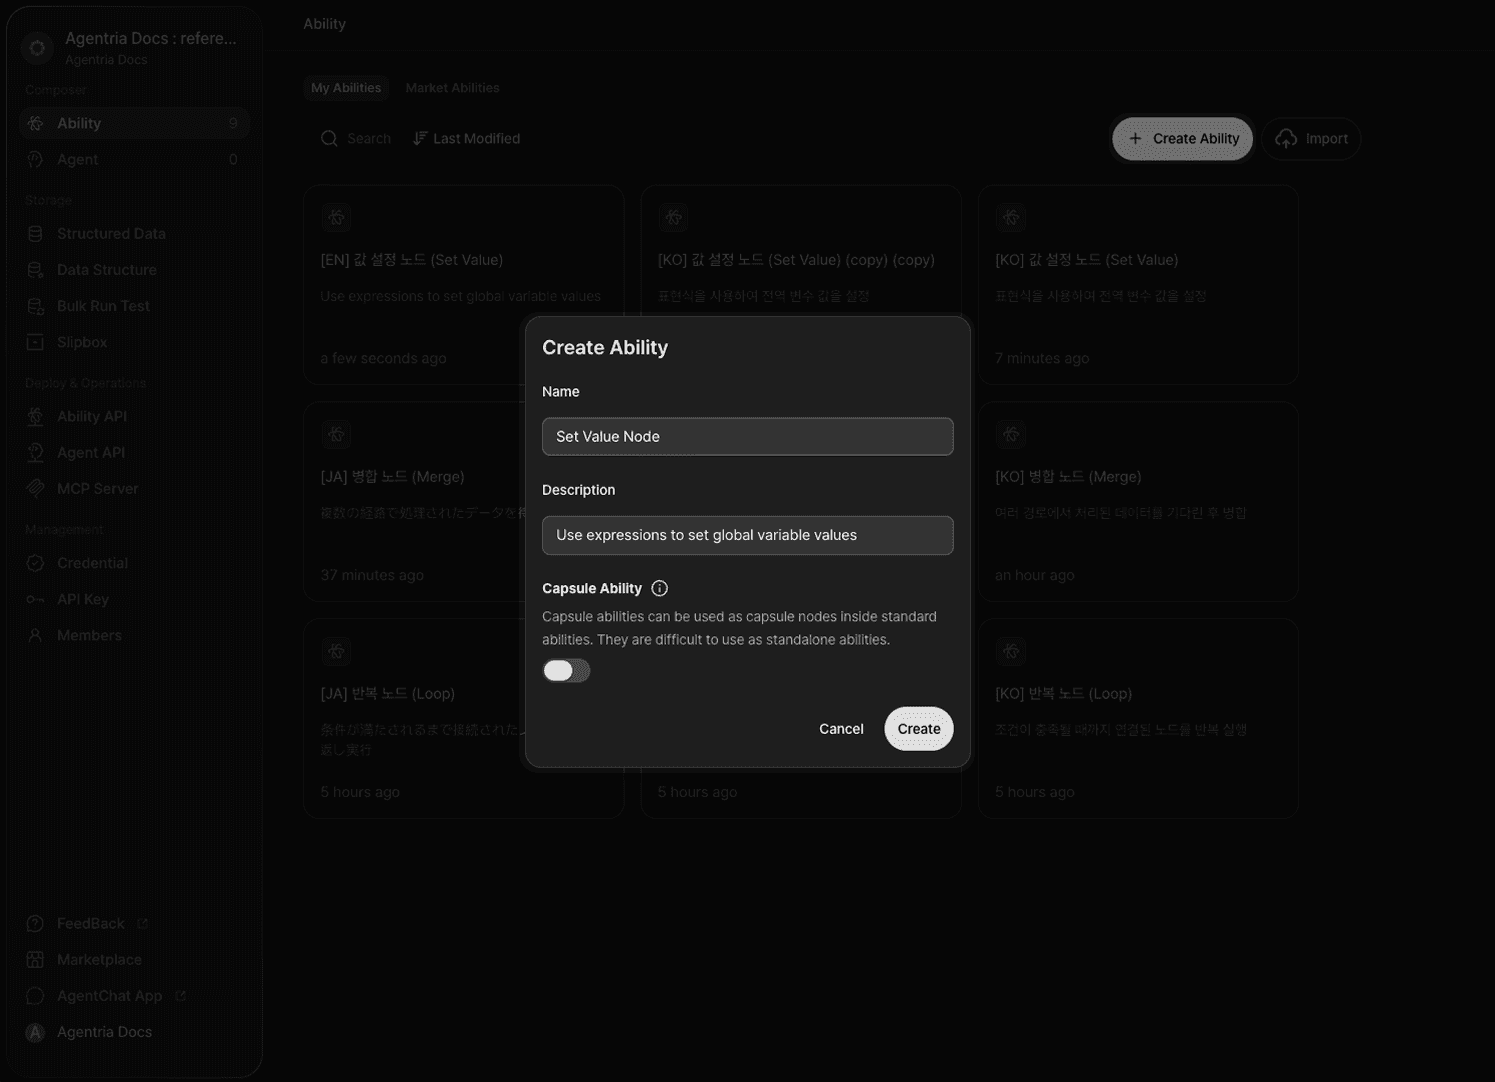
Create a new Ability on the Agentria Canvas.
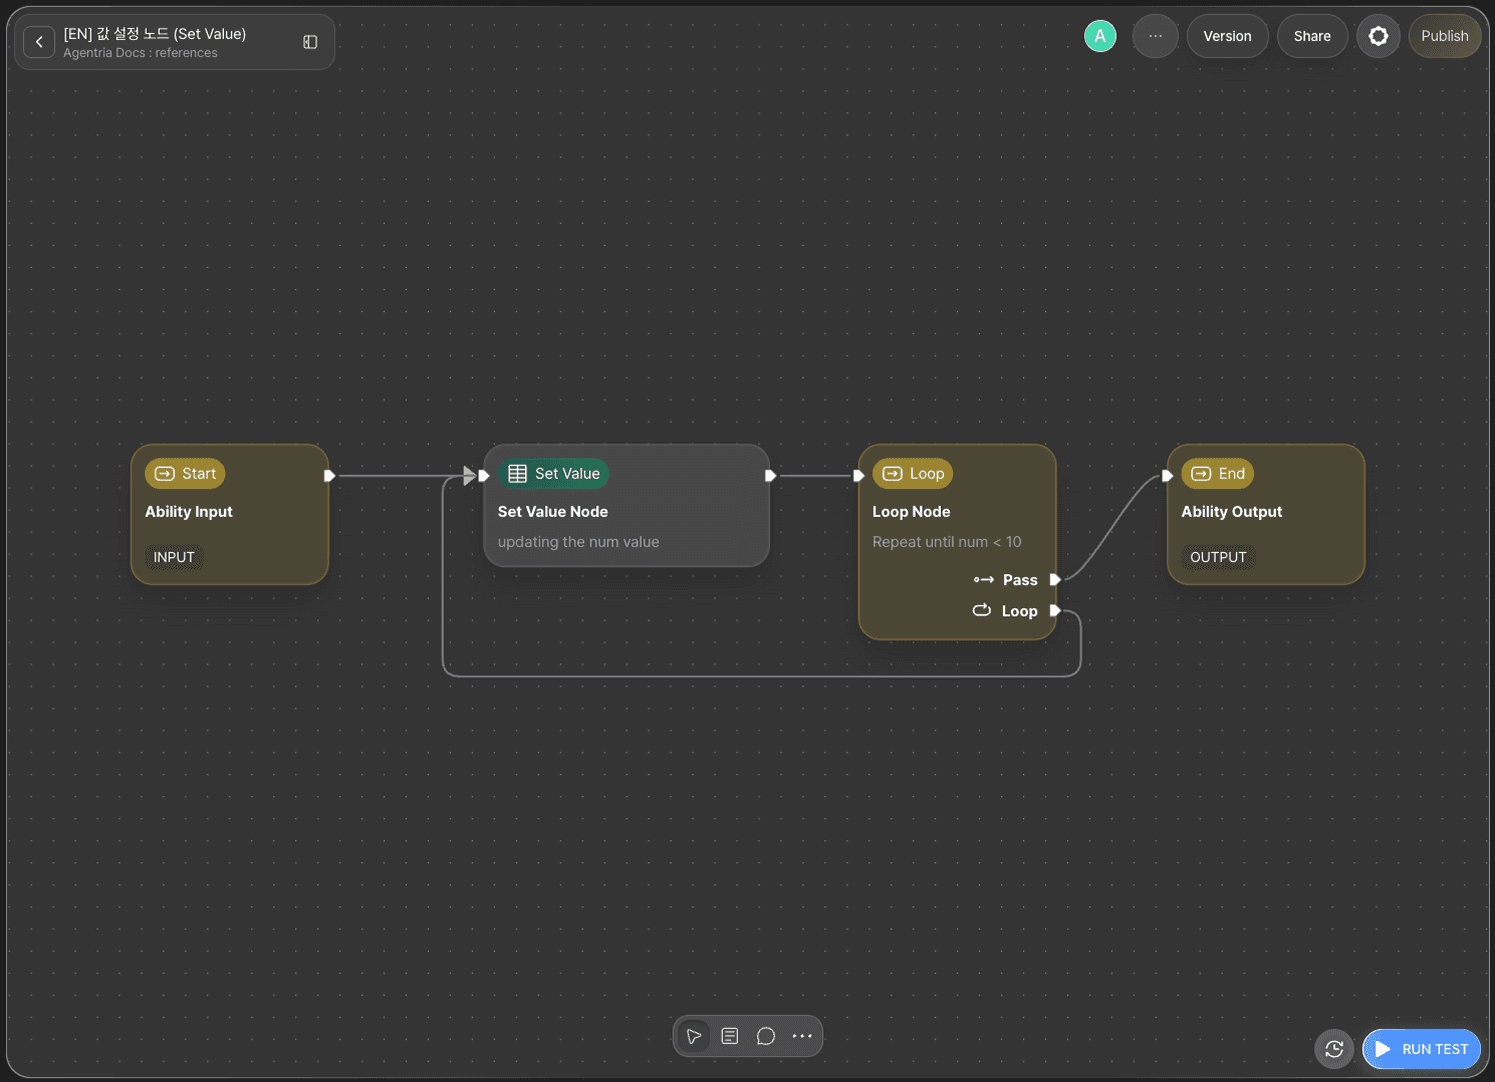
Step 2: Arrange and Connect the Workflow
Add the following nodes to the Canvas and arrange them as shown in the image.
Set Value node: Click
+Add Node→ select from theDatacategory.Loop node: Click
+Add Node→ select from theFlow Controlcategory.
Once arranged, connect the edges in the following order.
Out-Pin of Start Node → In-Pin of Set Value node
Out-Pin of Set Value node → In-Pin of Loop node
pass pin of Loop node → In-Pin of End Node
loop pin of Loop node → In-Pin of Set Value node
Step 3: Open the Global Variables Tab
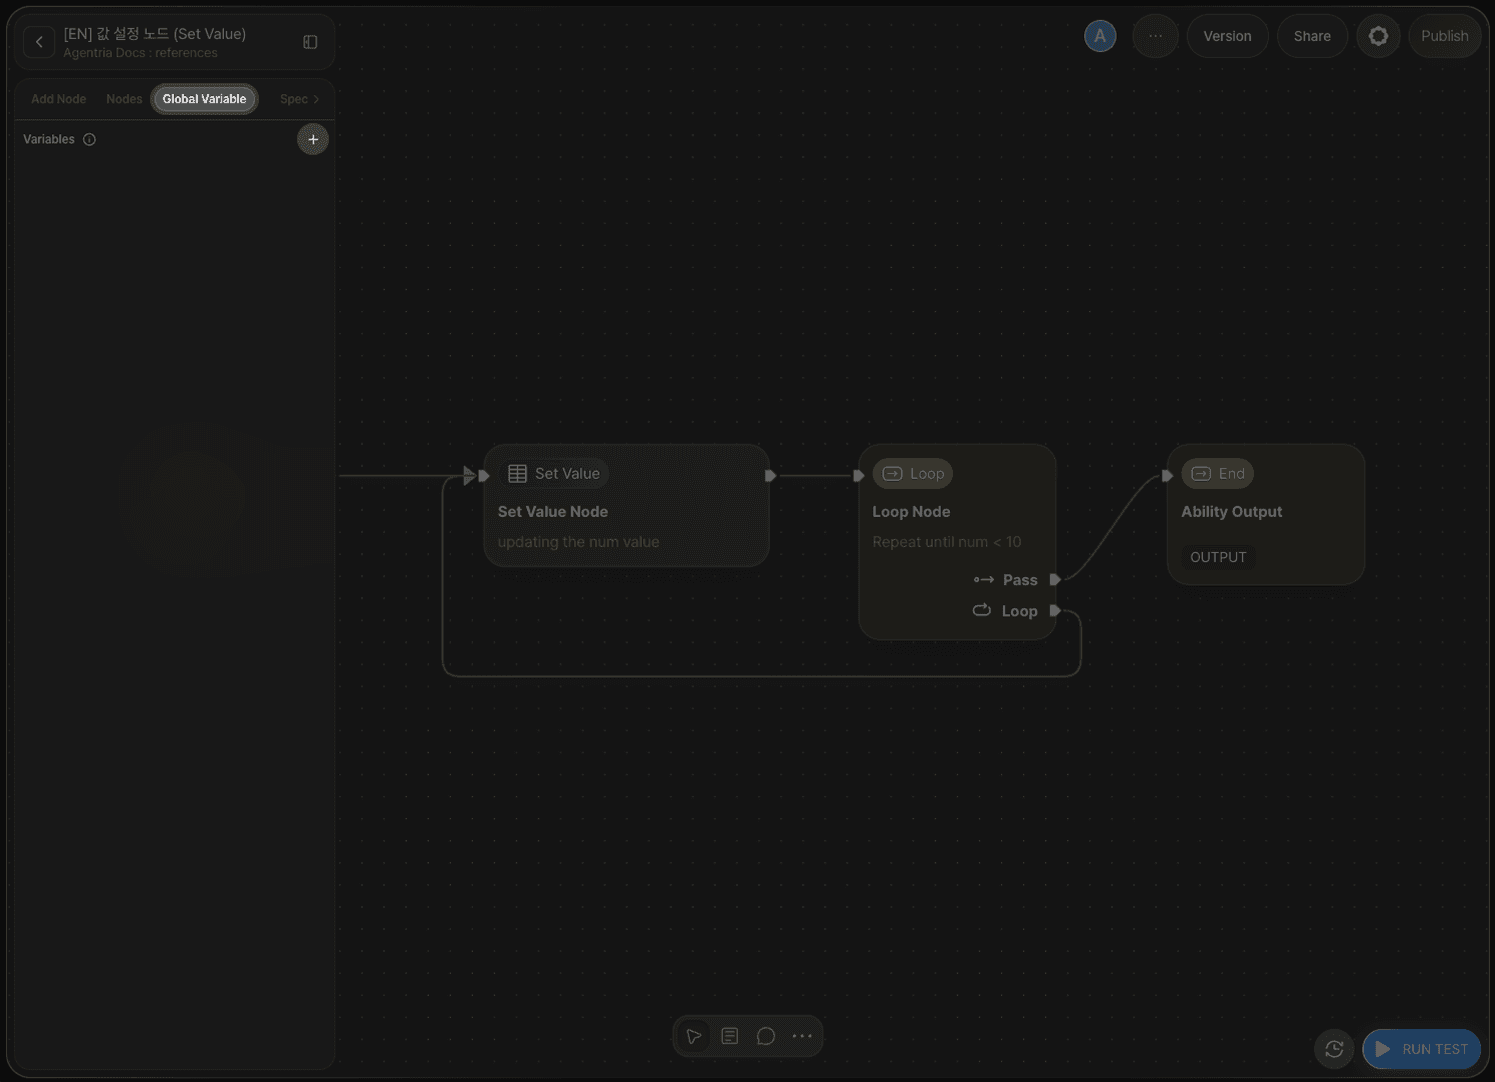
Open the left side panel on the Canvas and navigate to the Global Variables tab. Click + to start adding a global variable.
Step 4: Declare a Global Variable
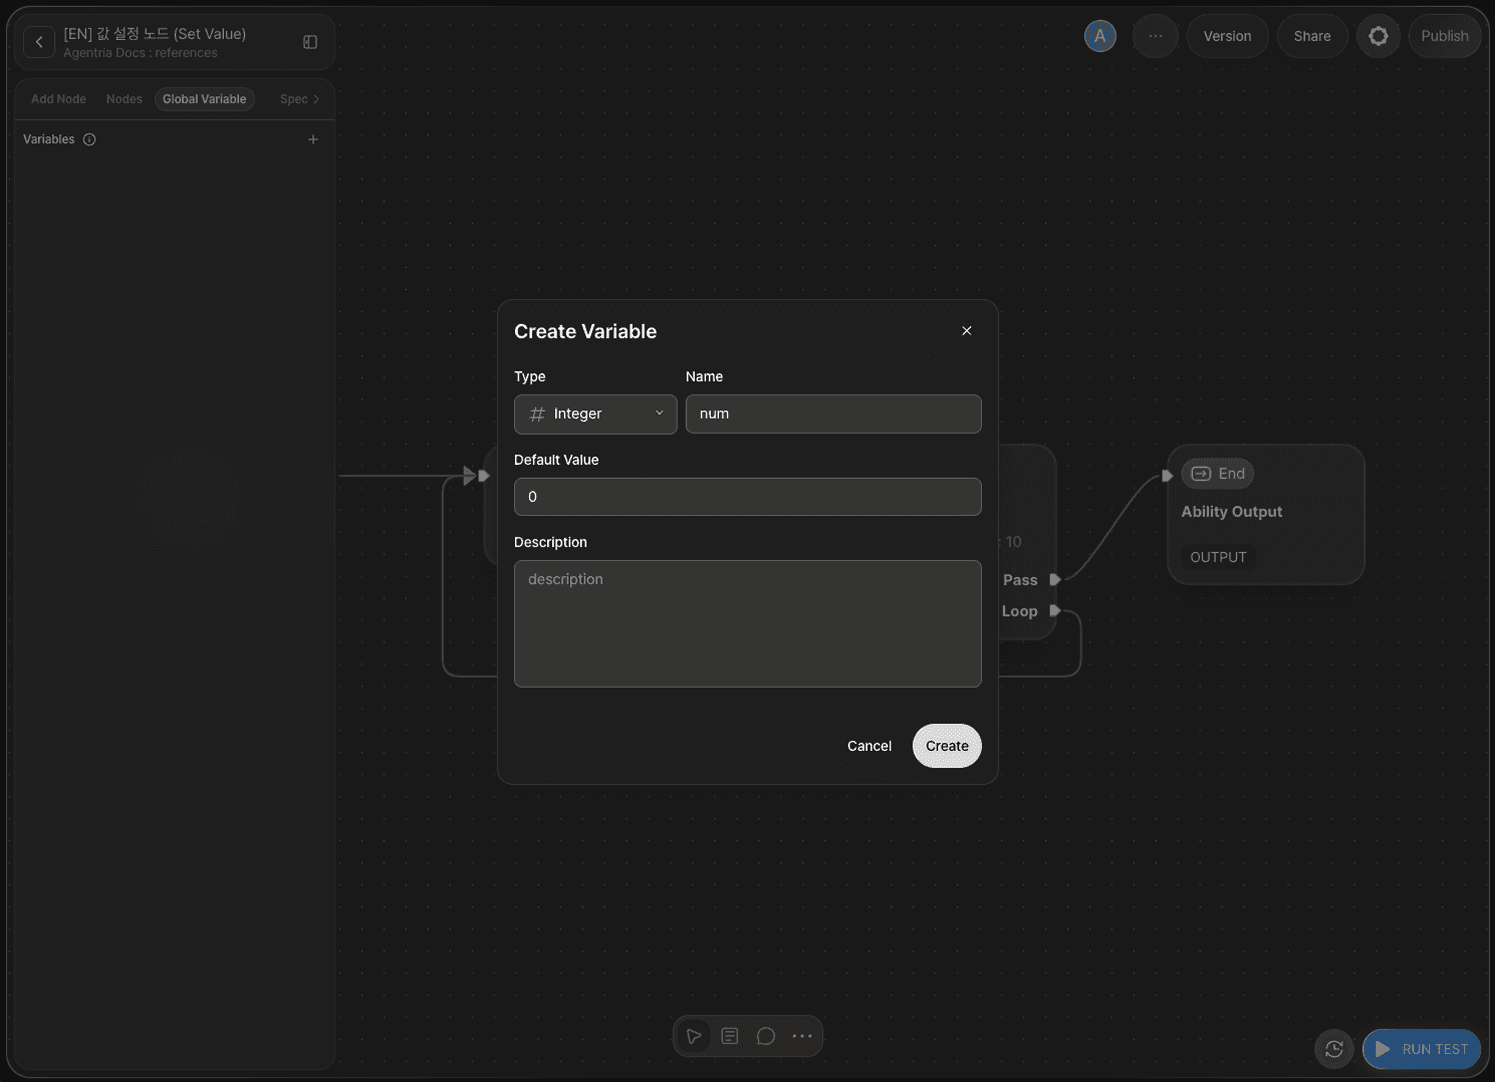
Configure the global variable as follows.
Field | Value |
|---|---|
Type | Integer |
Name |
|
Default |
|
num is the counter's starting value. This tutorial uses the global variable's default value (0) as the counter's initial value.
Step 5: Configure the Set Value Node
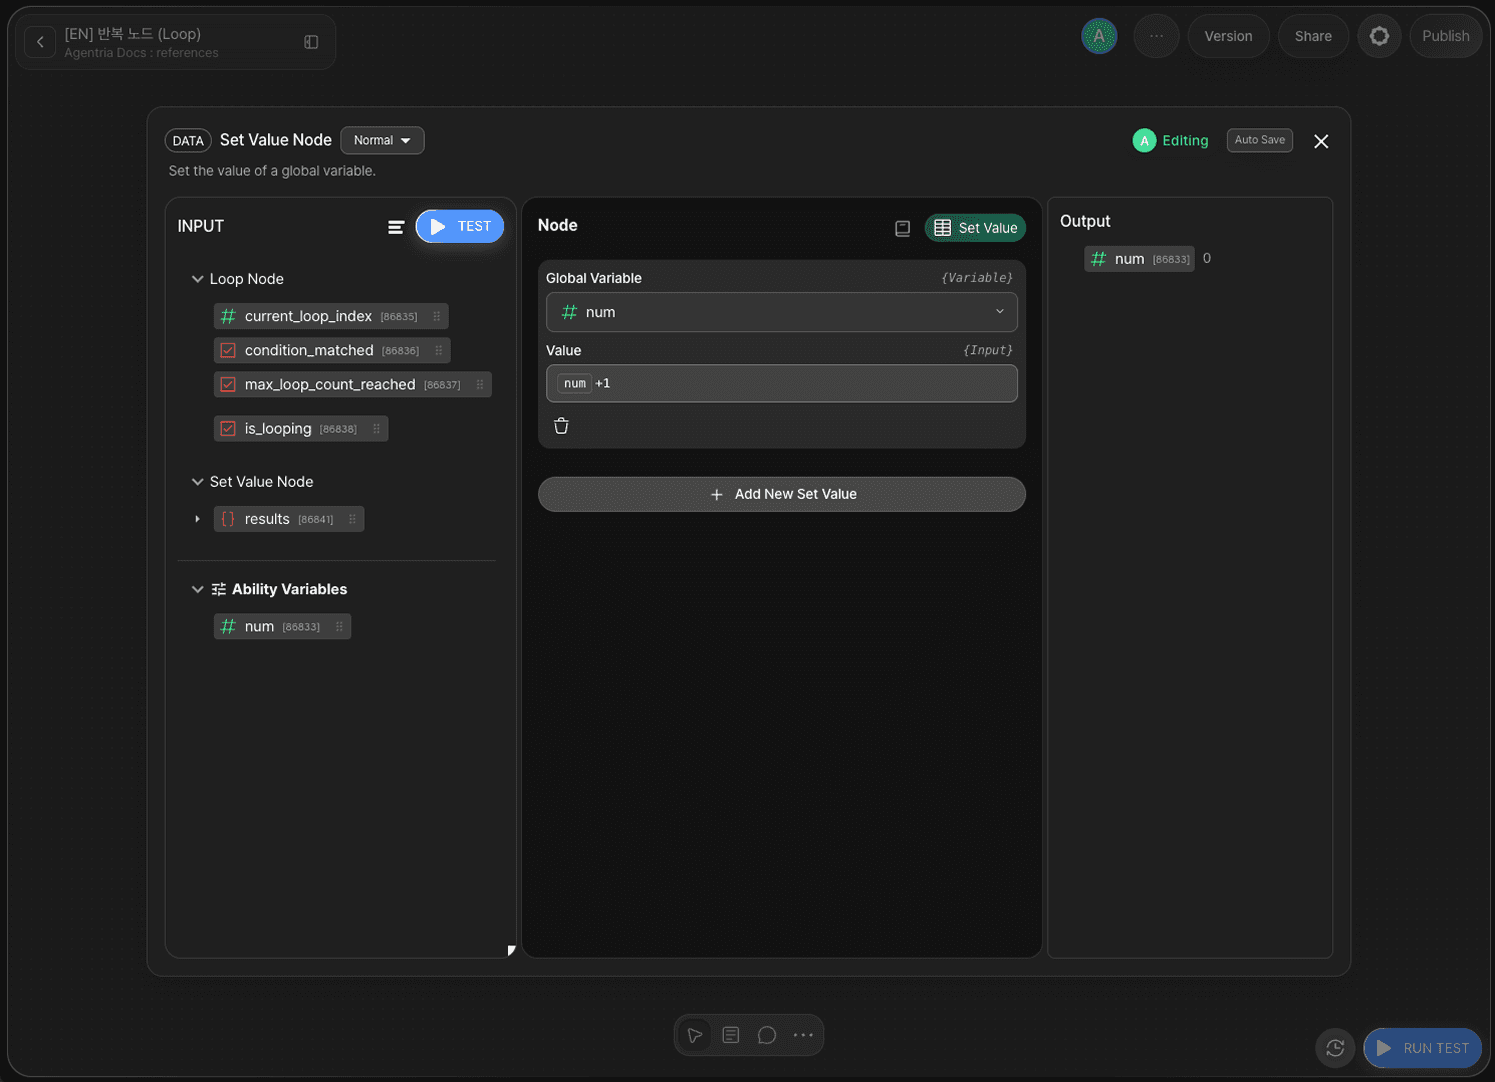
Double-click the Set Value node to open the Node Editor.
The Set Value node provides the following options.
Option | Required | Description |
|---|---|---|
| Required | Select the global variable to update. |
| Required | Enter a value or expression to set in the global variable. Drag and drop variables from |
Setting the Global Variable
Select the global variable num in the Global Variable field.
Entering the Set Value
Enter the following expression in the Set Value field. Drag and drop num from Ability Variables on the left to complete it.
num + 1 adds 1 to the current value of the global variable num. With this configuration, the result of the num + 1 expression is stored in the global variable num on every iteration.
Setting Multiple Variables at Once
Click +Add Item in the Node Editor to add a new Global Variable / Set Value row. This lets you update multiple global variables in a single node.
Functions and Expressions Available in Set Value
In the Set Value field of the Set Value node, you can use not only arithmetic operators but also the built-in functions and constants listed below. Combined with variables, you can handle tasks such as averaging, rounding, sorting, and length calculation — all within a single node.
Available Functions and Constants
Category | Function/Constant | Description | Example |
|---|---|---|---|
Type Conversion |
| Convert to string |
|
| Convert to integer |
| |
| Convert to float |
| |
| Convert to boolean |
| |
| Convert to list |
| |
| Convert to dictionary |
| |
| Convert to tuple |
| |
| Convert to set |
| |
Math/Aggregation |
| Length |
|
| Absolute value |
| |
| Minimum value |
| |
| Maximum value |
| |
| Sum |
| |
| Round |
| |
Sequence Operations |
| Sort |
|
| Reverse |
| |
| Index + value |
| |
| Zip |
| |
| Number range |
| |
Constants |
| True |
|
| False |
| |
| Null value |
|
Usage Examples
By combining these functions, you can write common operations in a single expression line — no separate Code node required.
Purpose | Expression |
|---|---|
Calculate average |
|
Price with tax |
|
Unique item count |
|
Sort descending |
|
Range (max - min) |
|
String to number + 1 |
|
Functions not listed above are not available. For more complex logic, use the 🔗Code Node (Python).
Step 6: Configure the Loop Node
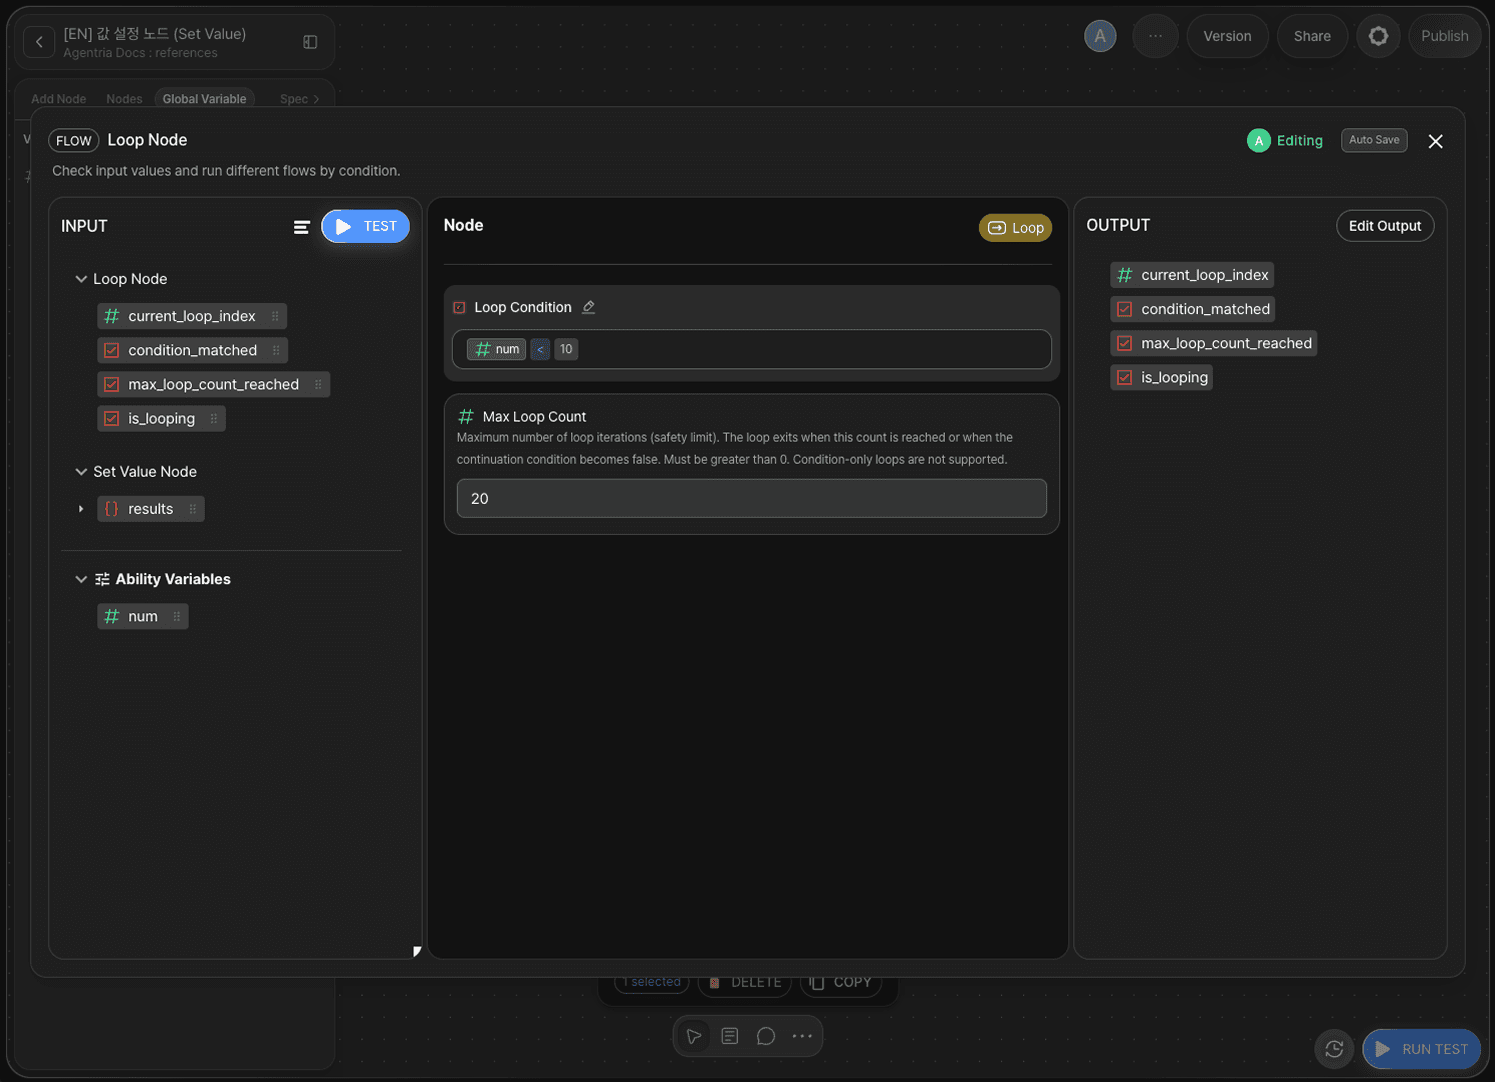
Double-click the Loop node to open the Node Editor.
The Loop node checks the condition against the global variable num updated by the Set Value node.
Option | Value |
|---|---|
|
|
Max Iterations |
|
Enter the following expression in the Loop Condition field. Drag and drop num from Ability Variables to complete it.
While num < 10 is true, the flow returns to the Set Value node via the loop pin. When num reaches 10, the condition becomes false and the flow proceeds to the End Node via the pass pin.
Step 7: Check the Start Node
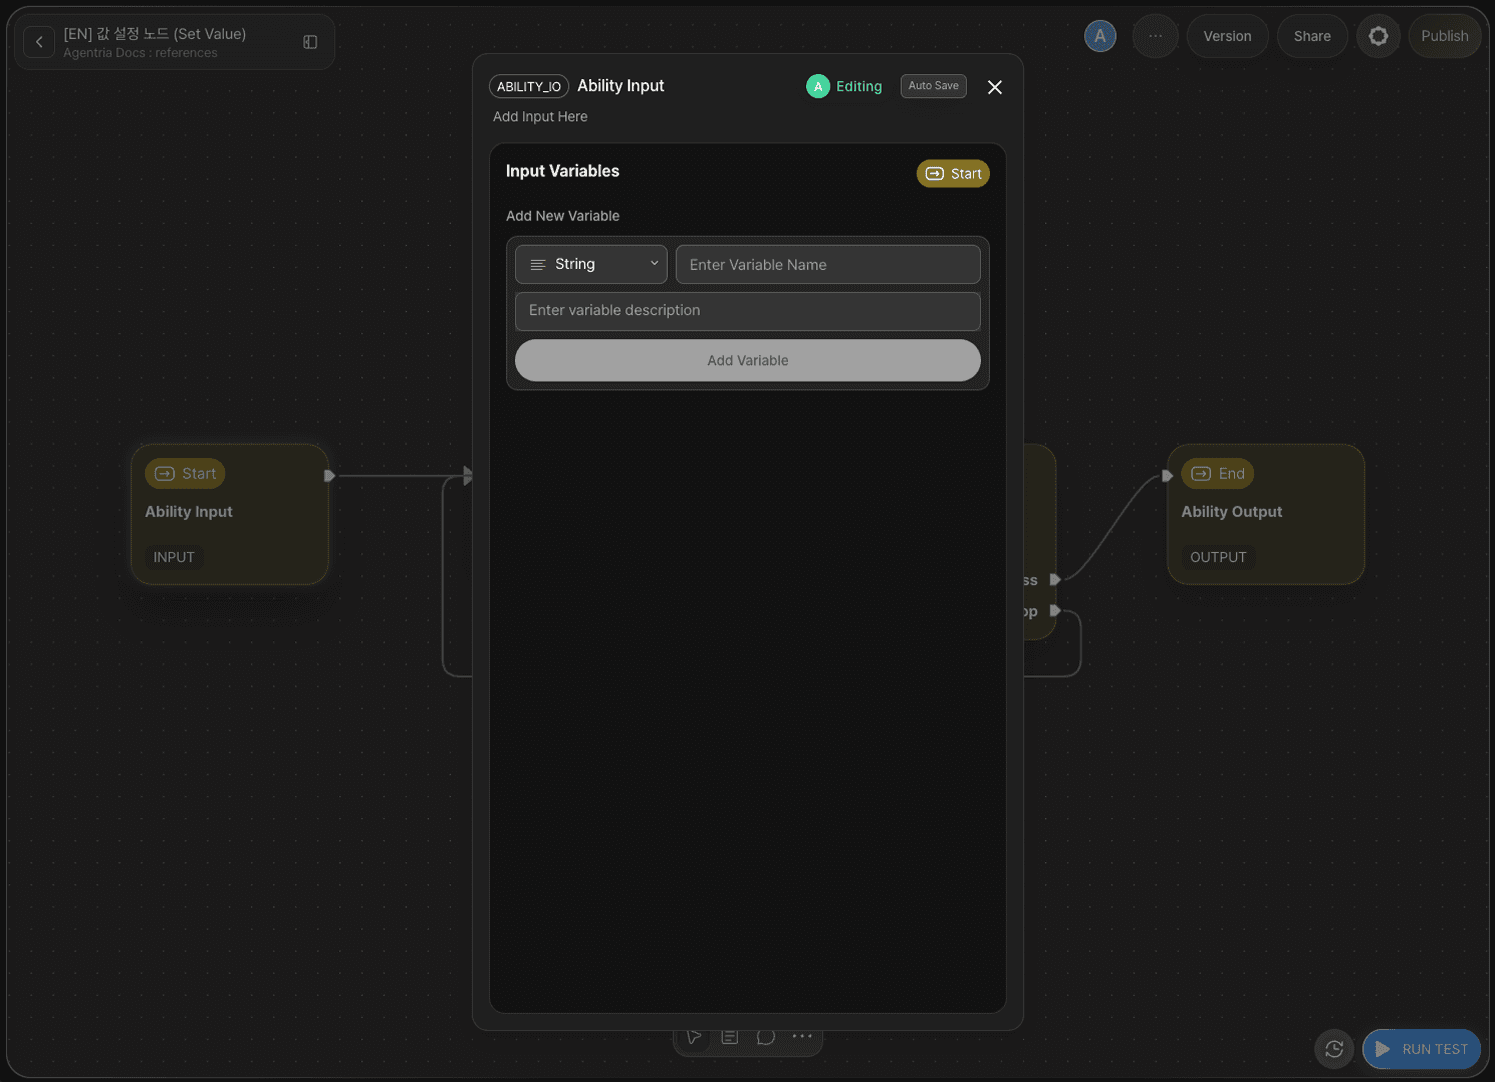
This tutorial uses the global variable's default value (0) as the counter's initial value, so no Input variables need to be declared in the Start Node. Leave the Start Node as is.
Step 8: Configure the End Node
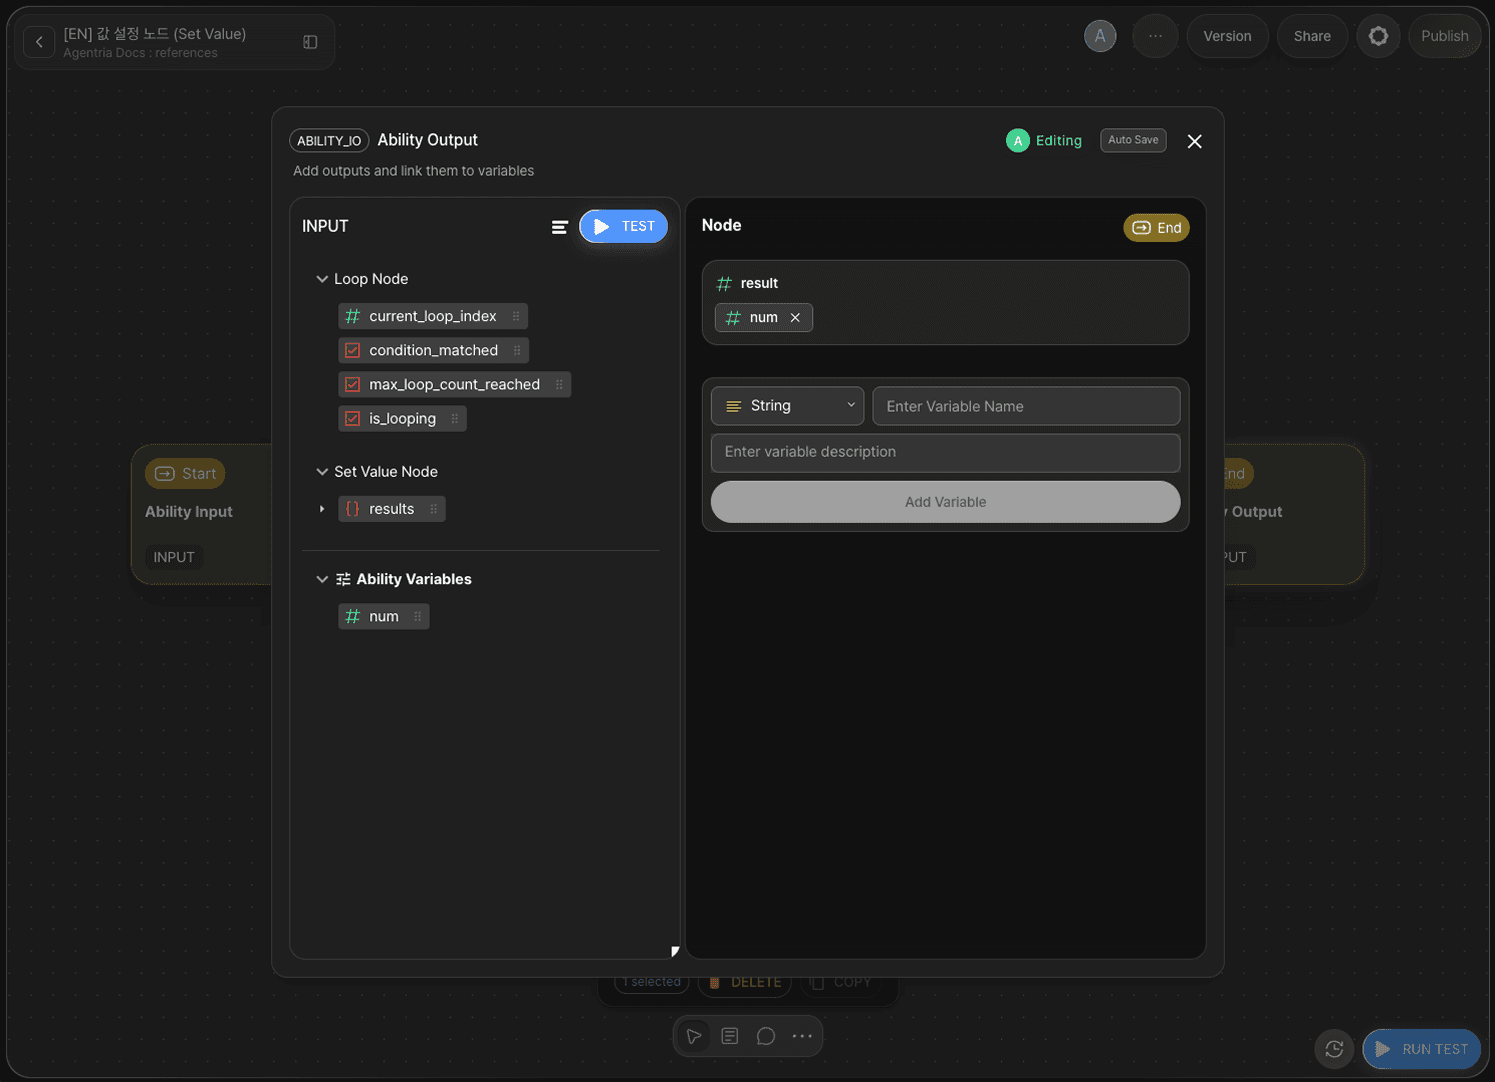
Double-click the End Node to open the Node Editor.
Add the following variable in the Output Section.
Variable | Type |
|---|---|
| Integer |
Drag and drop num from Ability Variables to bind it to result.
Step 9: Run the Ability Test
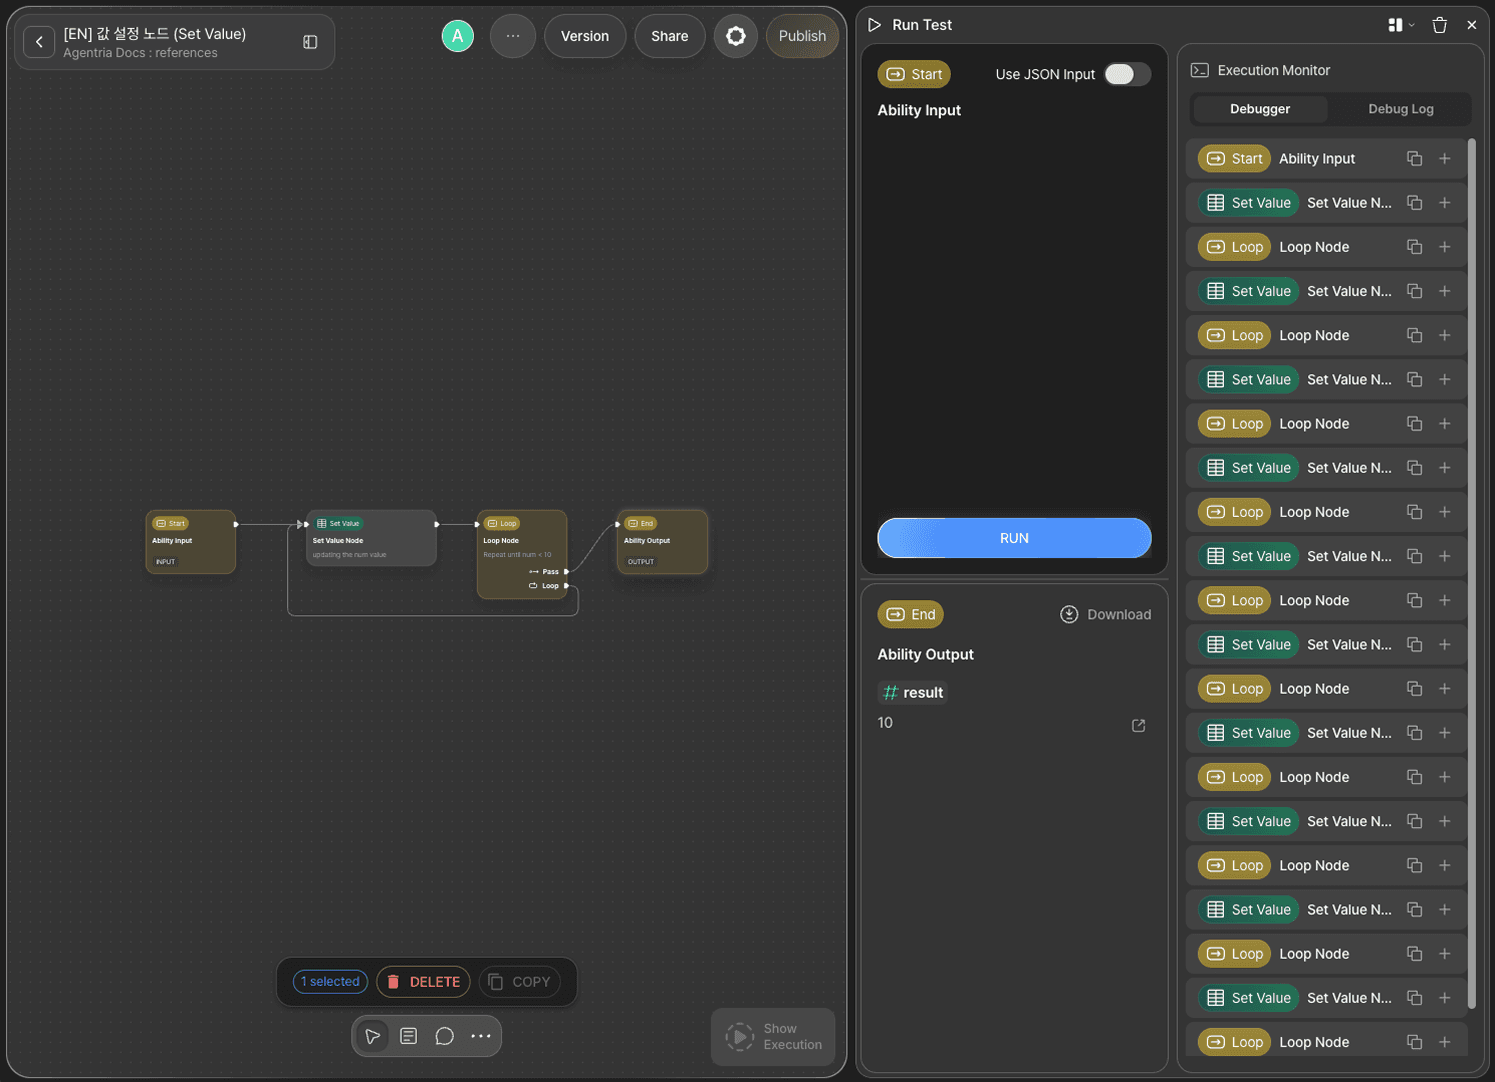
Click the Run Test button in the bottom-right corner of the Canvas. Proceed through Run Test → Run Test → Run to execute the full test.
The global variable num starts at 0. The Set Value node evaluates num + 1 and updates num, then the Loop node checks the num < 10 condition. When num reaches 10, the condition becomes false and the flow proceeds to the End Node via the pass pin.
Iteration | num (before check) | Set Value (num + 1) | num (after update) | Condition (num < 10) |
|---|---|---|---|---|
1 | 0 | +1 | 1 | True (loop) |
2 | 1 | +1 | 2 | True (loop) |
3 | 2 | +1 | 3 | True (loop) |
4 | 3 | +1 | 4 | True (loop) |
5 | 4 | +1 | 5 | True (loop) |
6 | 5 | +1 | 6 | True (loop) |
7 | 6 | +1 | 7 | True (loop) |
8 | 7 | +1 | 8 | True (loop) |
9 | 8 | +1 | 9 | True (loop) |
10 | 9 | +1 | 10 | True (loop) |
11 | 10 | — | — | False (pass) |
Confirm that result: 10 is returned.
Step 10: Review Execution Results
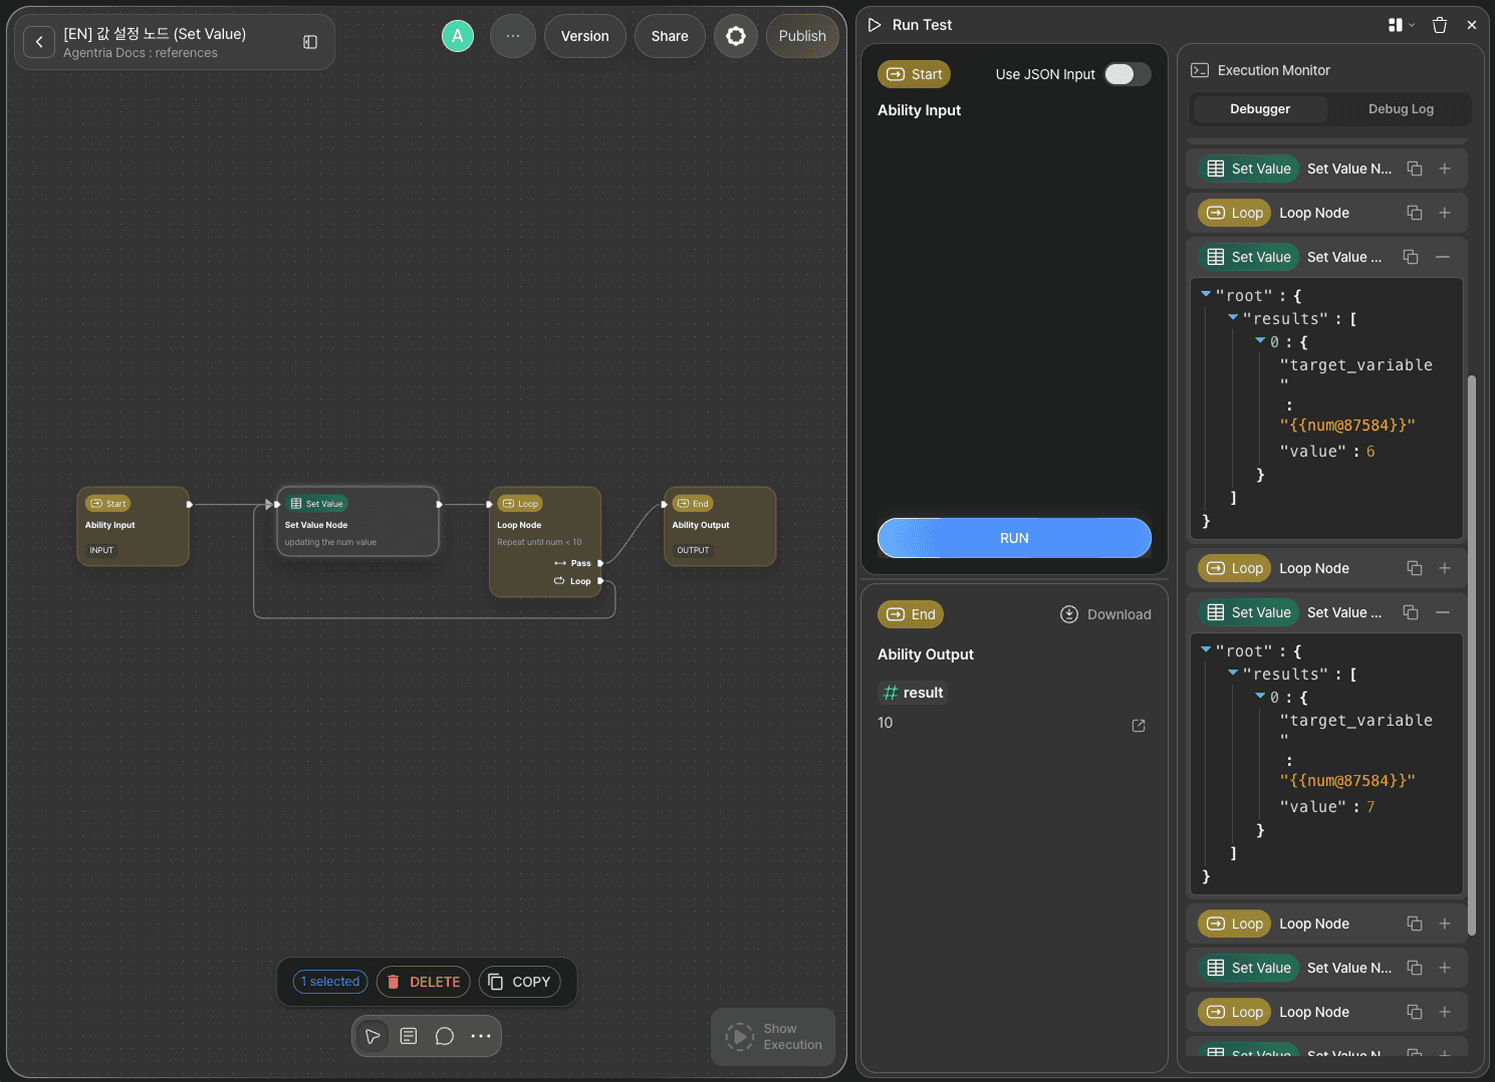
In the Execution Monitor panel of the test window, review the step-by-step execution results of each node.
Next Steps
🎉 Congratulations! You've successfully built the "+1 Counter" workflow using Agentria.
Try updating multiple global variables at once using +Add Item, or change the expression to build more complex state management workflows.
Agentria is a place where ideas become reality—your workflow can expand infinitely with your creativity.
For more Ability examples, visit the 🔗Ability Guide.
For Agent-based examples, visit the 🔗Agent Guide.