Get Started
📢 [Notice] The ReAct Node is currently disabled
We’re preparing a v2 version of the ReAct Node with improved performance, and new additions are temporarily restricted.
ReAct Nodes that are already added to workflows will continue to work normally.
If you need similar functionality, please use the
Agentic Loop Node.The release schedule for ReAct Node v2 will be announced later.
The Advanced Guide Tutorial covers more diverse workflow-building processes that can be created through Agentria.
In this tutorial, you will configure an Agent using a ReAct Node and perform a Chat Test to validate its execution.
Through this process, you’ll learn how to build a ReAct Agent Workflow that can reason and act autonomously.
ReAct Node
The ReAct Node is implemented based on research on the reasoning and acting capabilities of language models.
It selects and executes the most appropriate connected ReAct Tool Nodes by making autonomous decisions.
For more detailed background, refer to the following research paper:
Prerequisites
To begin, create a Project in Agentria and open the Agent Canvas.
For detailed steps on accessing the canvas, refer to Step 1 (Create a Project and Select a Composer) in the 🔗3-Step Core Guide.
By completing this tutorial, you will be able to:
Use the ReAct Node
Connect multiple nodes
Link ReAct Tool Nodes
Build an Agent Workflow
Validate workflow results through Chat Test
Step 1: Input Variables
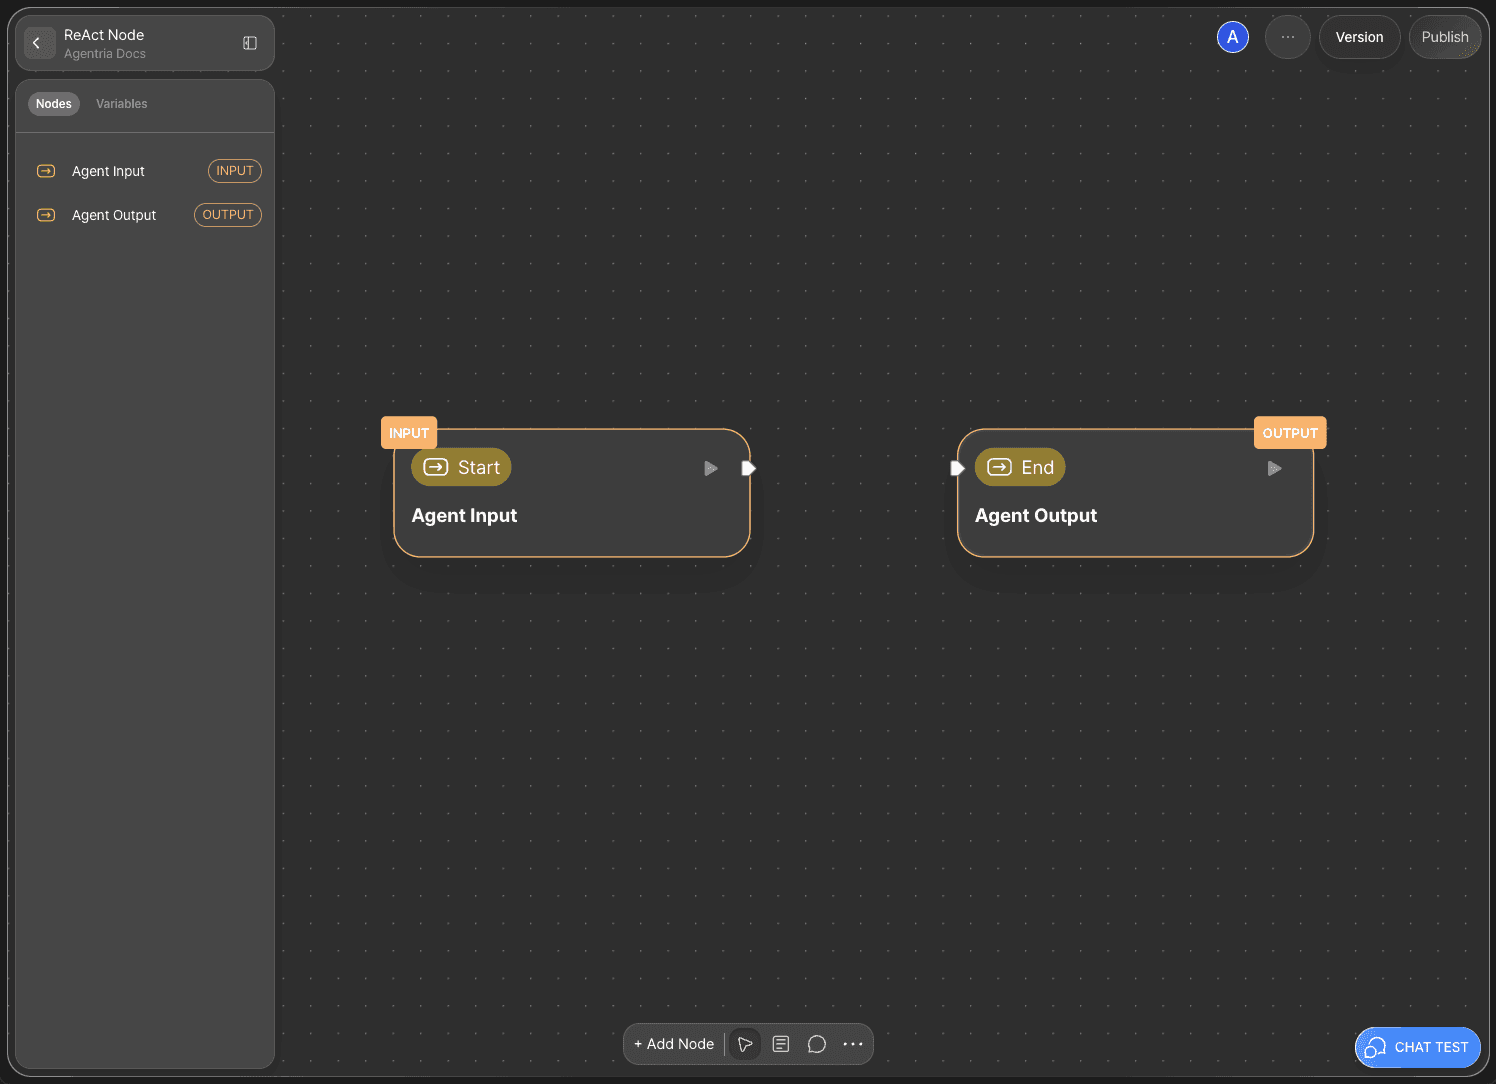
The Agentria Canvas includes one Start Node and one End Node by default.
The Start Node initiates the workflow.
The End Node completes the workflow.
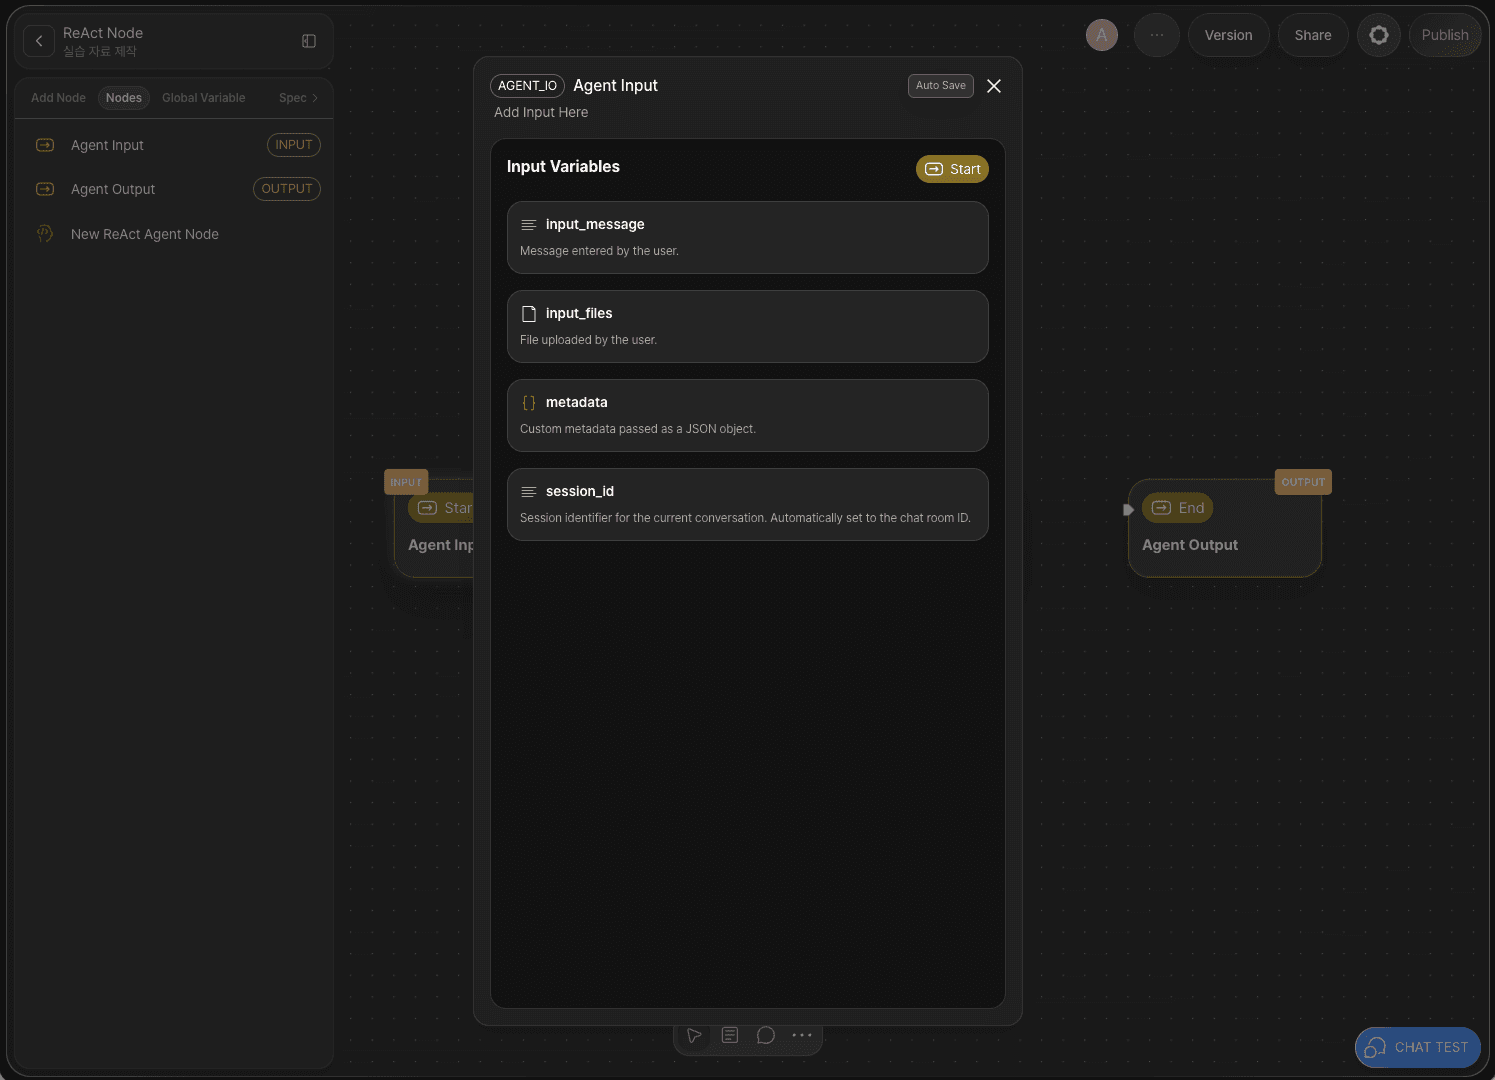
The Agent Start Node already includes default input variables for Chat Test.
Double-click the Start Node to open the node editor as a popup, where you can review the data types and descriptions.
Now, return to the canvas to continue.
Step 2: Add Nodes via Drag and Drop

Next, you’ll add the node that will reason and act autonomously.
The ReAct node autonomously selects the appropriate tool from the connected tools to achieve the given goal, and executes it through repeated cycles of reasoning and acting.
Click the Add Node button in the left panel and place the ReAct Agent node from the AI Agent category using drag and drop.
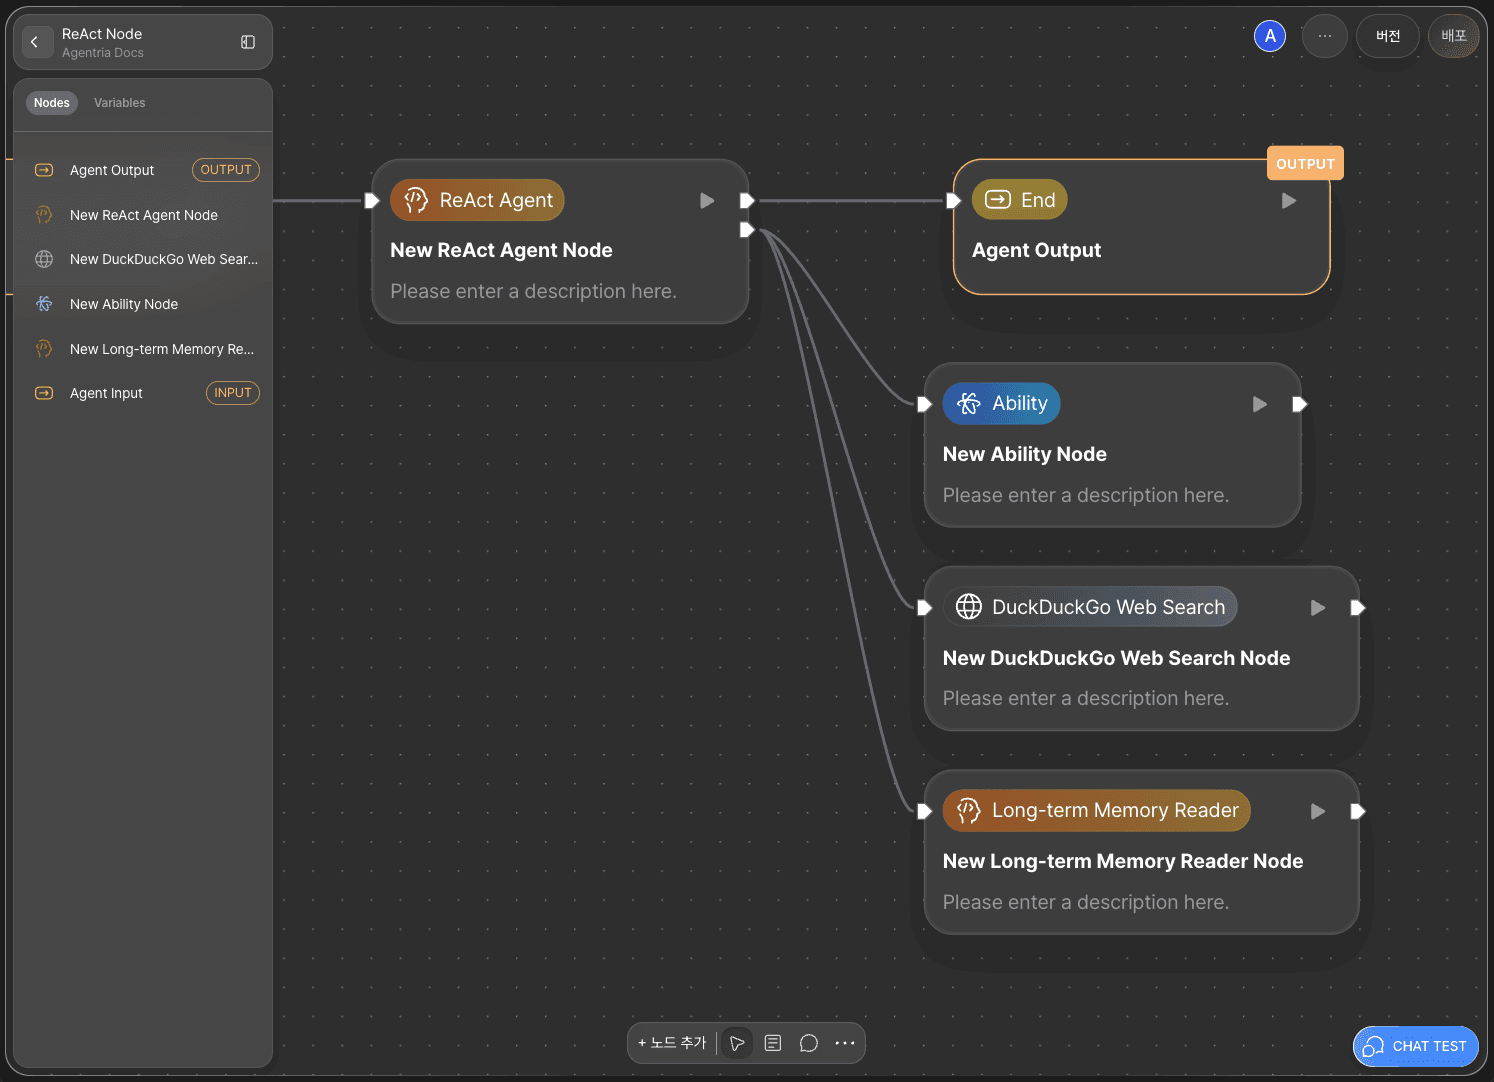
Step 3: Add ReAct Tool Nodes
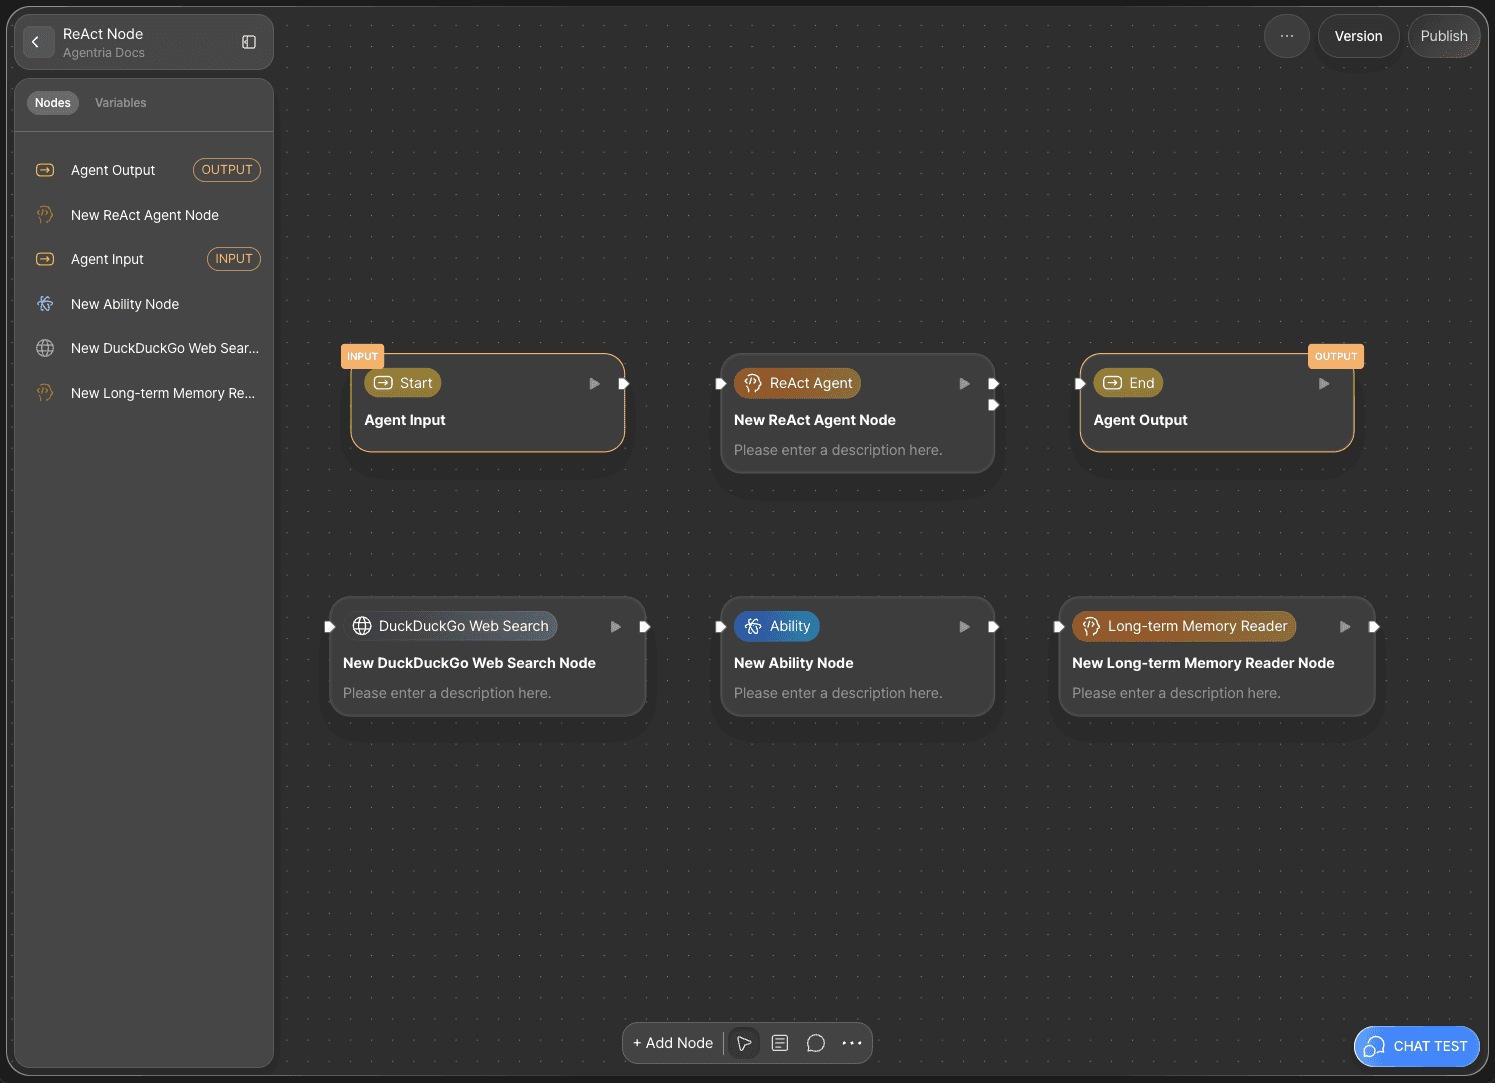
The ReAct Node selects and executes the most appropriate tools among the ones connected to it.
You’ll now add the tool nodes that the ReAct Node can use.
This tutorial uses the following three nodes:
Web Tools: DuckDuckGo Web Search Node
Ability
AI Agent: Long-term Memory Reader Node
An existing Ability previously created and deployed via 🔗API Release.
For this tutorial, we’ll use the workflow from 🔗Using the AI Node.
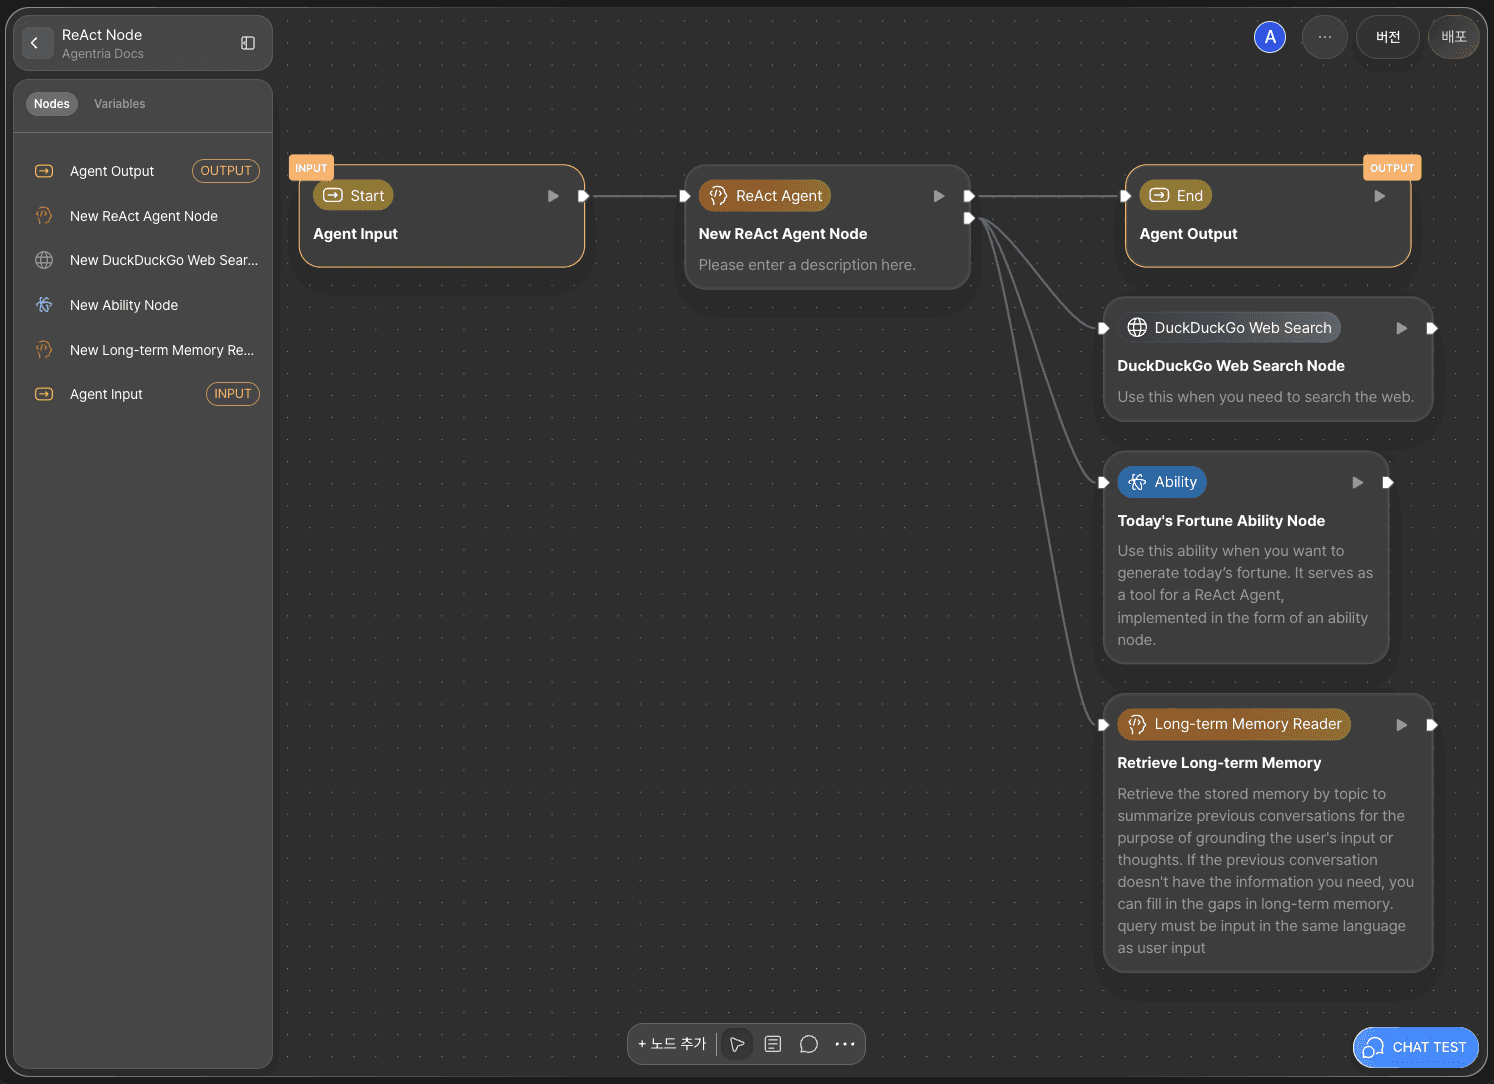
Step 4: Connect Nodes with Edges
1) Basic Structure
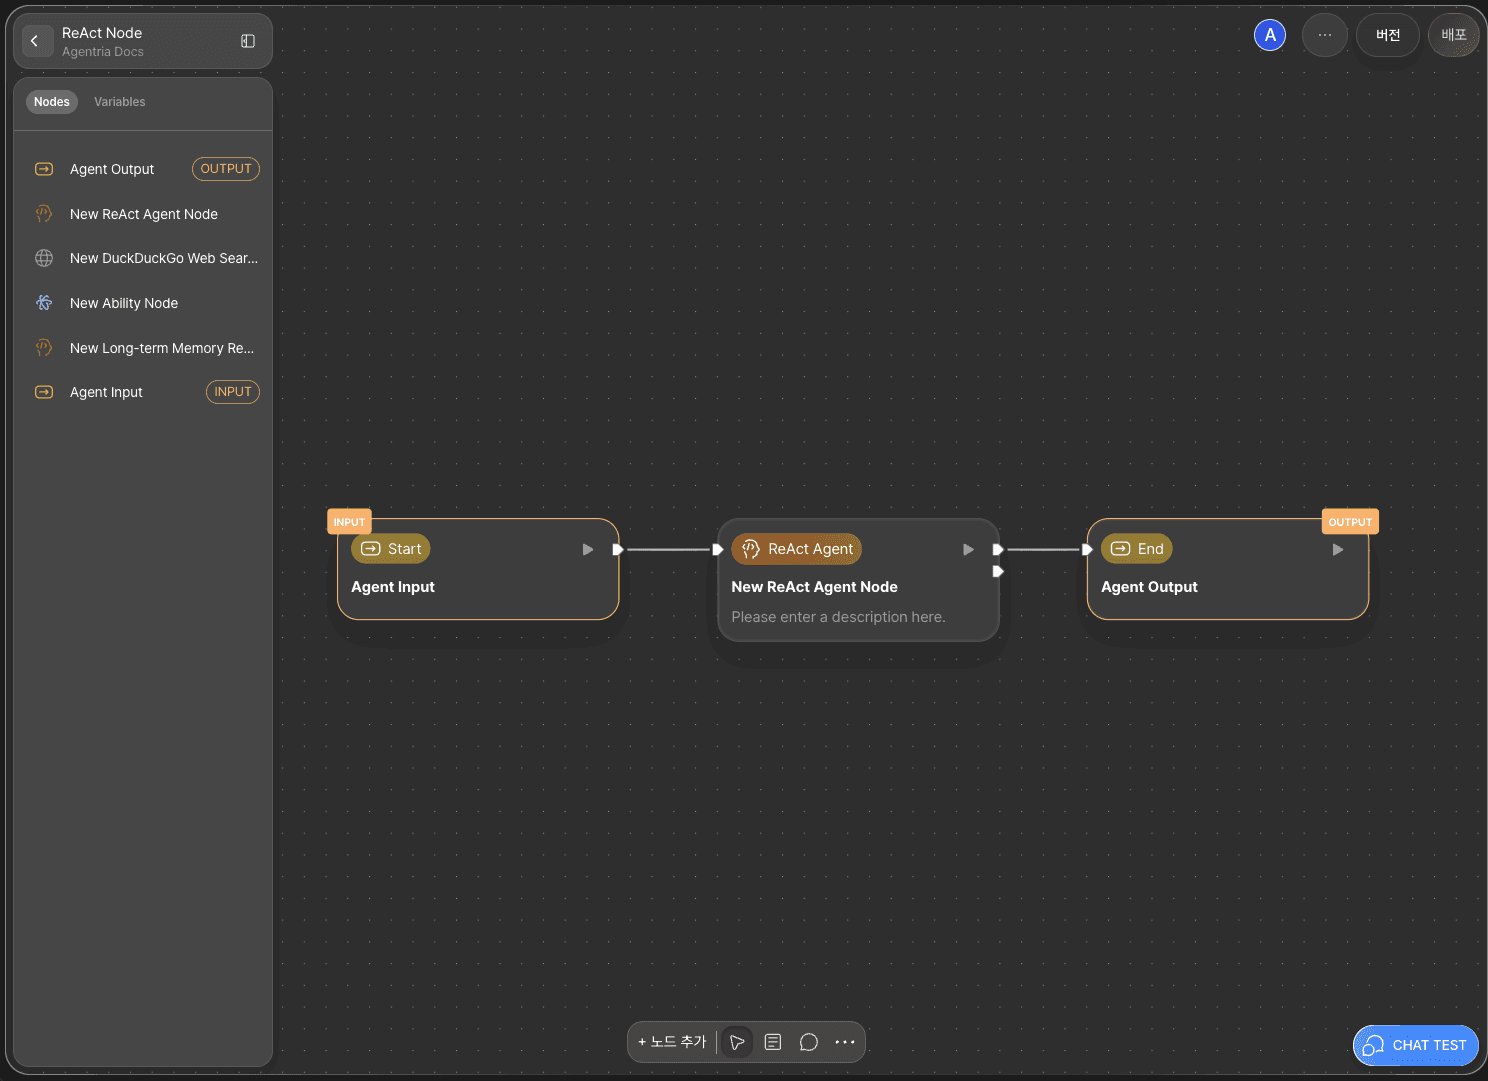
To allow the ReAct Node to use the variables received from the Start Node, you must connect the two with an Edge.
Connect the Out-Pin on the right side of the Start Node to the In-Pin on the left side of the ReAct Node.
This allows the input values from the Start Node to be passed to the ReAct Node.
2) ReAct structure
The ReAct Node determines which tool to use by connecting to ReAct Tool Nodes.
Below the ReAct Node’s Out-Pin, you’ll find a Tool-Pin.
Connect the Tool Pin to the In-Pin of each tool node to establish their links.
Step 5: Configure Tool Nodes
A Tool Node can only represent a single node.
If you want to modularize a multi-step process, you must create it as an Ability, which consolidates the flow into one node.
The ReAct Node determines which tool to use based on the name and description of each tool node.
Therefore, the clearer and more specific the node’s name and description are, the better the ReAct Node can reason and perform effectively.
Hover over a node and click the Edit icon to modify its title and description.
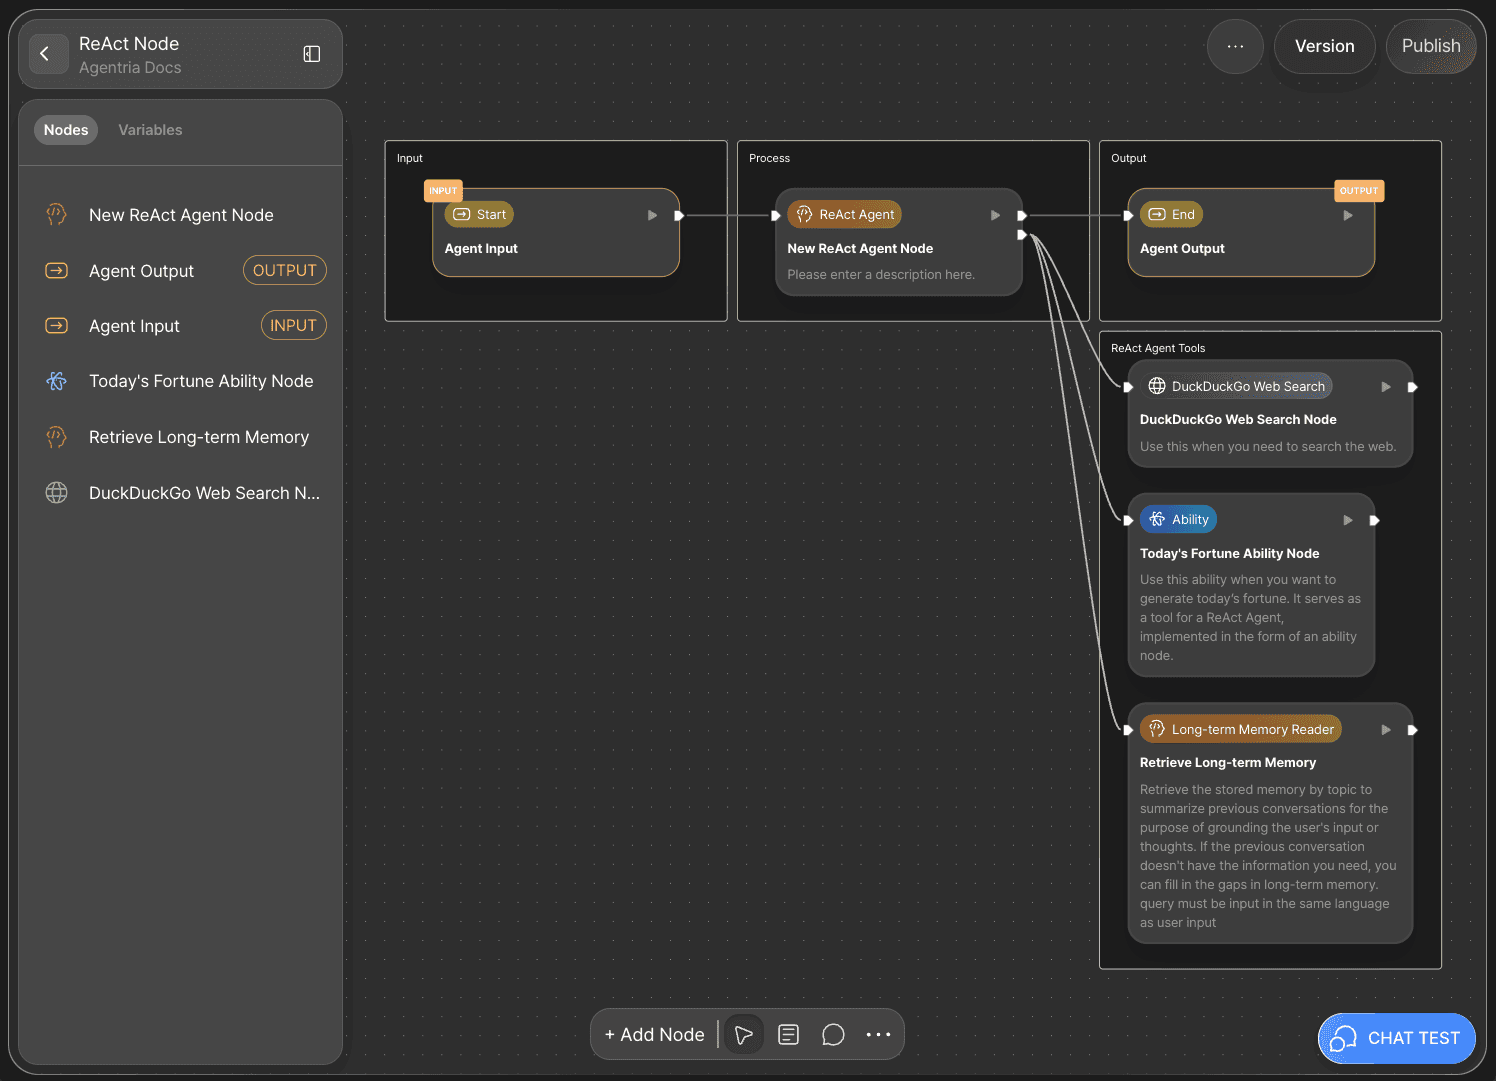
Add appropriate names and detailed descriptions for each node as shown below:
Examples:
DuckDuckGo Web Search Node
Use this when you need to search the web.
Today’s Fortune Ability Node
Use this ability when you want to generate today’s fortune. It serves as a tool for a ReAct Agent, implemented in the form of an ability node.
Retrieve Long-term Memory
Retrieve the stored memory by topic to summarize previous conversations for the purpose of grounding the user's input or thoughts. If the previous conversation doesn't have the information you need, you can fill in the gaps in long-term memory. Query must be input in the same language as user input.
Step 6: Bind Variables in the ReAct Node

In Agentria, you can easily connect variables without writing any code — simply drag and drop to bind them.
user_input:
input_messagechat_histories:
input_files
Step 7: Bind Variables in Tool Nodes
Now, connect the appropriate input variables to each tool node’s adapter variables.
1) DuckDuckGo Web Search Node
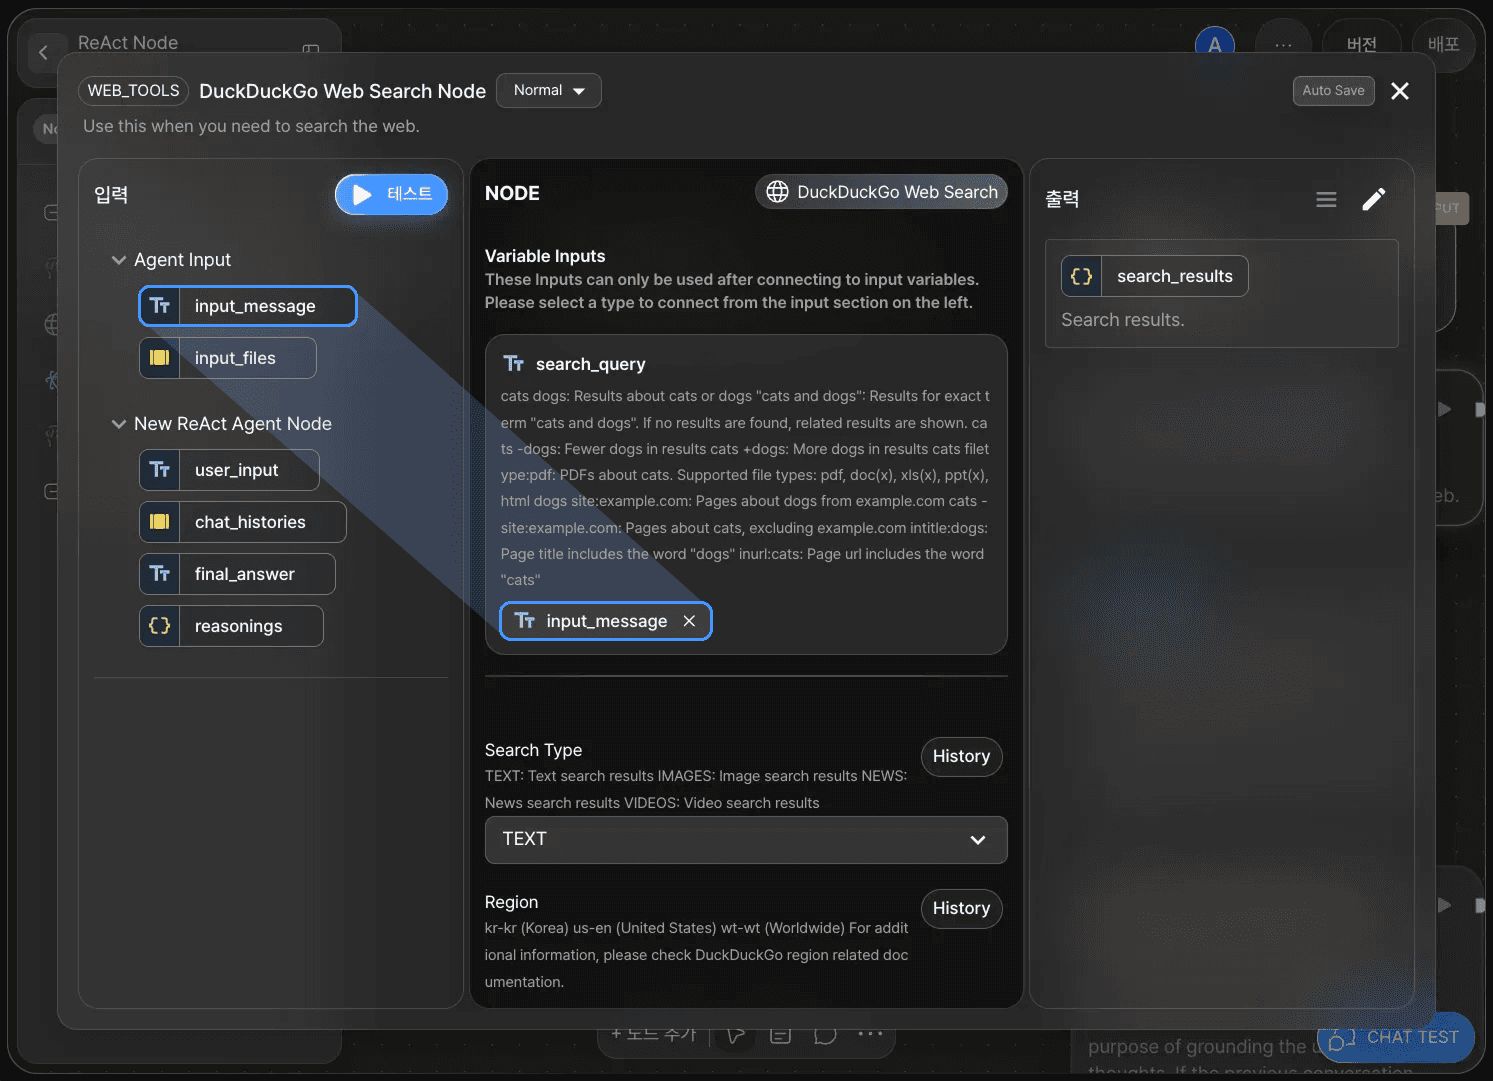
search_query:
input_message
2) Ability Node (Using AI Node)
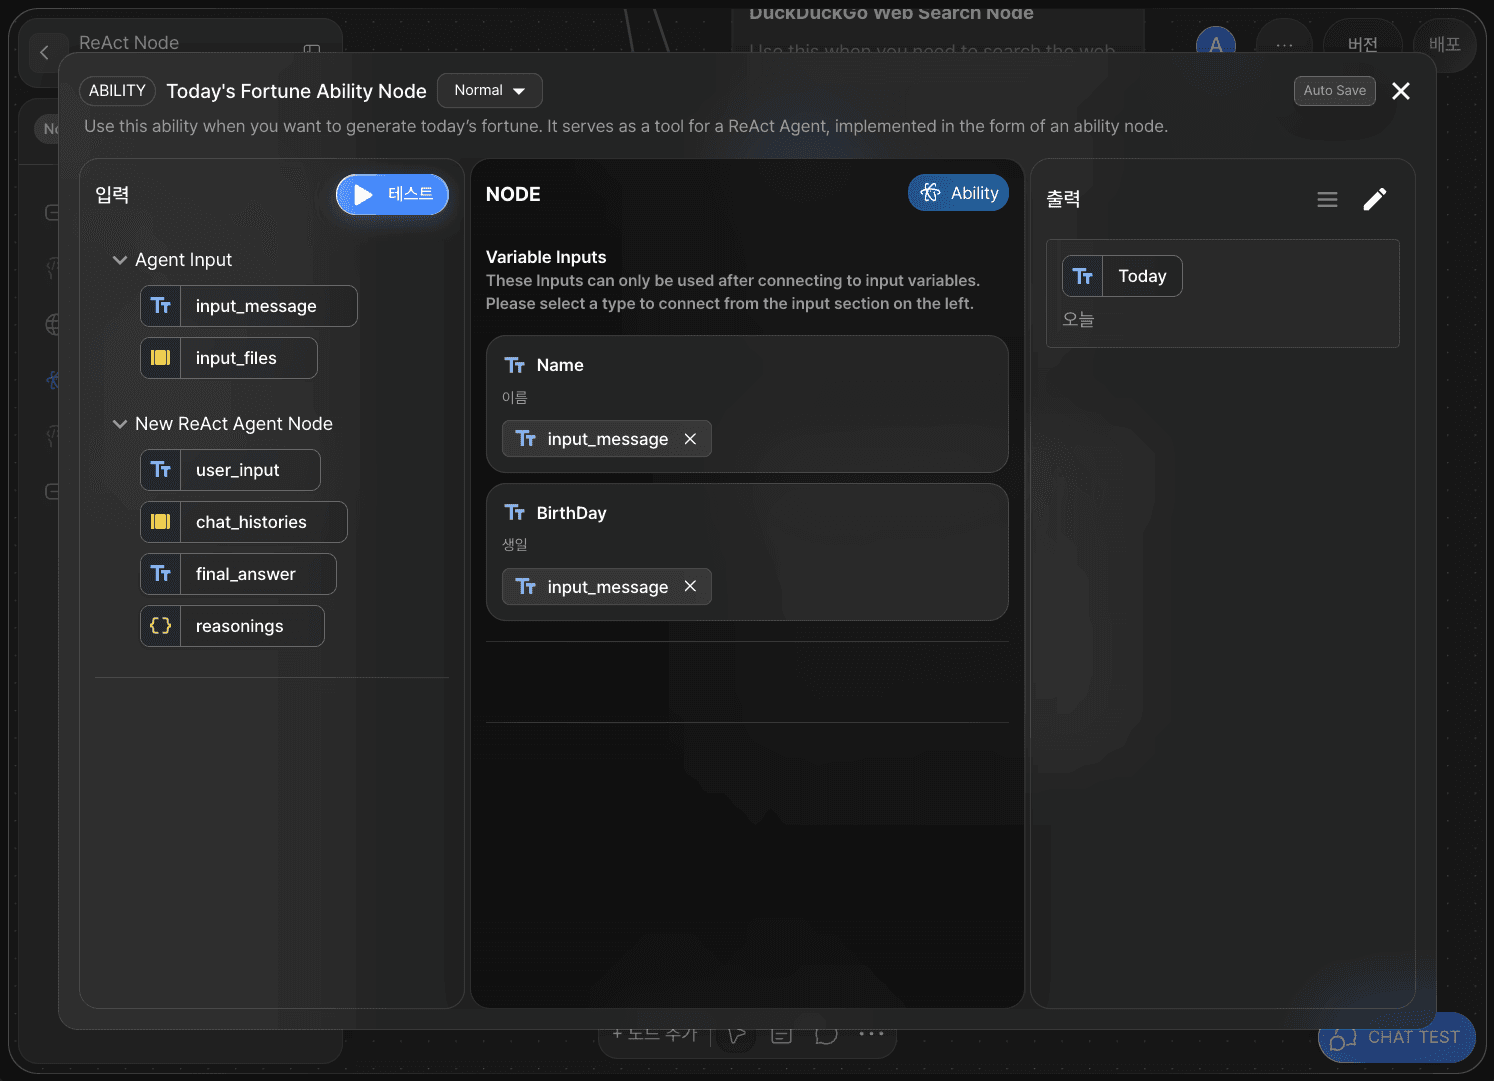
Name:
input_messageBirthDay:
input_message
3) Long-term Memory Node
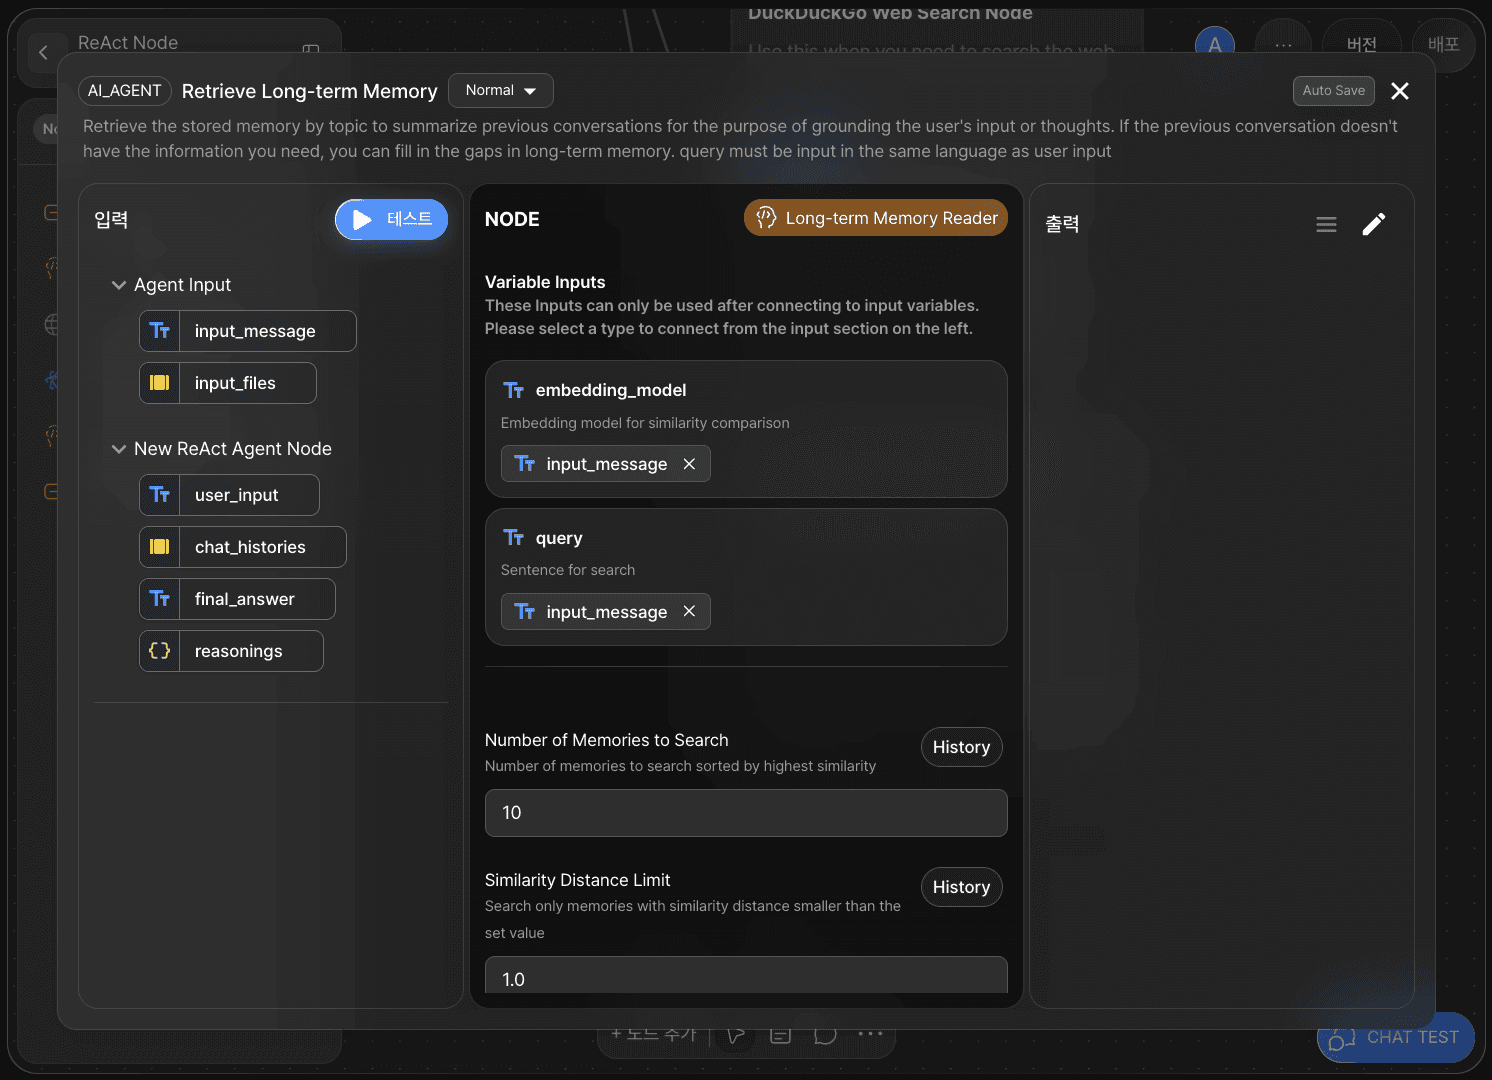
embedding_model:
input_messagequery:
input_message
Step 8: Connect the End Node
Now, pass the generated ReAct output to the End Node.
Return to the canvas and connect the ReAct Node to the End Node using an edge.
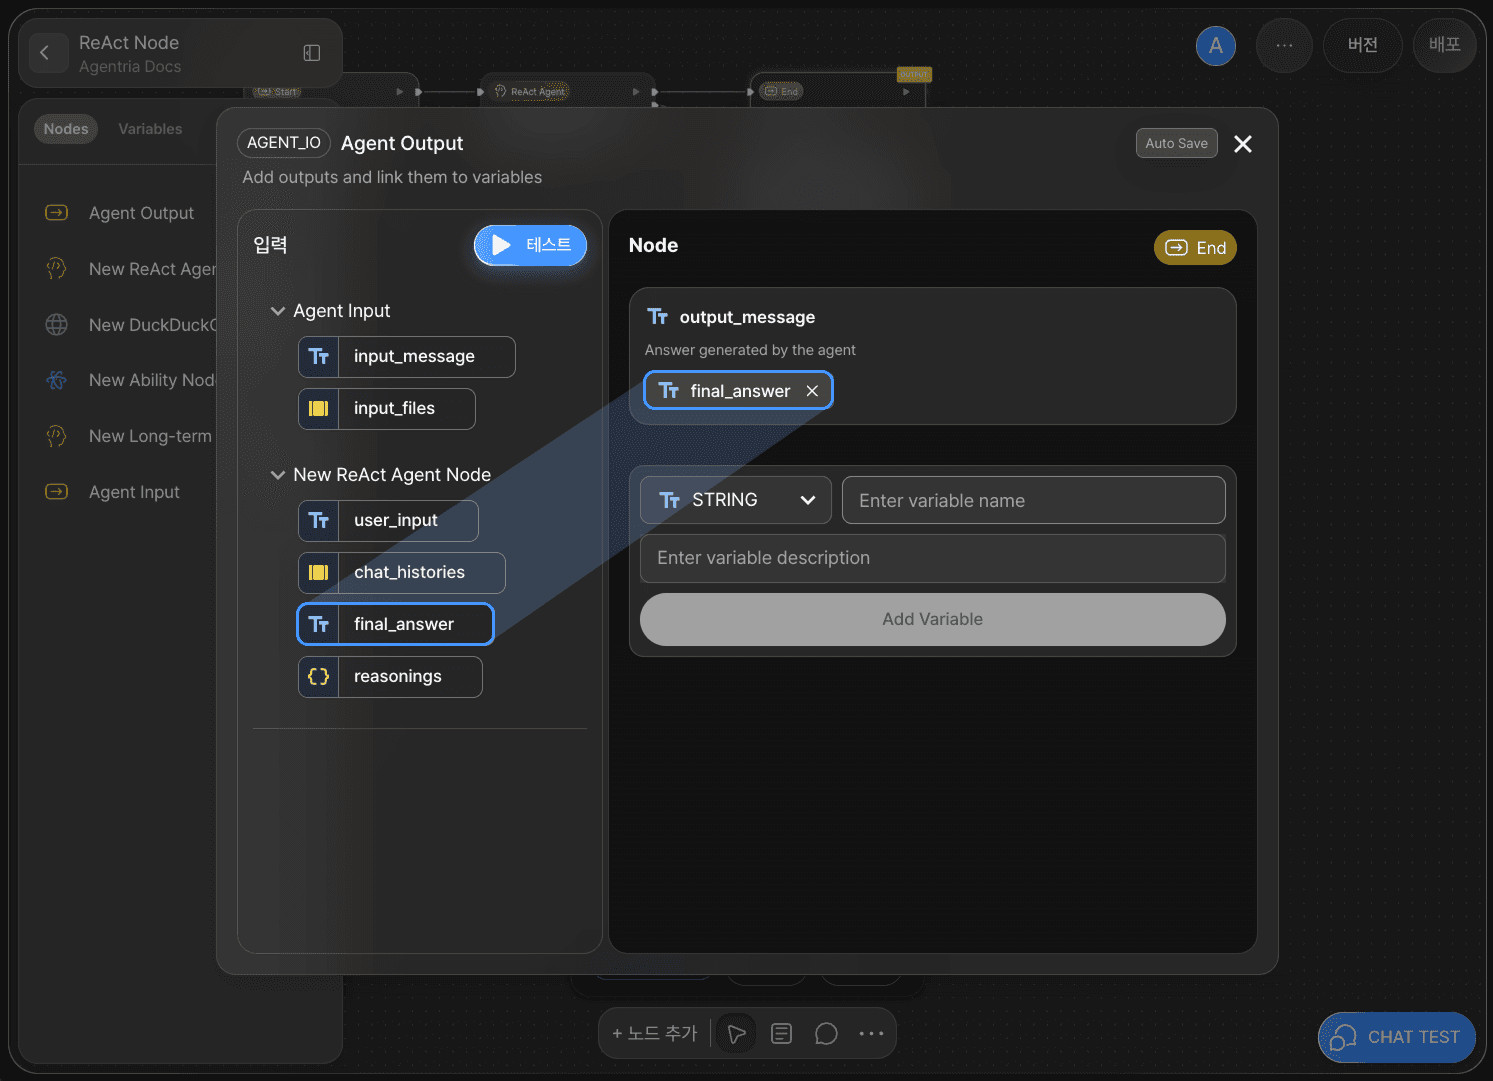
Double-click the End Node to open the node editor. By default, you’ll see an adapter variable named output_message with the String type.
Select or drag and drop the final_answer variable generated by the ReAct Node and bind it to output_message.
With this, the ‘Decision-making Agent using the ReAct Node’ workflow is complete.
Step 9: Verify the Workflow with Chat Test

Click the CHAT TEST button at the bottom-right corner of the canvas to run the completed workflow.
Agent testing is conducted in a chat-based format.
You can refine nodes and improve functionality while checking whether interactions are running smoothly.
Send a message to check today’s fortune.
Example:
My name is Joy, and my birthday is October 10, 1999. Please tell me today’s fortune based on my name and birthday.
Search for the definition of “fortune.”
Step 10: Review the Conversation Generation Process
The Agent Chat Test allows you to inspect the conversation generation logic of the agent.
Click the agent’s response to open a right-side panel showing the node-level logic behind how the reply was generated.
This feature can be used to fine-tune and improve the agent’s performance.
Under ReAct Node > Output Variables > reasonings, you can see how the ReAct Node is thinking and making decisions autonomously.
1) Using the Ability Node
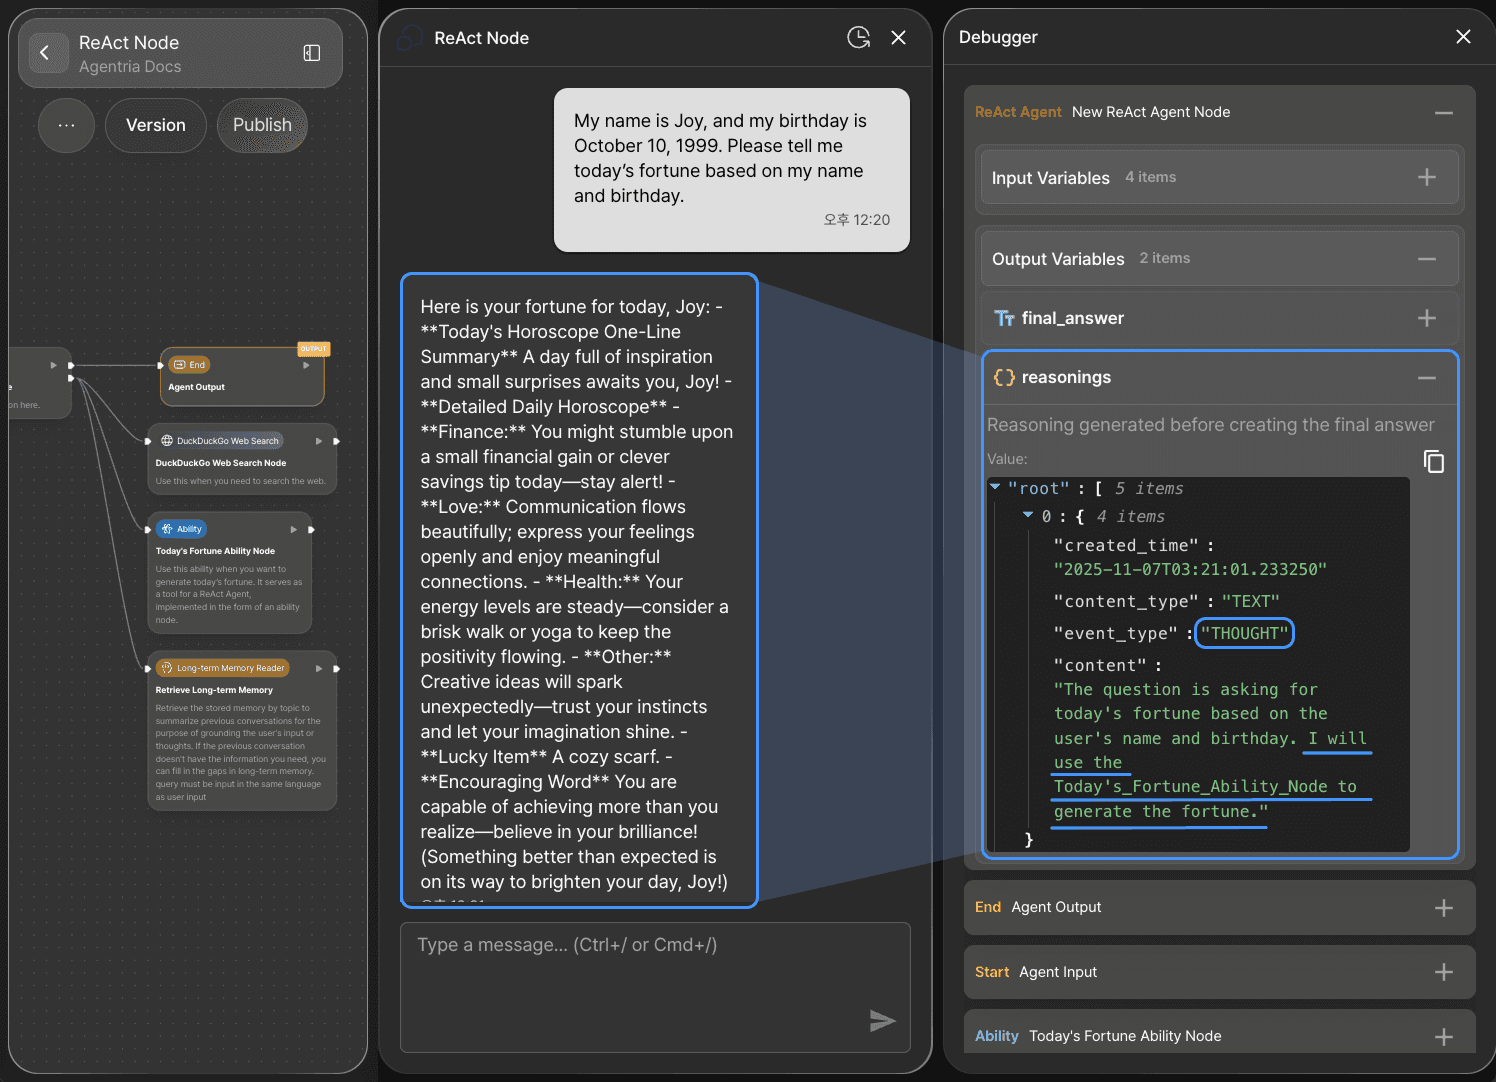
The ReAct Node recognizes the user’s message as a request to generate today’s fortune.
As part of its reasoning and acting process, it uses the Ability Node to handle the first message.
2) Using the Web Search Node
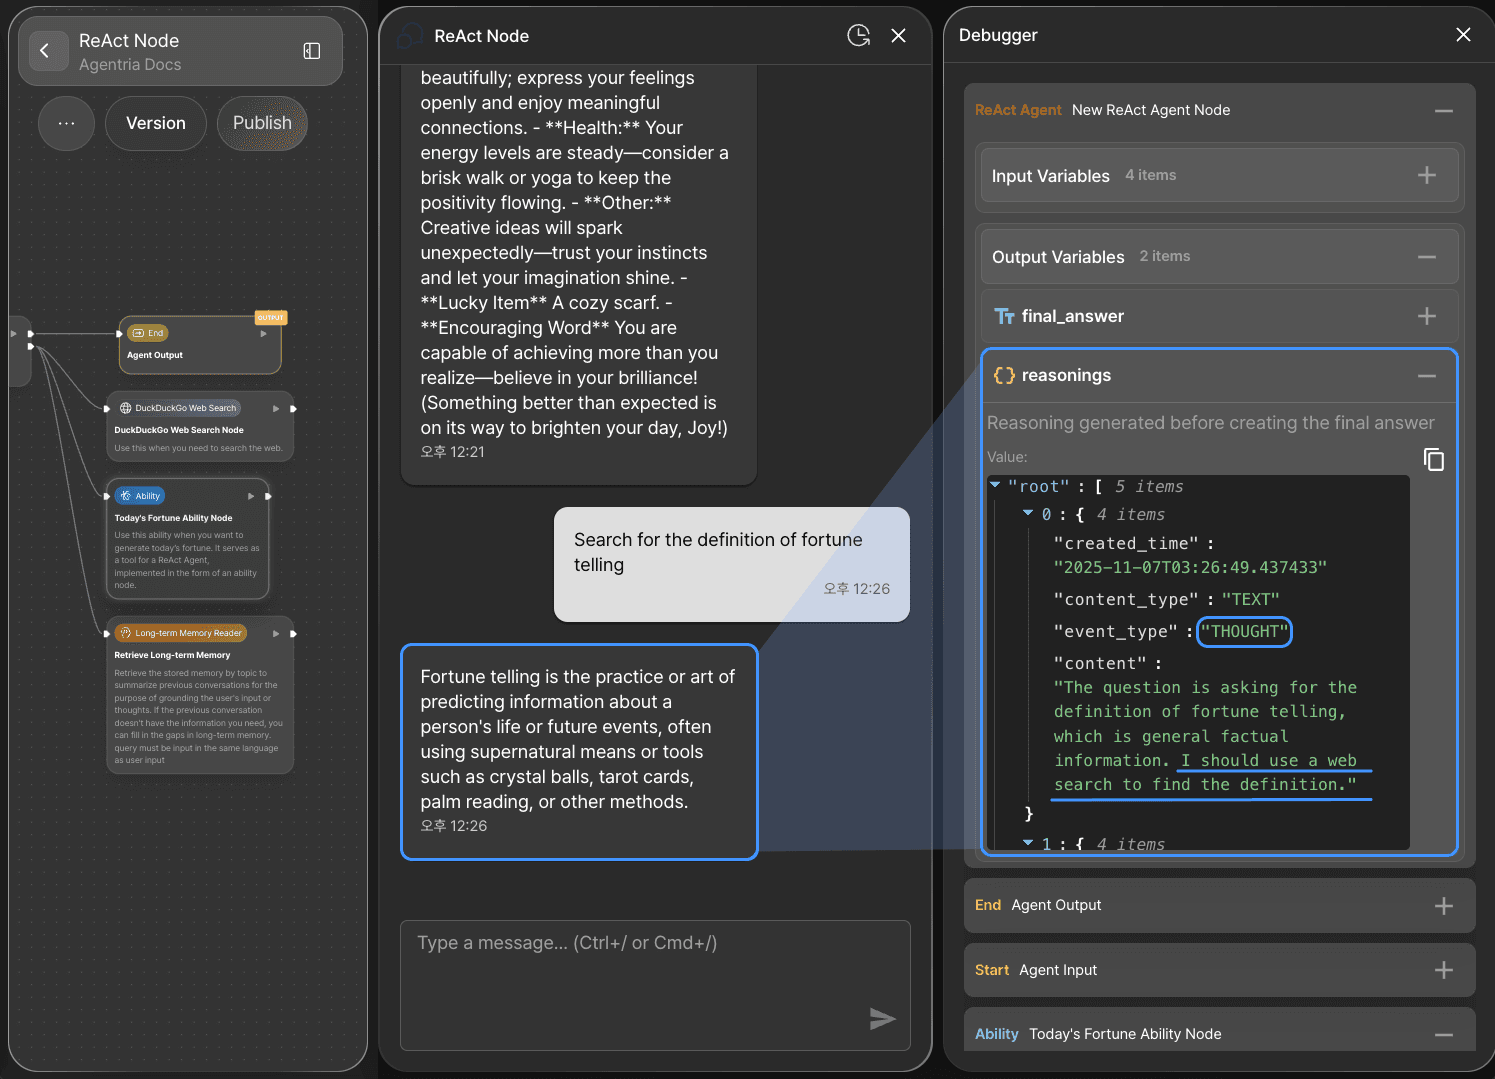
The ReAct Node recognizes the user’s message as a request to look up the definition of fortune.
As part of its reasoning and acting process, it uses the Web Search Node to handle the second message.
Next Step
🎉 Congratulations! You’ve successfully created a “ReAct Agent” using Agentria.
Now, try entering various messages in Chat Test, review the results, and adjust nodes to improve your workflow’s performance.
Agentria is a space where ideas turn into reality.
With your imagination, workflows can expand infinitely.
For more Ability examples, visit the 🔗Ability Guide.
For Agent-based examples, visit the 🔗Agent Guide.