Get Started
This tutorial for the Web Request node covers the basics of integrating external APIs for Agentria beginners.
In this tutorial, you will send an HTTP request to a public weather API and build and run an ability that uses the response data in your workflow.
Prerequisites
To get started, create a project in Agentria, then enter the Ability Canvas.
For the canvas entry steps, please refer to Step 1 (Create a project and choose a composer) in the 🔗3-Step Core Guide.
After completing this tutorial, you will be able to:
Add a Web Request node
Set the request method and URL
Configure headers
Add optional parameters
Set a timeout
Run a Node Test to check the response
Pass the response data to the next node
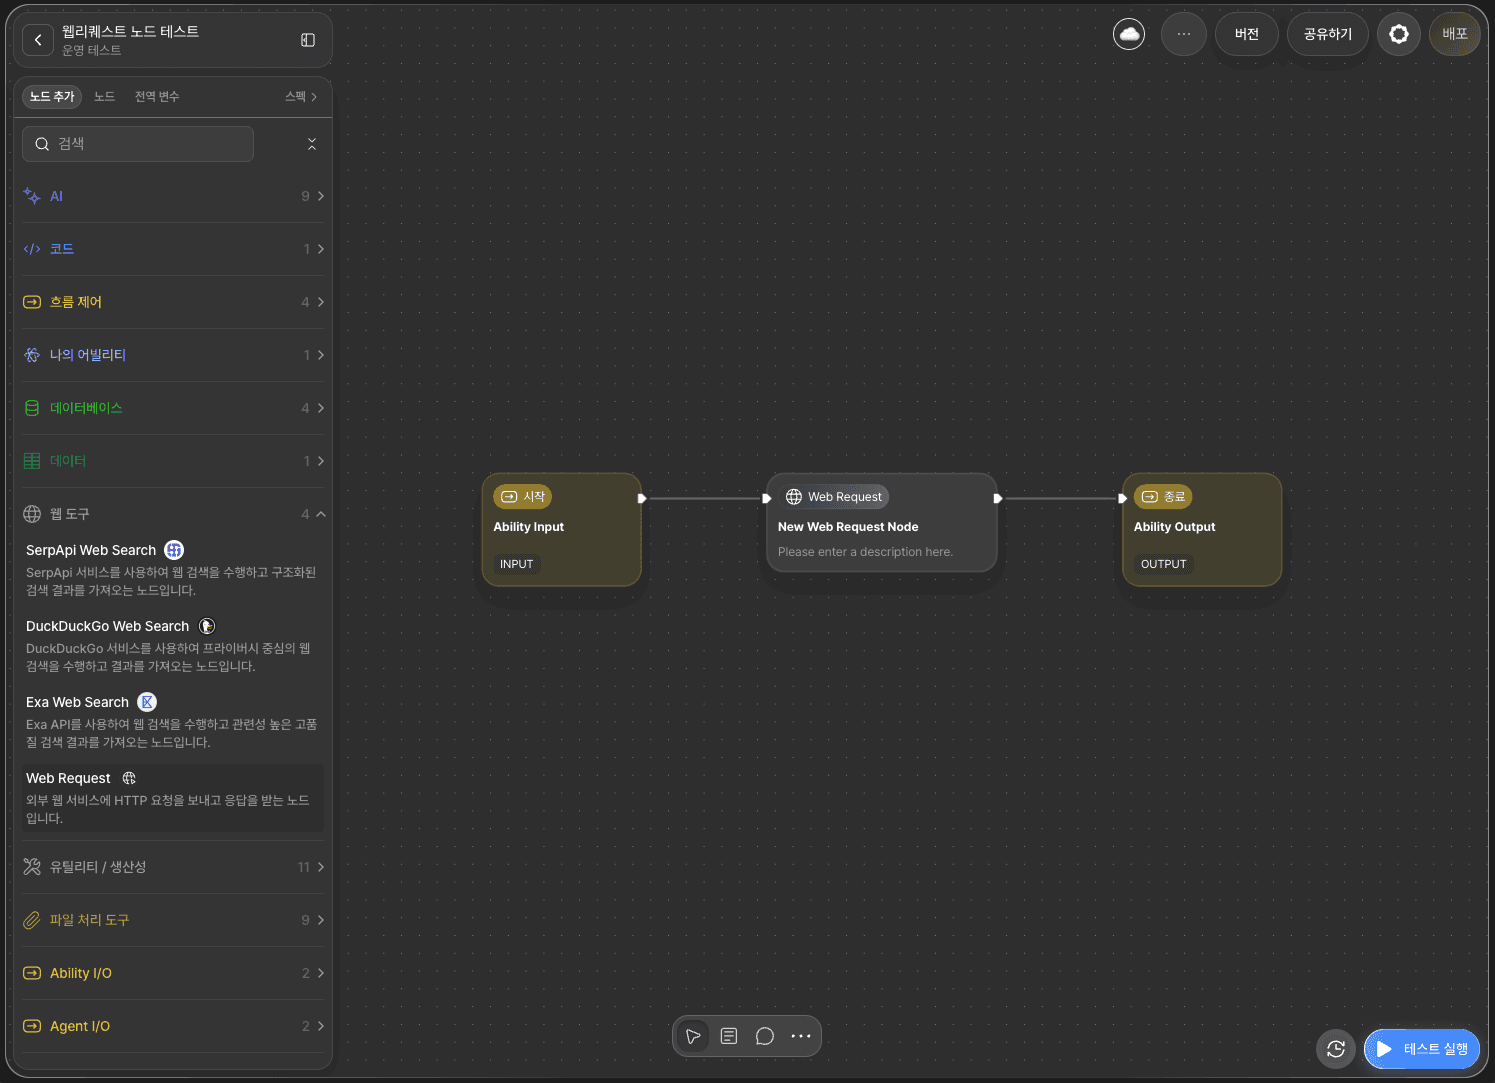
Step 1: Add a Web Request node
Click the + Add Node button in the left panel of the canvas.
From the Web Tools category, drag and drop the Web Request node onto the canvas.
Double-click the node to open the node editor in a popup.
Step 2: Set the request method

Select an HTTP method from Request Method at the top of the node editor.
GET— Use to retrieve data.POST— Use to send data to a server or create a new resource.PUT— Use to update existing data.DELETE— Use to delete data.
In this tutorial, we use GET to fetch weather data.
Step 3: Set the request URL
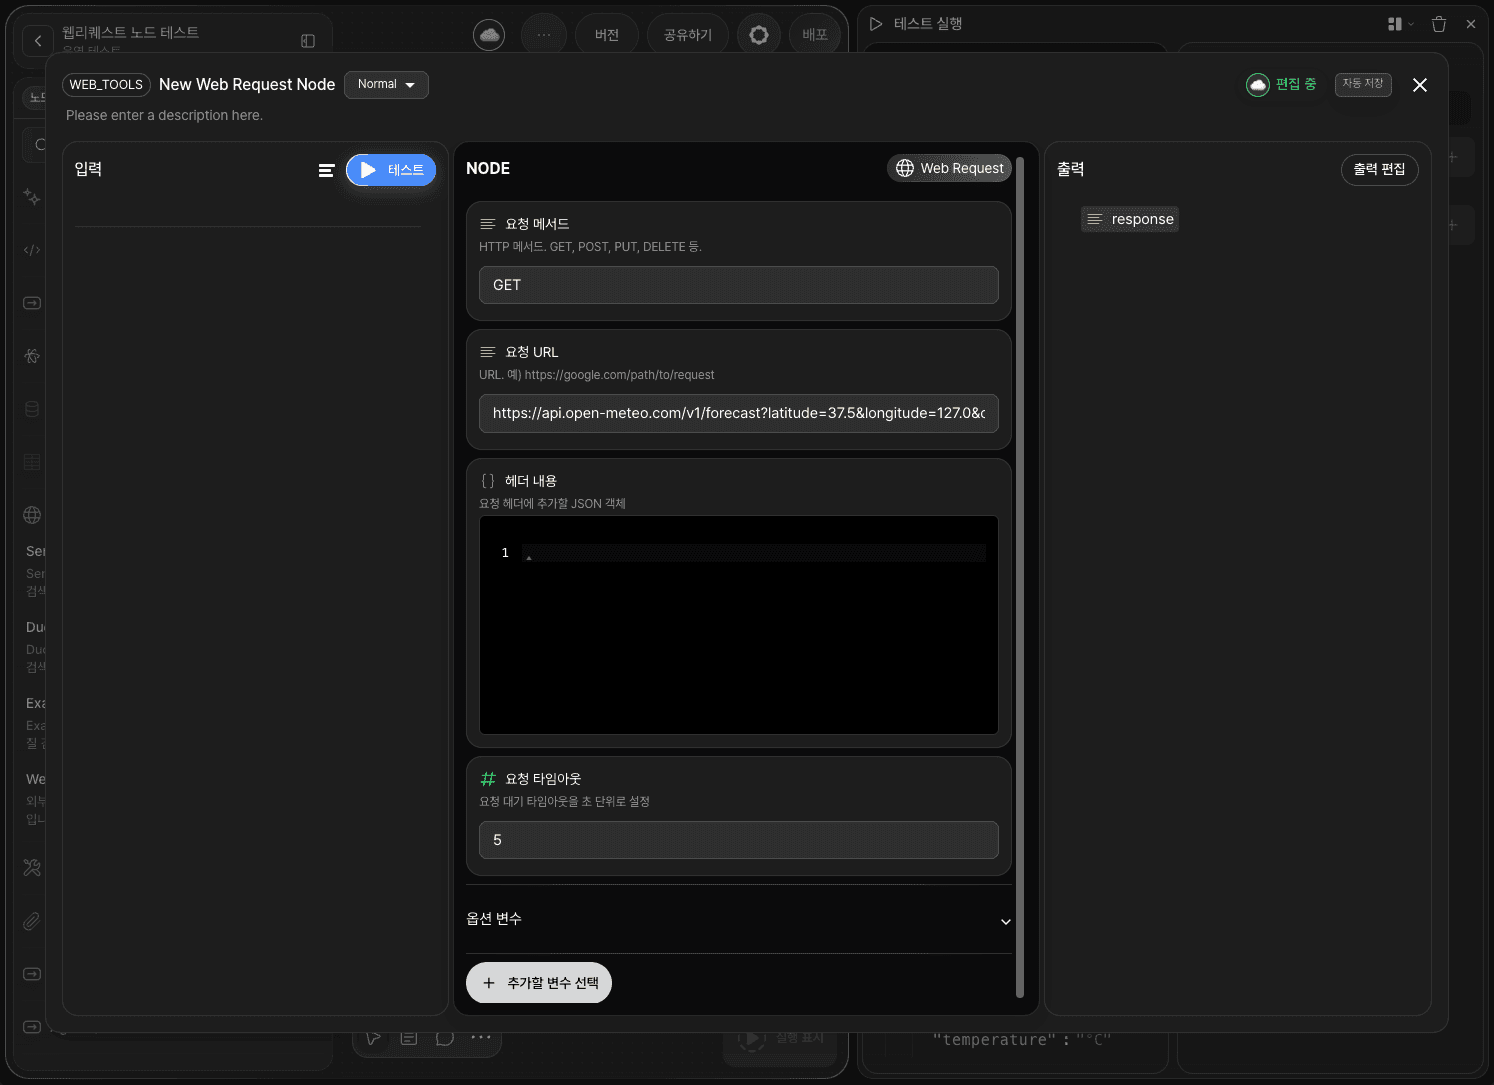
Enter the server address you want to send the request to in the Request URL field.
Example:
https://api.open-meteo.com/v1/forecast?latitude=37.5&longitude=127.0¤t_weather=true
To include dynamic values (variables) in the URL, use the path or query_params options in the optional parameters step.
Step 4: Set headers
In Header field, enter request header information in JSON format.
If the API requires authentication, add Authorization info like the following.
Example:
{ "Authorization": "Bearer YOUR_TOKEN", "Content-Type": "application/json" }
If you are using a public API that does not require authentication, you can leave this field empty.
Step 5: Add optional parameters
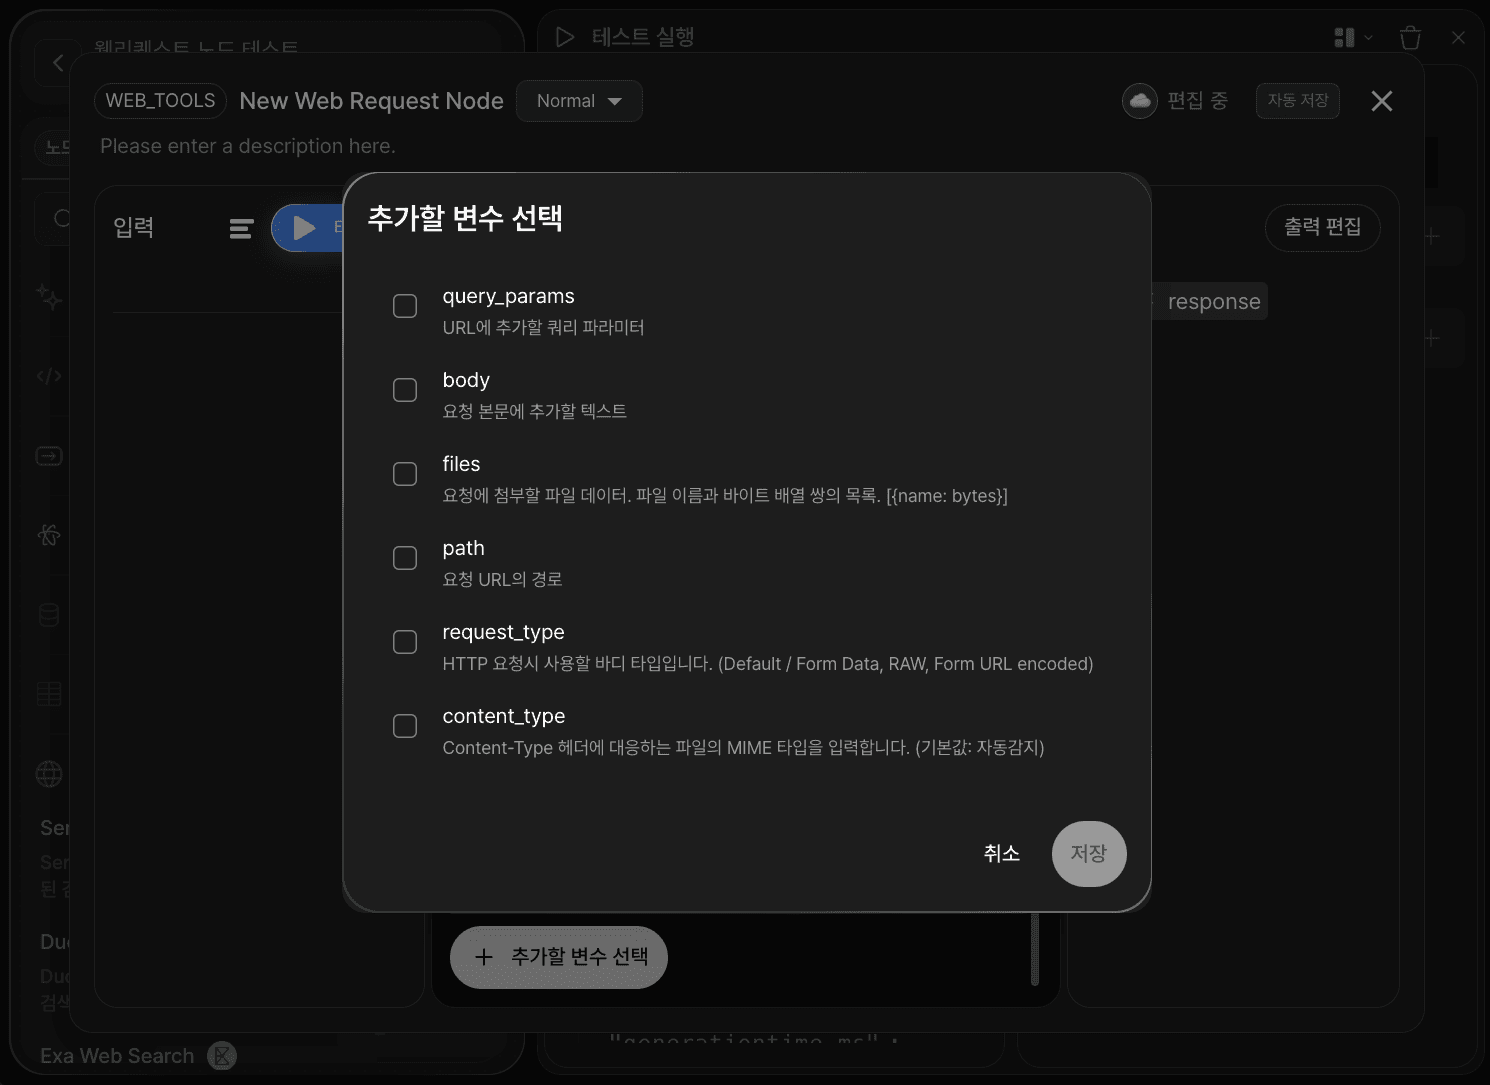
Click the button to add optional variables in the option variables section.
Enable parameters as needed.
query_params— Query parameters to add to the URL.body— Text data to include in the request body. Used with POST/PUT requests.files— File data to attach to the request. Enter in the form[{name: bytes}].path— Dynamic path segments in the request URL.request_type— Body type for the HTTP request. Choose from Default / RAW / Form Data / Form URL Encoded.content_type— MIME type for the Content-Type header. Default is auto-detected.
To bind variables passed from previous nodes, drag and drop variables to the corresponding fields.
Step 6: Set timeout
Set the waiting time in seconds in Request Timeout.
The default is 5 seconds. Increase it to prevent Timeout Errors when calling slow external APIs.
Step 7: Run a Node Test
After finishing the configuration, click TEST in the input area to run a Node Test.
🔗Node Test is a verification step you can run individually in the node editor.
By confirming the node is configured correctly before connecting it to other nodes, you can minimize errors and keep the flow stable.
When the test succeeds, the response data will appear in the response variable in the output section.
Example:
Output:
Step 8: Connect to the next node
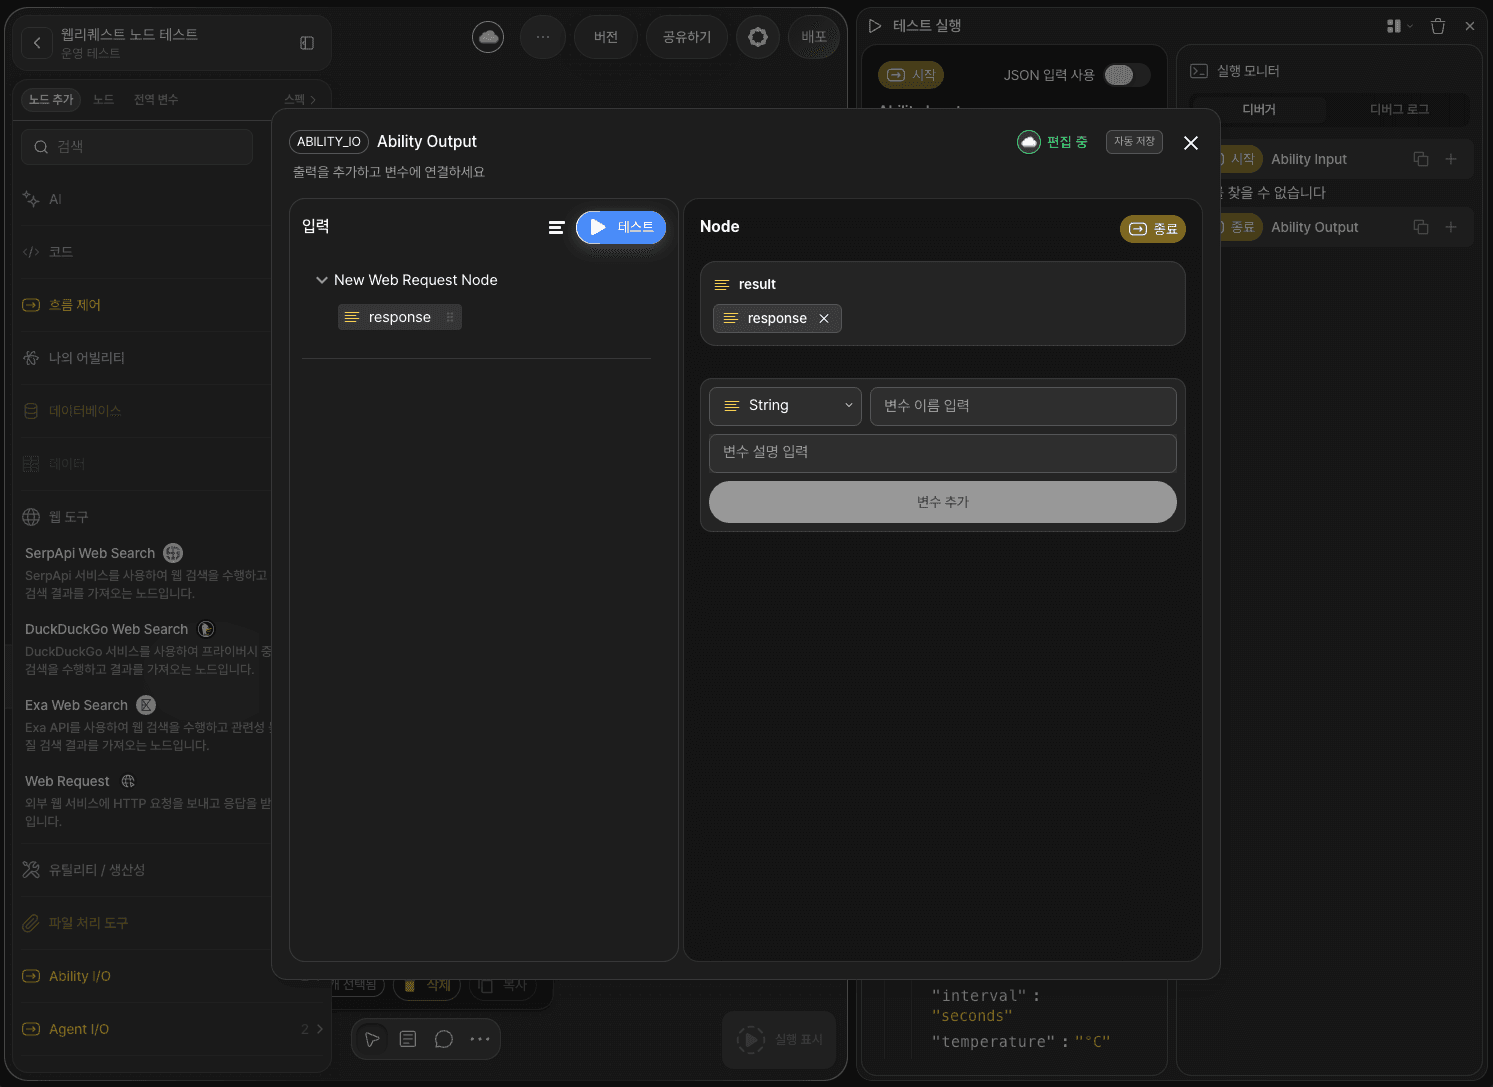
After confirming the correct response via the test, return to the canvas and connect the Web Request node’s Out-Pin to the next node’s In-Pin with an edge.
The response data is stored in the response variable and passed to the next node.
Declare a result variable in the End node and bind it to response.
(In this tutorial, you don’t need to declare variables in the Input node.)
Now the API response is passed to the End node.
This completes the “Weather API Call” workflow.
Step 10: Run the full workflow with an Ability Test
Click RUN TEST in the bottom-right of the canvas to execute the entire workflow.
Just like the Node Test, the weather API result will appear in result.
Next steps
Congratulations! You’ve completed a workflow that integrates an external API using Agentria.
Now try expanding your workflow by connecting the response data to an LLM node for summarization, or combining it with conditional branching nodes.
Agentria is a space where ideas become real.
With your imagination, workflows can be expanded endlessly.
For more ability examples, see 🔗Ability Guide.
For agent examples, see 🔗Agent Guide.