Get Started
Using Slipbox Nodes (Slipbox Query)
The Slipbox Query node connects to an Agent Loop node as a tool, searching a slipbox for relevant documents and using the results in Agent responses. It implements a RAG (Retrieval-Augmented Generation) pattern where the Agent generates accurate answers based on operational knowledge stored in the slipbox.
In this tutorial, build the "Agentria Docs Chatbot" Agent workflow — connecting the Slipbox Query node to a slipbox built from Agentria Docs to answer questions about the documentation.
Before You Begin
A slipbox must be set up in your project before starting this tutorial. For instructions on building a slipbox, see the 🔗Slipbox Guide.
After completing this tutorial, you will be able to:
Connect the Slipbox Query node as a tool to an Agent Loop node.
Link a slipbox to the Slipbox Query node.
Set a persona and guidelines on the Agent Loop node.
Write prompts that reference slipbox search results in an LLM node.
Verify the slipbox-powered chatbot using the chat test.
Workflow Overview

The core of this tutorial is the Slipbox Query node.
The Slipbox Query node is registered as a tool on the Agent Loop node, allowing the Agent to query the slipbox as needed. Connect LLM node A (default) to the llm_model_node pin and LLM node B (fallback) to the fallback_llm_model_node pin on both the Agent Loop node and the Slipbox Query node to ensure reliable response generation.
Step 1: Verify Prerequisites

A slipbox must exist in your project to use the Slipbox Query node. For instructions, see the 🔗Slipbox Guide.
In this tutorial, Agentria Docs is used as the slipbox to serve as Agent knowledge.
Step 2: Create an Agent

Create a new Agent.
What is a Desk Agent? A Desk Agent runs in Desk mode in the client app and can control the desktop environment using Desk tools. This tutorial has nothing to do with desktop control, so create a standard Agent.
Step 3: Arrange and Connect the Workflow
Add the following nodes to the canvas and arrange them as shown in the image.
Slipbox Query node: Click+Add Node→ add from theSlipboxcategory.LLM node A,LLM node B: Click+Add Node→ add from theAIcategory.
Once arranged, connect the nodes in the following order.
Connect edges:
Input node→Agent Loop node→Output node.Connect the
toolspin ofAgent Loop node→Slipbox Query node.Connect the
llm_model_nodepin ofAgent Loop node→LLM node A.Connect the
fallback_llm_model_nodepin ofAgent Loop node→LLM node B.Connect the
llm_model_nodepin ofSlipbox Query node→LLM node A.Connect the
fallback_llm_model_nodepin ofSlipbox Query node→LLM node B.
fallback_llm_model_nodeis a backup LLM that runs when the default LLM (LLM node A) fails to respond.
Step 4: Configure the Agent Loop Node — Input Binding
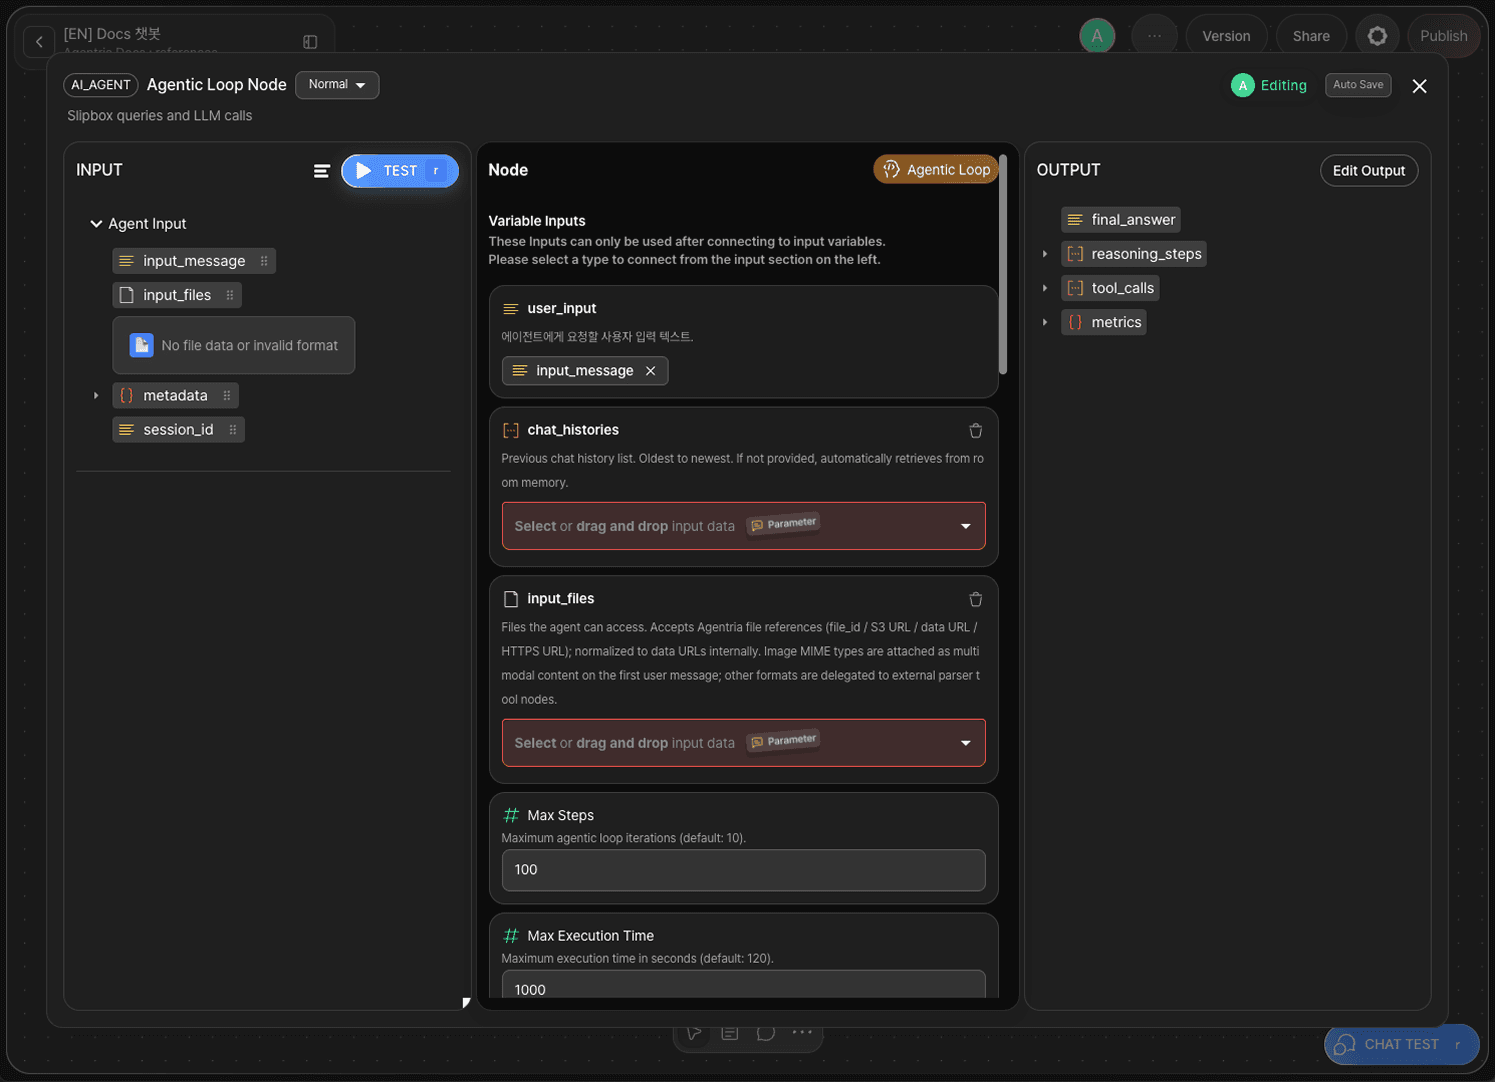
No variables need to be declared in the Input node for this tutorial. Double-click Agent Loop node to enter the Node Editor.
Drag and drop input_message onto the user_input adapter variable to bind it.
Step 5: Configure the Agent Loop Node — Persona and Guidelines
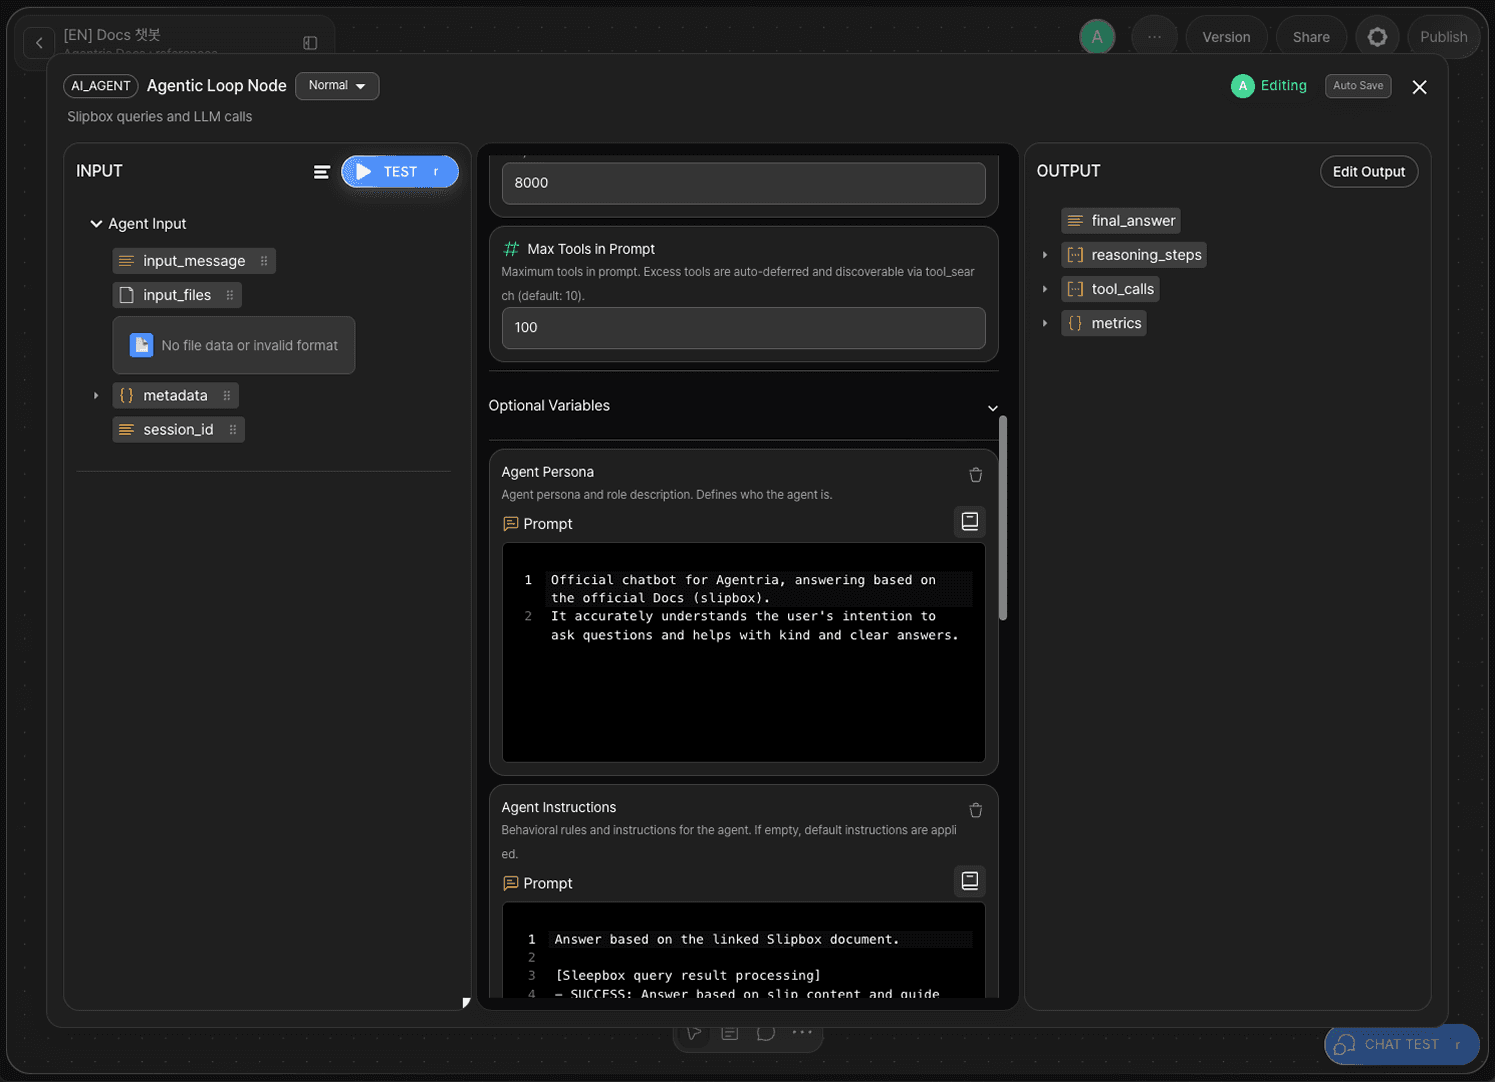
Add optional variables to improve chatbot performance. Add the Agent Persona and Agent Guidelines optional variables.
Optional Variable | Description |
|---|---|
Agent Persona | Defines the Agent's role. In this tutorial, set to "Agentria Official Chatbot" — an assistant that references Agentria Docs to provide clear answers. |
Agent Guidelines | Guides how the Agent behaves. Prompt it to respond honestly when the slipbox has no relevant information. |
Step 6: Configure the Slipbox Query Node
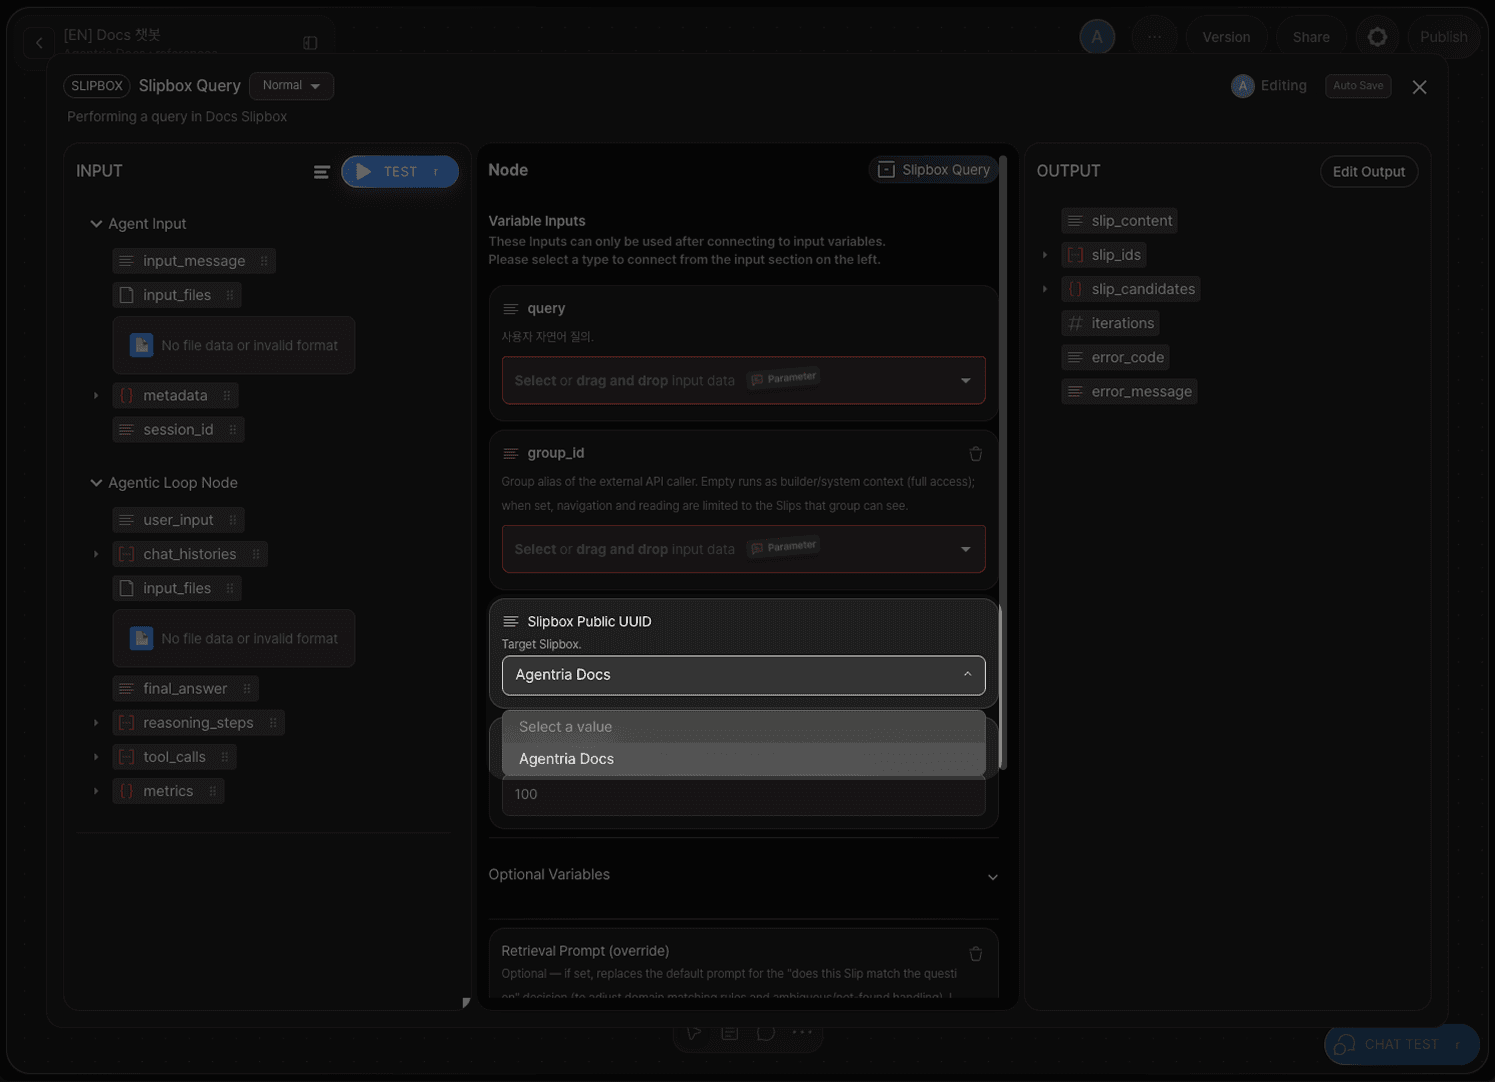
Double-click Slipbox Query node to enter the Node Editor.
The Slipbox Query node provides the following option.
Option | Required | Description |
|---|---|---|
| Required | Enter the public UUID of the slipbox to connect. |
Select the slipbox in the Slipbox Public UUID section. In this tutorial, connect the Agentria Docs slipbox.
Step 7: Configure the LLM Node

Double-click LLM node A to enter the Node Editor. Write the system prompt and user prompt.
In the user prompt, drag and drop the variables for the query and slipbox search results to reference them.
Configure LLM node B identically to LLM node A. LLM node B (fallback) acts as a backup when LLM node A (default) fails to generate a response.
Step 8: Configure the Output Node
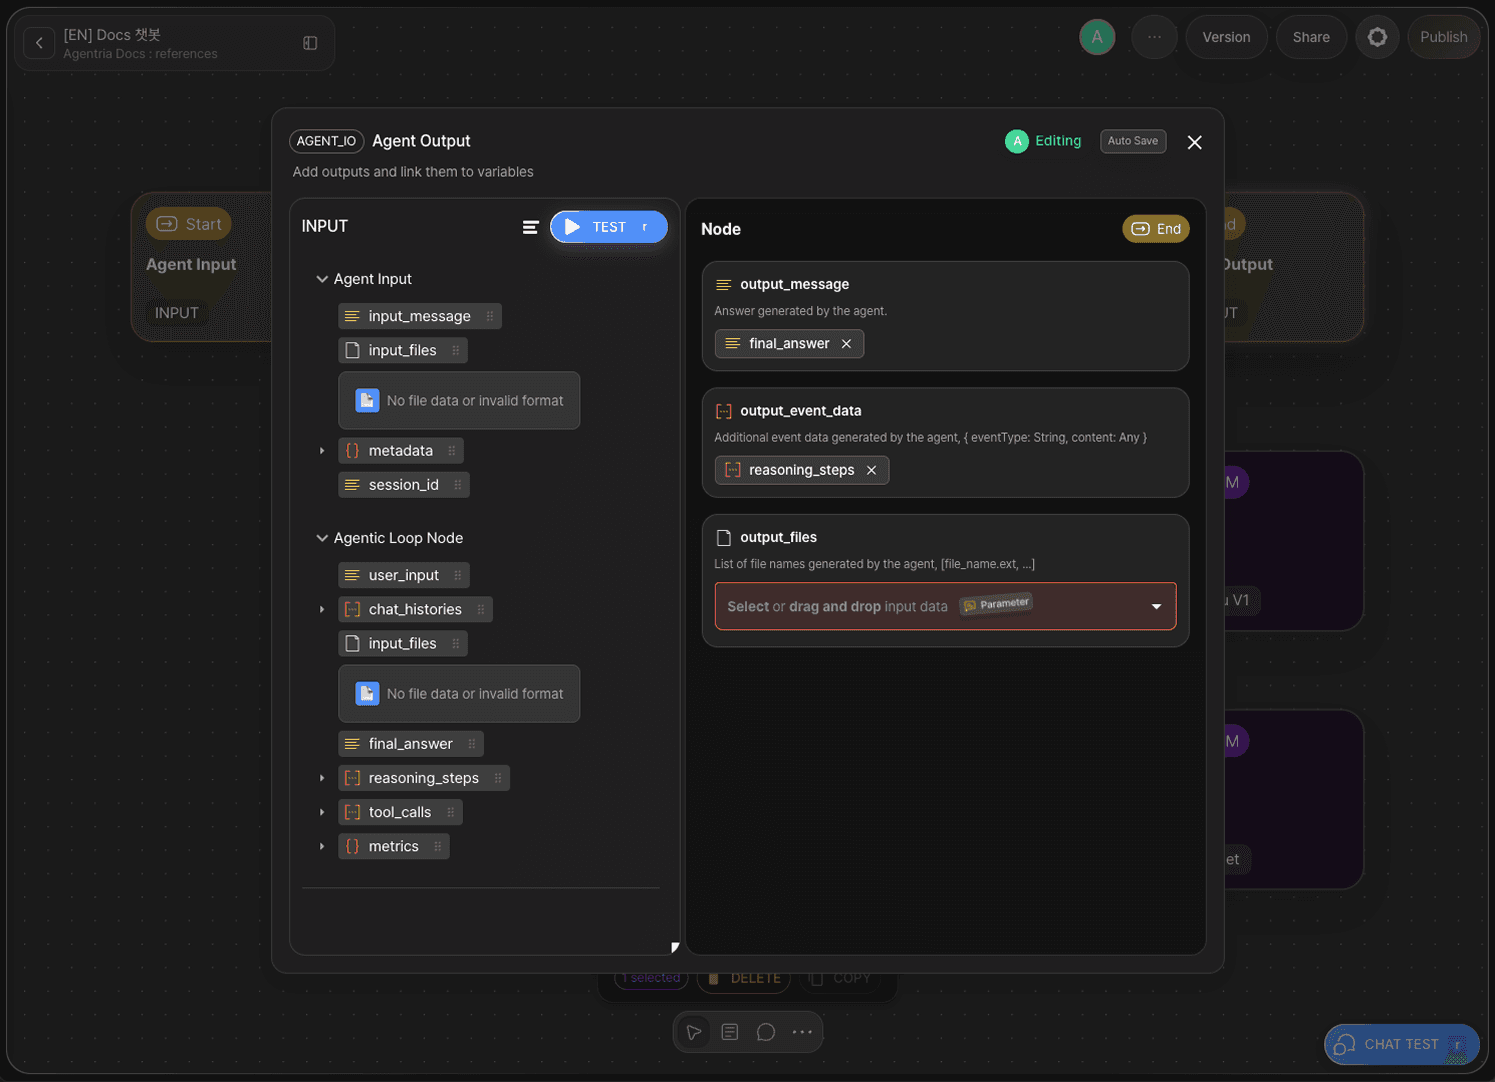
Double-click Output node to enter the Node Editor.
Drag and drop
final_answeronto theoutput_messageadapter variable.Drag and drop
reasoning_stepsonto theoutput_event_dataadapter variable.
Step 9: Run the Chat Test
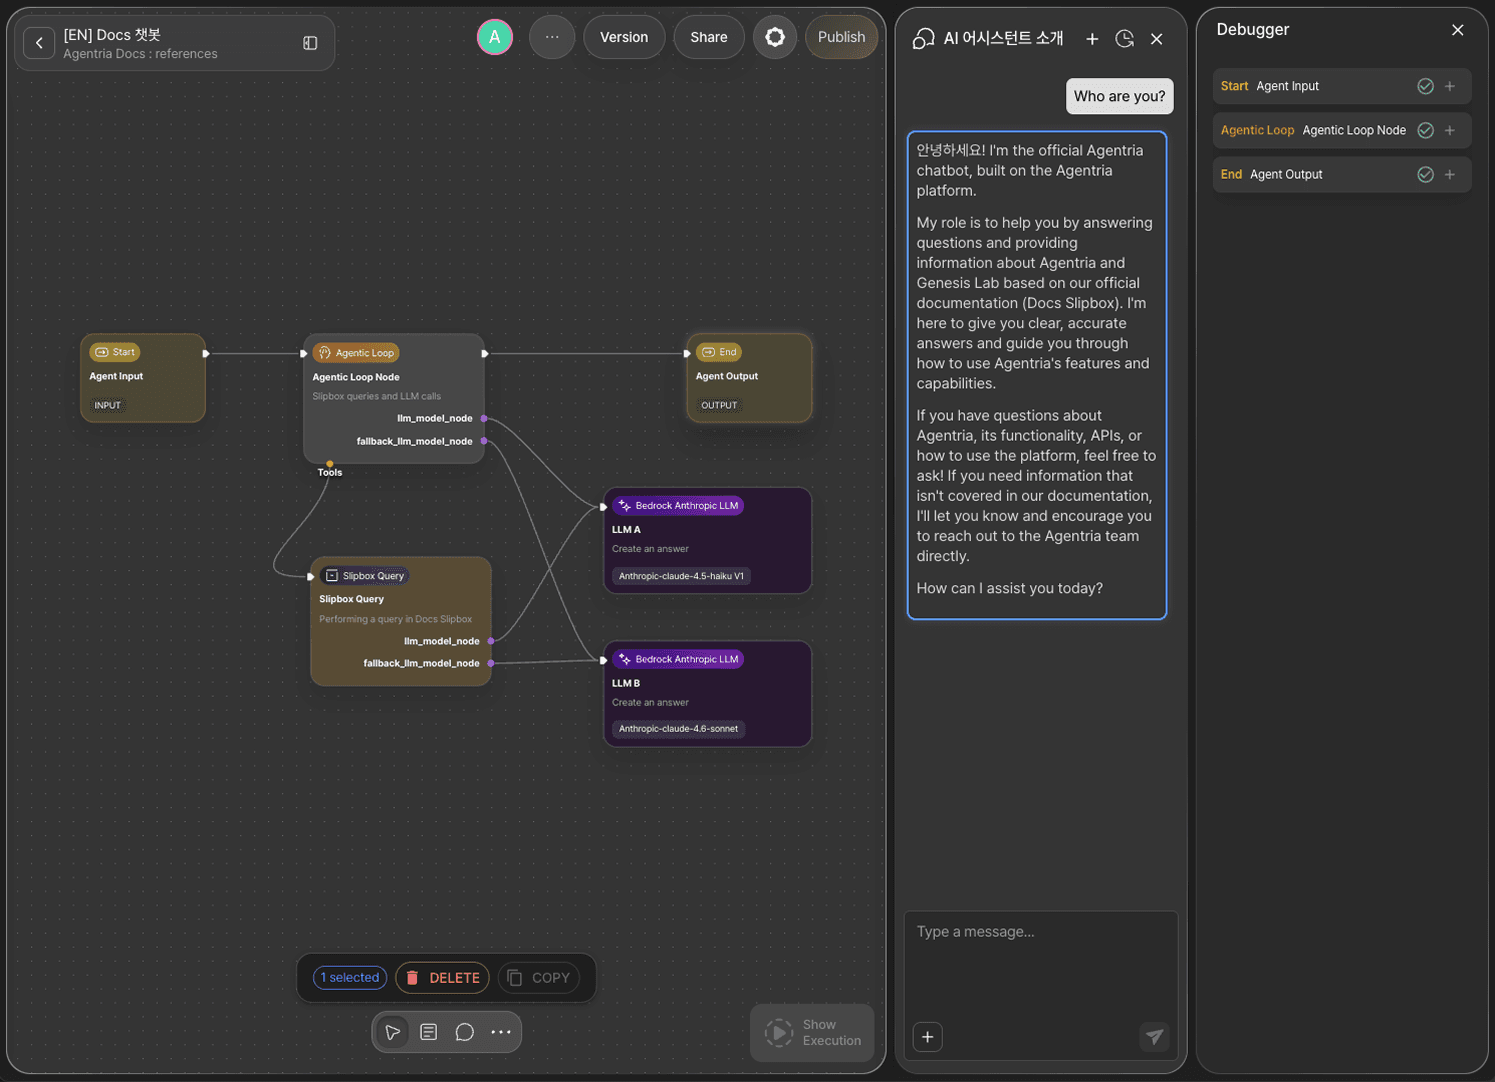
Use the chat test to verify the chatbot. Ask "Who are you?" and confirm the Agent responds as "Agentria Official Chatbot" based on the persona set in the Agent Loop node.
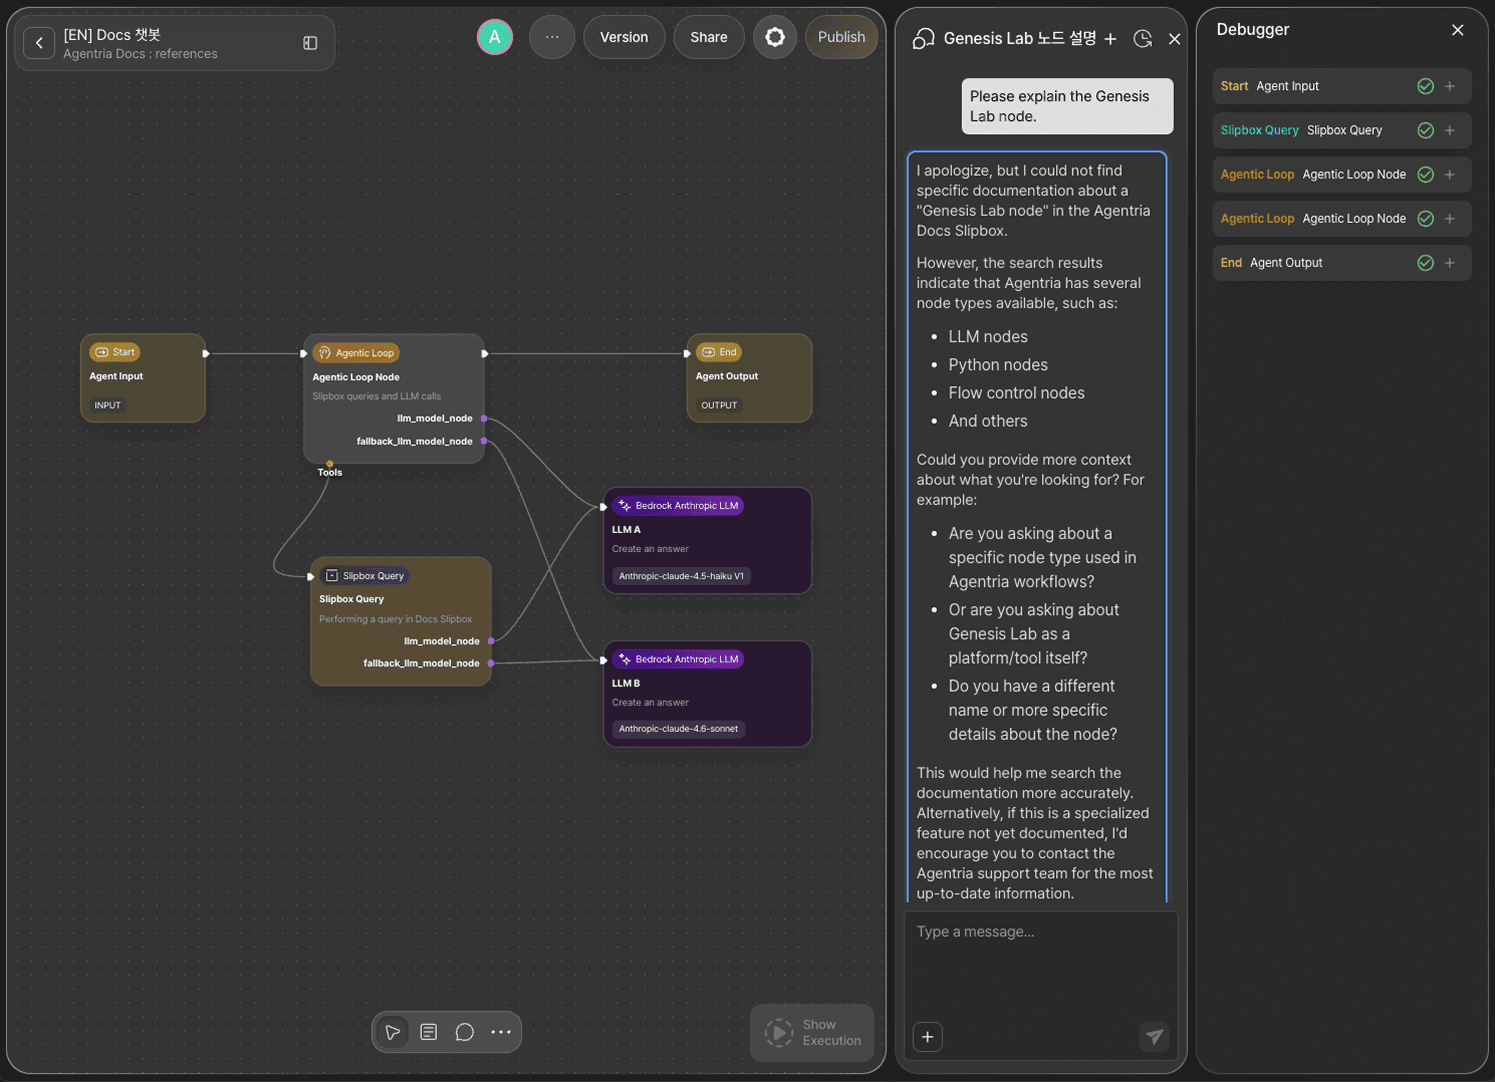
Ask "Tell me about Genesis Lab nodes." The Agent honestly responds that no relevant information is available — because the Agent Loop node's guidelines include this exception handling.

Ask a real user question such as "Are there any Python node usage examples?" and confirm the Agent answers accurately based on the slipbox content.
Next Steps
🎉 Congratulations! You've successfully built the "Agentria Docs Chatbot" workflow using Agentria.
Deploy this chatbot via API to use it in production. For deployment instructions, see the 🔗API Release Guide.
Agentria is a place where ideas become reality—your workflow can expand infinitely with your creativity.
For more Ability examples, visit the 🔗Ability Guide page.
For Agent-based examples, visit the 🔗Agent Guide page.