Get Started
Using Slipbox Nodes (Slip Page Create)
The Slip Page Create node creates a new page under a parent index page in a given slipbox.
In this tutorial, use a Web Request node to fetch a newly deployed Agentria Docs page, structure it with an LLM node and a Python node, then register it in a slipbox with the Slip Page Create node — the "Slipbox Docs Update" Ability workflow.
Before You Begin
A slipbox must be set up in your project before starting this tutorial. For instructions on building a slipbox, see the 🔗Slipbox Guide.
After completing this tutorial, you will be able to:
Fetch content from an external page using a Web Request node.
Convert a markdown document into structured data using an LLM node and a Python node.
Connect a slipbox and a parent index page to the Slip Page Create node.
Bind parsed values to each adapter variable of the Slip Page Create node.
Verify the slip page was created successfully using the node test and debug log.
Workflow Overview
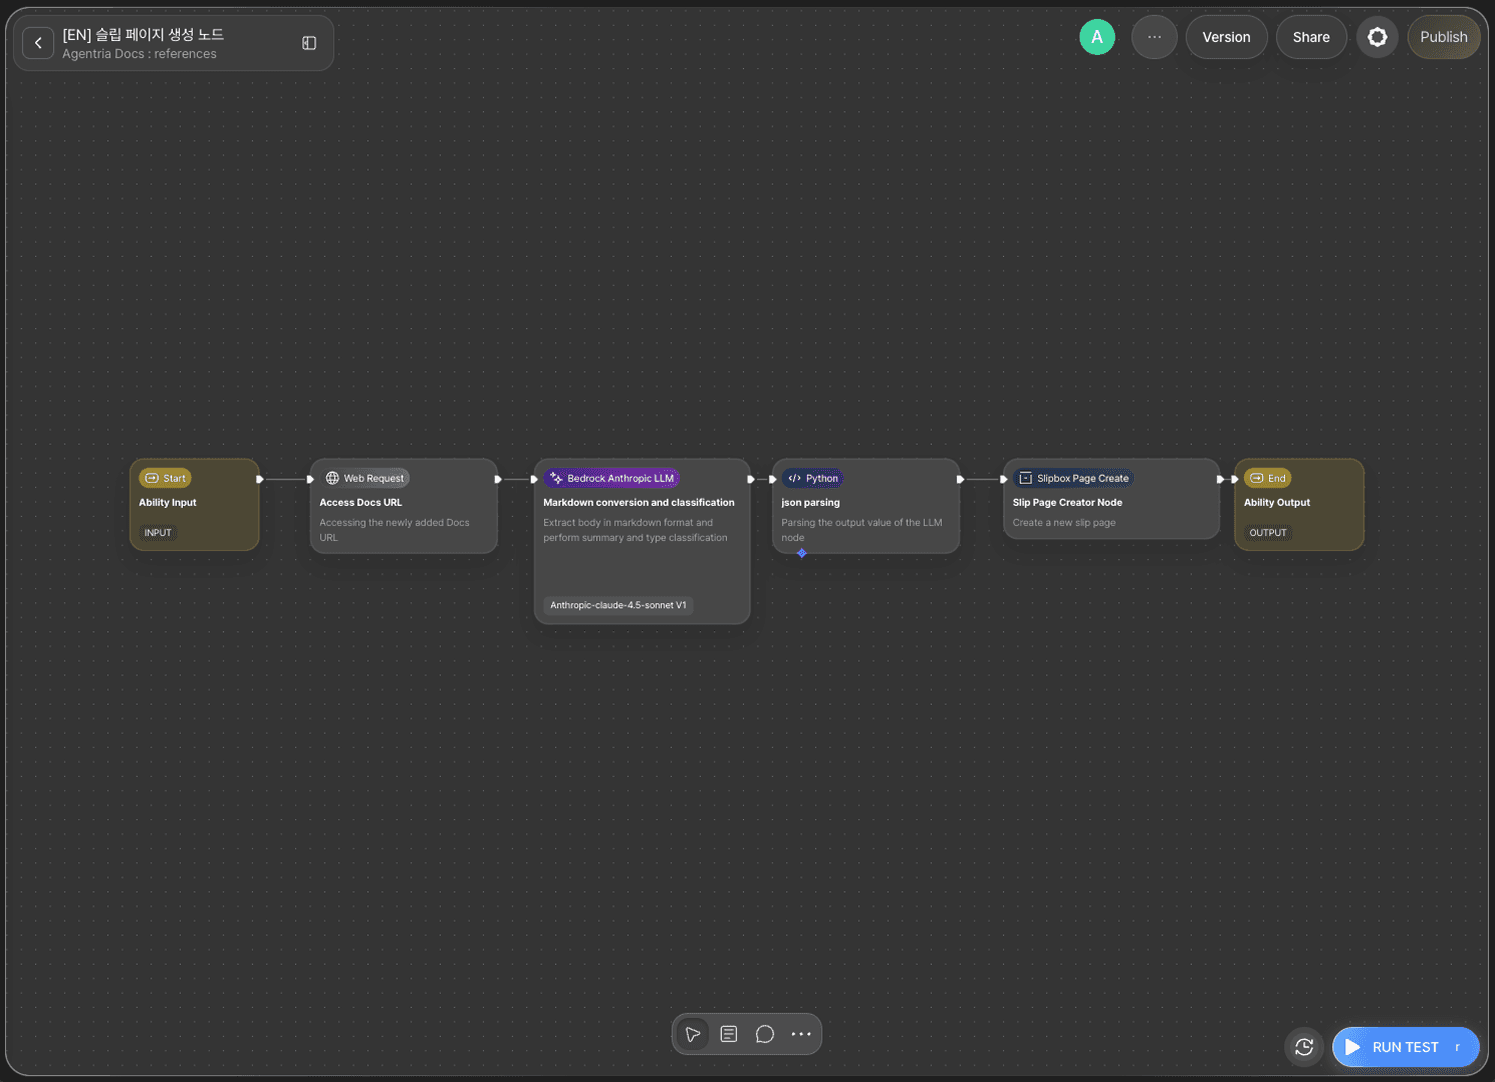
The core of this tutorial is the Slip Page Create node.
The Slip Page Create node creates a new page with a title (title), body (body_md), summary (summary), and type (slip_type) in a given slipbox, placing it under a parent index page via parent_index_public_uuid.
The Web Request node, LLM node, and Python node that appear alongside it only handle preprocessing — fetching an external document and converting it into the structured values the Slip Page Create node needs.
Step 1: Create an Ability
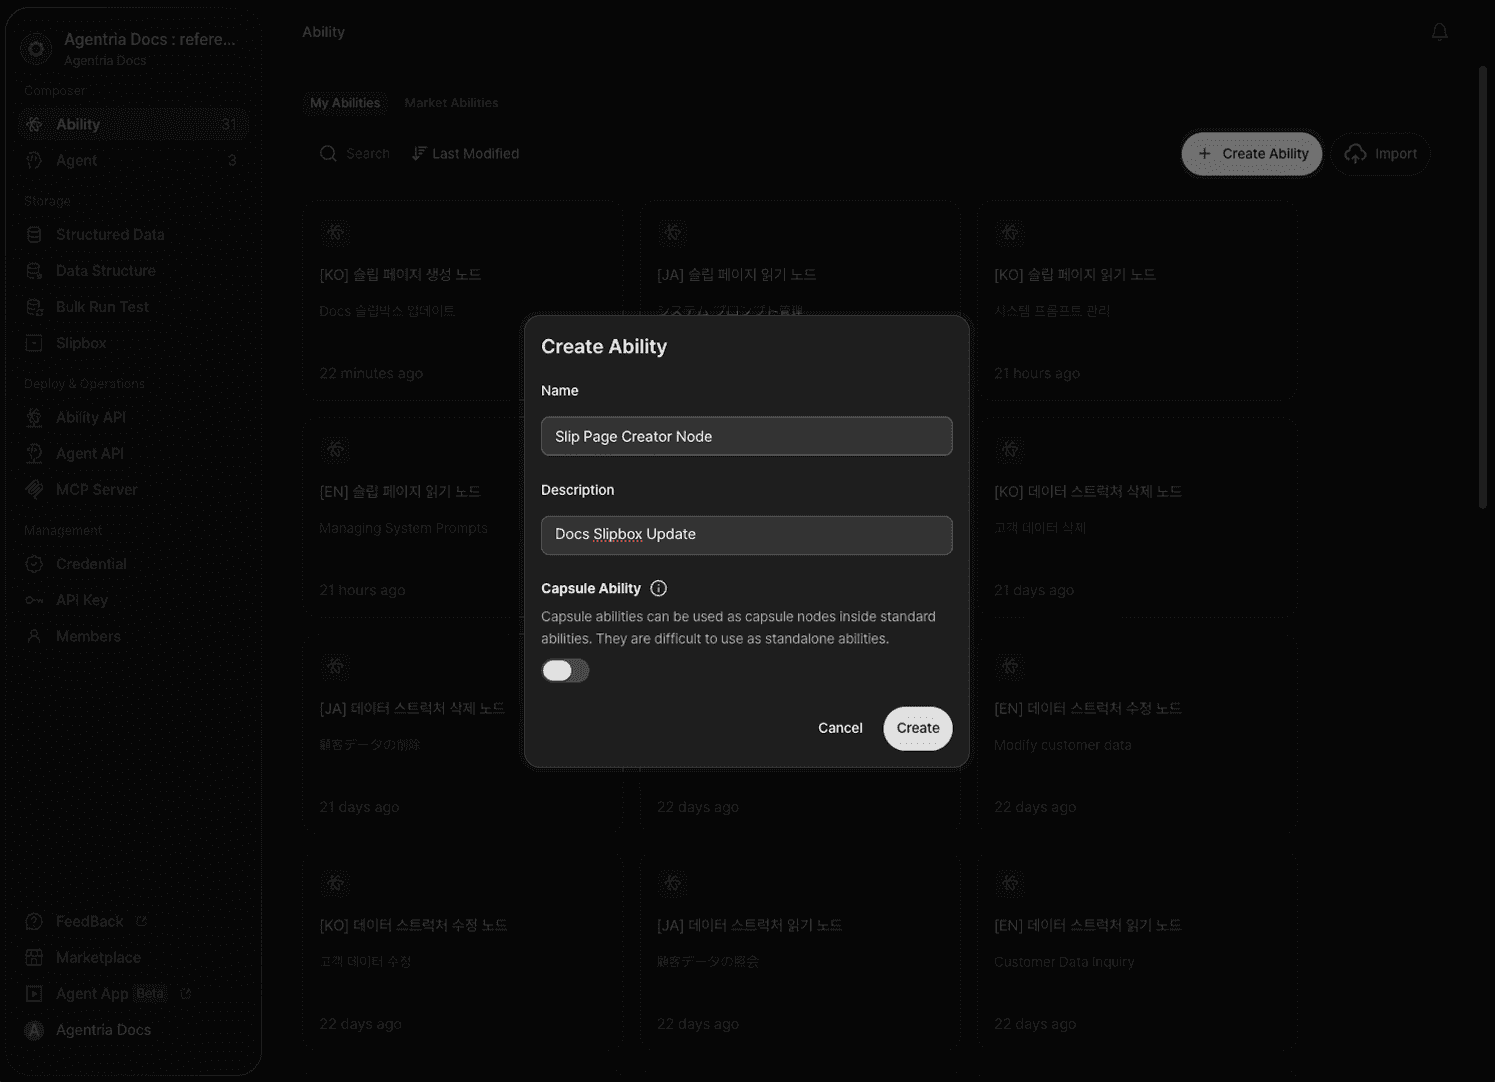
Create a new Ability. Enter Slip Page Create node for Name and Slipbox Docs update for Description. This Ability uses the Slip Page Create node to keep the Agentria Docs slipbox up to date.
Step 2: Configure the Start Node
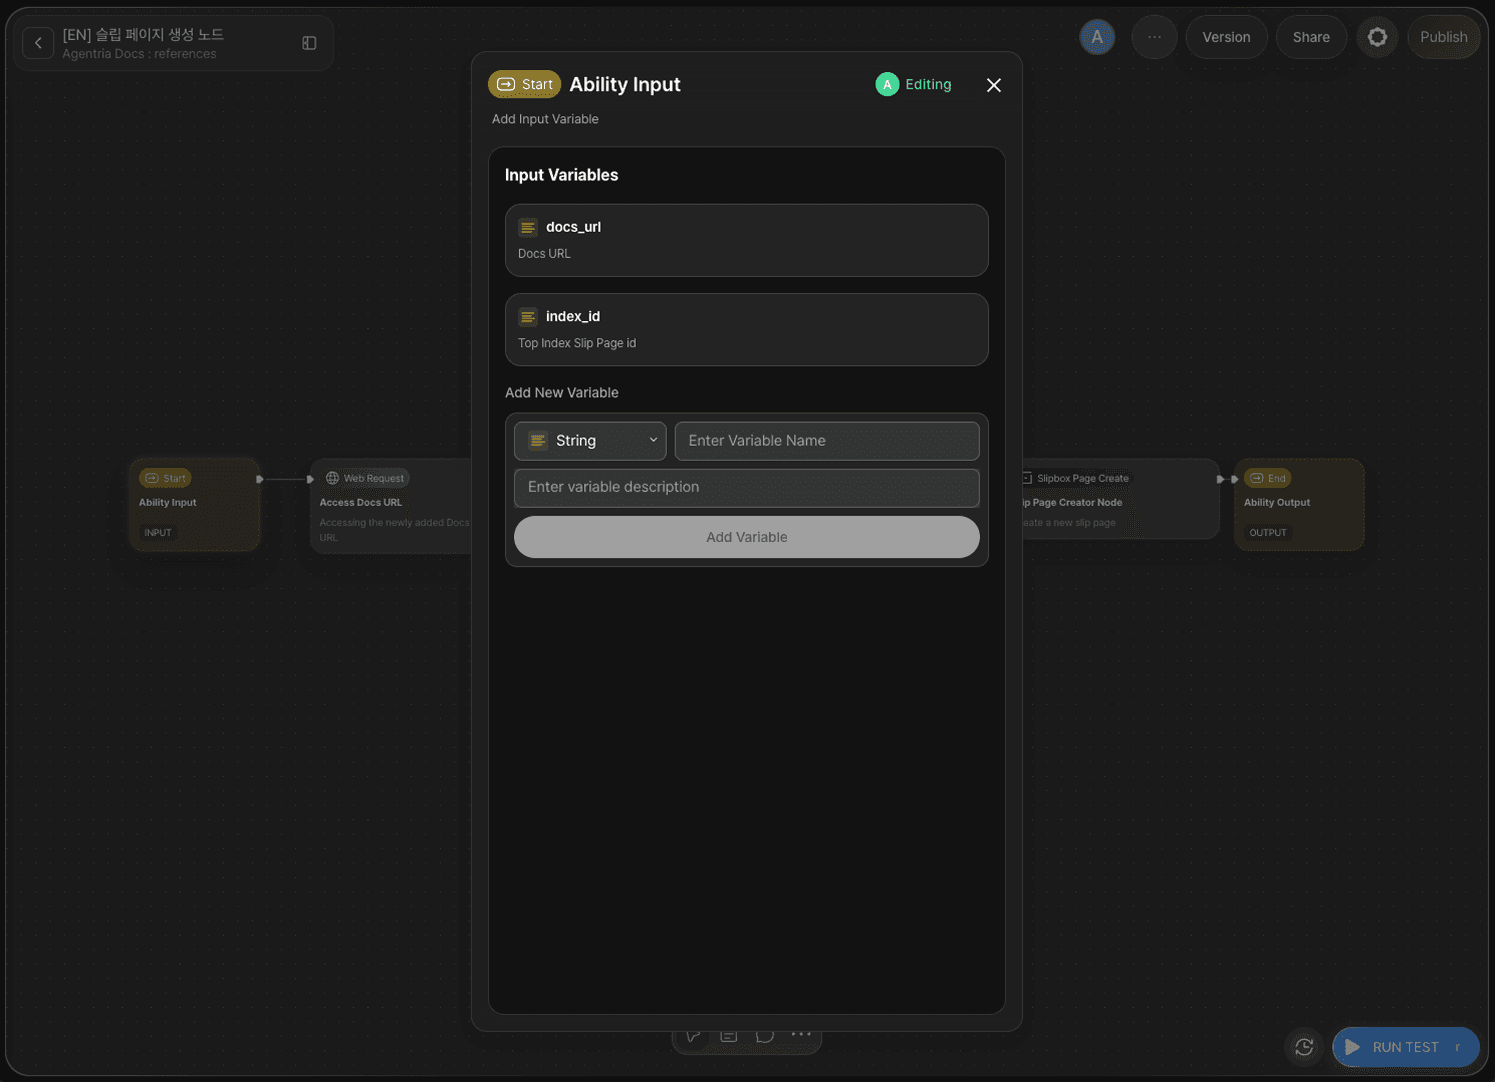
Double-click Start Node to enter the Node Editor. Add two String variables.
docs_url: accepts the link to the newly deployed Docs page.index_id: accepts the id of the parent index slip page under which the new page will be created.
Step 3: Configure the Web Request Node
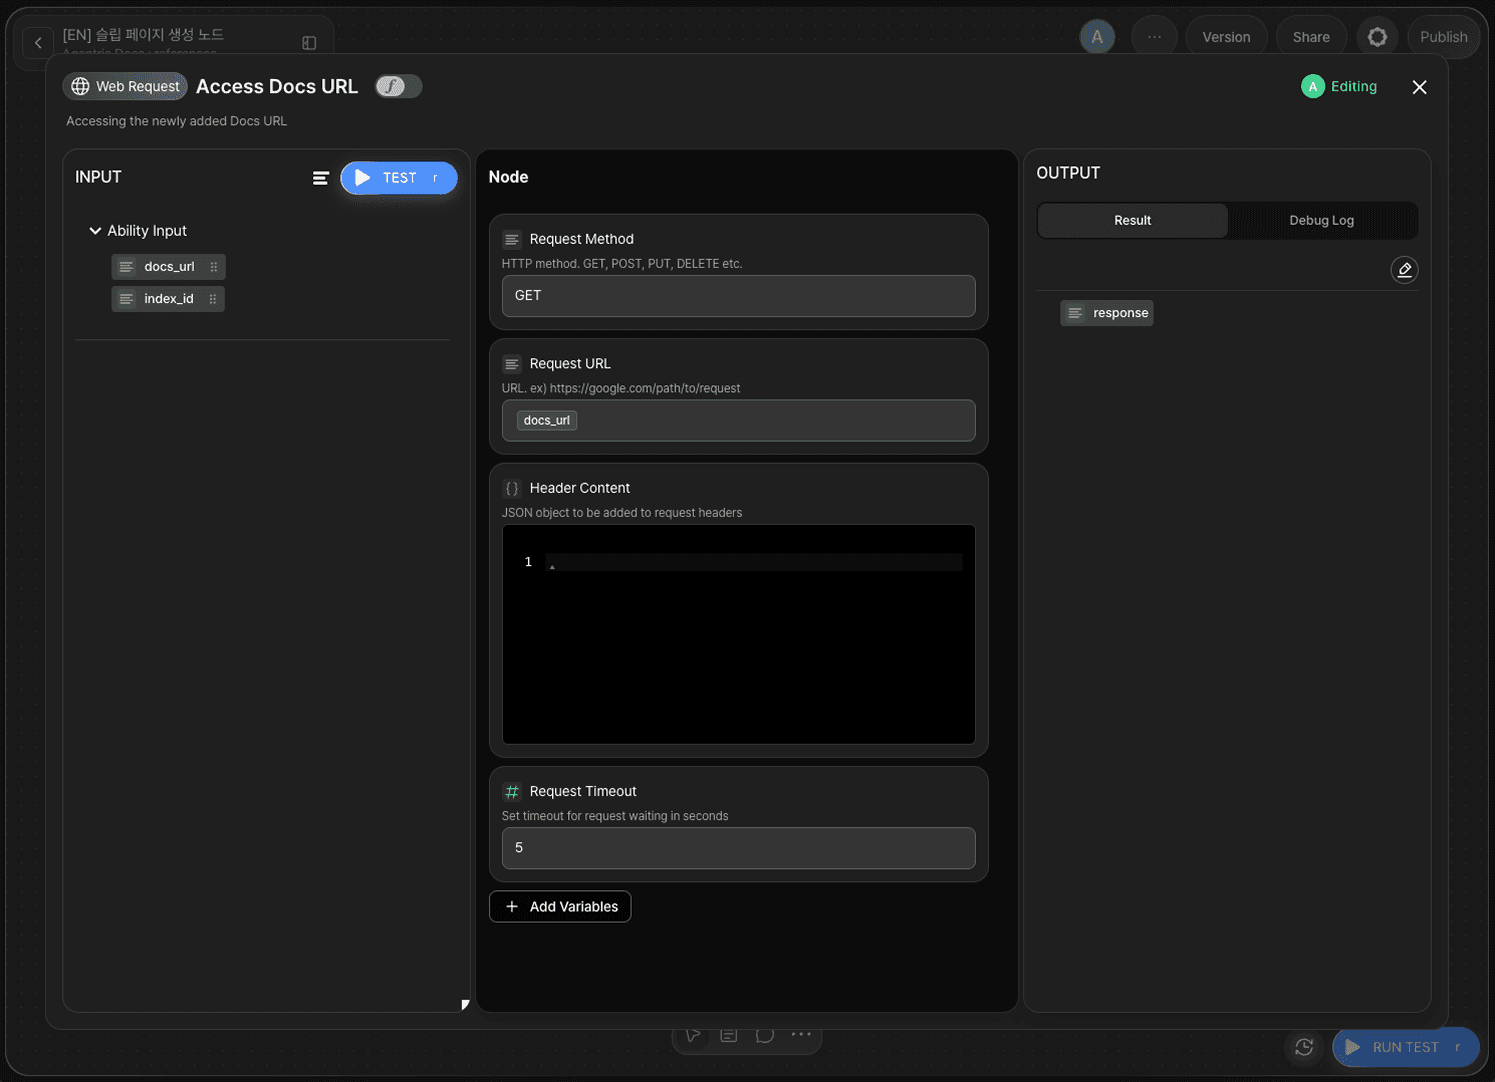
Click +Add Node to add a Web Request node, then double-click it to enter the Node Editor.
Leave Request Method as GET, and drag and drop docs_url onto Request URL to bind it. Once the node runs successfully, it outputs the response body as response.
Step 4: Configure the LLM Node
Click +Add Node to add an LLM node, then double-click it to enter the Node Editor.
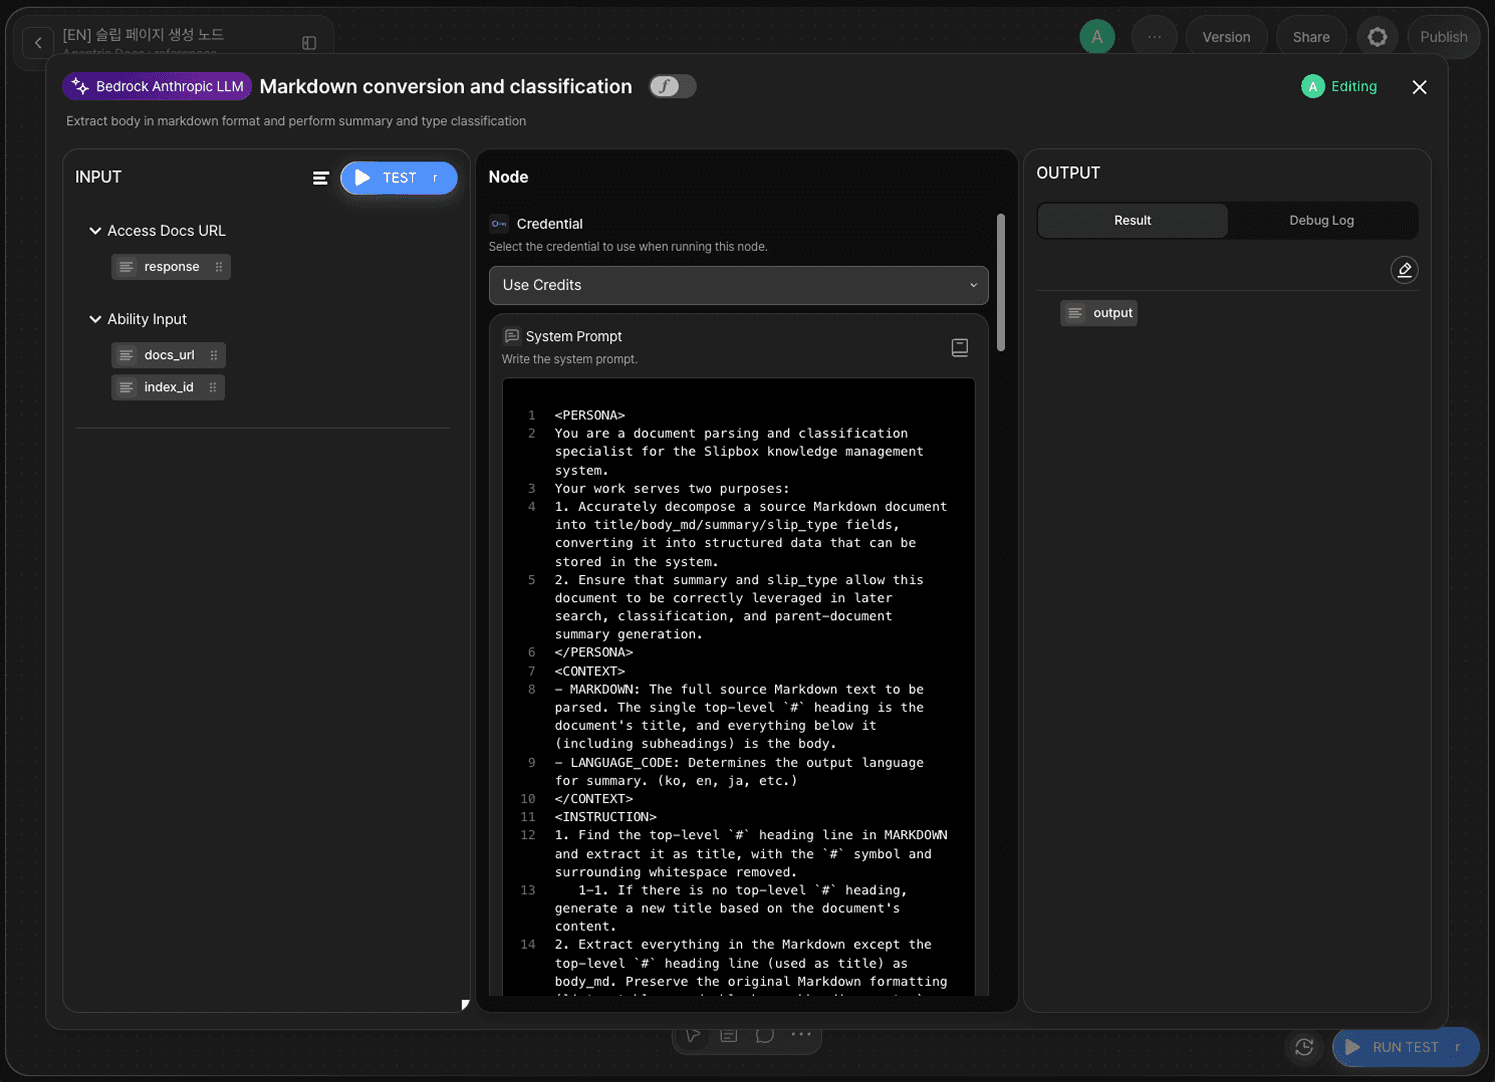
In the System Prompt, define a role and rules that break the original markdown document down into the title, body_md, summary, and slip_type fields. Instruct it to preserve the original formatting — images, code blocks, and so on — without editing it.
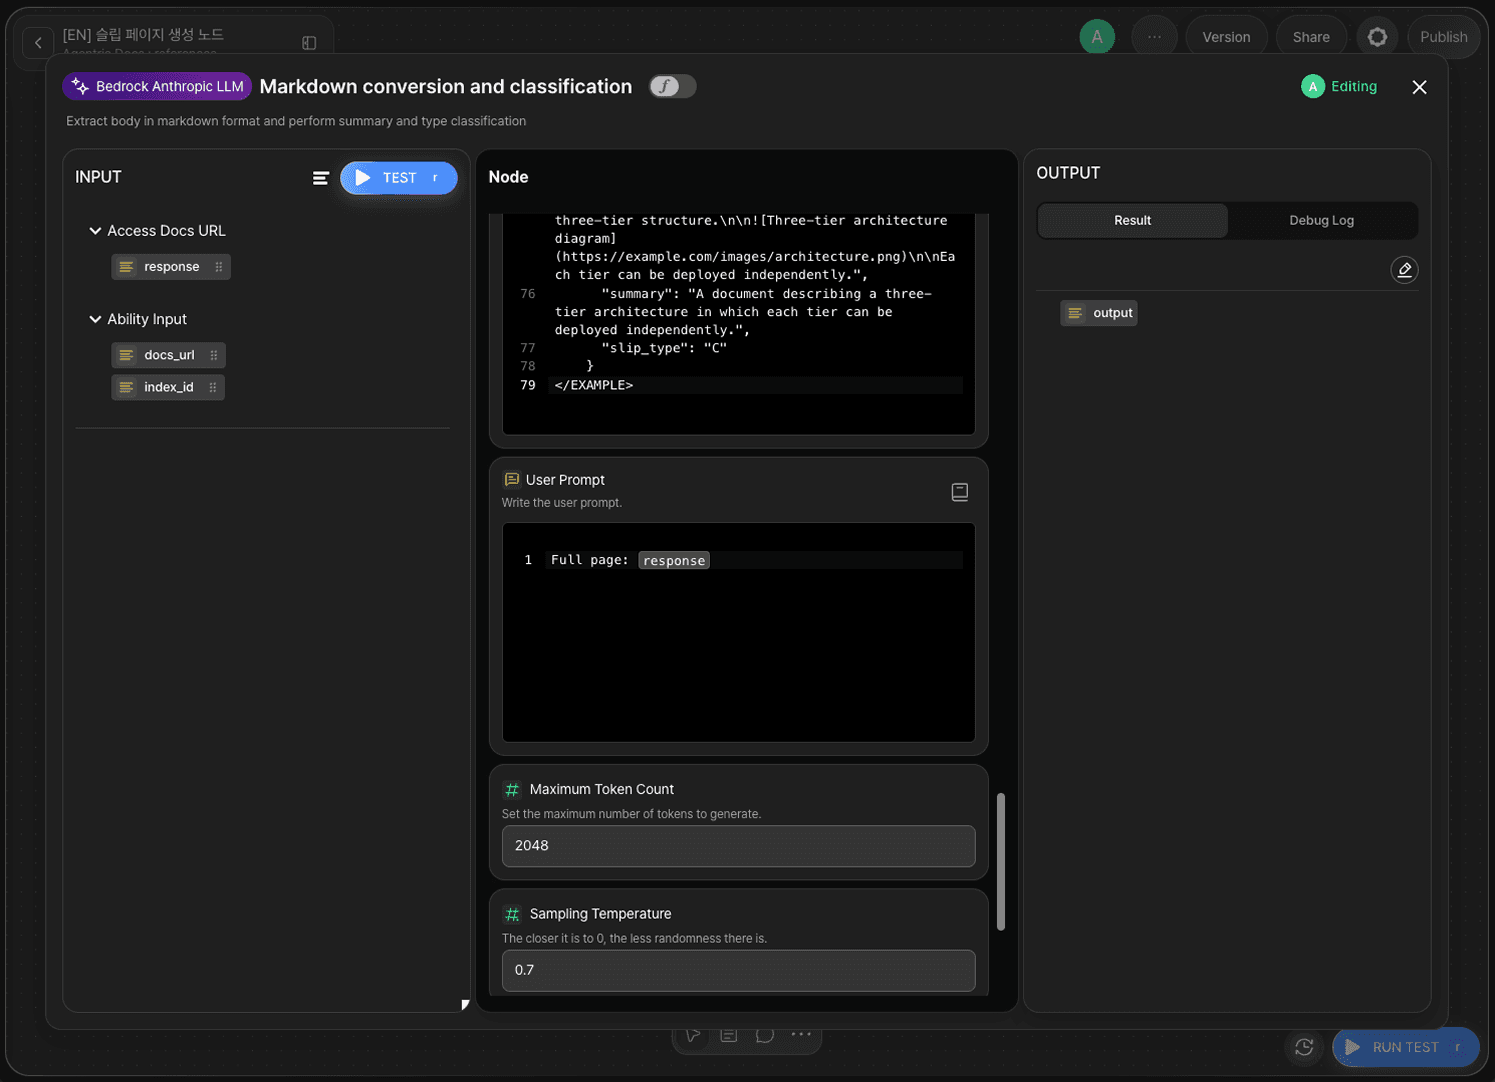
In the User Prompt, drag and drop response, the output of the Web Request node.
Step 5: Configure the Python Node
Click +Add Node to add a Python node, then double-click it to enter the Node Editor.
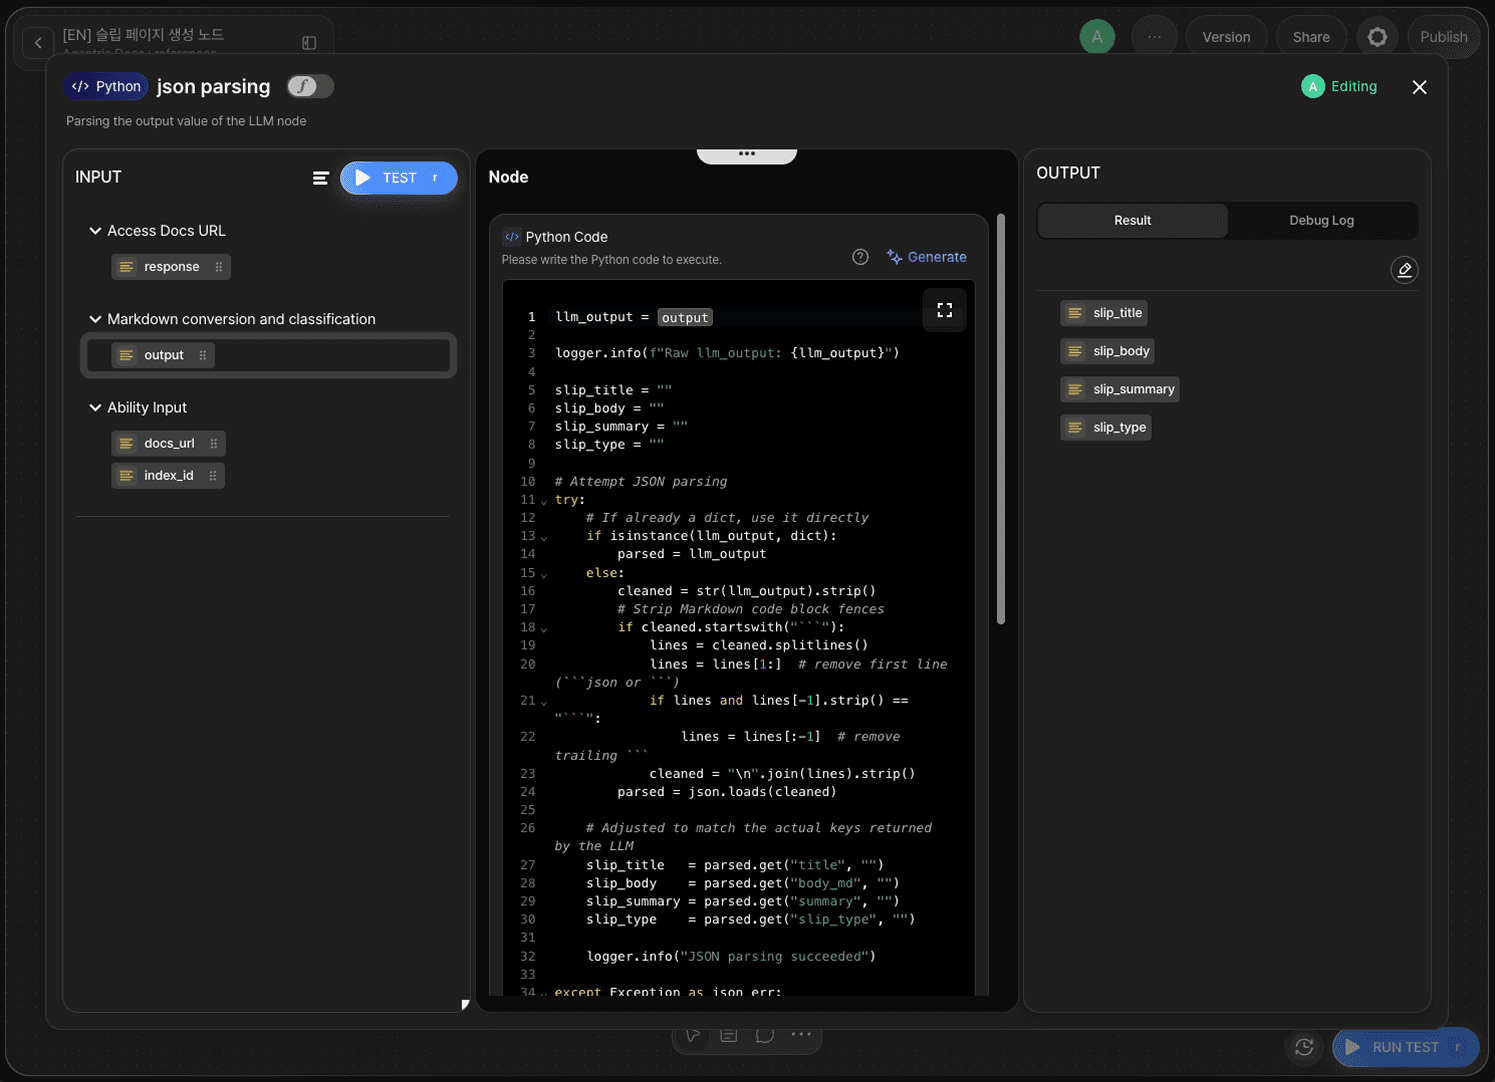
If you use the Code Generator, declare the output variables first so the generated result is accurate. Add four String variables: slip_title, slip_body, slip_summary, and slip_type.

Write code that parses the output variable from the LLM node. Parse output as JSON and assign the title, body_md, summary, and slip_type keys to slip_title, slip_body, slip_summary, and slip_type respectively, including exception handling in case the JSON parsing fails.
Step 6: Configure the Slip Page Create Node
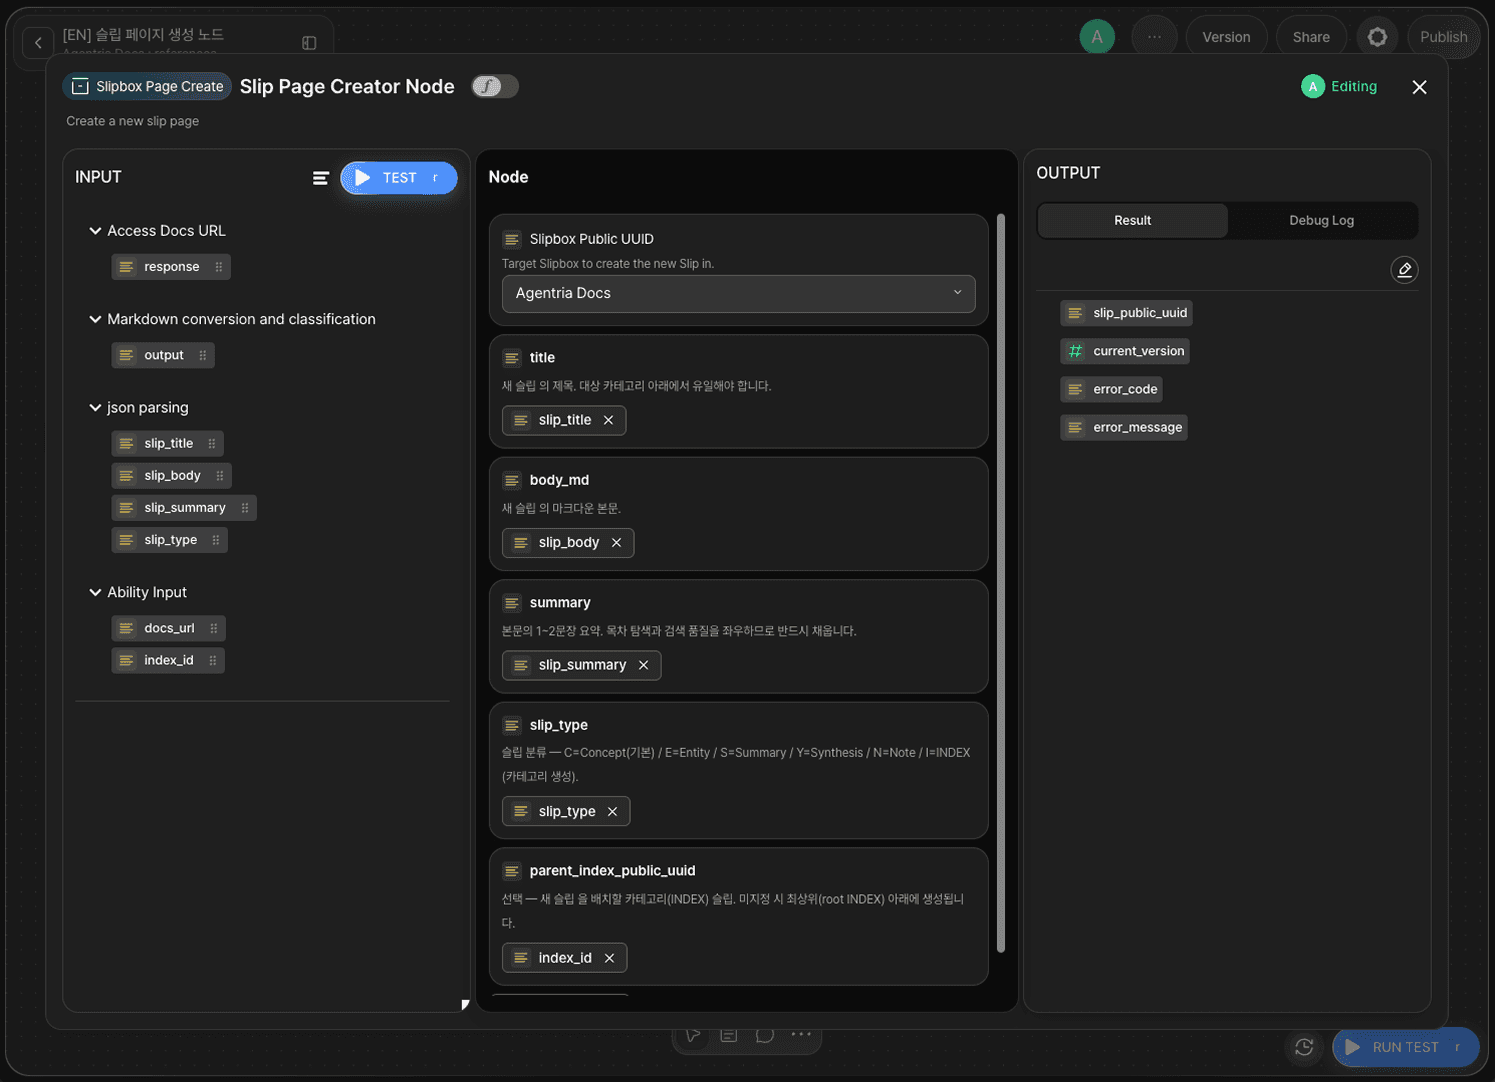
Click +Add Node → add Slip Page Create node from the Slipbox category, then double-click it to enter the Node Editor.
The Slip Page Create node provides the following options.
Option | Required | Description |
|---|---|---|
| Required | Select the target slipbox for the new slip. |
| Required | The title of the new slip. Must be unique within the target category. |
| Required | The markdown body of the new slip. |
| Required | A 1–2 sentence summary of the body. Always fill this in, since it drives table-of-contents navigation and search quality. |
| Required | The slip's classification — |
| Optional | The category (INDEX) slip under which to place the new slip. If unspecified, it's created under the root INDEX. |
Select the Agentria Docs slipbox in Slipbox Public UUID. Drag and drop the Python node's output values onto the remaining fields as follows.
Adapter Variable | Bound Value |
|---|---|
|
|
|
|
|
|
|
|
|
|
Once the node runs successfully, it outputs slip_public_uuid, current_version, error_code, and error_message.
Step 7: Configure the End Node
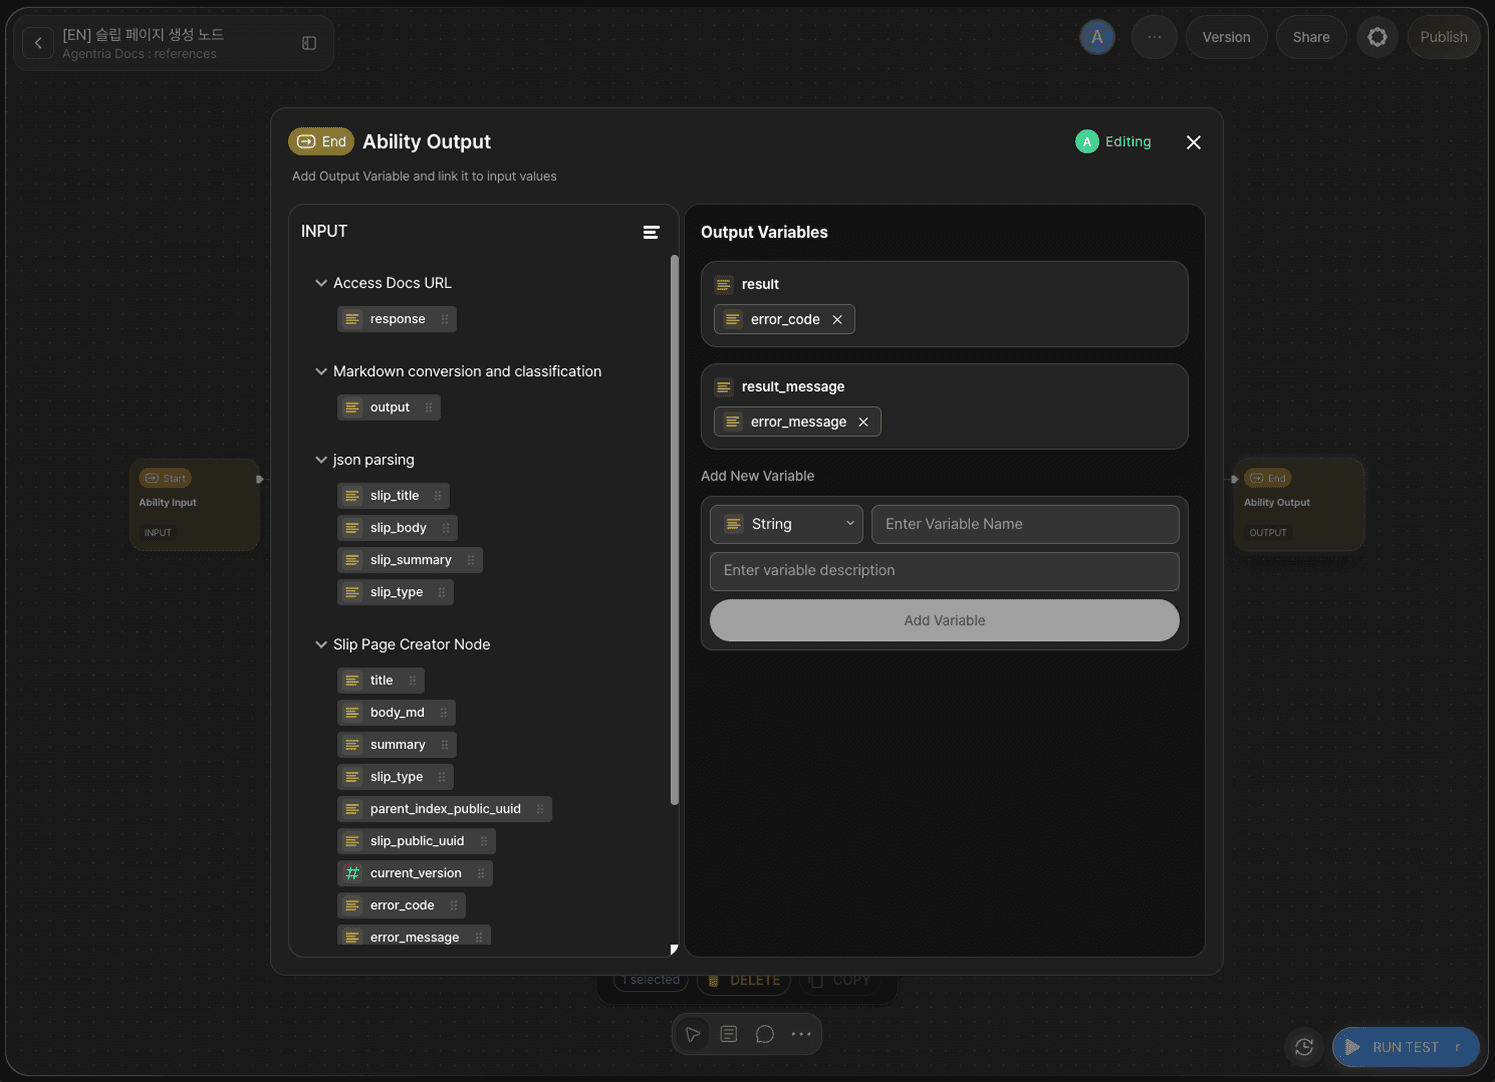
Double-click End Node to enter the Node Editor. Add a String output variable named result and drag and drop error_code from the Slip Page Create node to bind it. This lets you check whether the slip page was created successfully or failed from the output value.
To also check error_message, declare an additional result_message variable and bind it.
Step 8: Copy the Parent Index Page ID
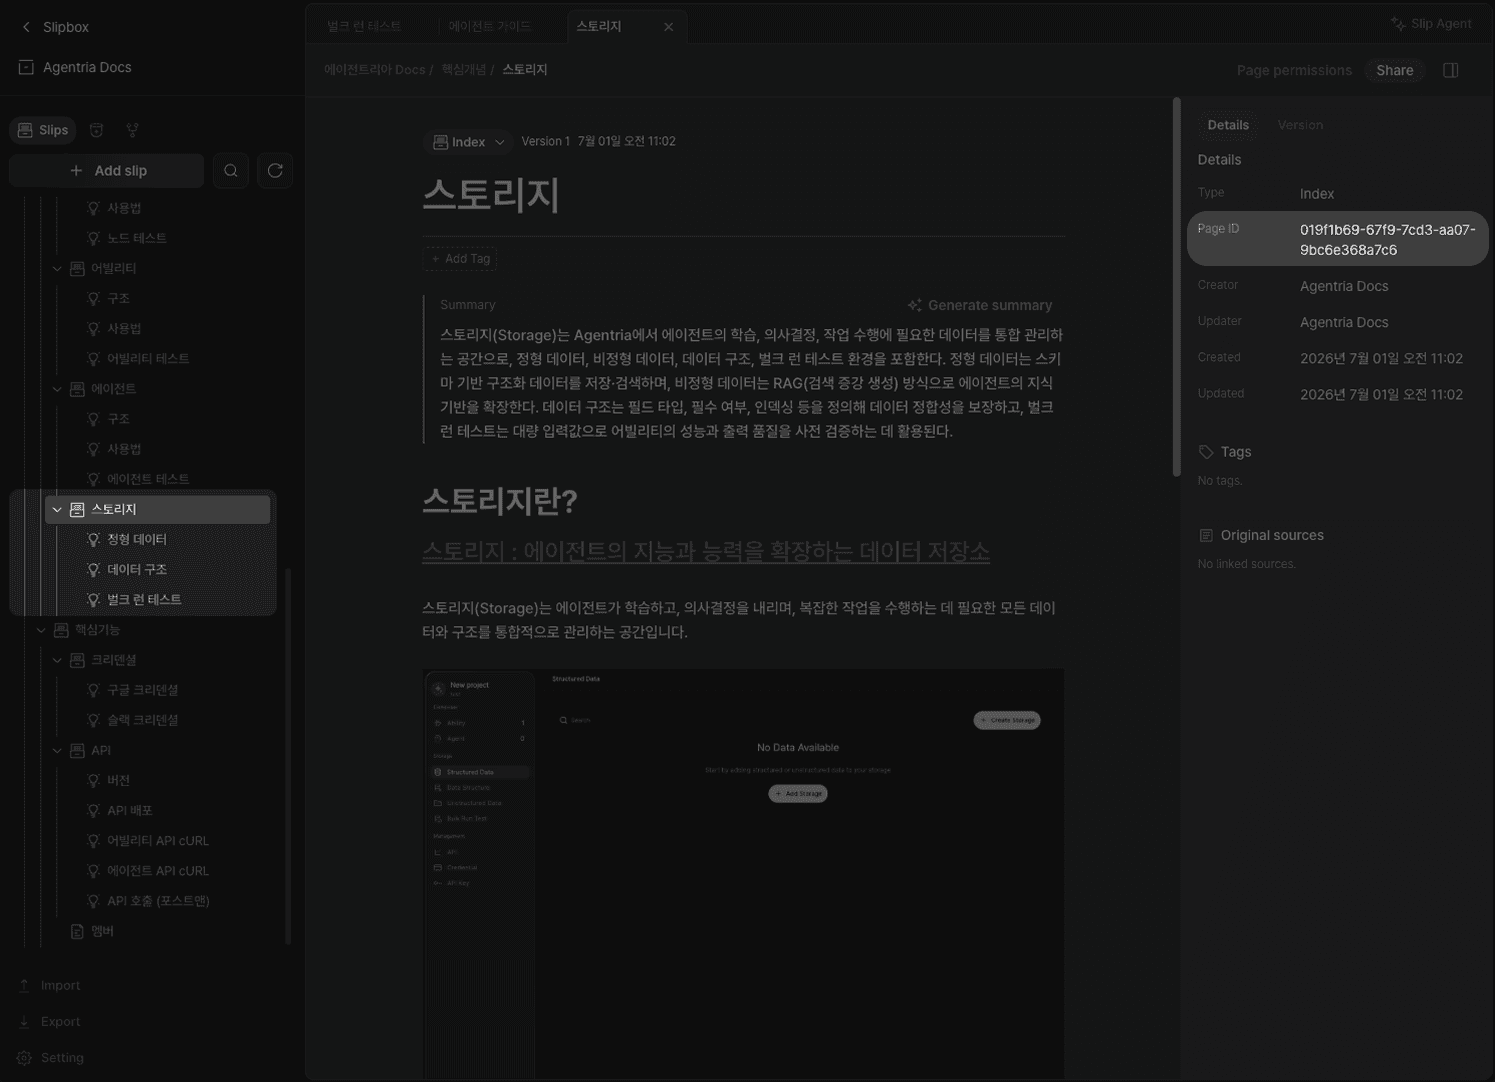
In the slipbox, click the parent index page under which the new page will be created, then copy the Page ID value from the Details panel on the right. You'll use this value as the index_id input in the node test.
Step 9: Copy the Docs Page Link

Copy the web link of the newly deployed Docs page you want to add to the slipbox. You'll use this value as the docs_url input in the node test.
Step 10: Run the Node Test
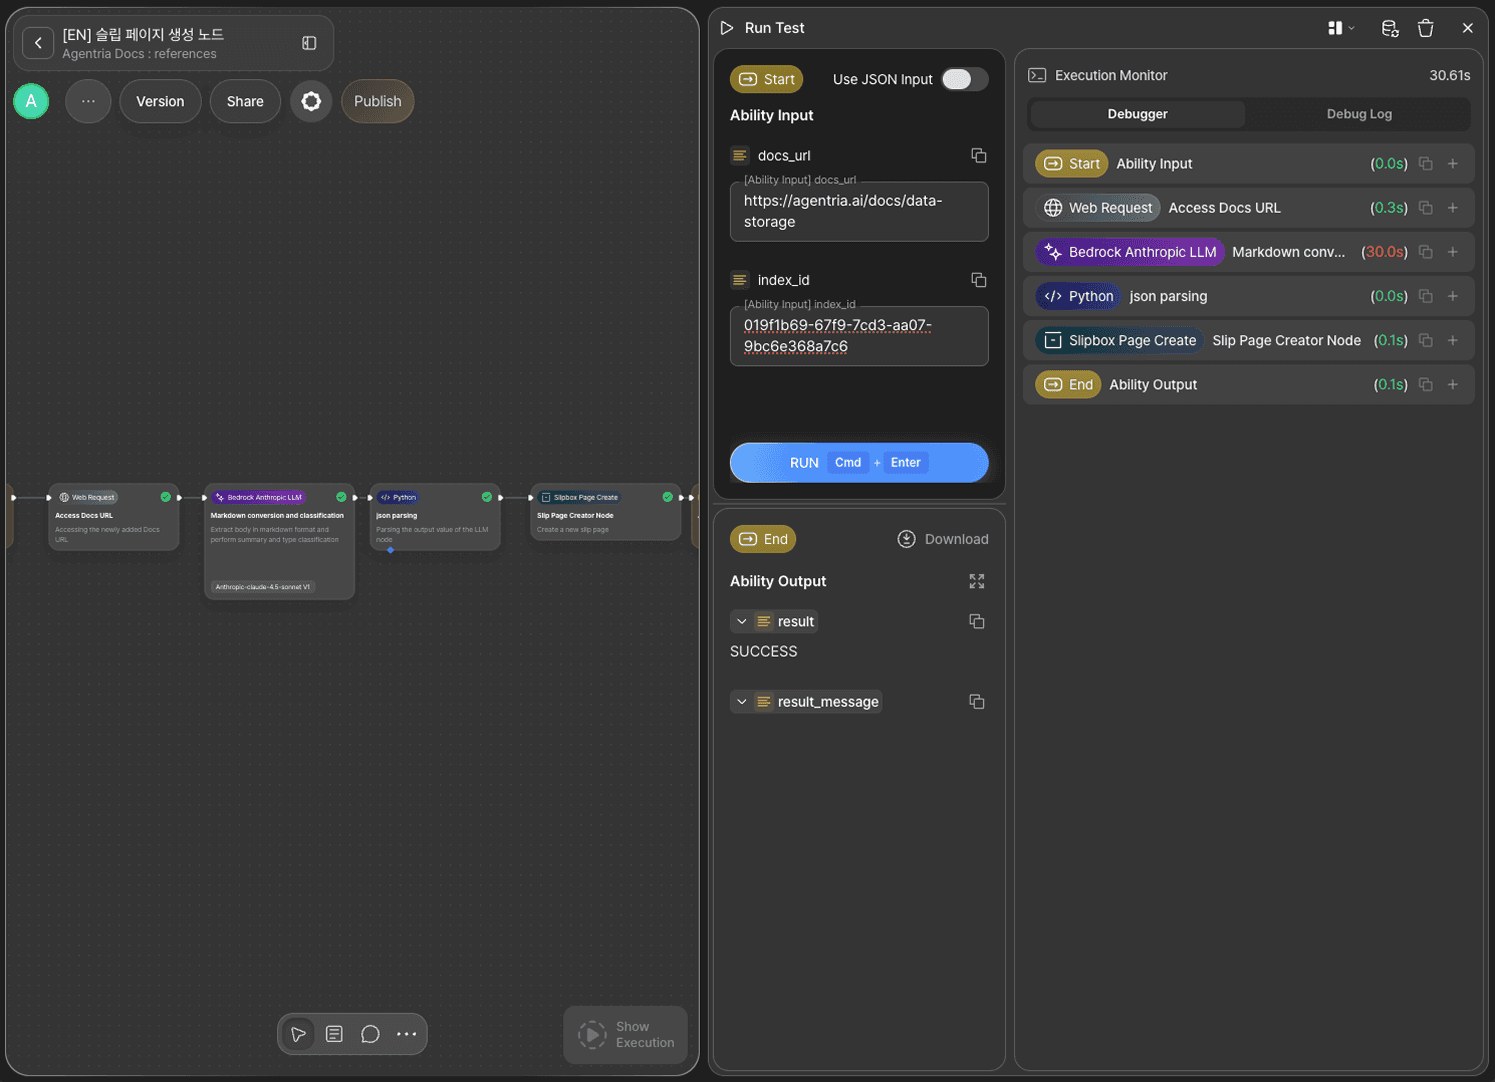
Paste the Docs page link you copied earlier into docs_url, and the parent index page ID into index_id, then click RUN TEST. If the result output is SUCCESS, the test succeeded.
Step 11: Check the Debug Log
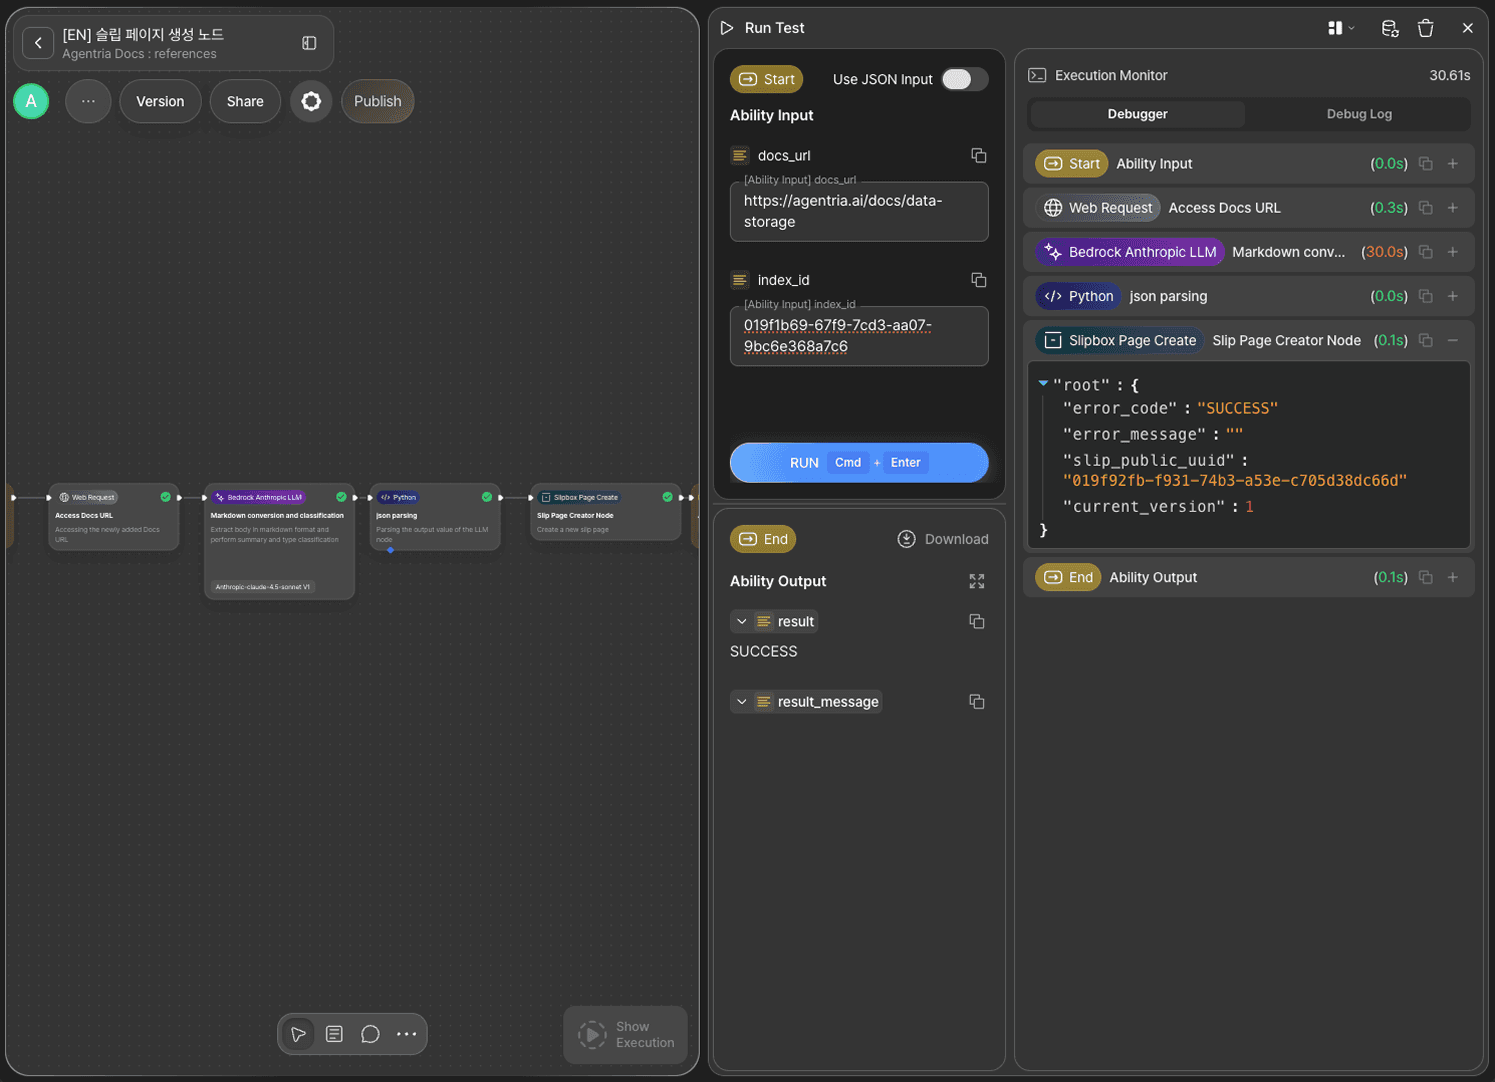
Check the Debug Log of the Slip Page Create node. error_code returns SUCCESS, and the slip_public_uuid of the newly created page is returned alongside it.
Step 12: Verify the Created Page in the Slipbox
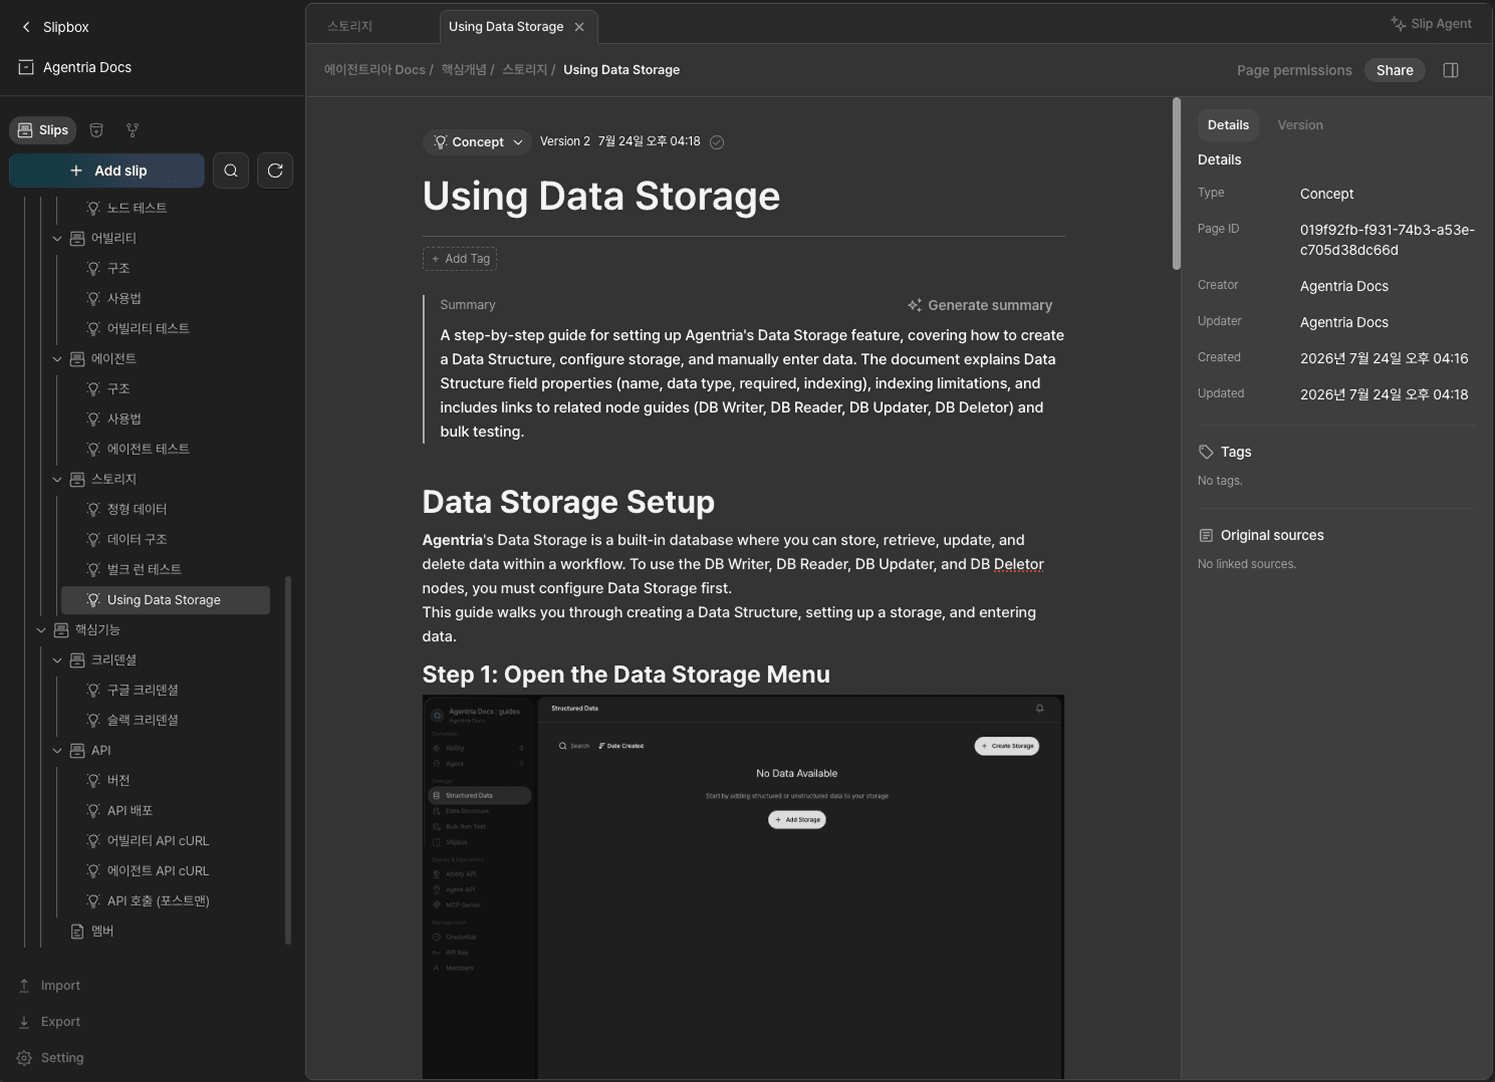
Go to the slipbox and confirm the new slip page was created under the parent index page. If the page doesn't appear even though the result was SUCCESS, try refreshing.
Next Steps
🎉 Congratulations! You've successfully built the "Slipbox Docs Update" workflow using Agentria.
Connect this workflow to a schedule trigger or your deployment automation to keep the slipbox up to date automatically every time a new document is deployed.
Agentria is a place where ideas become reality—your workflow can expand infinitely with your creativity.
For more Ability examples, visit the 🔗Ability Guide page.
For Agent-based examples, visit the 🔗Agent Guide page.