Get Started
Using Slipbox Nodes (Slip Page Read)
The Slip Page Read node looks up a page stored in a slipbox by its UUID, letting you use the page content elsewhere in your workflow.
In this tutorial, store a system prompt as a slipbox page, then use the Slip Page Read node to pull it into a workflow that drafts automatic replies to customer reviews — the "Customer Review Response Bot".
Before You Begin
A slipbox must be set up in your project before starting this tutorial. For instructions on building a slipbox, see the 🔗Slipbox Guide.
After completing this tutorial, you will be able to:
Create a slipbox page and find its
Page ID.Connect a slipbox to the Slip Page Read node.
Bind a page ID to the
slip_public_uuidof the Slip Page Read node.Reference the Slip Page Read node's
slip_contentoutput in another node.Verify the slipbox-powered dynamic prompt workflow using the node test.
Workflow Overview
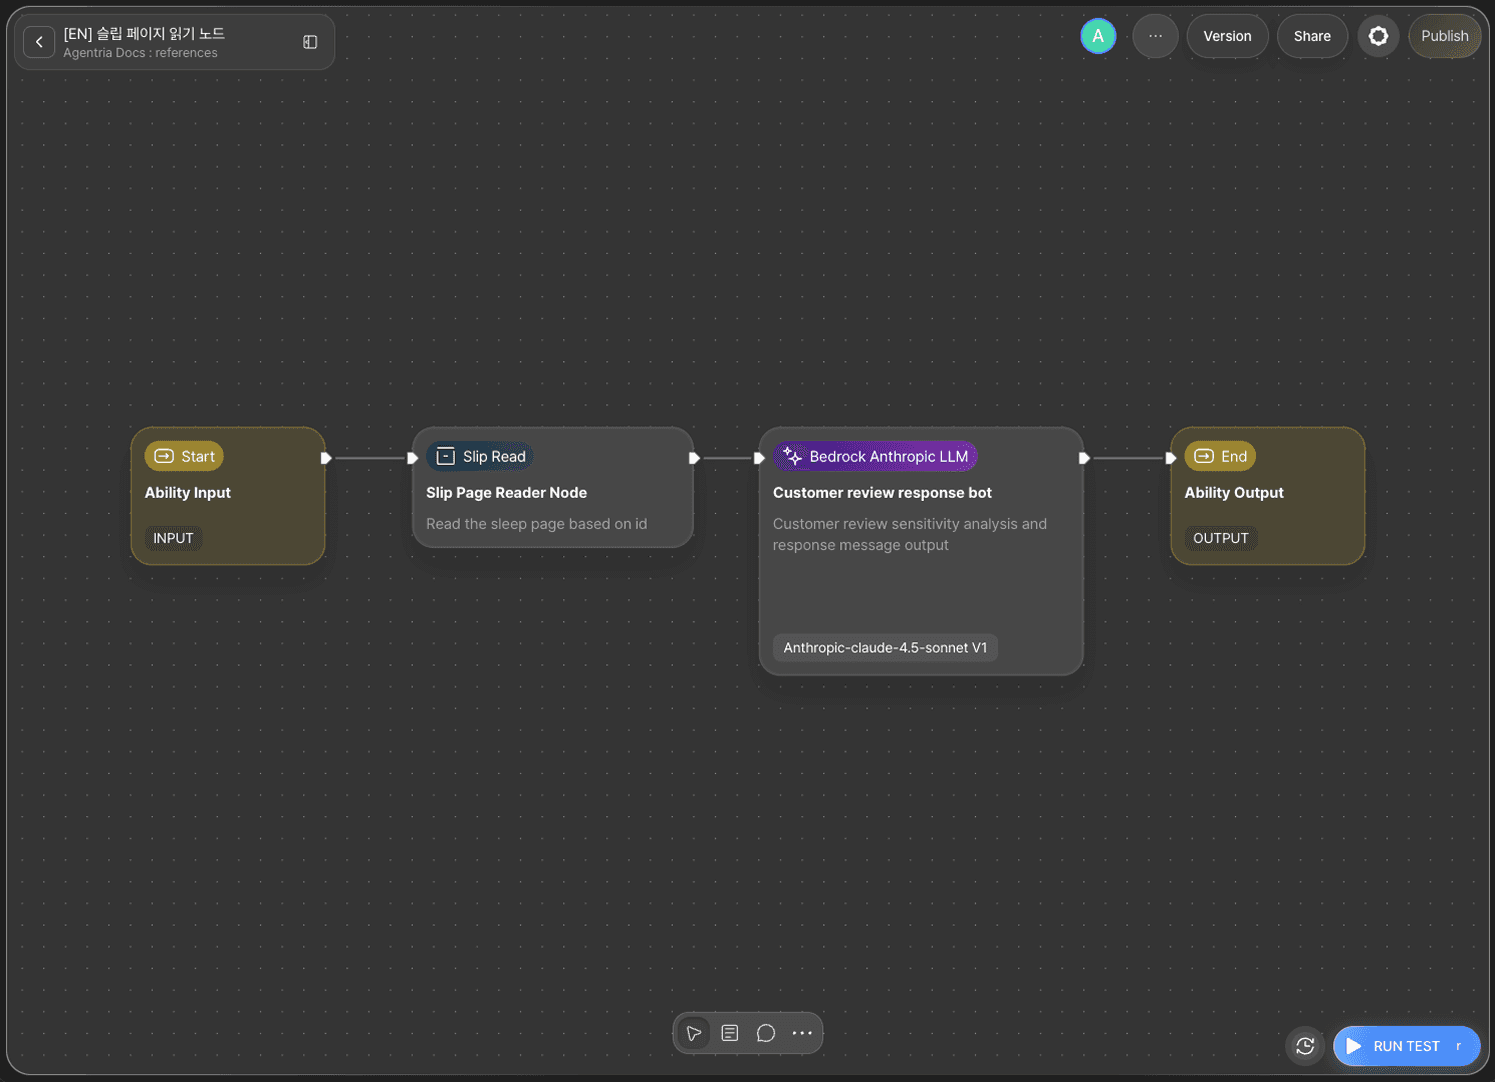
The core of this tutorial is the Slip Page Read node.
The Slip Page Read node looks up the page matching a UUID in a given slipbox, returning its body (slip_content), title (title), and more. In this tutorial, a global variable holding a page ID is bound to the node so it dynamically loads a system prompt stored in the slipbox.
The LLM node that appears alongside it only drafts a reply, referencing the retrieved system prompt and the customer review.
Step 1: Create an Ability
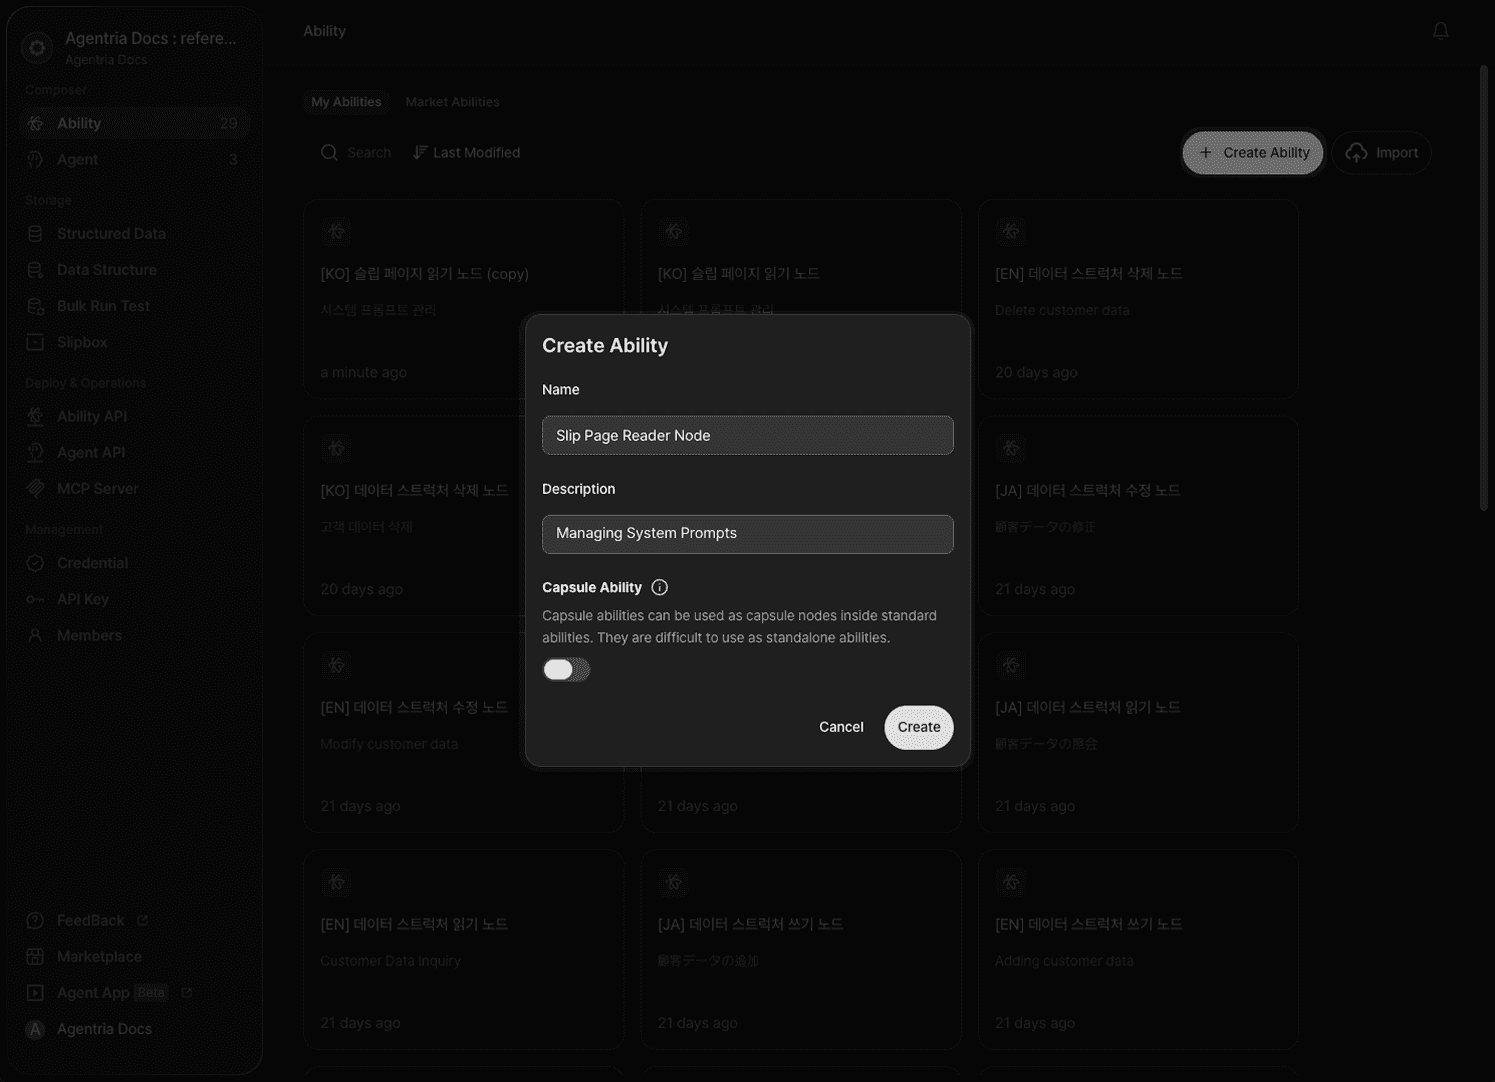
Create a new Ability. Enter Slip Page Read node for Name and System prompt management for Description. This Ability builds the "Customer Review Response Bot" workflow, which manages a system prompt through a slipbox and automatically responds to customer reviews.
Step 2: Create a Slipbox
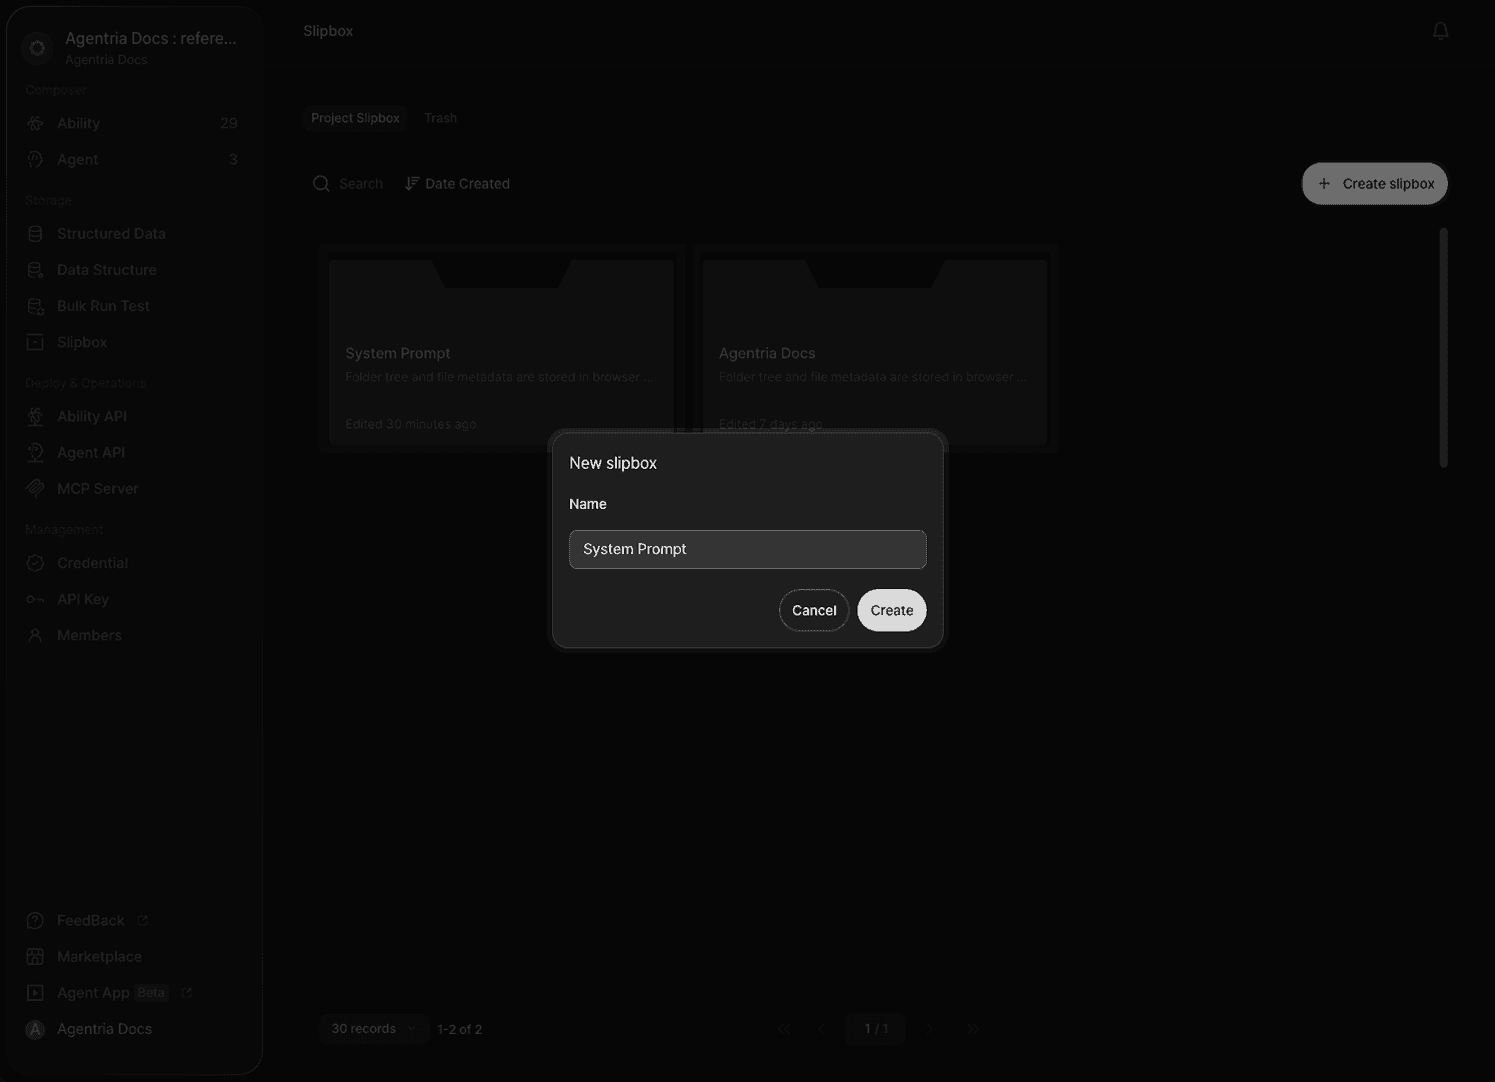
Go to the Slipbox menu in the left sidebar and click +Create Slipbox. Enter System Prompt for Name and click Create.
For detailed instructions on creating a slipbox, see the 🔗Slipbox Guide.
Step 3: Write a Slip Page and Copy the Page ID
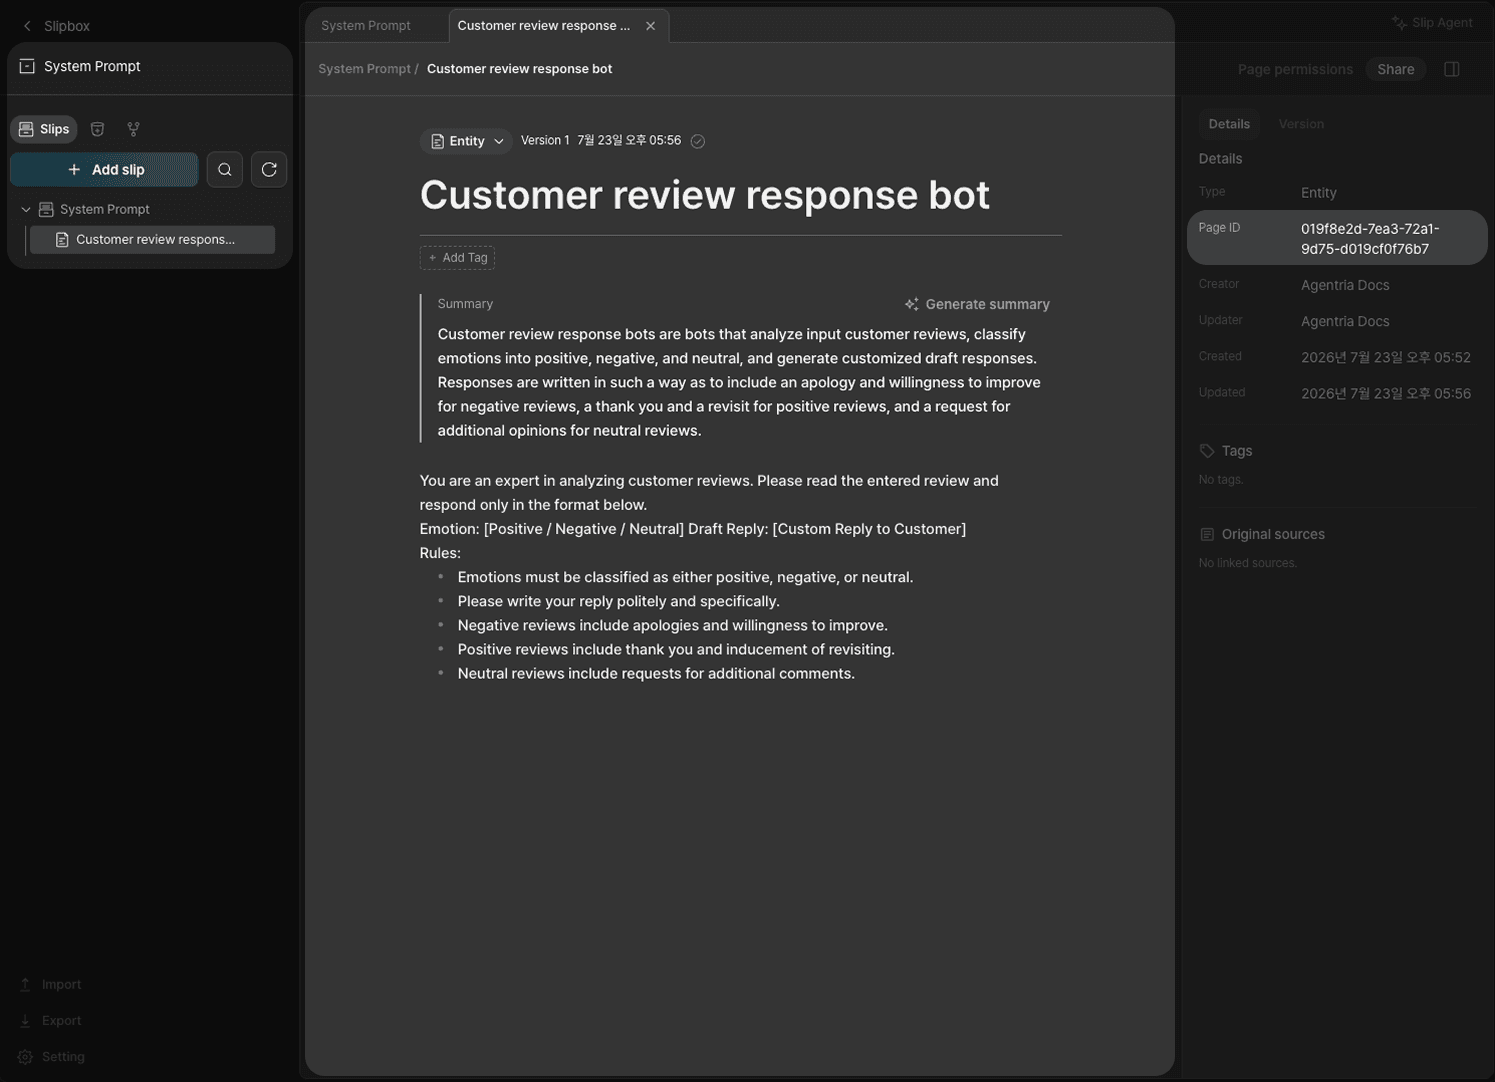
Create a Customer Review Response Bot page in the System Prompt slipbox, and write a system prompt that analyzes customer reviews and drafts replies.
Why manage this with a slipbox? A system prompt is static, so it's hard to update once an Ability has been versioned and deployed. Managing it as a slipbox page lets you update the content freely even after deployment.
Copy the Page ID value from the Details panel on the right. You'll need this value in the next step.
Step 4: Declare a Global Variable
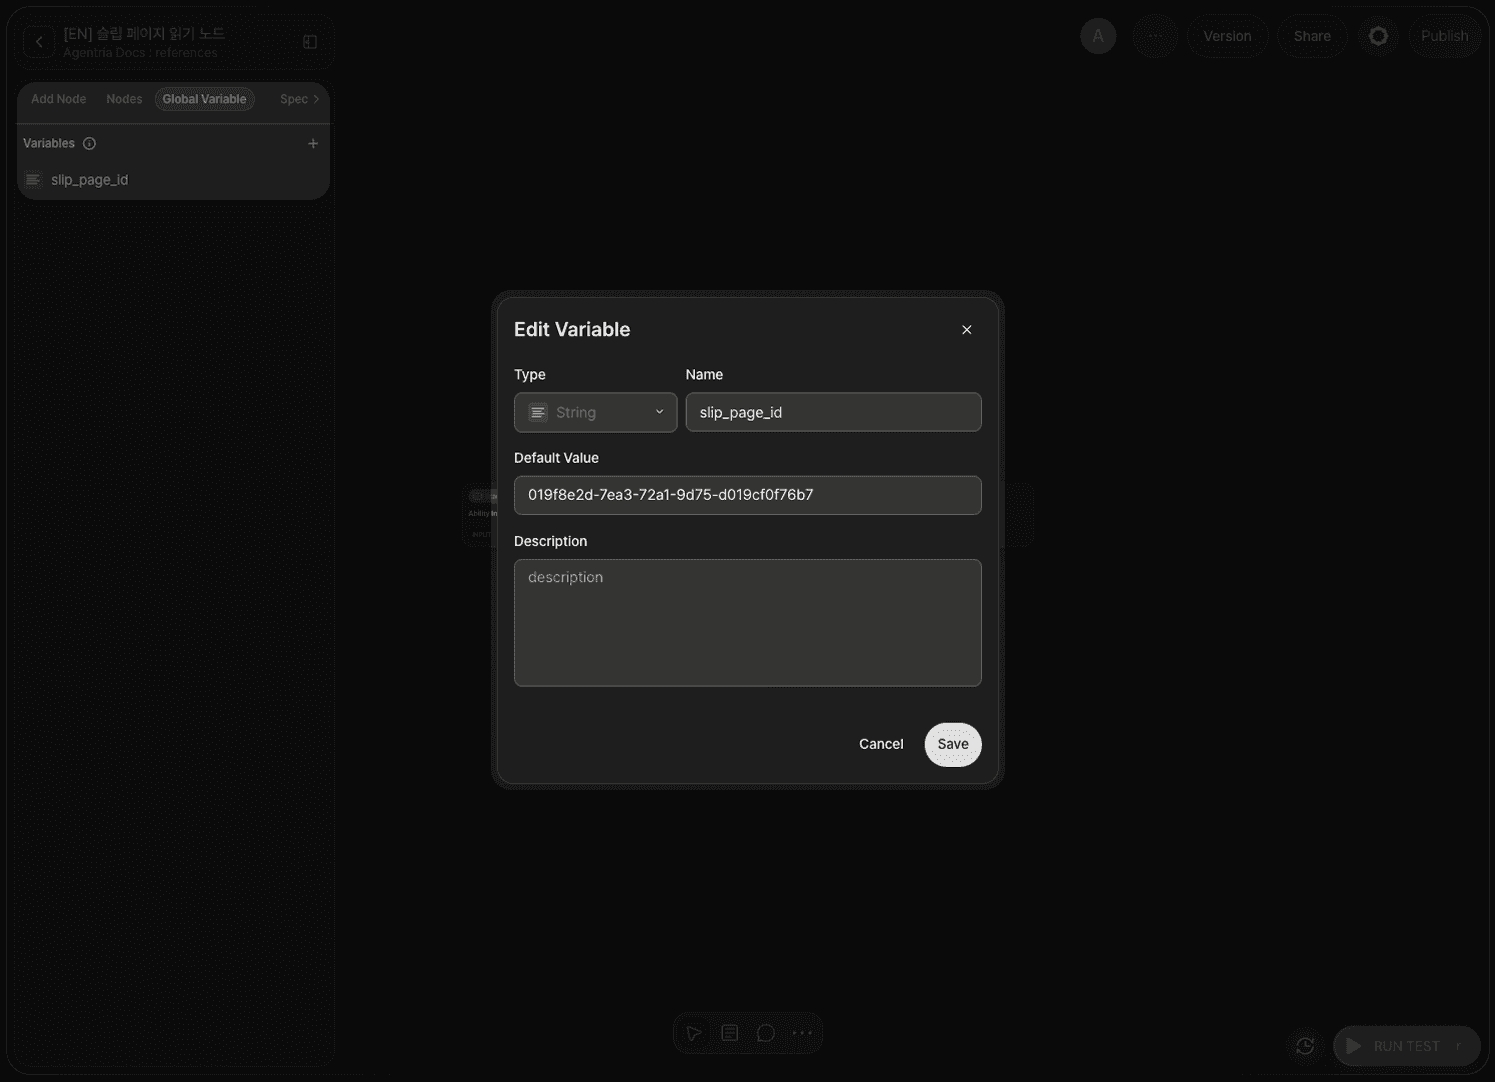
In the Global Variable tab, add a String variable named slip_page_id. Paste the Page ID you copied earlier into Default Value.
Step 5: Configure the Start Node
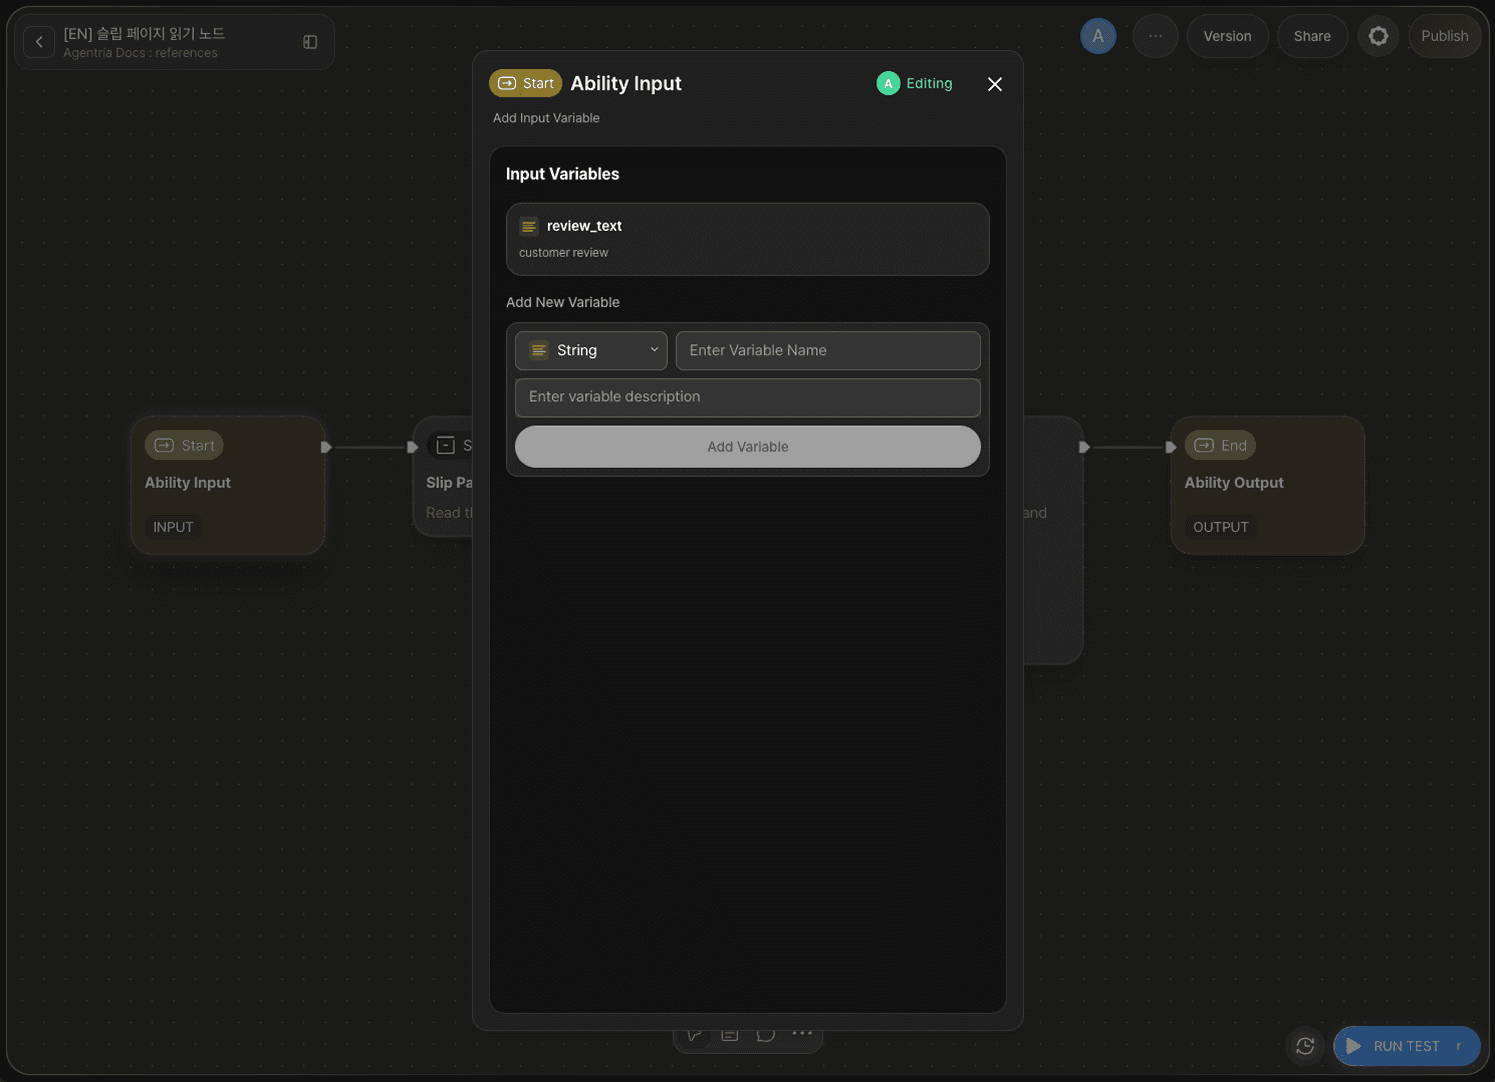
Double-click Start Node to enter the Node Editor. Add a String variable named review_text to accept the customer review text.
Step 6: Configure the Slip Page Read Node
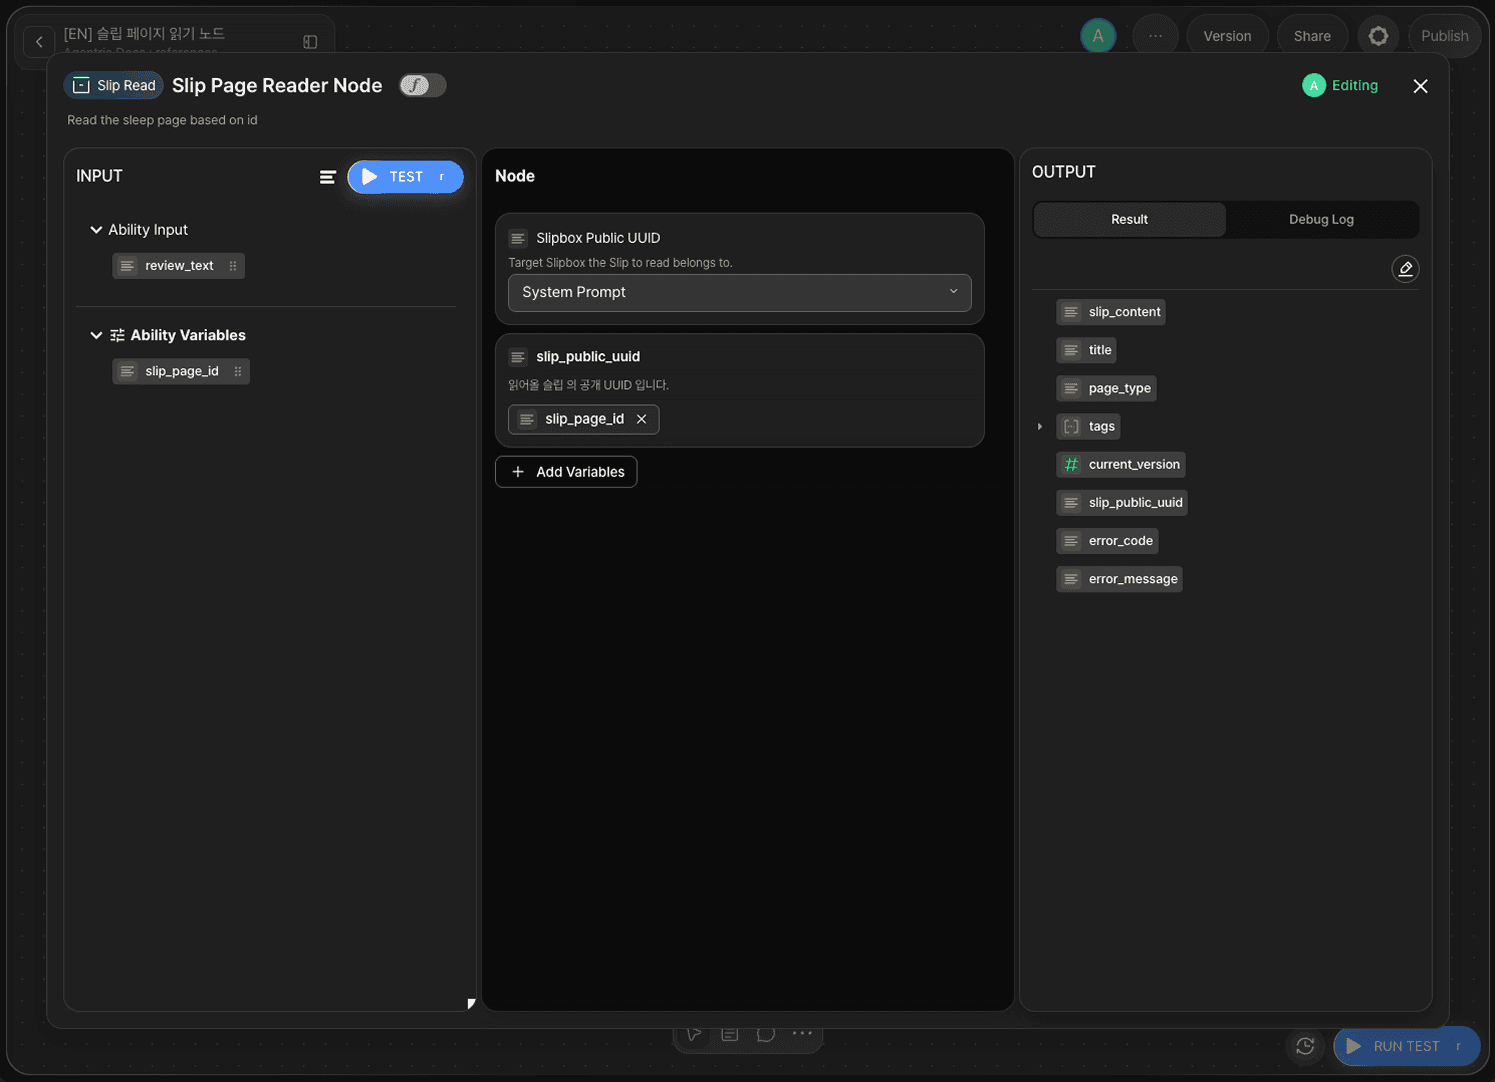
Click +Add Node → add Slip Page Read node from the Slipbox category, then double-click it to enter the Node Editor.
The Slip Page Read node provides the following options.
Option | Required | Description |
|---|---|---|
| Required | Select the target slipbox that the slip to read belongs to. |
| Required | The public UUID of the slip to read. |
Select the System Prompt slipbox in Slipbox Public UUID. Drag and drop the slip_page_id variable onto slip_public_uuid to bind it.
Once the node runs successfully, it outputs slip_content, title, page_type, tags, current_version, slip_public_uuid, error_code, and error_message. This tutorial uses slip_content, the page body.
Step 7: Configure the LLM Node
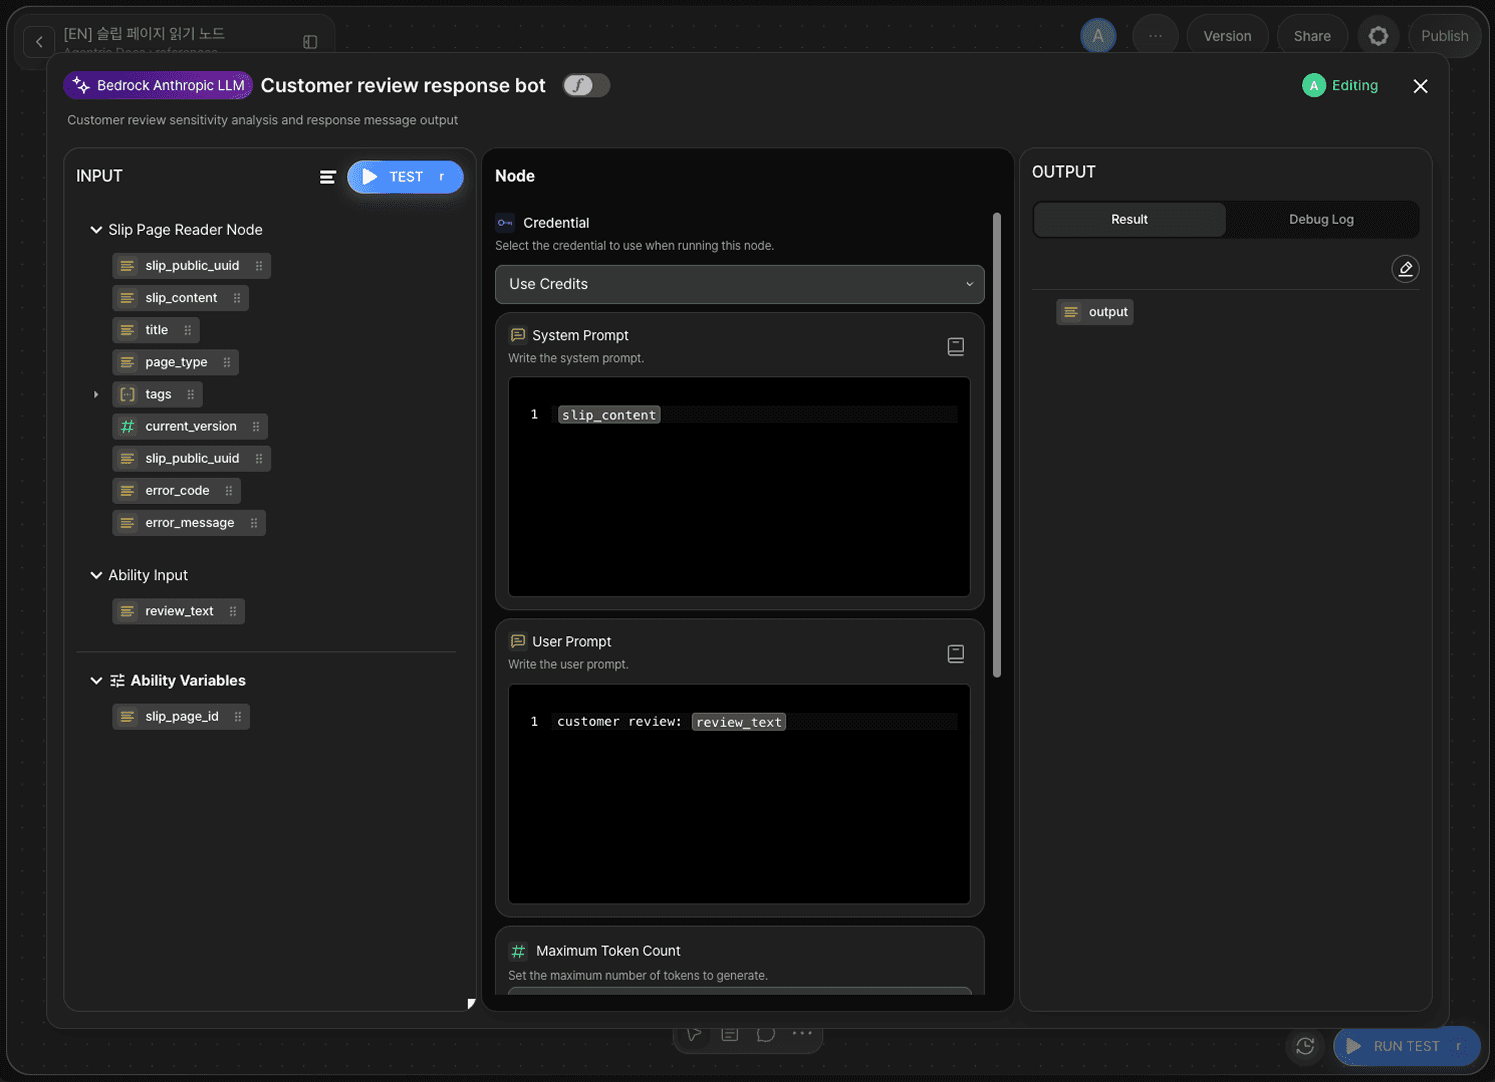
Double-click the Customer Review Response Bot (LLM node) to enter the Node Editor. Select the Credential to use.
In the System Prompt field, drag and drop slip_content from the Slip Page Read node. In the User Prompt field, drag and drop review_text.
This lets you manage the system prompt dynamically through the slipbox, even after deployment.
Step 8: Configure the End Node
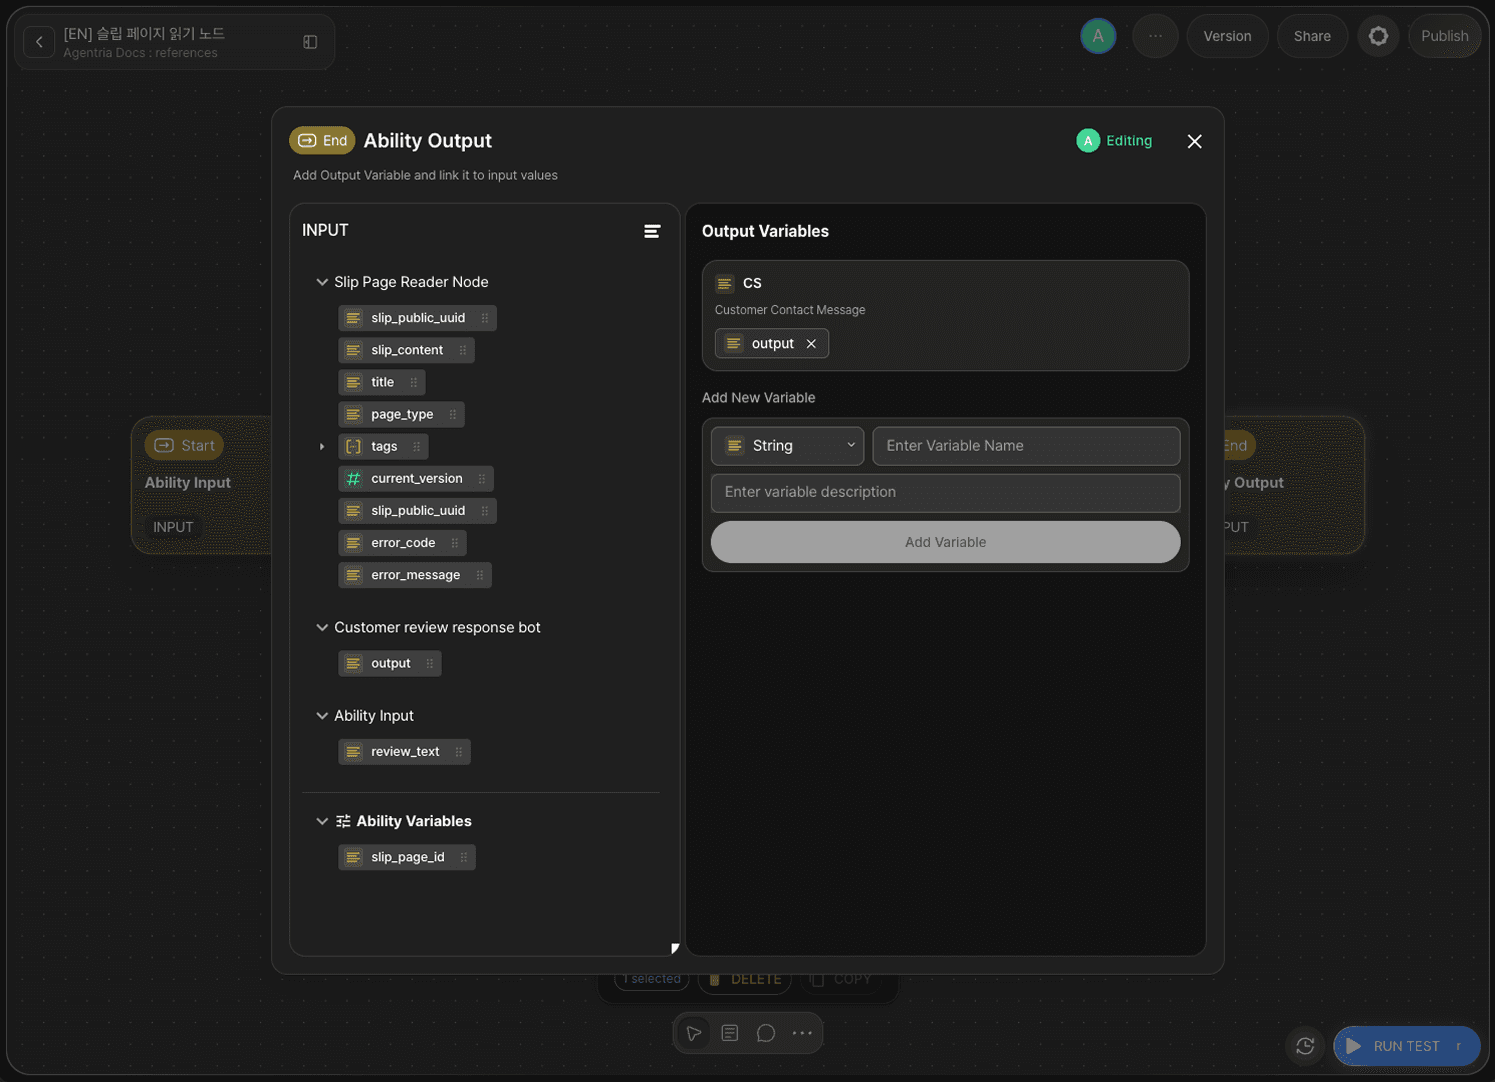
Double-click End Node to enter the Node Editor. Add a String output variable named CS, and drag and drop output from the Customer Review Response Bot (LLM node) to bind it.
Step 9: Run the Node Test
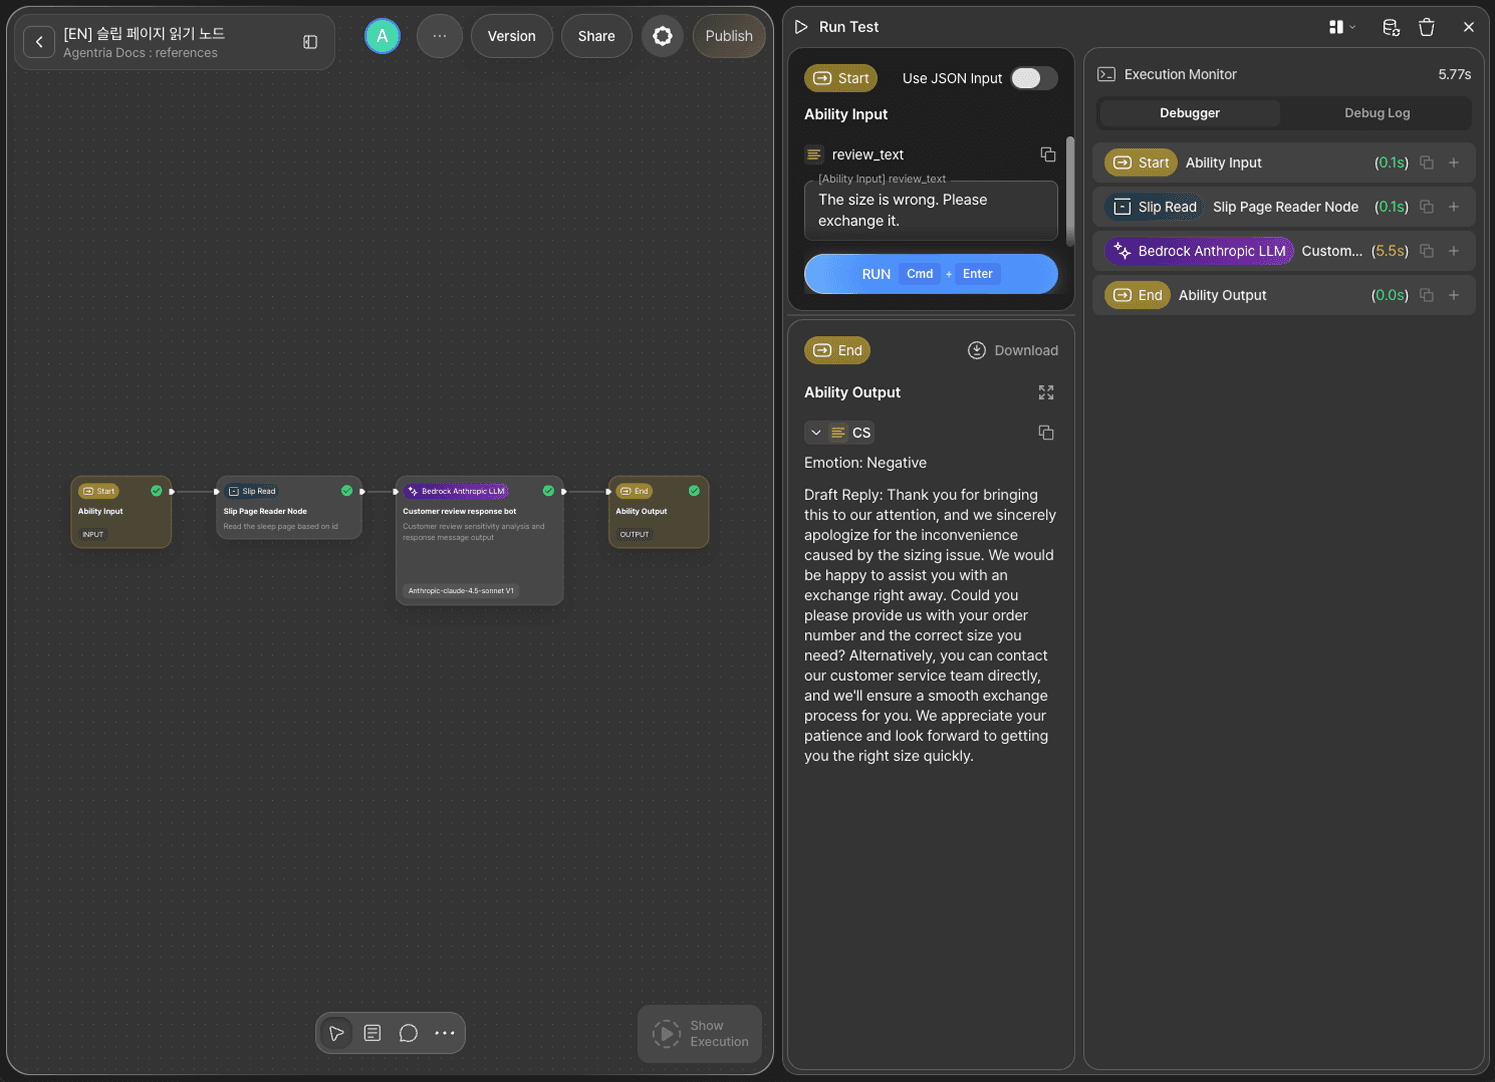
Enter The size was wrong. Please exchange it. for review_text and click RUN TEST. Confirm the review's sentiment is classified as Negative and a matching reply draft is generated.
Step 10: Check the Debug Log
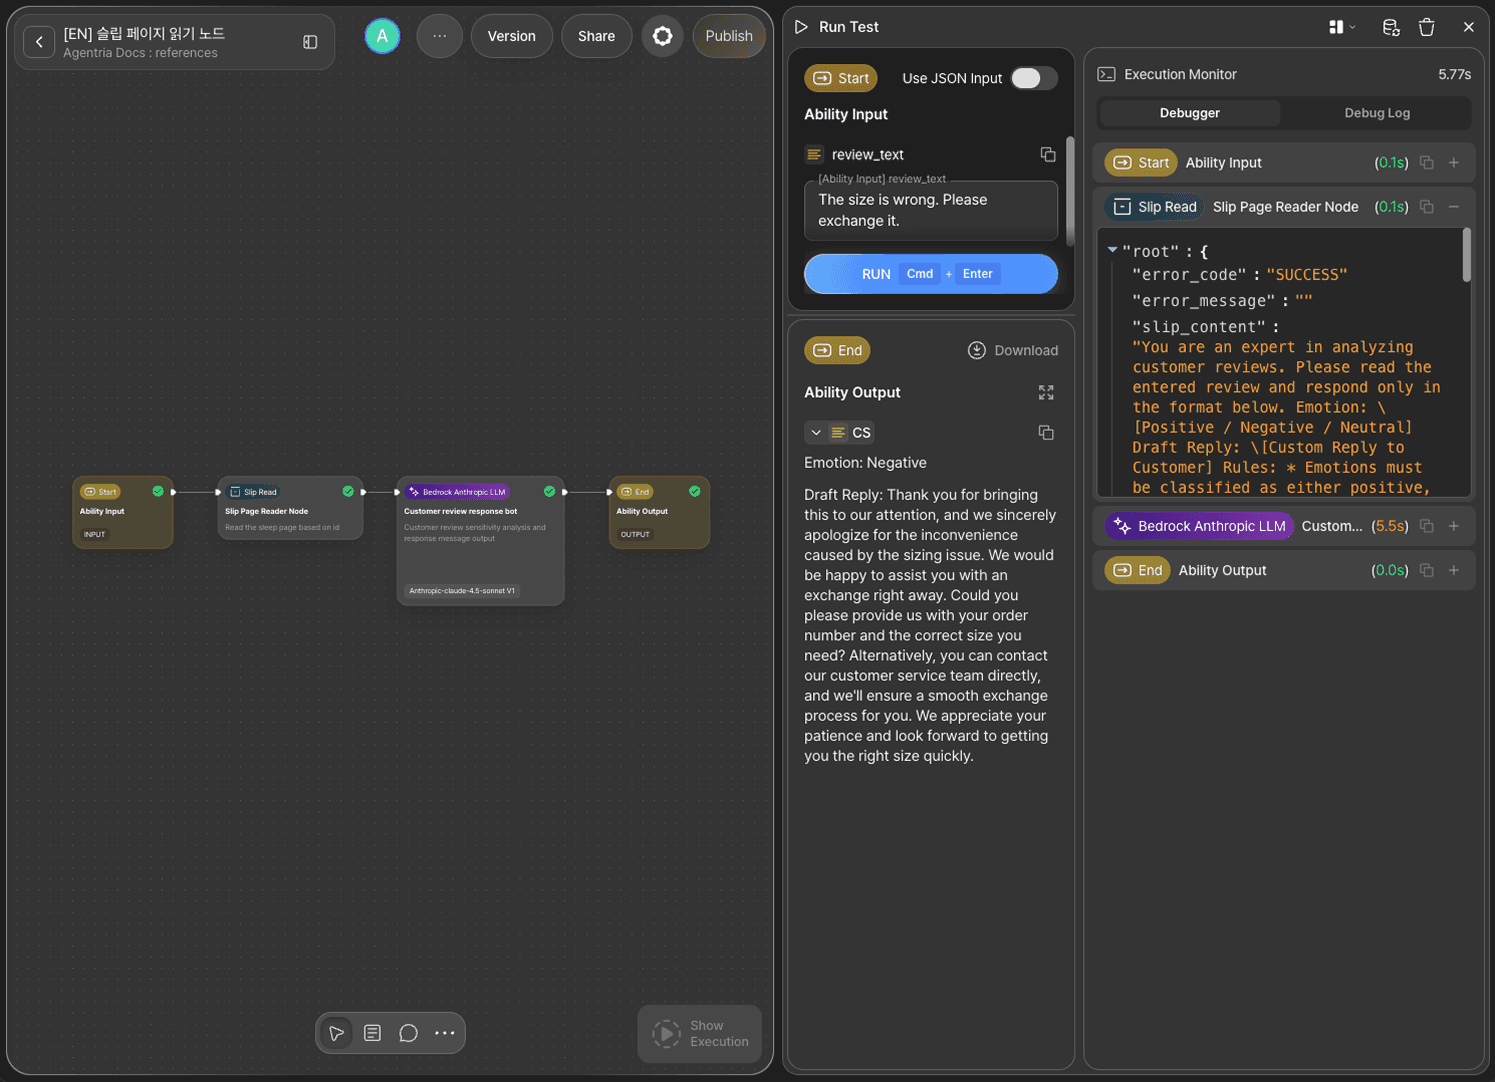
Check the Debug Log of the Slip Page Read node. error_code returns SUCCESS, and slip_content contains exactly the text written on the page in the System Prompt slipbox — confirming the workflow actually read and used the slipbox page.
Next Steps
🎉 Congratulations! You've successfully built the "Customer Review Response Bot" workflow using Agentria.
Not just system prompts — instructions, policy documents, and other frequently updated text can also be managed as slipbox pages, so you can update them flexibly even after deployment.
Agentria is a place where ideas become reality—your workflow can expand infinitely with your creativity.
For more Ability examples, visit the 🔗Ability Guide page.
For Agent-based examples, visit the 🔗Agent Guide page.