Operations Guide
Data Storage is a secure space for managing the data used in your project workflows.
You can store both structured data (tables, CSV, JSON, etc.) and unstructured data (text, documents, etc.), and configure them as read-only or read/write depending on your needs.
Creating a Data Structure
Open the Data Storage menu from the project sidebar.
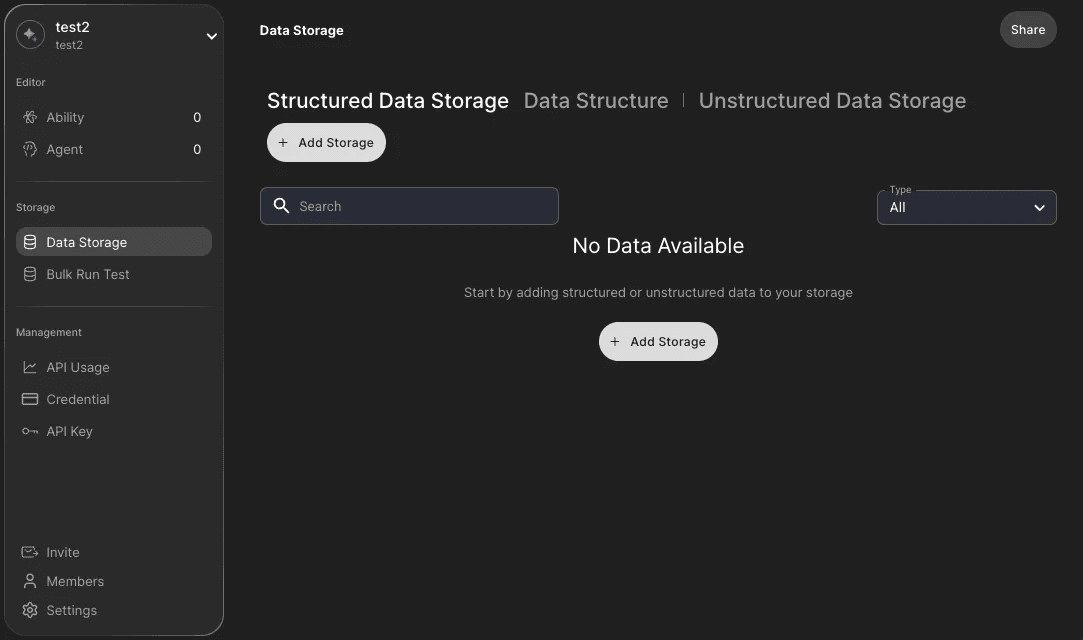
Since you need to define the framework first, select Data Structure → Add Storage from the top menu.

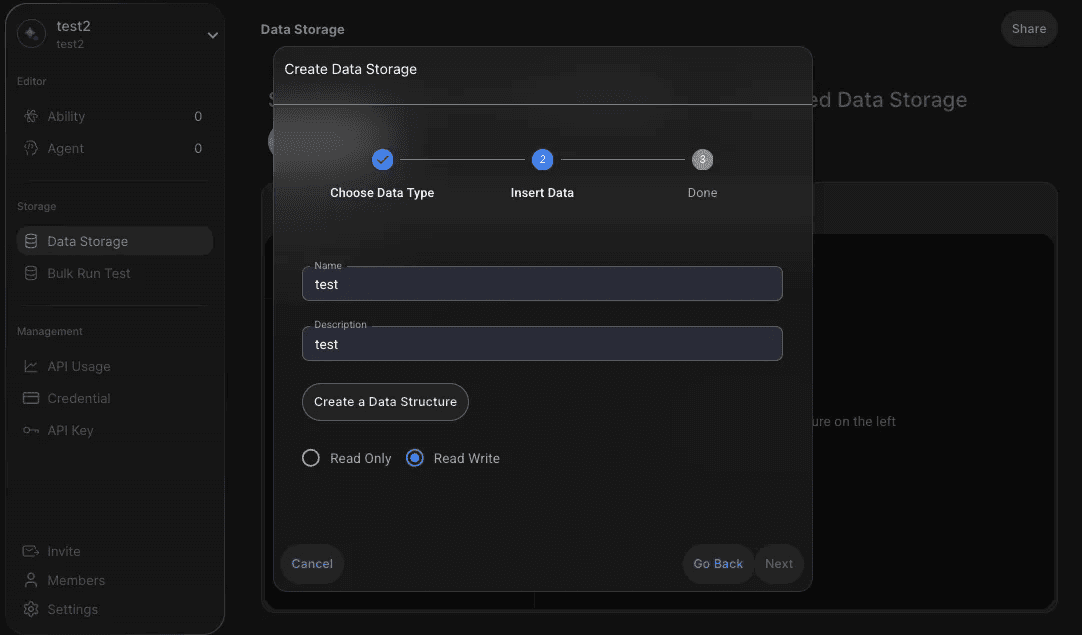
Choose a data type:
(This guide uses structured data as an example.)
Structured
Unstructured
Set access permissions:
Read Only: view-only mode
Read Write: allows both reading and writing
If you choose Read Write, nodes can add new items later.
When finished, click Create a Data Structure.
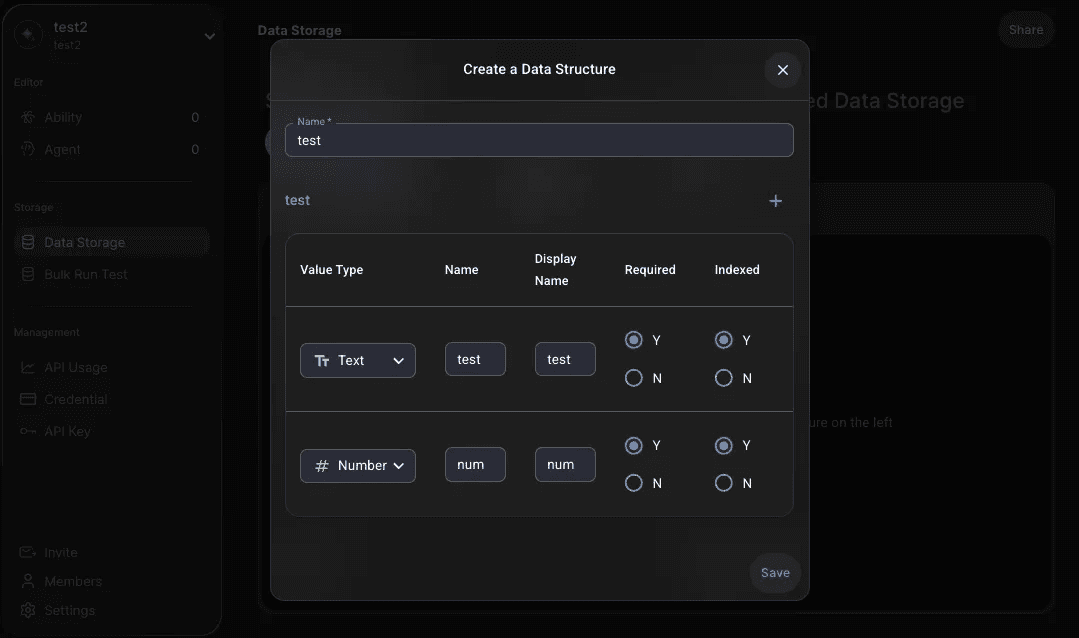
Define the dataset columns:
Assign a data type and name
Mark fields as required or optional
Enable or disable external references
Add as many columns as needed, then save.
Finally, upload your data file to complete the setup.
Adding Data
Manual Input: On the storage detail page, select the desired dataset and add rows directly via EDIT MODE → ADD ROW.
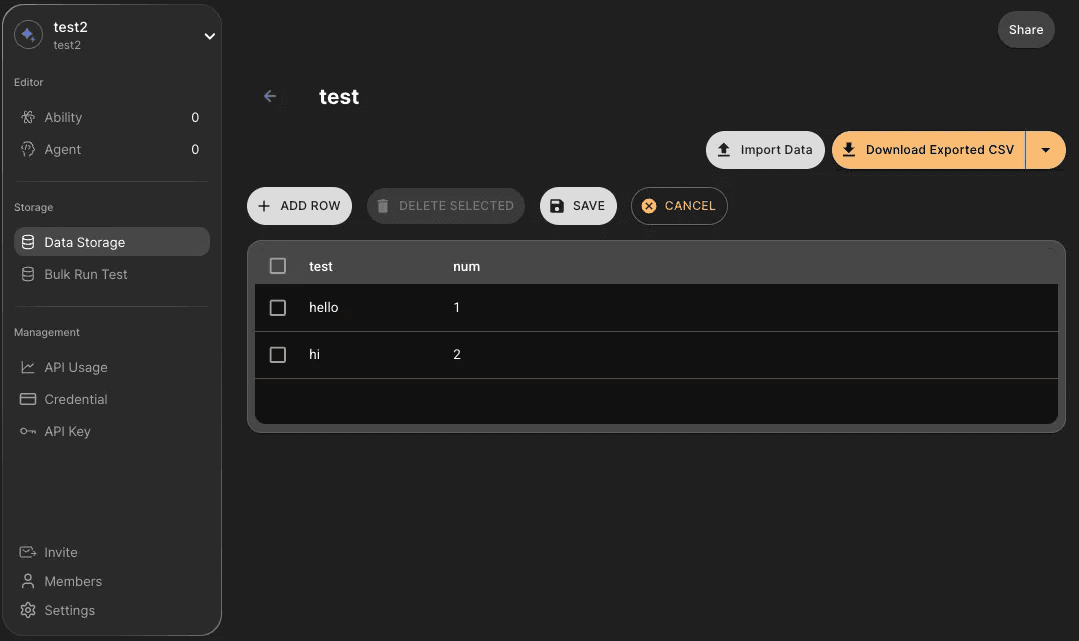
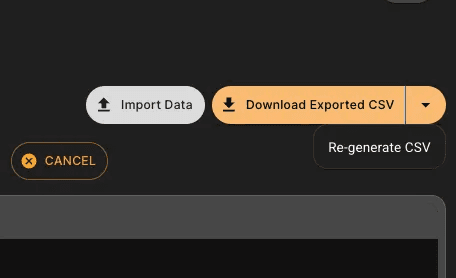
File Upload: Import a CSV file using the Import Data feature.
Imported files will overwrite and remove any previously entered manual data.
For this reason, it is recommended to upload files before manually adding data.
The CSV column names must exactly match the column names defined in your data structure to be applied correctly.
Using Data
Use the Export Data button to download your dataset as a CSV file.
When data is updated, click the Re-generation button to refresh and apply the changes.